I think you’ll have plenty of room with the taller frame and the t-case not as flat.
CK5

You are using an out of date browser. It may not display this or other websites correctly.
You should upgrade or use an alternative browser.
You should upgrade or use an alternative browser.
'89 R3500 Crew Cab 2wd to 4wd conversion & beyond
- Thread starter mrk5
- Start date
Started out with 2wd TBI350 with SM465 to current 4wd with 454, 700r4, NP241
That's the kind of positive thinking I like to hear.
Just to play devil's advocate....I think it's going to suck, you are going to curse more than you have in your entire life, probably smash a finger nail or two, and it's going to fight you every step of the way.
You're welcome
You're welcome
You need positive thought lessons!
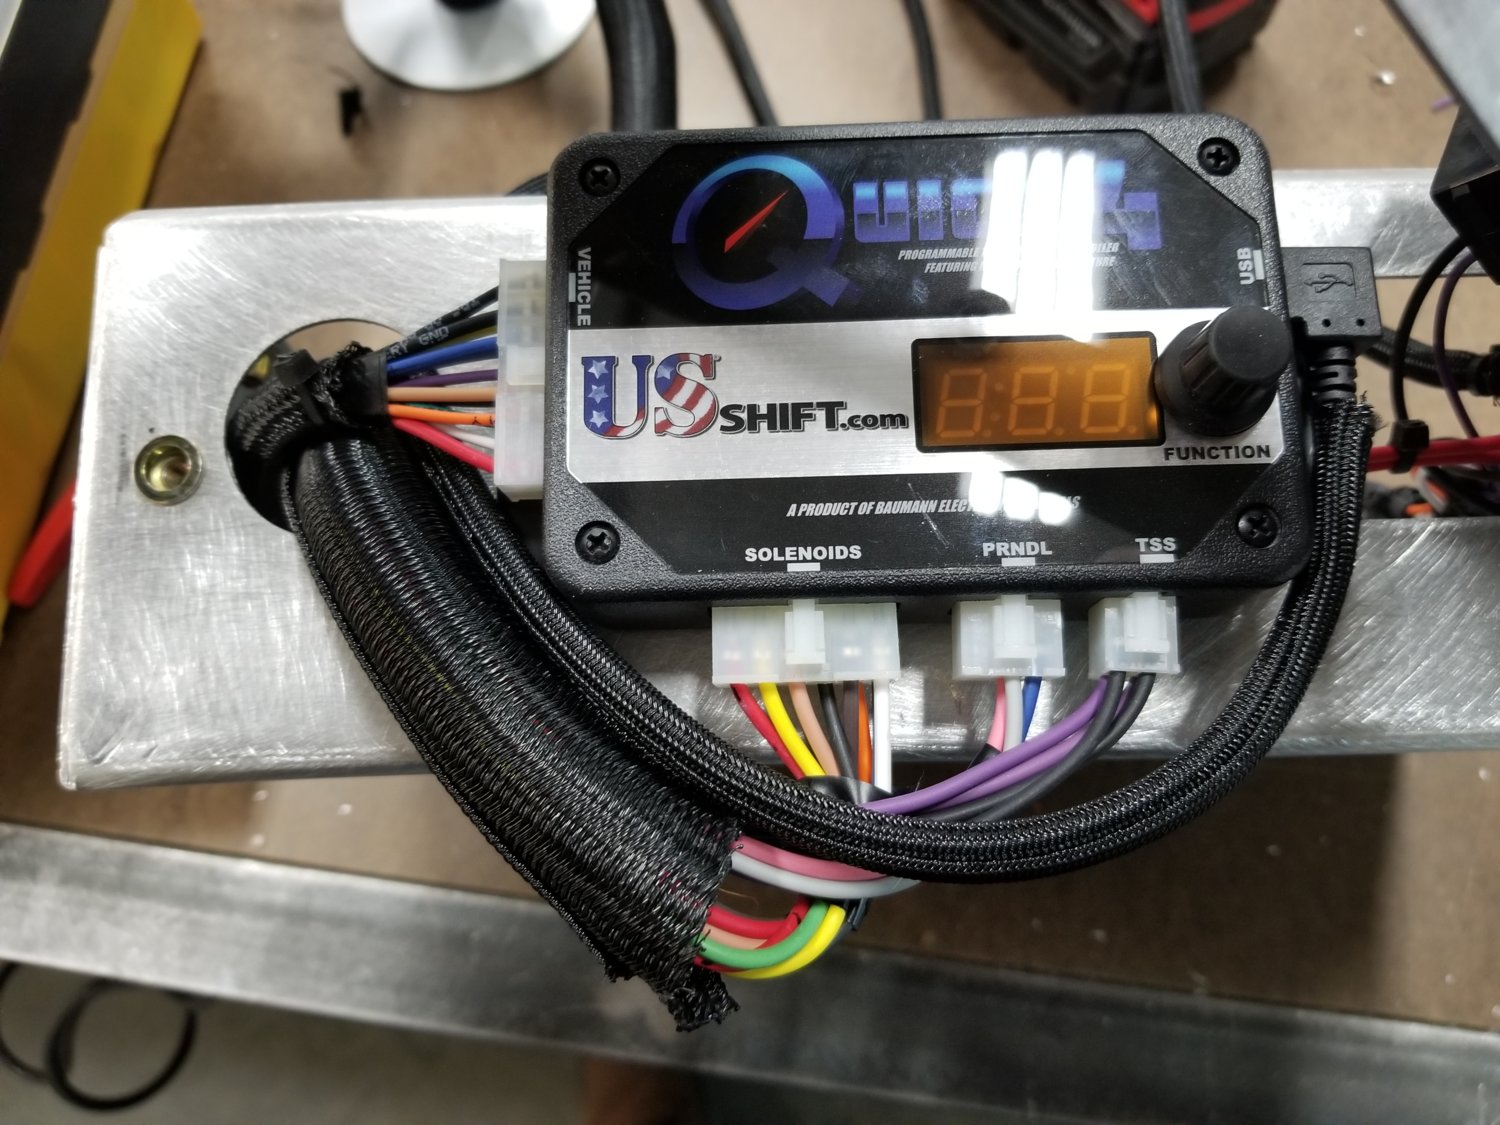
Wired up my little controller panel.
I found these plugs for the Carling switches to make wiring them up easier/nicer.
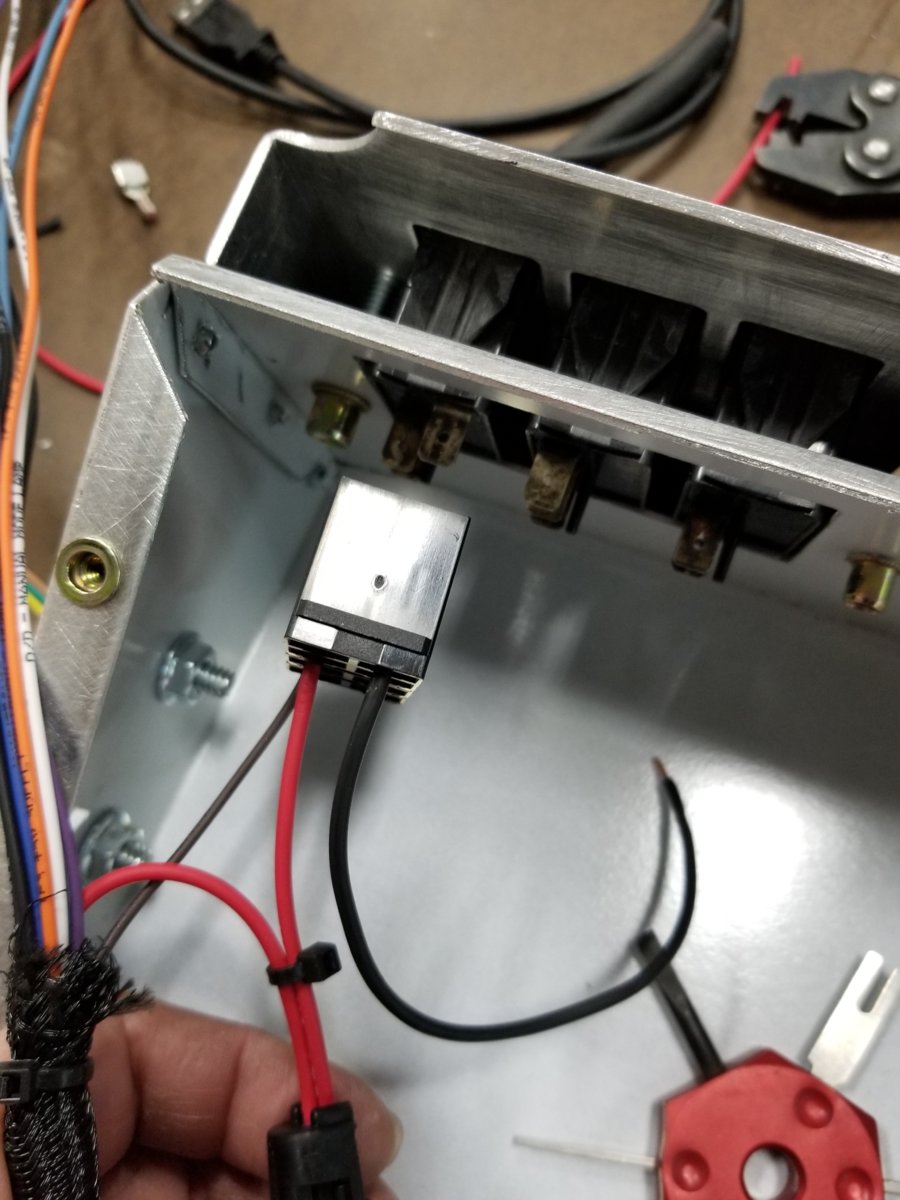
The terminals are numbered on the back of the Carling switches.
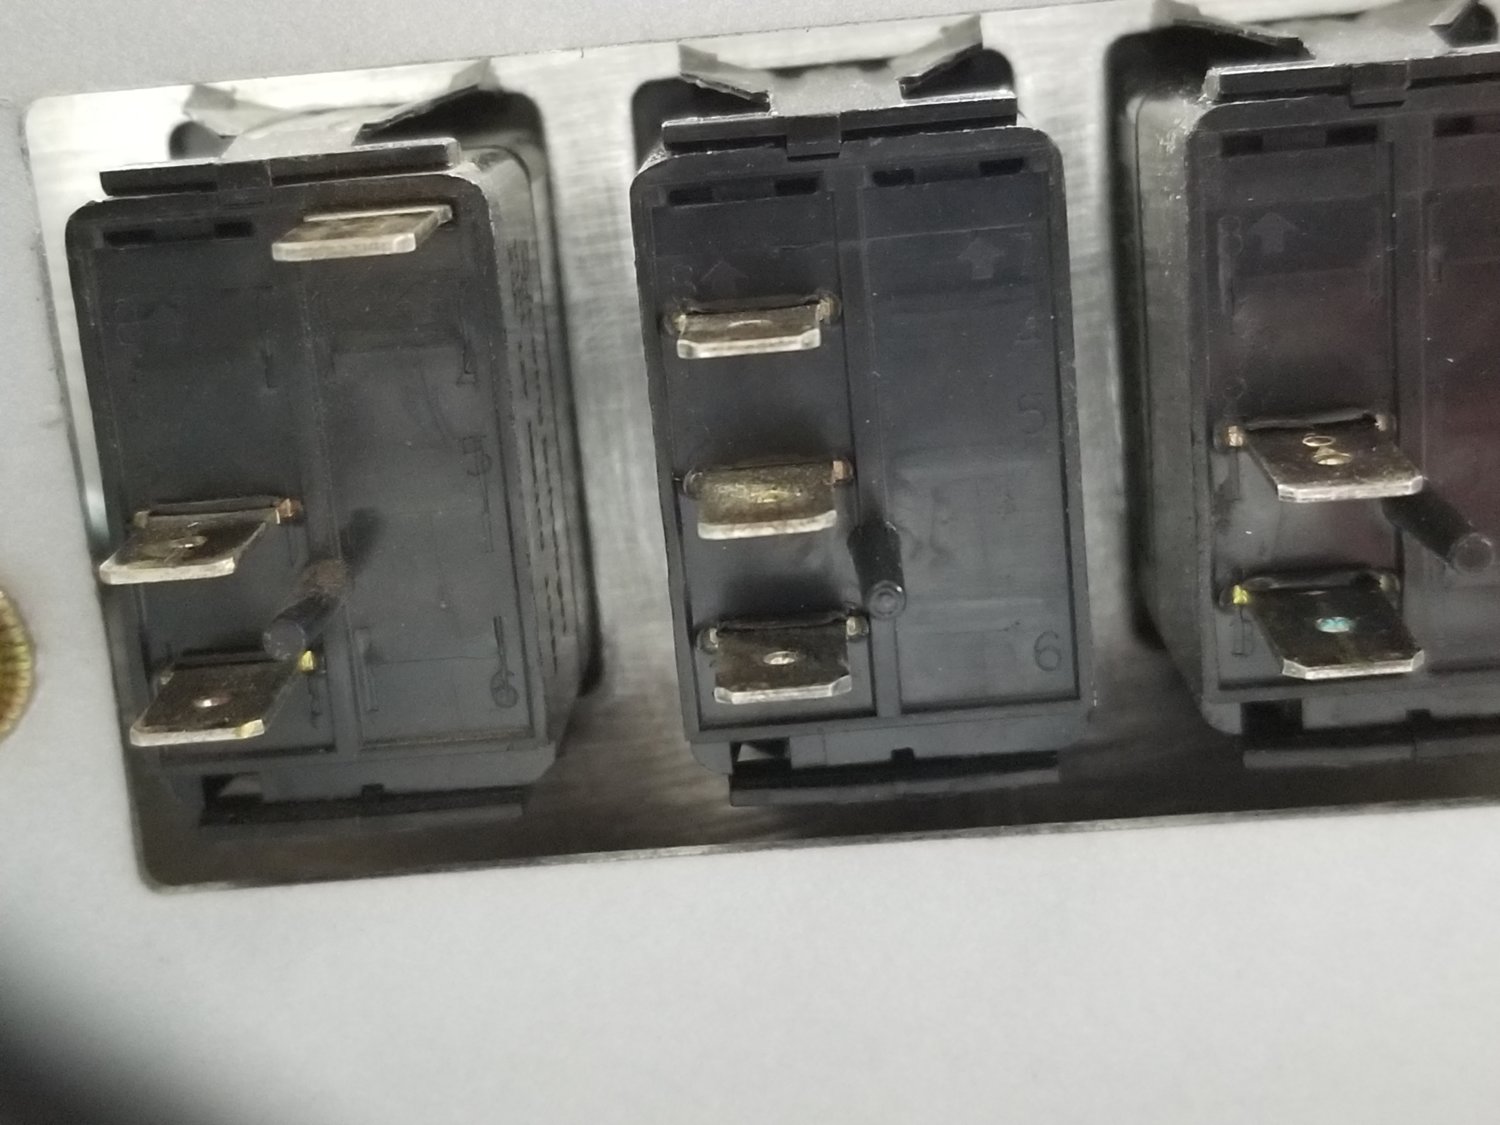
The plugs are numbered to correspond.
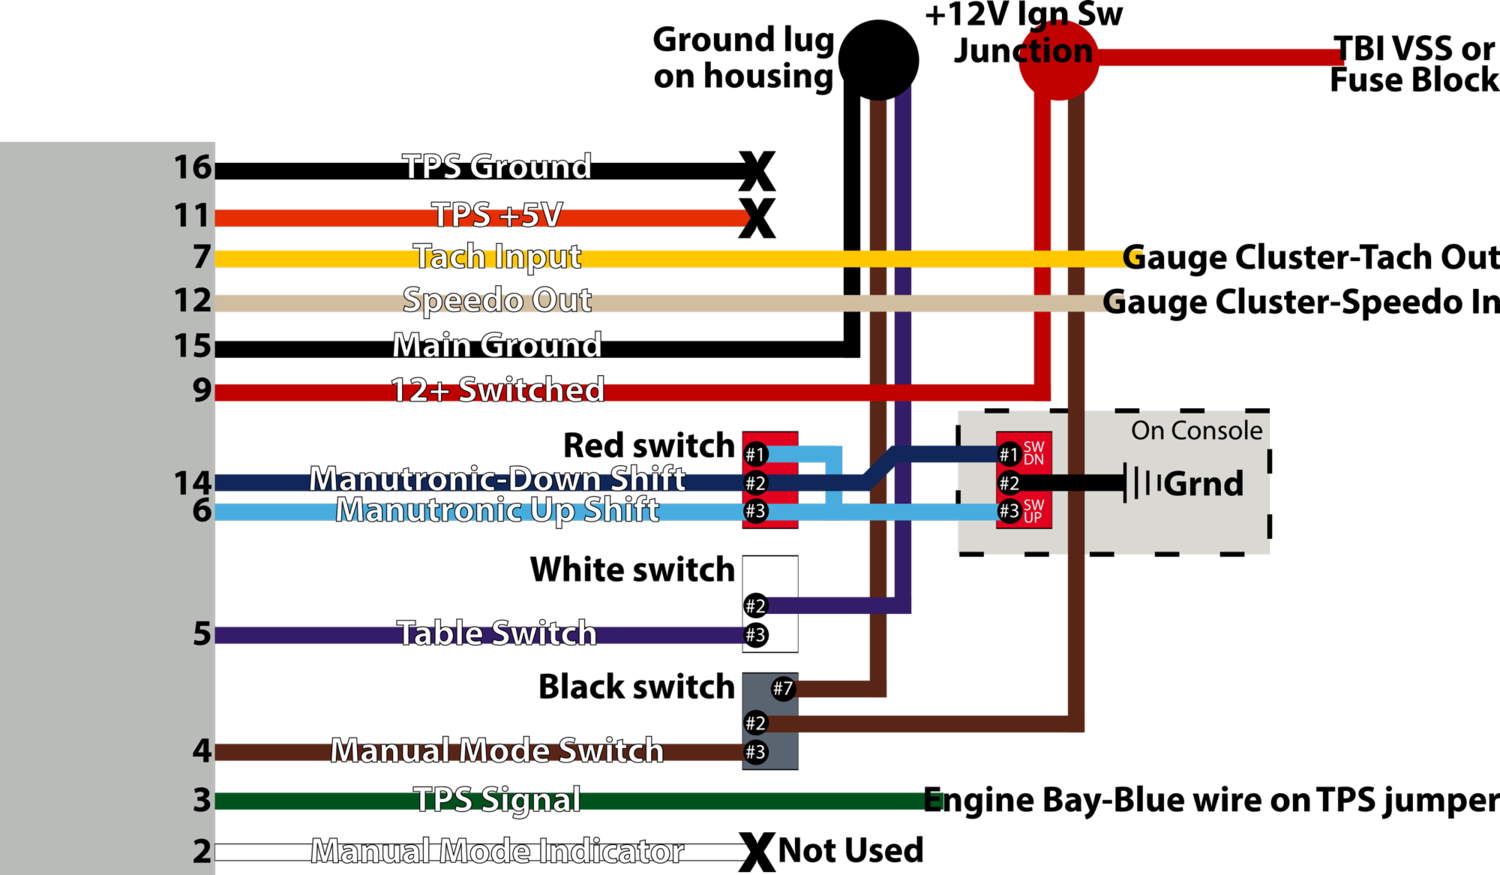
Then you can use diagrams like this to wire them up properly.
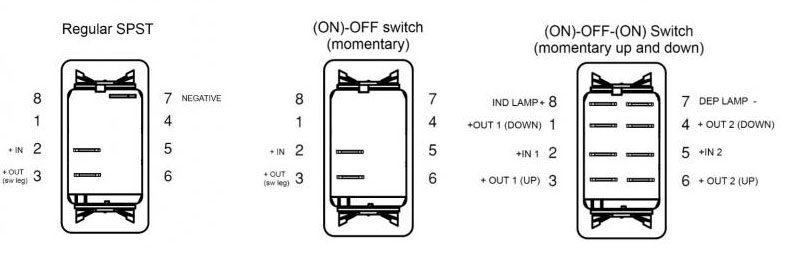
You will notice the momentary switches are a little counter intuitive because the terminal on the bottom matches up to the action of pushing the top of the switch.
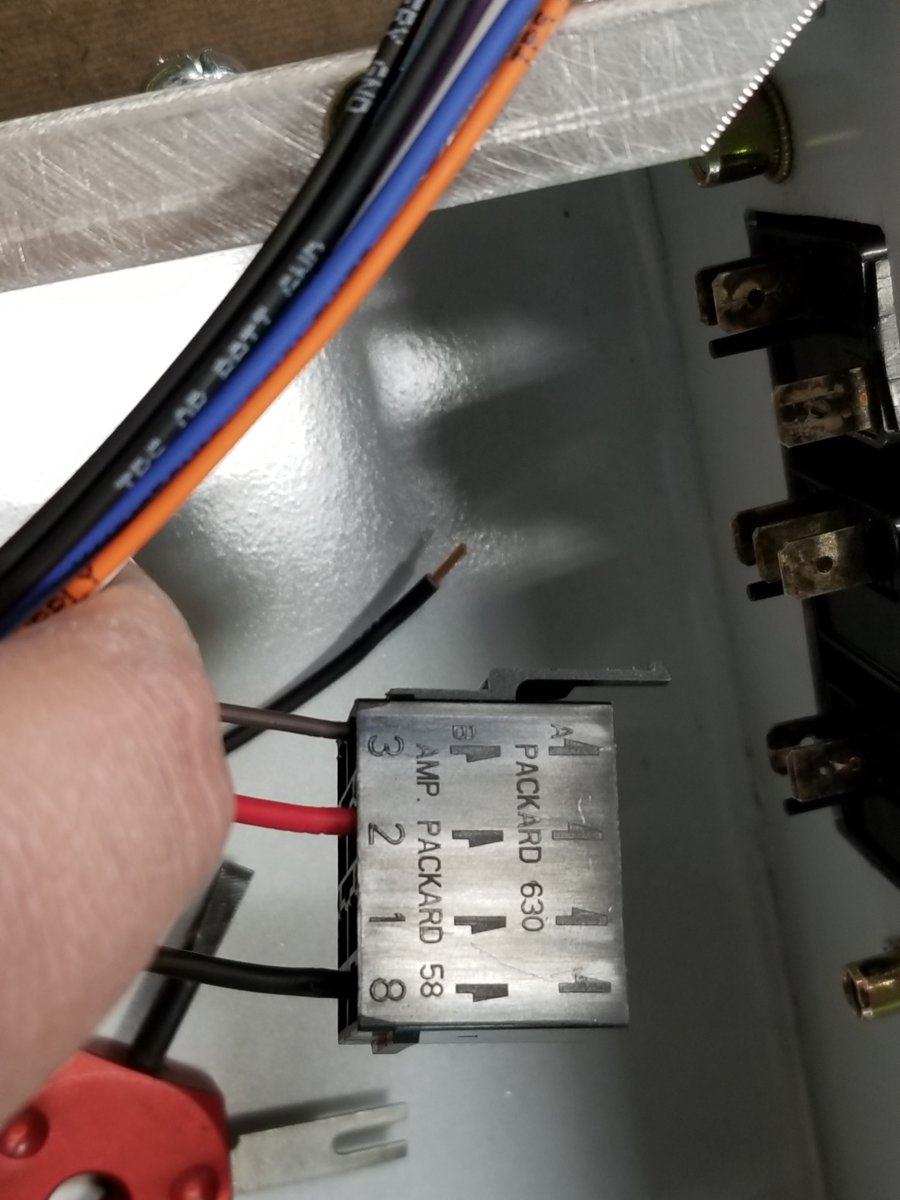
And the plugs are plugged into the switches.
The switches are related to the vehicle harness part of the controller. This is my little wiring diagram I drew up for it.
This is why I made the face plate for the controller mount.
I wanted to cover up all the wiring.
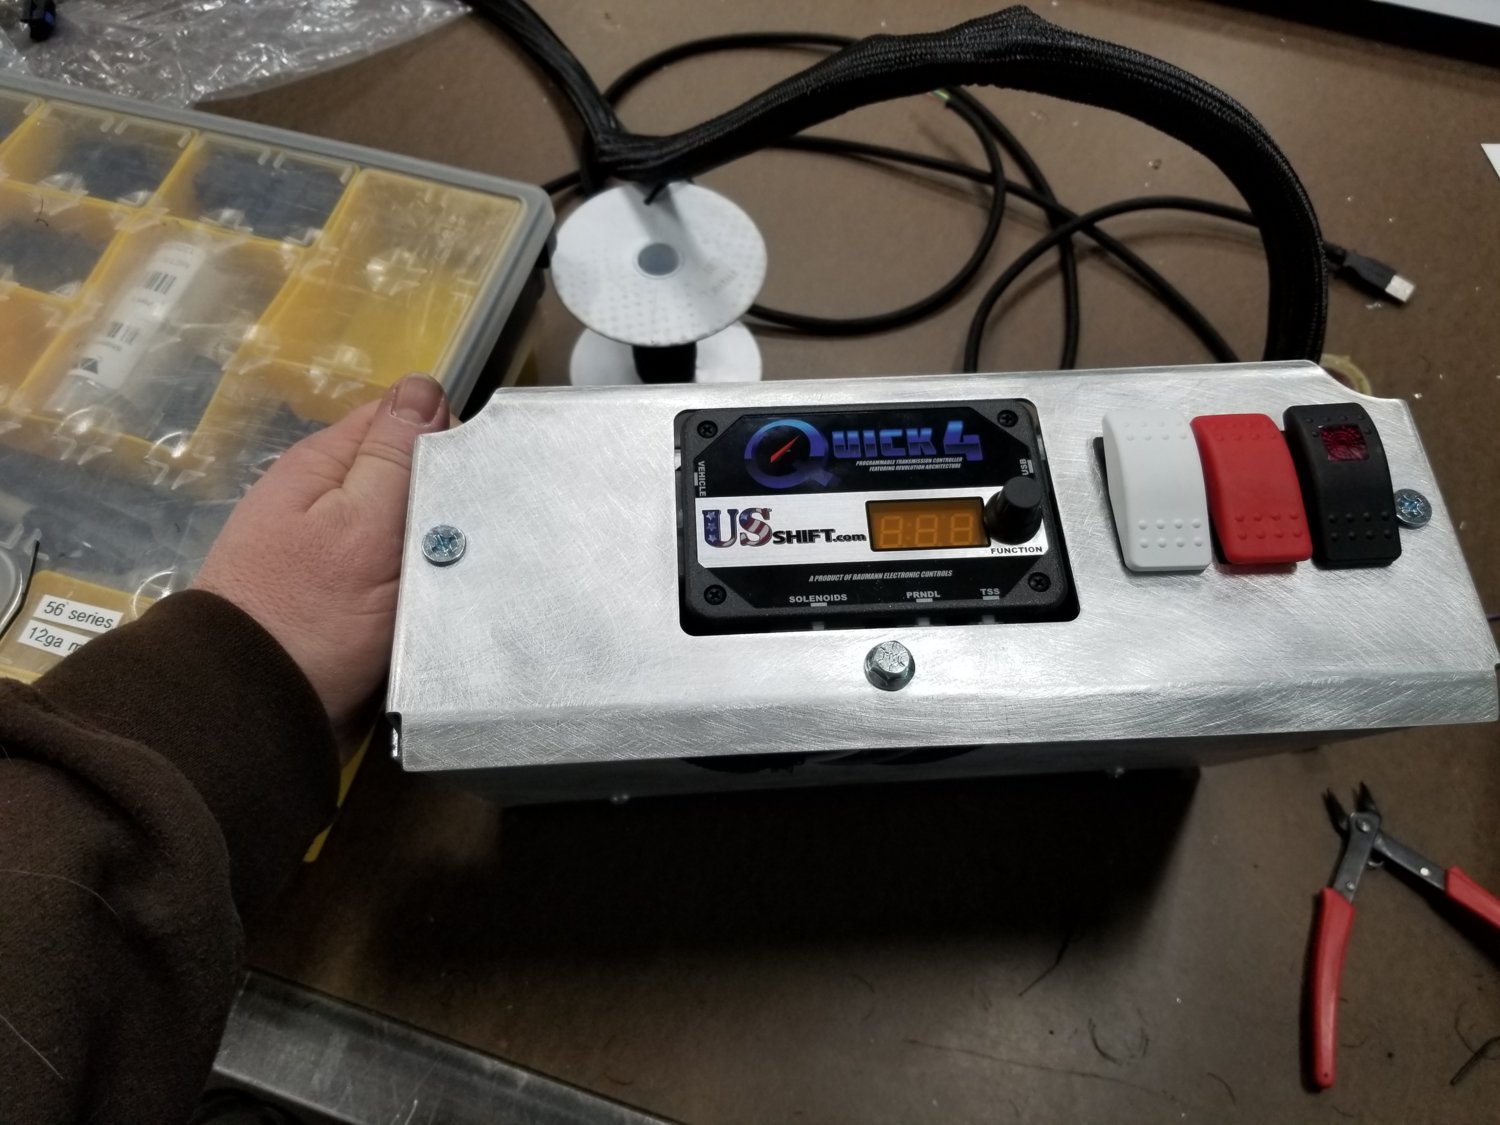
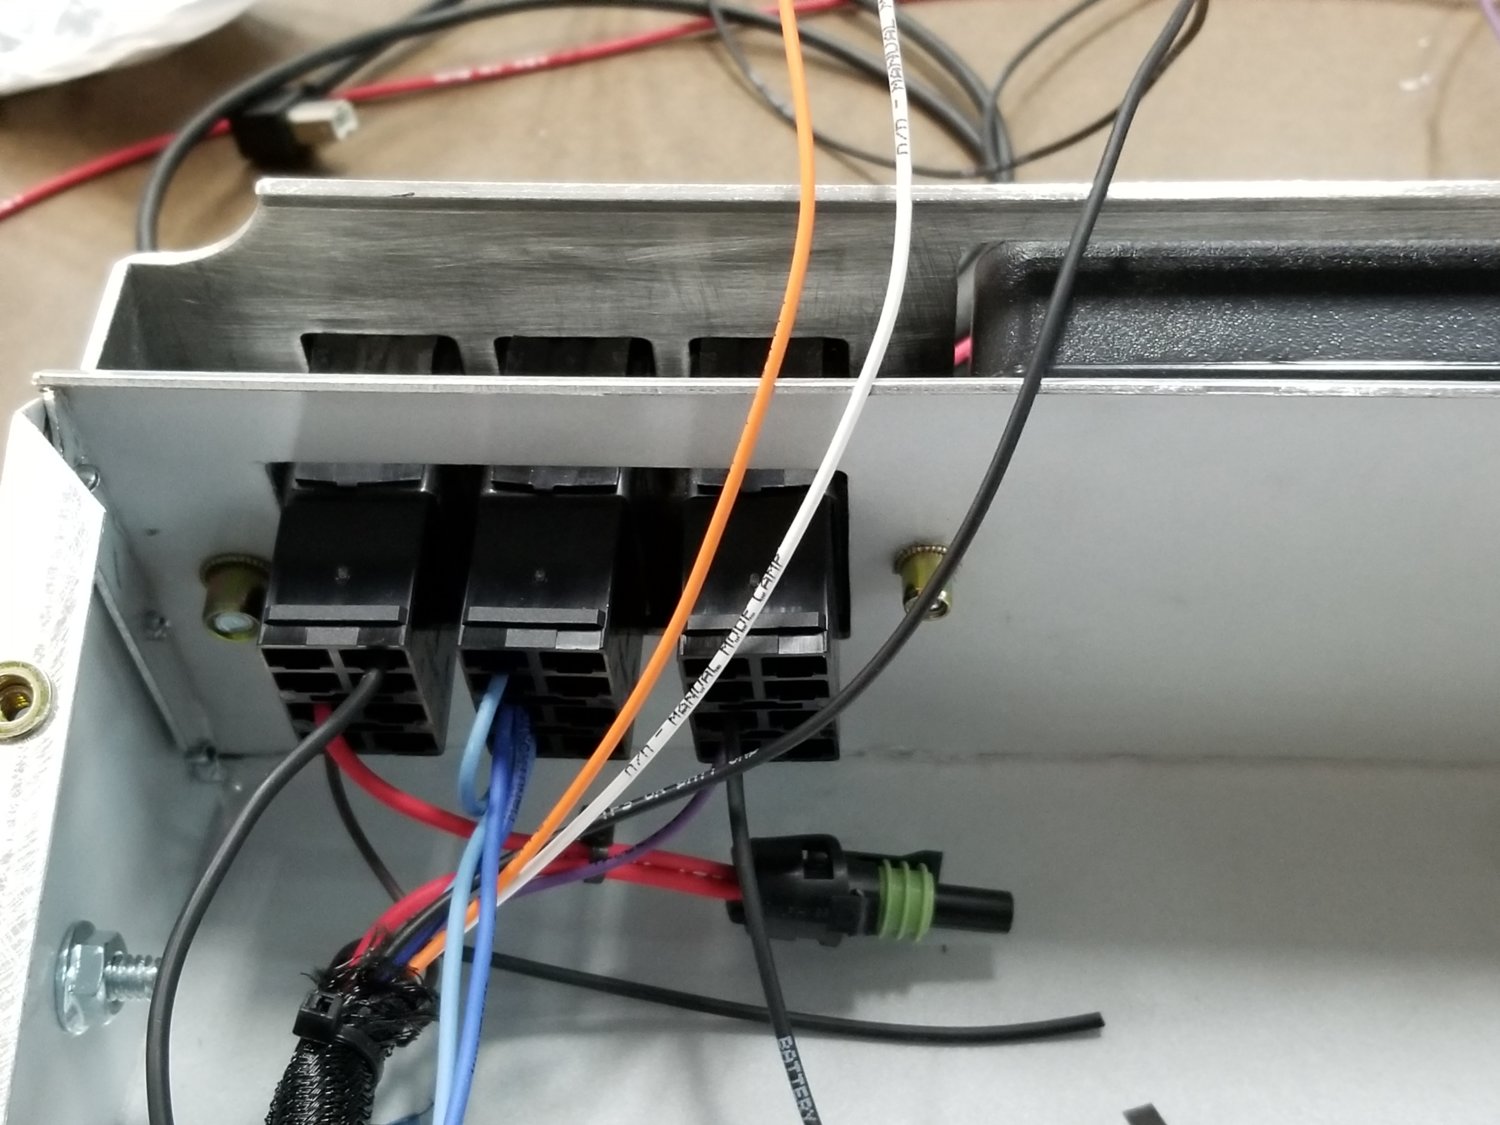
You can still see the wiring poking out just a little bit, but I'm okay with that. I had to do a little more massaging of the wiring above before putting the face plate on. In order to tuck the harnesses up more I had to take the loom cover off. I slit a small rubber hose to line the hole with so the wires won't abrade without the loom cover.
I'm going to drop the transmission harness down thru the big hole in the floor from the original standard transmission. No sense making a big hole for that harness when I already have a gigantic hole. Obviously there will be a cover involved. I built the controller mount like I did so any excess harness length can be coiled up in the void behind the controller and switches.
I found these plugs for the Carling switches to make wiring them up easier/nicer.
The terminals are numbered on the back of the Carling switches.
The plugs are numbered to correspond.
Then you can use diagrams like this to wire them up properly.
You will notice the momentary switches are a little counter intuitive because the terminal on the bottom matches up to the action of pushing the top of the switch.
And the plugs are plugged into the switches.
The switches are related to the vehicle harness part of the controller. This is my little wiring diagram I drew up for it.
This is why I made the face plate for the controller mount.
I wanted to cover up all the wiring.
You can still see the wiring poking out just a little bit, but I'm okay with that. I had to do a little more massaging of the wiring above before putting the face plate on. In order to tuck the harnesses up more I had to take the loom cover off. I slit a small rubber hose to line the hole with so the wires won't abrade without the loom cover.
I'm going to drop the transmission harness down thru the big hole in the floor from the original standard transmission. No sense making a big hole for that harness when I already have a gigantic hole. Obviously there will be a cover involved. I built the controller mount like I did so any excess harness length can be coiled up in the void behind the controller and switches.
I want you to rewire my Yukon when it comes time to do that.
I want you to rewire my Yukon when it comes time to do that.
I’m next.
3rd
Looks good!
Where did you find the plugs? I have found them at Digi-key, and I know that I should be able to get them from Freightliner.
Where did you find the plugs? I have found them at Digi-key, and I know that I should be able to get them from Freightliner.
Waytekwire.com
It helps that I already had the crimper for the Packard connectors that match the factory non-weather pack stuff. But I'm still really preferring the weather pack stuff. The crimper works way better and the plugs connect and disconnect more easily. And they are much easier to find.
It helps that I already had the crimper for the Packard connectors that match the factory non-weather pack stuff. But I'm still really preferring the weather pack stuff. The crimper works way better and the plugs connect and disconnect more easily. And they are much easier to find.
I should also mention that you don't have to do all this wiring. I'm just trying to get all the bells and whistles out of it. I think minimum would be 1 switch.
Went on a little snow run yesterday. Before we left I was checking things under the truck when I noticed a run of oil on the passenger header. Since coming back from Blazer Bash I had noticed a burning oil smell when I first started the truck. I had assumed it was oil dripping from the rear main area landing on the crossover pipe. Now I know that's not the case.
I figured the only place that drip on the header could come from is the valve cover. Sure enough, all the nuts on the cover studs were essentially finger tight. Since we were hitting the road soon, I just tightened up as best I could with an end wrench. When I have some time in the shop I will blue loctite them down good.
Here's one video I shot of Nate and @doubletrouble yesterday.


That took place in the one area we encountered challenging snow. It was wind blown with a hard surface crust so if you broke through it was easy to get hung up. Before pulling Nate out, we could spin the rear tires by hand because the truck was sitting on the axle.
Line of trucks waiting to get through.

I feel like wheeling with @doubletrouble and Nate is a little like watching Nitro Circus. They are always up to some sort of Tom foolery. An example below; this was the only picture I could grab thru the windshield before Nate backed off due to fears of flopping over.

Nate's maiden voyage with the 6.0L, TH400, and Doubler went well. Just a few minor things needed to be fixed. Now hopefully he'll buy some tires.

I figured the only place that drip on the header could come from is the valve cover. Sure enough, all the nuts on the cover studs were essentially finger tight. Since we were hitting the road soon, I just tightened up as best I could with an end wrench. When I have some time in the shop I will blue loctite them down good.
Here's one video I shot of Nate and @doubletrouble yesterday.
That took place in the one area we encountered challenging snow. It was wind blown with a hard surface crust so if you broke through it was easy to get hung up. Before pulling Nate out, we could spin the rear tires by hand because the truck was sitting on the axle.
Line of trucks waiting to get through.
I feel like wheeling with @doubletrouble and Nate is a little like watching Nitro Circus. They are always up to some sort of Tom foolery. An example below; this was the only picture I could grab thru the windshield before Nate backed off due to fears of flopping over.
Nate's maiden voyage with the 6.0L, TH400, and Doubler went well. Just a few minor things needed to be fixed. Now hopefully he'll buy some tires.
Great pics! Snow wheeling looks like sooooo much fun!
No need for new tires with those tire chains 
Looks like you had a good time up there. Snow wheeling is great with the right group.
You don't have the new Trans/Magnum in your truck yet do you?
Not yet. Waiting for the youngest to finish up basketball. Plan is March 17th. Gonna keep working on as much as I can do ahead of time.
I got the controller mounted and mostly wired up today.
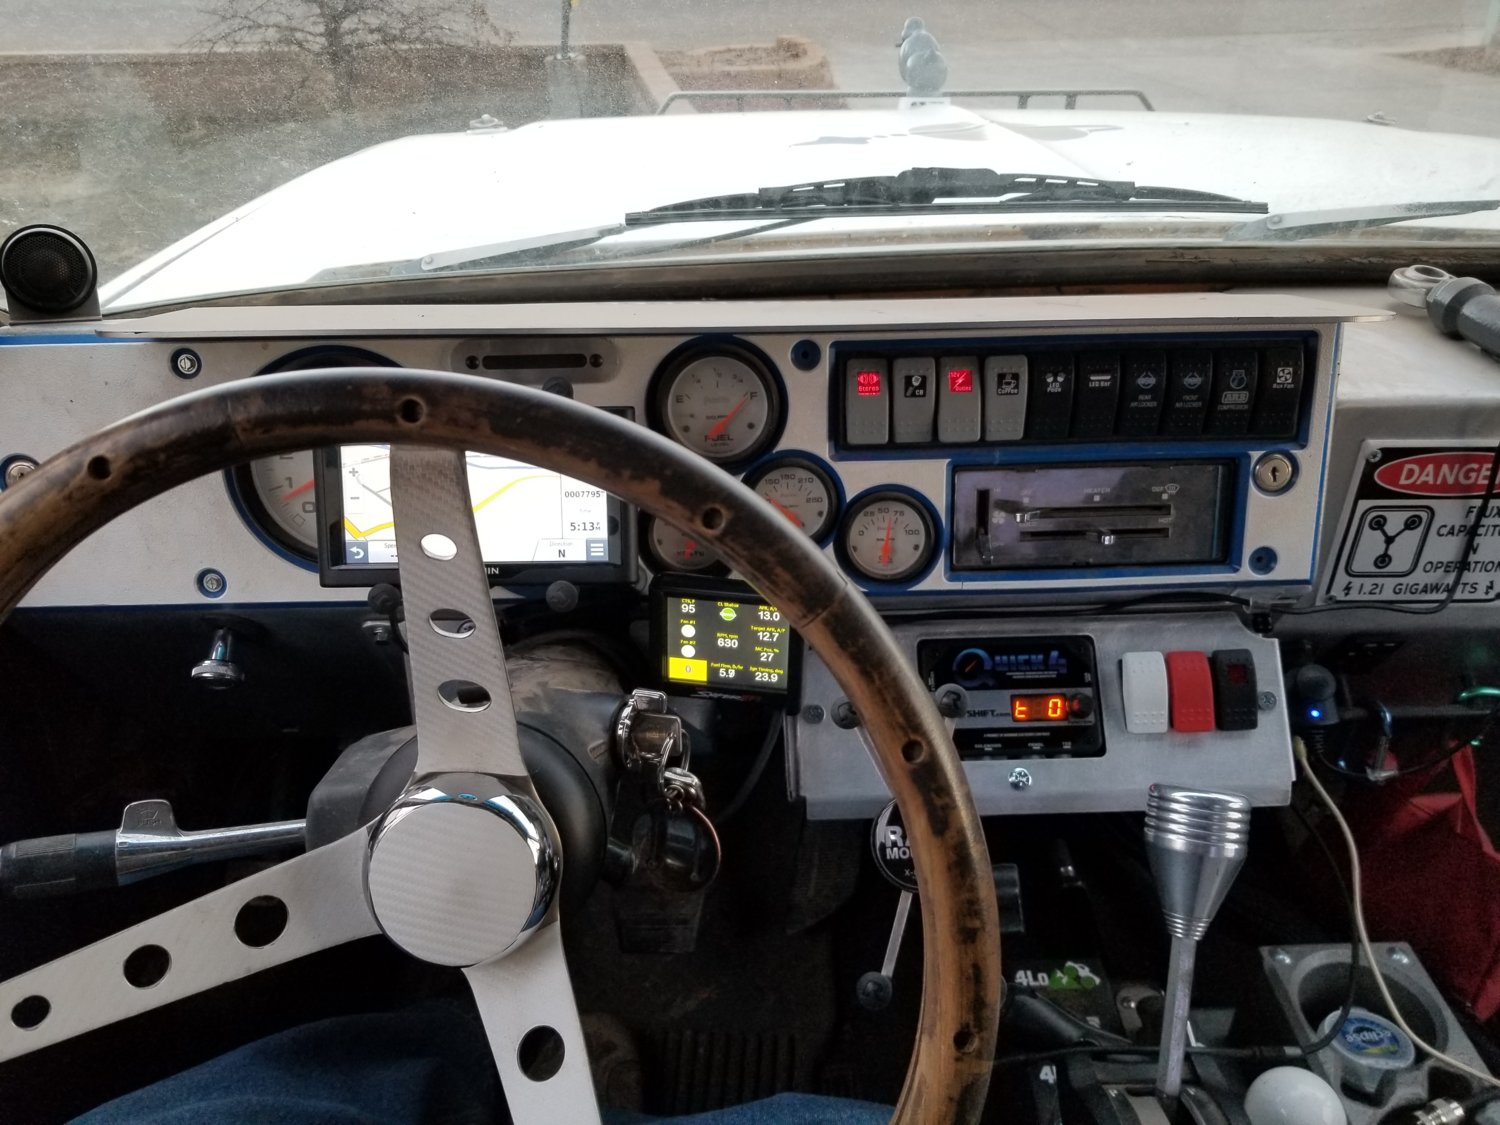
I probably should have not connected the power because the controller thought that transmission armageddon had occurred. It was flashing error messages about the TPS (the part I didn't wire up yet) and solenoids being open. I hate to see it fret so much.
Here are the harnesses leaving the controller housing.
I made sure the wiring isn't pinched. I was a little worried it would be too tight but the wires can move freely.
I finally removed to factory VSS. I had it ziptied up behind the gauges.
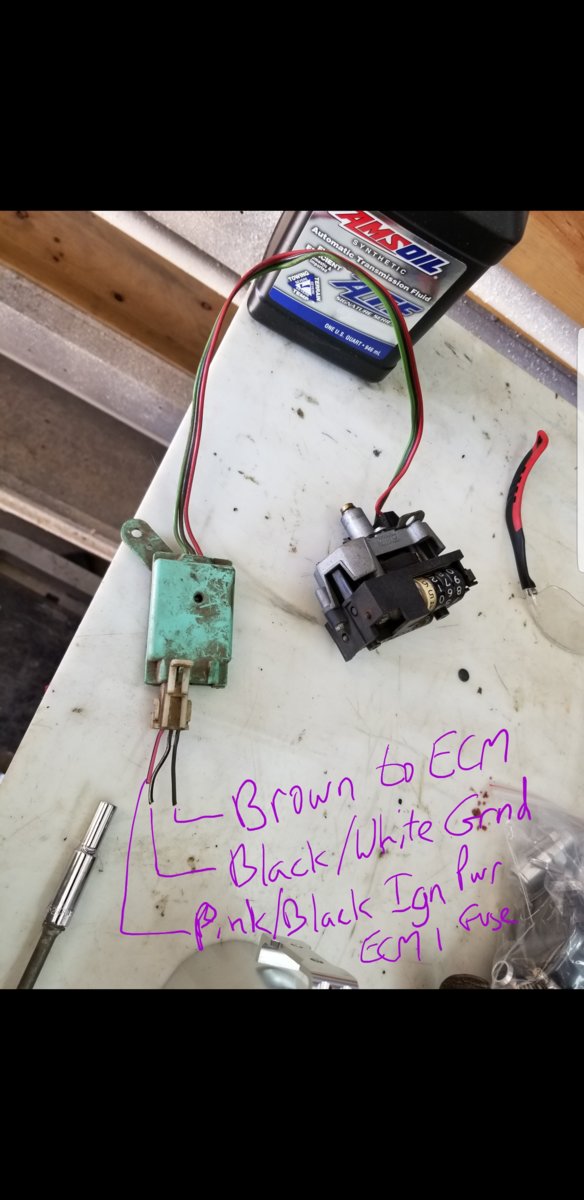
I used my manual with the electrical drawings to figure out what each wire is for. I wanted to use the power wire for the Quick4 controller. It comes off the ECM 1 fuse.
I also installed the fittings to connect the transmission to the cooler in the radiator.
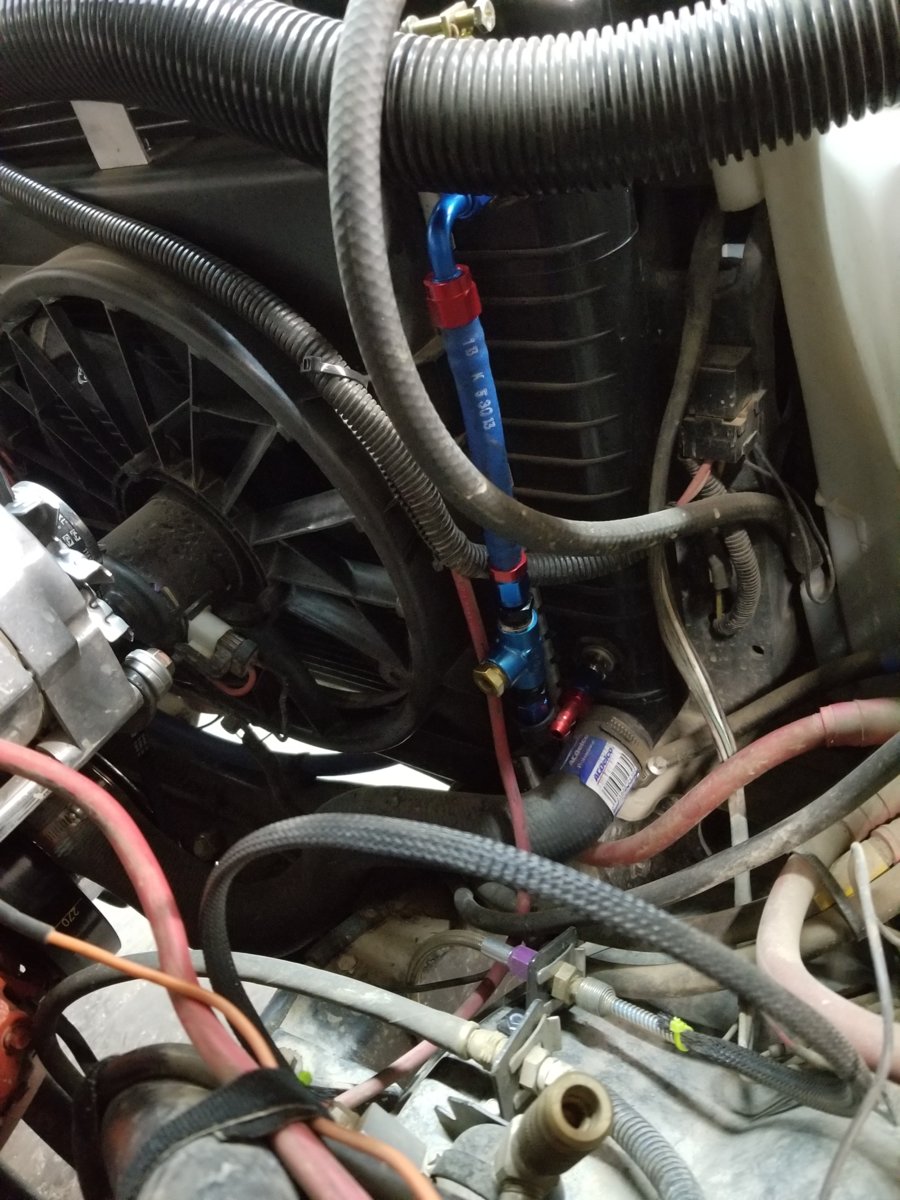
I'm short 1 fitting to finish the plumbing prep. For some reason the auxiliary trans cooler uses -8AN and my lines are -6. So I need a fitting that is -8 AN to 3/8" hose barb.
The tee was something I found in my stash of fittings. Figured it would be good for the trans temp gauge sender. On the 700r4 I have it in the test port. The Quick4 will give me trans temp but I don't plan on having it display that all the time. Since I already have a gauge, might as well keep using it.
I also re-torqued my valve cover nuts and added some blue loctite this time.
Next weekend we're going to be meeting up with @ktmoutfront to get the rest of the Blazer Bash stuff to him. Sunday I will work on a little more on the prep. Then the following weekend will be the big install.
I probably should have not connected the power because the controller thought that transmission armageddon had occurred. It was flashing error messages about the TPS (the part I didn't wire up yet) and solenoids being open. I hate to see it fret so much.
Here are the harnesses leaving the controller housing.
I made sure the wiring isn't pinched. I was a little worried it would be too tight but the wires can move freely.
I finally removed to factory VSS. I had it ziptied up behind the gauges.
I used my manual with the electrical drawings to figure out what each wire is for. I wanted to use the power wire for the Quick4 controller. It comes off the ECM 1 fuse.
I also installed the fittings to connect the transmission to the cooler in the radiator.
I'm short 1 fitting to finish the plumbing prep. For some reason the auxiliary trans cooler uses -8AN and my lines are -6. So I need a fitting that is -8 AN to 3/8" hose barb.
The tee was something I found in my stash of fittings. Figured it would be good for the trans temp gauge sender. On the 700r4 I have it in the test port. The Quick4 will give me trans temp but I don't plan on having it display that all the time. Since I already have a gauge, might as well keep using it.
I also re-torqued my valve cover nuts and added some blue loctite this time.
Next weekend we're going to be meeting up with @ktmoutfront to get the rest of the Blazer Bash stuff to him. Sunday I will work on a little more on the prep. Then the following weekend will be the big install.
Very cool. I am still on for Saturday.
I did more prep work for the 4l80e + Magnum install.
Installed the TPS jumper wire.

https://www.summitracing.com/parts/cei-108103
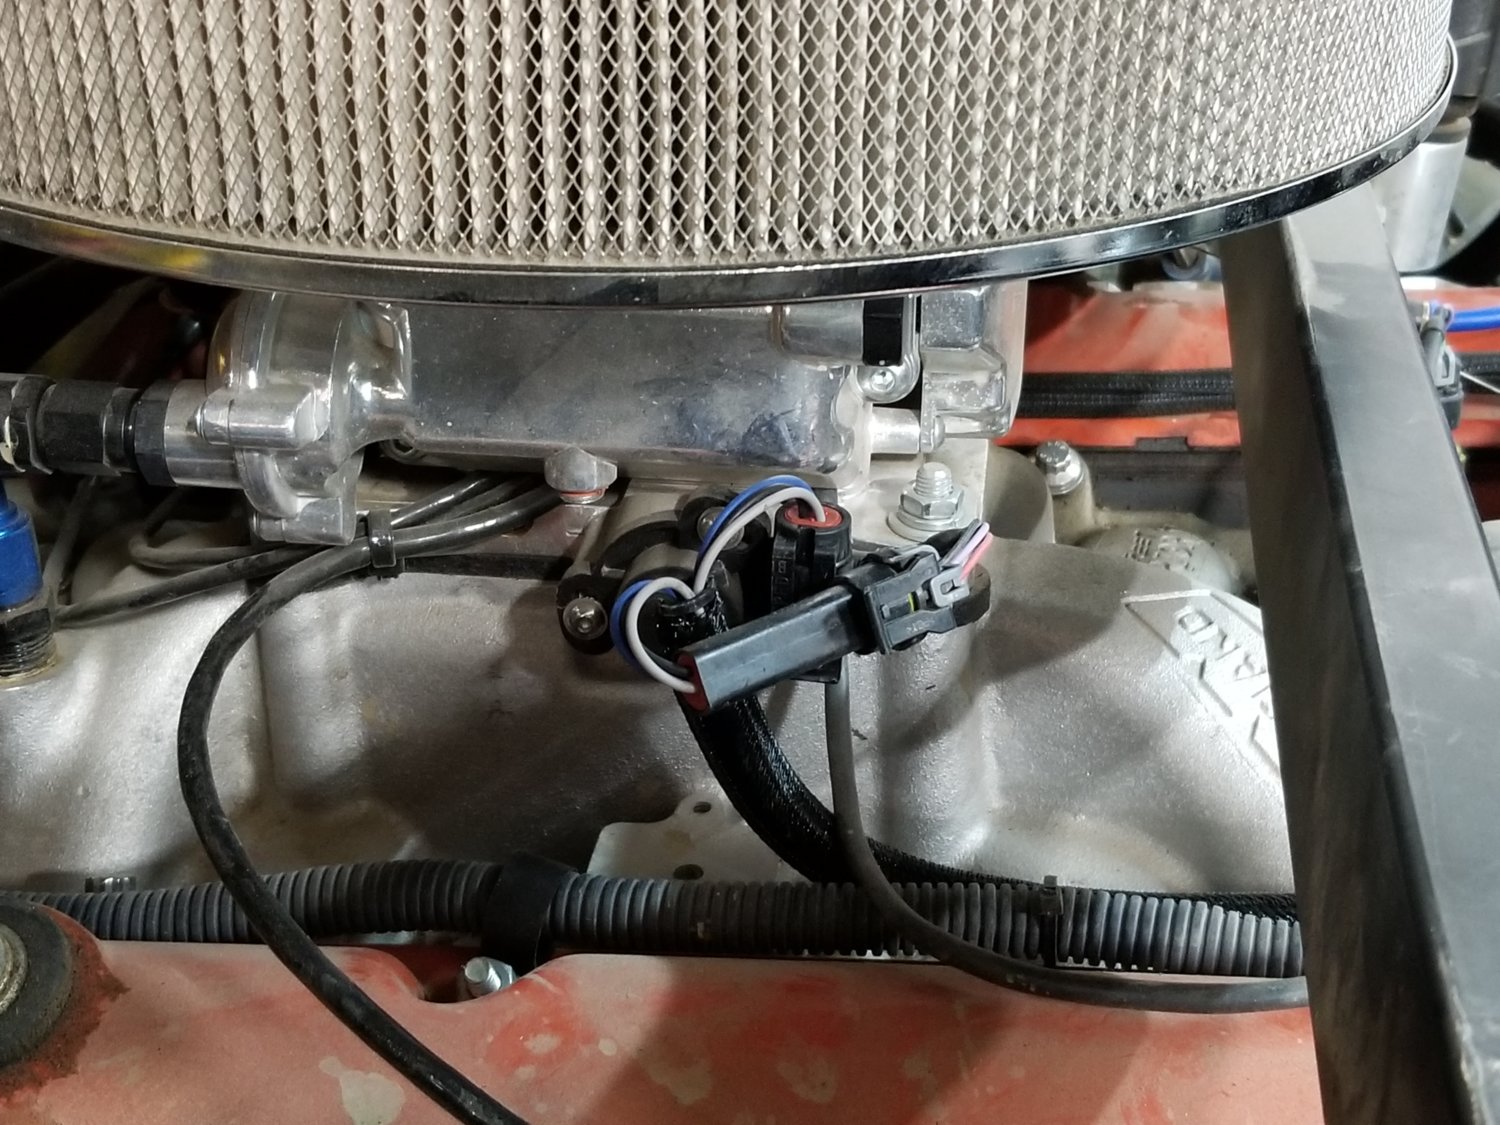
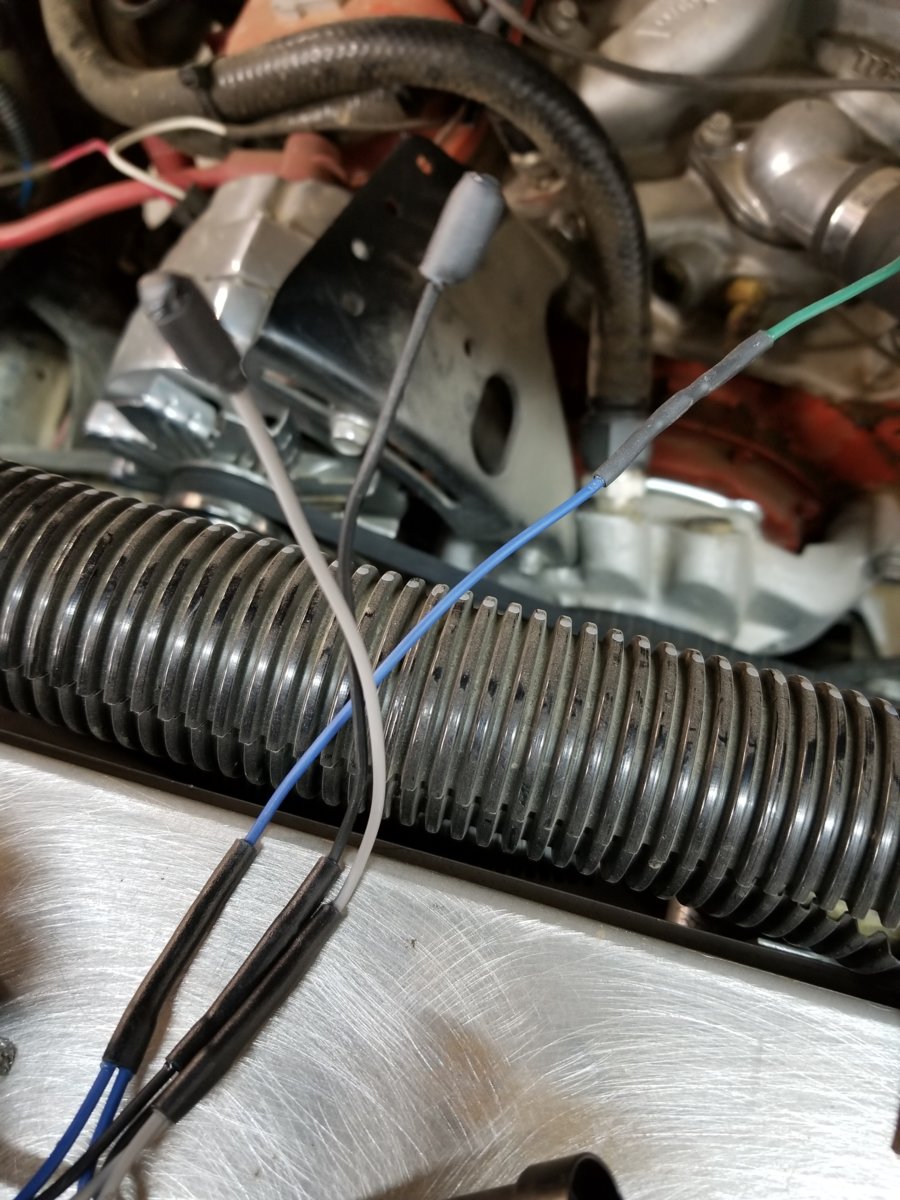
I only need the blue sender wire so I capped the white and black wires. I also did my first solder job in the truck. It was a pain holding the wires in place but I got it done. You can see the end results there on the green wire above.
So funny story related to installing the TPS jumper. I needed to verify the wires and it was my first chance to use my new multimeter. I've had one for probably 10 years that I keep in the truck, but if I needed one when the truck wasn't handy I didn't have one. So I bought a new one that is autoranging and all that fancy stuff.
I couldn't get the damn thing to work right. I was thinking the auto-ranging thing was a waste of time. Then after doing to internet searching I realized I was being a dummy. This is how the leads look coming out of the box.
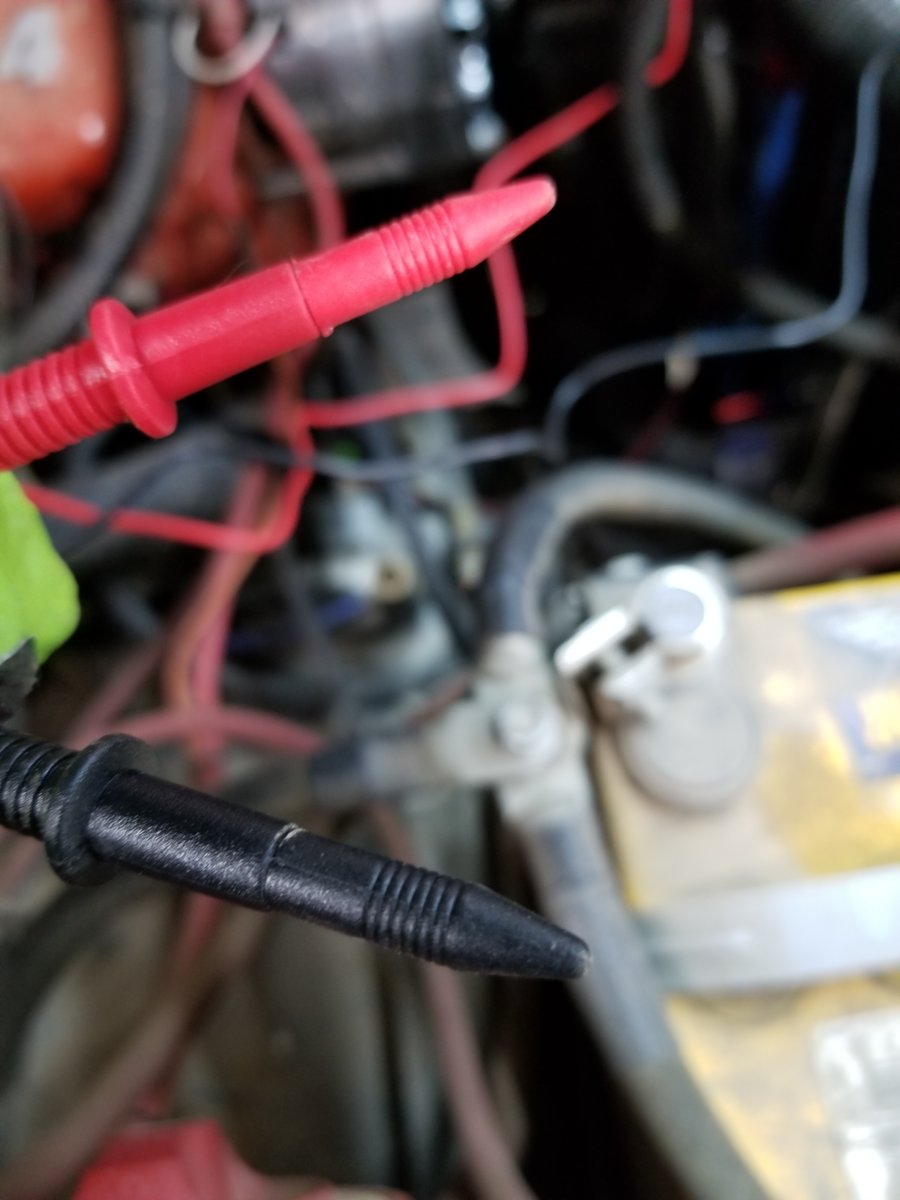
I thought they were fancy new fangled leads that no longer used bare metal ends. Figured it was one of those upgrades that came along with the auto-ranging feature. Nope, those are just caps.
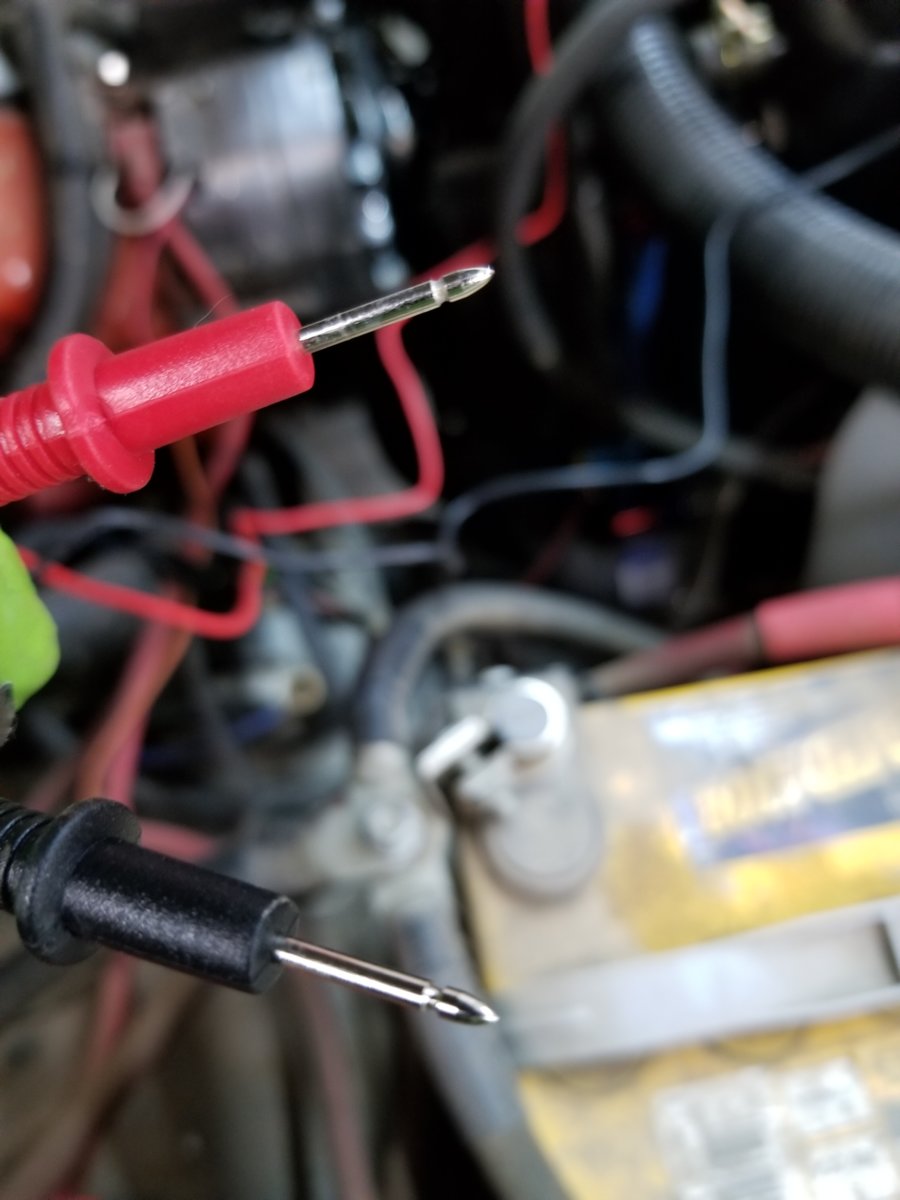
Once I took the caps off the multimeter worked great.
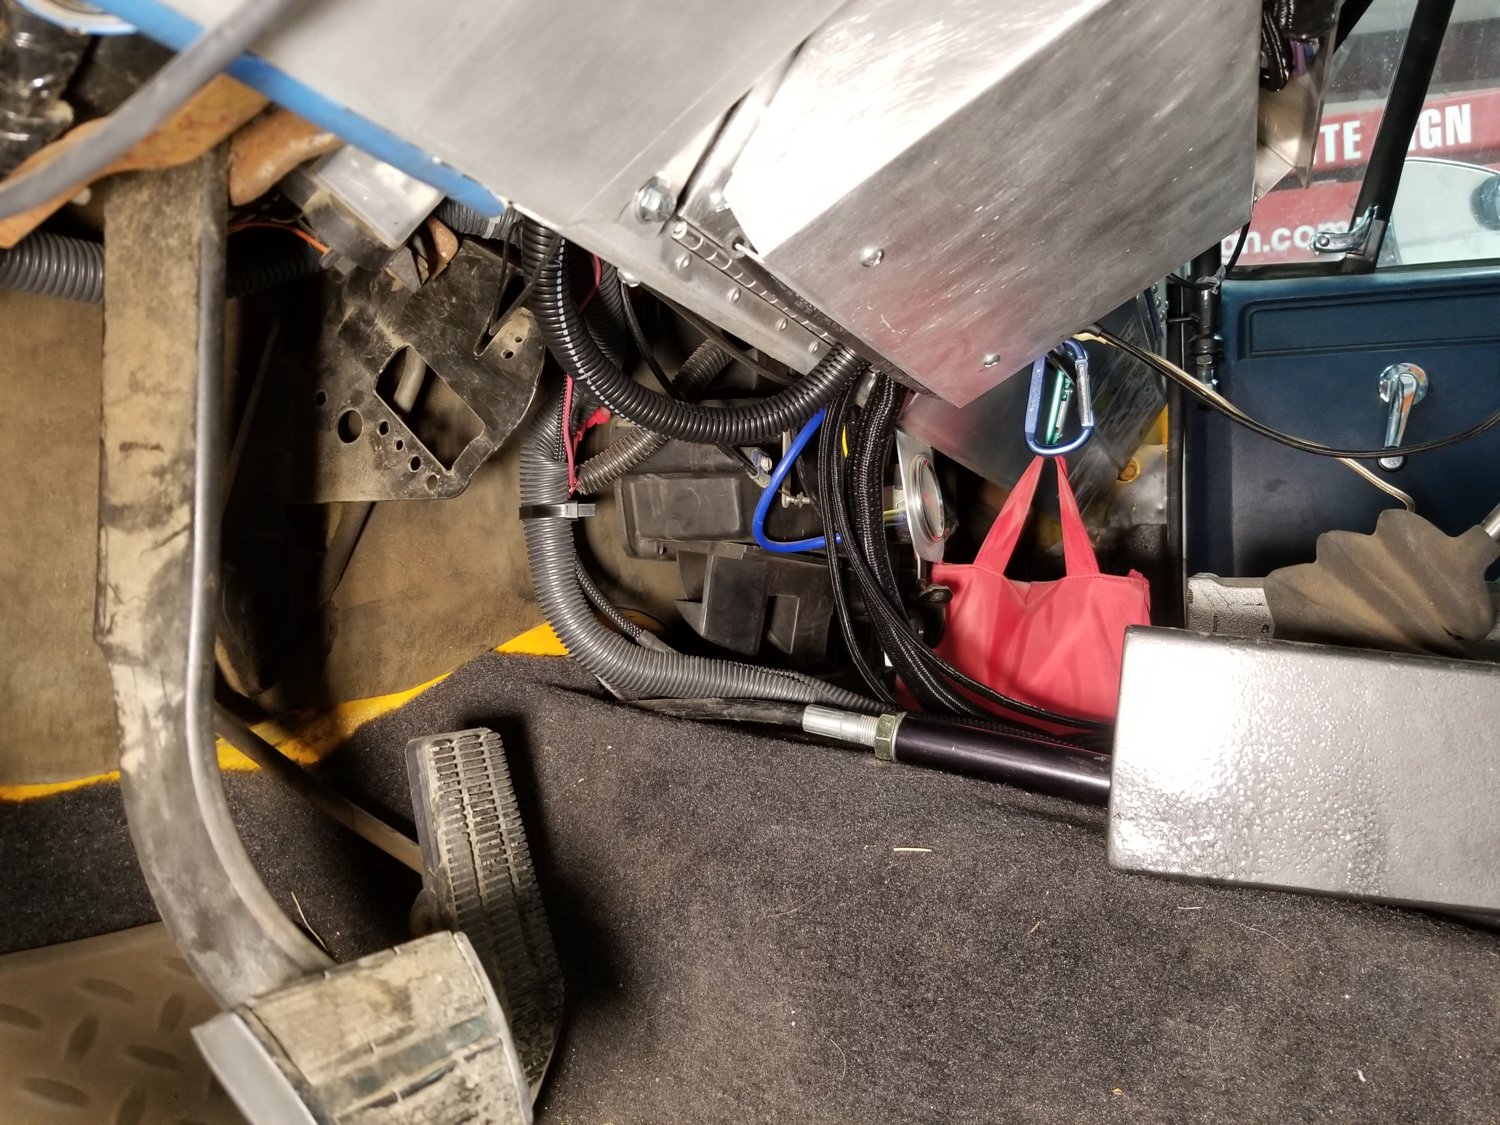
I also routed the wiring harness for the transmission through the floor. I have a cover over the hole from the standard transmission shifter the truck came with. I used a hammer and round rod to make a tunnel in the cover that the wires fit in. Only got a picture of the carpet pulled back before getting the harness routed. You can barely make out the front edge of the cover in the picture below.
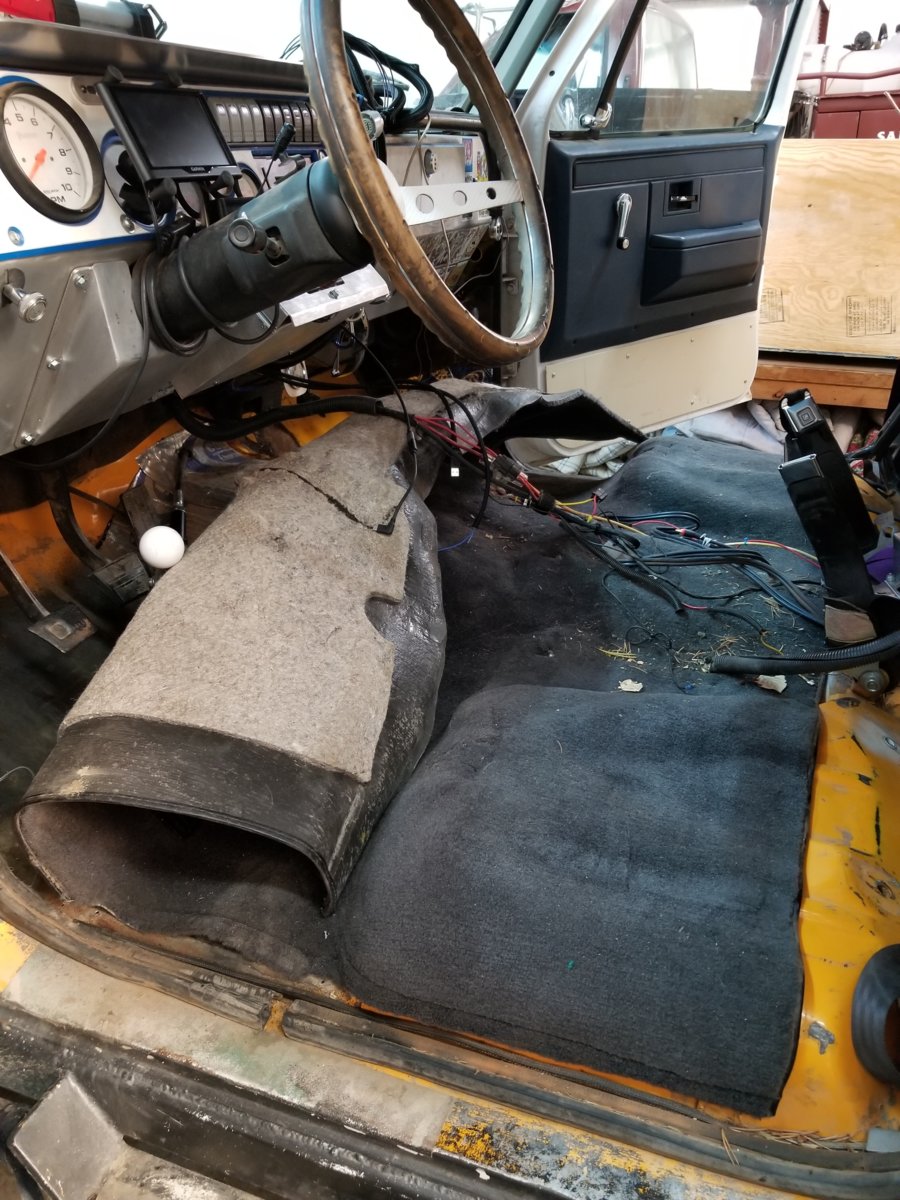
The wiring you see there is for the stereo mounted in the console, amp behind the back seats, and ARB compressor that's in the bed.
So back some time ago, I had posted this:
Well it turns out it's not just a CYA. On the drive home the Sniper would not stay in closed loop. Considering the only thing I changed was adding the jumper in the TPS, I'm pretty sure that's the cause. Some quick Google searching brought up some results with people having the same issue. Apparently any variation the TPS signal will keep the Sniper out of closed loop. Soooo, now I need to get an add-on TPS.
Just curiosity sake, I did a similar search for FiTech and it doesn't seem to be a problem to use the jumper on their EFI. So that's something for people to consider when deciding between Sniper and FiTech.
When I drive the truck back to the shop for the 4l80e install I will unplug the jumper and verify that's the cause.
Installed the TPS jumper wire.
https://www.summitracing.com/parts/cei-108103
I only need the blue sender wire so I capped the white and black wires. I also did my first solder job in the truck. It was a pain holding the wires in place but I got it done. You can see the end results there on the green wire above.
So funny story related to installing the TPS jumper. I needed to verify the wires and it was my first chance to use my new multimeter. I've had one for probably 10 years that I keep in the truck, but if I needed one when the truck wasn't handy I didn't have one. So I bought a new one that is autoranging and all that fancy stuff.
I couldn't get the damn thing to work right. I was thinking the auto-ranging thing was a waste of time. Then after doing to internet searching I realized I was being a dummy. This is how the leads look coming out of the box.
I thought they were fancy new fangled leads that no longer used bare metal ends. Figured it was one of those upgrades that came along with the auto-ranging feature. Nope, those are just caps.
Once I took the caps off the multimeter worked great.
I also routed the wiring harness for the transmission through the floor. I have a cover over the hole from the standard transmission shifter the truck came with. I used a hammer and round rod to make a tunnel in the cover that the wires fit in. Only got a picture of the carpet pulled back before getting the harness routed. You can barely make out the front edge of the cover in the picture below.
The wiring you see there is for the stereo mounted in the console, amp behind the back seats, and ARB compressor that's in the bed.
So back some time ago, I had posted this:
I'm also finding further frustration with getting the 4l80e controller setup. Apparently Holley recommends against tapping into the TPS signal to run another controller like for the transmission. Done some searching and not having any luck finding if people have been trying it and if it's working. It's hard to believe there aren't a lot of Snipers running in vehicles with 4l60e. Maybe that means it's not an issue and Holley is just giving themselves an out, aka CYA.
So if I can't tap into the sensor wiring, I'll have to get a second add-on TPS. Ugh!
Well it turns out it's not just a CYA. On the drive home the Sniper would not stay in closed loop. Considering the only thing I changed was adding the jumper in the TPS, I'm pretty sure that's the cause. Some quick Google searching brought up some results with people having the same issue. Apparently any variation the TPS signal will keep the Sniper out of closed loop. Soooo, now I need to get an add-on TPS.
Just curiosity sake, I did a similar search for FiTech and it doesn't seem to be a problem to use the jumper on their EFI. So that's something for people to consider when deciding between Sniper and FiTech.
When I drive the truck back to the shop for the 4l80e install I will unplug the jumper and verify that's the cause.

