
Had a long weekend of wrenching on the truck, made great progress! Hope to turn the key this weekend if everything works out and I don't wait forever for things to get shipped.
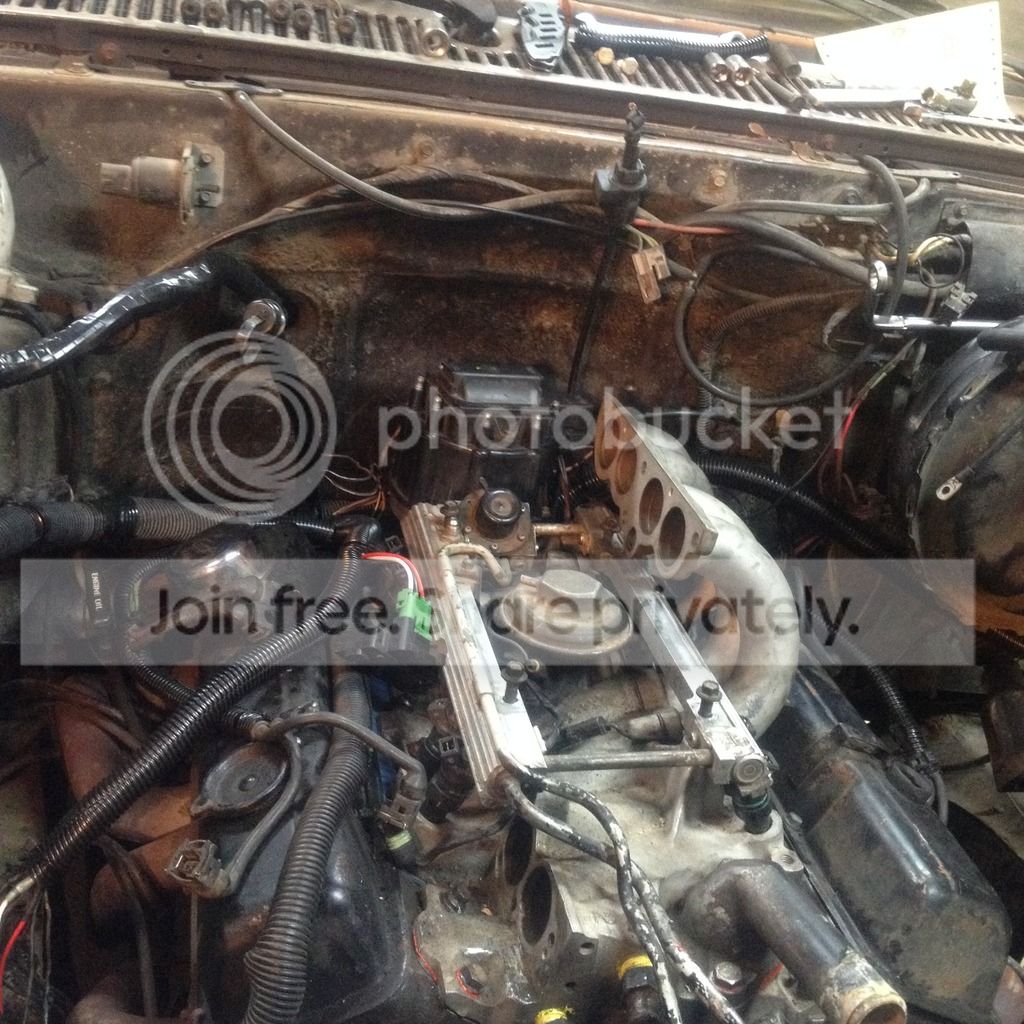
First off, poser shot of the intake in place. Cause it looks so good sitting in there!

Here is a breakdown of what went down.
Got the wiring finished after installing the lower intake and mocking up the harness in the truck to get routing figured out. Even the underdash connections to the VSS, TCC Brake Switch, ECM Ground, Gear Selector, Fuel Pump, ECM 12V. I found my multimeter and was able to test the gear selector that me and Jess were talking about above. It does indeed work as I had hoped. So I hooked one terminal to ground and the other to my P/N wire from the ECM that now has ground supplied when in Park and Neutral.


With the wiring finished I moved on to getting the distributor dropped in.
Then I moved on to getting the new fuel pickup dropping in my tank. Brainstormed my fuel line options and came up with a pretty simple solution I think for under the tank and at the fuel rail.
I had left over stock TPI fuel hoses/hard lines that go from stock Camaro/Firebird subframes under the brake booster up to the fuel rail. The hoses have female 16mm & 14mm fittings on them. These are the same fittings that are at the end of the fuel rail. The hard lines have the male fittings of those sizes.
From the fuel rail I was able to bend the smaller 5/16th (14mm) hardline to go down and towards the passenger side frame rail. I wasn't able to get the 3/8th (16mm) feed line bent without it wanting to kink. So I will cut it and run hose following the same path as the return. I will then cut the end off the return hard line and run hose to the stock hard line already on the truck. That takes care of the fuel rail connections.
Back at the tank I will use the stock TPI hose that I referred to above to connect to the sending unit since it has the same male fittings that match up to the female fittings on the hoses. From there I bought Dorman repair sections of hard lines that have the male 16mm and 14mm fittings on one end and then are bare line on the other end. I will attach to the hose and make a loop above the tank going straight into the existing hard lines on the truck. Possibly installing my fuel filter somewhere in that area that has easy access.
You can see the stock hoses and dorman repair section here from when I tested the pump and pumped out some of the fuel that was in the tank. It was slightly heavy.

I began installing the rest of the intake last night before I went in for the evening.
This morning I ordered my fuel filter, oil pressure switch, and knock sensor. I still yet need to order a o2 sensor bung, the heated o2 sensor, and maybe a IAC.
To do list includes:
1. Finish installing intake.
2. Finish fuel system.
3. Install oil pressure sensor.
4. Install knock sensor.
5. Weld in bung and install o2 sensor.
6. Replace water pump that I noticed last night was really wobbly due to bad bearings.
7. Figure out upper radiator hose options.
8. Wire in a add on fuse group to get 12v to 4 wires under the dash.
9. Fill back up with coolant.
10. Prime fuel system checking for leaks.
11. Get EBL ECM out of Trans Am and hook it up to the harness. Program in tune.
12. Cross fingers, say a prayer, review if I missed anything and turn the key!
First off, poser shot of the intake in place. Cause it looks so good sitting in there!

Here is a breakdown of what went down.
Got the wiring finished after installing the lower intake and mocking up the harness in the truck to get routing figured out. Even the underdash connections to the VSS, TCC Brake Switch, ECM Ground, Gear Selector, Fuel Pump, ECM 12V. I found my multimeter and was able to test the gear selector that me and Jess were talking about above. It does indeed work as I had hoped. So I hooked one terminal to ground and the other to my P/N wire from the ECM that now has ground supplied when in Park and Neutral.


With the wiring finished I moved on to getting the distributor dropped in.
Then I moved on to getting the new fuel pickup dropping in my tank. Brainstormed my fuel line options and came up with a pretty simple solution I think for under the tank and at the fuel rail.
I had left over stock TPI fuel hoses/hard lines that go from stock Camaro/Firebird subframes under the brake booster up to the fuel rail. The hoses have female 16mm & 14mm fittings on them. These are the same fittings that are at the end of the fuel rail. The hard lines have the male fittings of those sizes.
From the fuel rail I was able to bend the smaller 5/16th (14mm) hardline to go down and towards the passenger side frame rail. I wasn't able to get the 3/8th (16mm) feed line bent without it wanting to kink. So I will cut it and run hose following the same path as the return. I will then cut the end off the return hard line and run hose to the stock hard line already on the truck. That takes care of the fuel rail connections.
Back at the tank I will use the stock TPI hose that I referred to above to connect to the sending unit since it has the same male fittings that match up to the female fittings on the hoses. From there I bought Dorman repair sections of hard lines that have the male 16mm and 14mm fittings on one end and then are bare line on the other end. I will attach to the hose and make a loop above the tank going straight into the existing hard lines on the truck. Possibly installing my fuel filter somewhere in that area that has easy access.
You can see the stock hoses and dorman repair section here from when I tested the pump and pumped out some of the fuel that was in the tank. It was slightly heavy.

I began installing the rest of the intake last night before I went in for the evening.

This morning I ordered my fuel filter, oil pressure switch, and knock sensor. I still yet need to order a o2 sensor bung, the heated o2 sensor, and maybe a IAC.
To do list includes:
1. Finish installing intake.
2. Finish fuel system.
3. Install oil pressure sensor.
4. Install knock sensor.
5. Weld in bung and install o2 sensor.
6. Replace water pump that I noticed last night was really wobbly due to bad bearings.
7. Figure out upper radiator hose options.
8. Wire in a add on fuse group to get 12v to 4 wires under the dash.
9. Fill back up with coolant.
10. Prime fuel system checking for leaks.
11. Get EBL ECM out of Trans Am and hook it up to the harness. Program in tune.
12. Cross fingers, say a prayer, review if I missed anything and turn the key!
 I don't "need" a oil pressure switch, knock sensor, or o2 sensor to be able to run it for a few seconds.
  I have all day/night tomorrow off work. And no other plans for that night. So that means its wrenching time all day tomorrow! Going to finish up the rest of the fuel system, get the tank reinstalled, get the intake bolted up, finish up the 12v wiring and possibly attempt to start it up.


