CK5
Register an account today to become a member! Once signed in, you'll be able to participate on this site by adding your own topics and posts, as well as connect with other members.

'72 K5 - AJ's Gray Matter Build

How the heck did you do that to your shin? I want to make sure never to do that.
Just don't jump anywhere. Now that I'm older and rounder, I don't jump anywhere. :D Don't want my knees to explode.
 
How the heck did you do that to your shin? I want to make sure never to do that.

Tailgate was down. Went to hurdle up into the bed. Planted my hands on the tailgate and swung my feet up. Only my feet caught the edge and slipped driving all my momentum and weight into the shin.
 
Tailgate was down. Went to hurdle up into the bed. Planted my hands on the tailgate and swung my feet up. Only my feet caught the edge and slipped driving all my momentum and weight into the shin.

Do you have that long bracket attached to the top of the tailgate? I recently attached mine and thought it would cause some knee damage if I ever missed climbing up. Maybe time to remove it again.
 
Do you have that long bracket attached to the top of the tailgate? I recently attached mine and thought it would cause some knee damage if I ever missed climbing up. Maybe time to remove it again.

For the soft top? I do. But, I just hit the top rounded edge of the tailgate with enough force that it peeled the shin open. I'm a skinny dude. There's no padding on the shin for me.
 
Do you have that long bracket attached to the top of the tailgate? I recently attached mine and thought it would cause some knee damage if I ever missed climbing up. Maybe time to remove it again.
That factory metal weatherstrip edge is called “shin buster” for a reason... impressive that AJ was able to get such a gnarly injury without it!! :)

-G
 
That factory metal weatherstrip edge is called “shin buster” for a reason... impressive that AJ was able to get such a gnarly injury without it!! :)

-G

Indeed, I am impressed. The weatherstrip edge was what I was talking about. AJ, maybe that’s what you need to install. If you’re going for stitches, “might as well” go all in! Can give you a great deal on mine. :D
 
Indeed, I am impressed. The weatherstrip edge was what I was talking about. AJ, maybe that’s what you need to install. If you’re going for stitches, “might as well” go all in! Can give you a great deal on mine. :D

Dude. I can't even. That trim piece may taken my whole leg off. :haha:
 
this item is the BIG ticket for shop use on lifted trucks . i love mine so much . i feel much safer now under hood working as i lean over fenders and also other things around the shop . also doubles as a 2 person bench for seating .

https://www.menards.com/main/paint/...deck-work-platform/ap-30k/p-1444436678233.htm
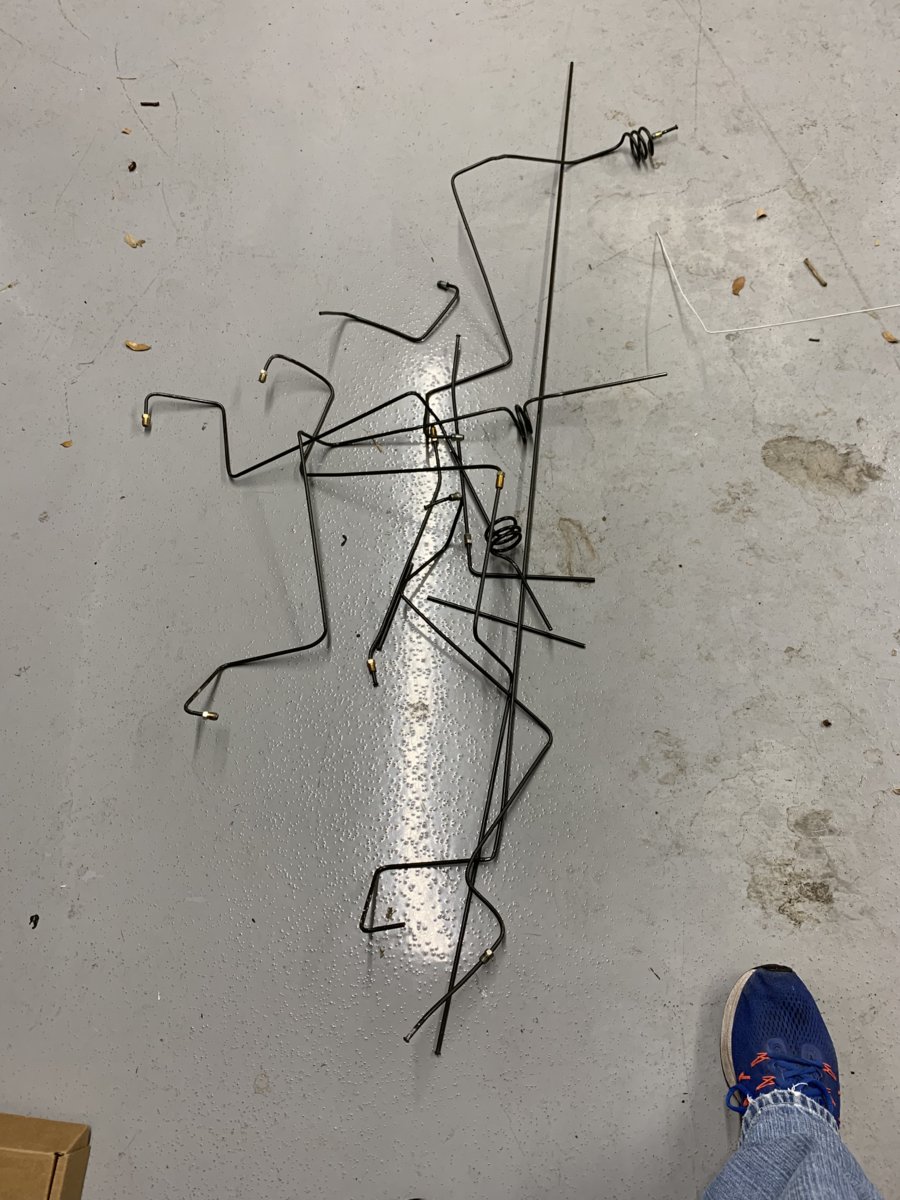
Yeah, I have 3 of those. One for the shop, one for home, and a smaller one I keep in the bed of the crew cab. I've found them for sale at Home Depot and Lowes at Black Friday time.
 
3/23/20 - STOP the madness, the quarantine update - well brake upgrades and this coronavirus nonsense. Been gathering up parts, albeit very slowly for a hydroboost upgrade. @Shawn was a bunch of help as he'd recently done it too.

For fittings and such, this site listed out all the adapters you need for both the box and booster. Helped a ton.

https://www.c1pulleys.com/products/hk275-black-aqp-hose-kit-hydroboost

and for the tiny return line fitting off the booster...

https://www.ebay.com/itm/6-AN-x-5-16-24-o-ring-hydroboost-spittier-return-port-fitting/253756877745

And last, I ended up calling these guys to get the booster output rod, spring, and star washer... the stuff you don't get with a reman booster. Tim was a TON of help there.

http://precisionrebuilders.com/

With that out of the way...less words, more pics!

Reman booster. Cut the eye off the input rod. Way too short to reach the pedal. Threaded the shaft.
full


Picked this up as an extension to reach the pedal. Comes with the needed bushings for the pedal bolt too.
full


Ended up here
full


Got ahold of CaptainFab over at 67-72chevytrucks.com and picked up his booster mount bracket and hydro adapter plate
full

full


Built some braided stainless teflon lines. The only company producing that 180* one (in steel) that I readily found was Earl's
full


Bent up new brake lines. The ones in the pic above that I did previously were sloppy. Got myself a tuition pile out of it
full


Got rid of the rag joint while I was at it. Might as well...
full


Finished product for now. Power steering system is bled with no leaks. Just need to bleed the brake lines.
full


Next up.... cold air intake...
 
Last edited:
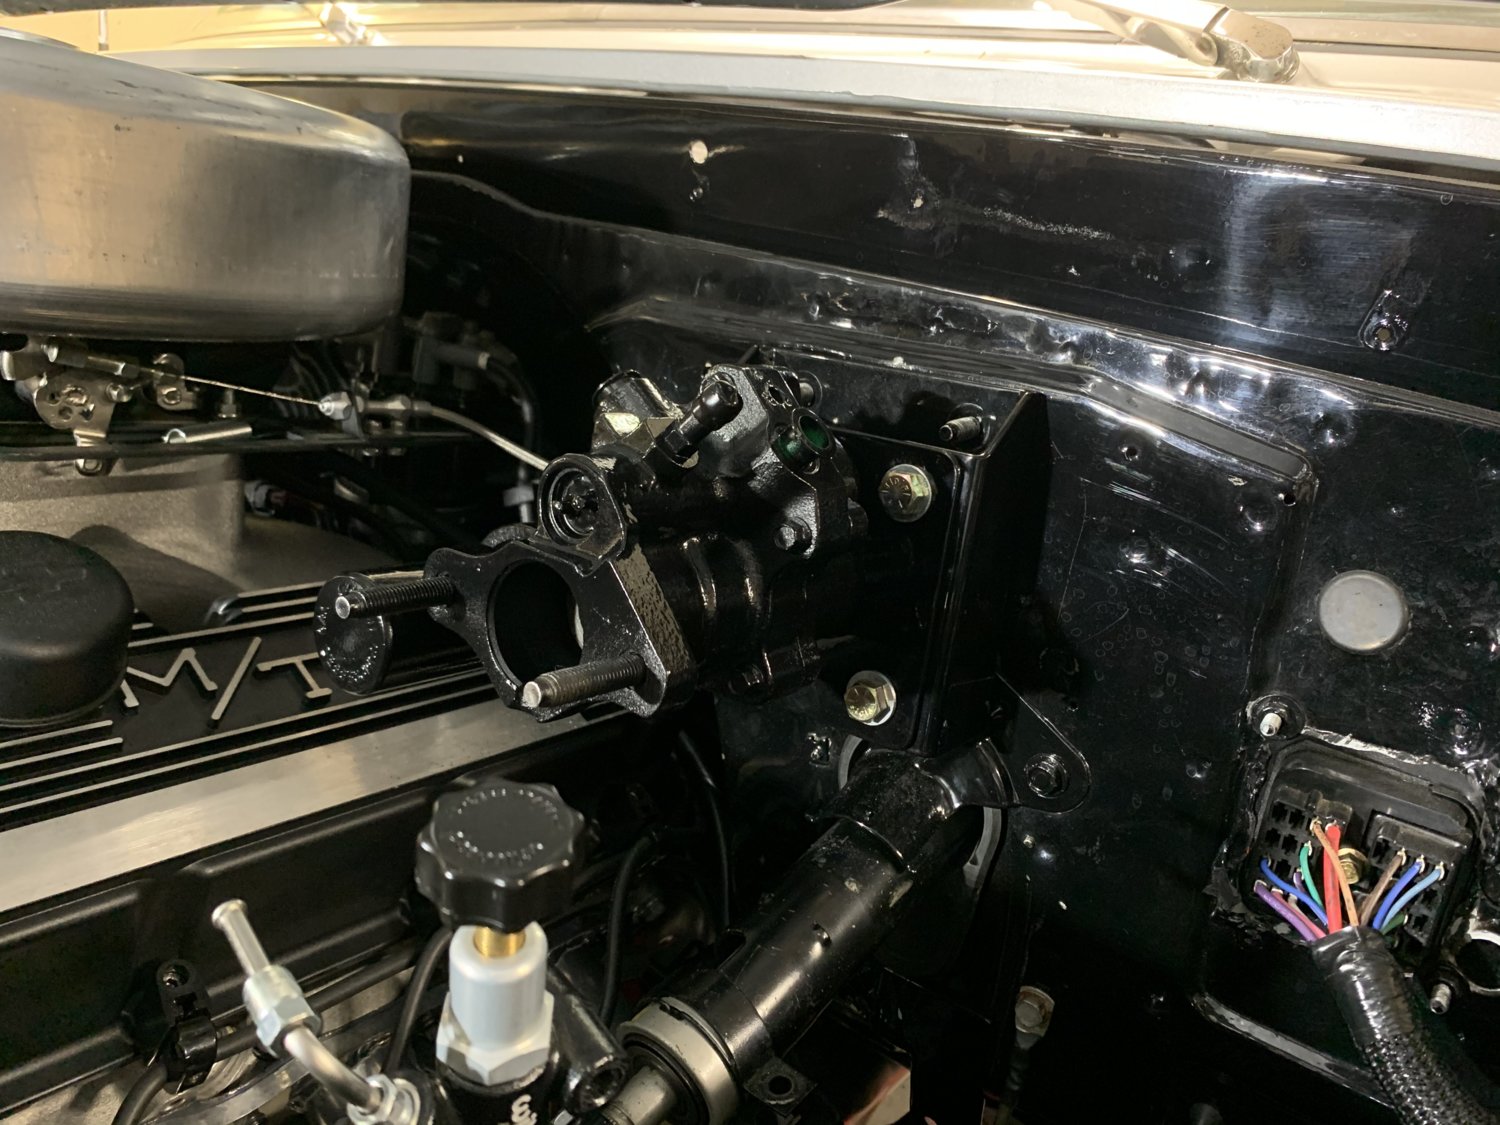
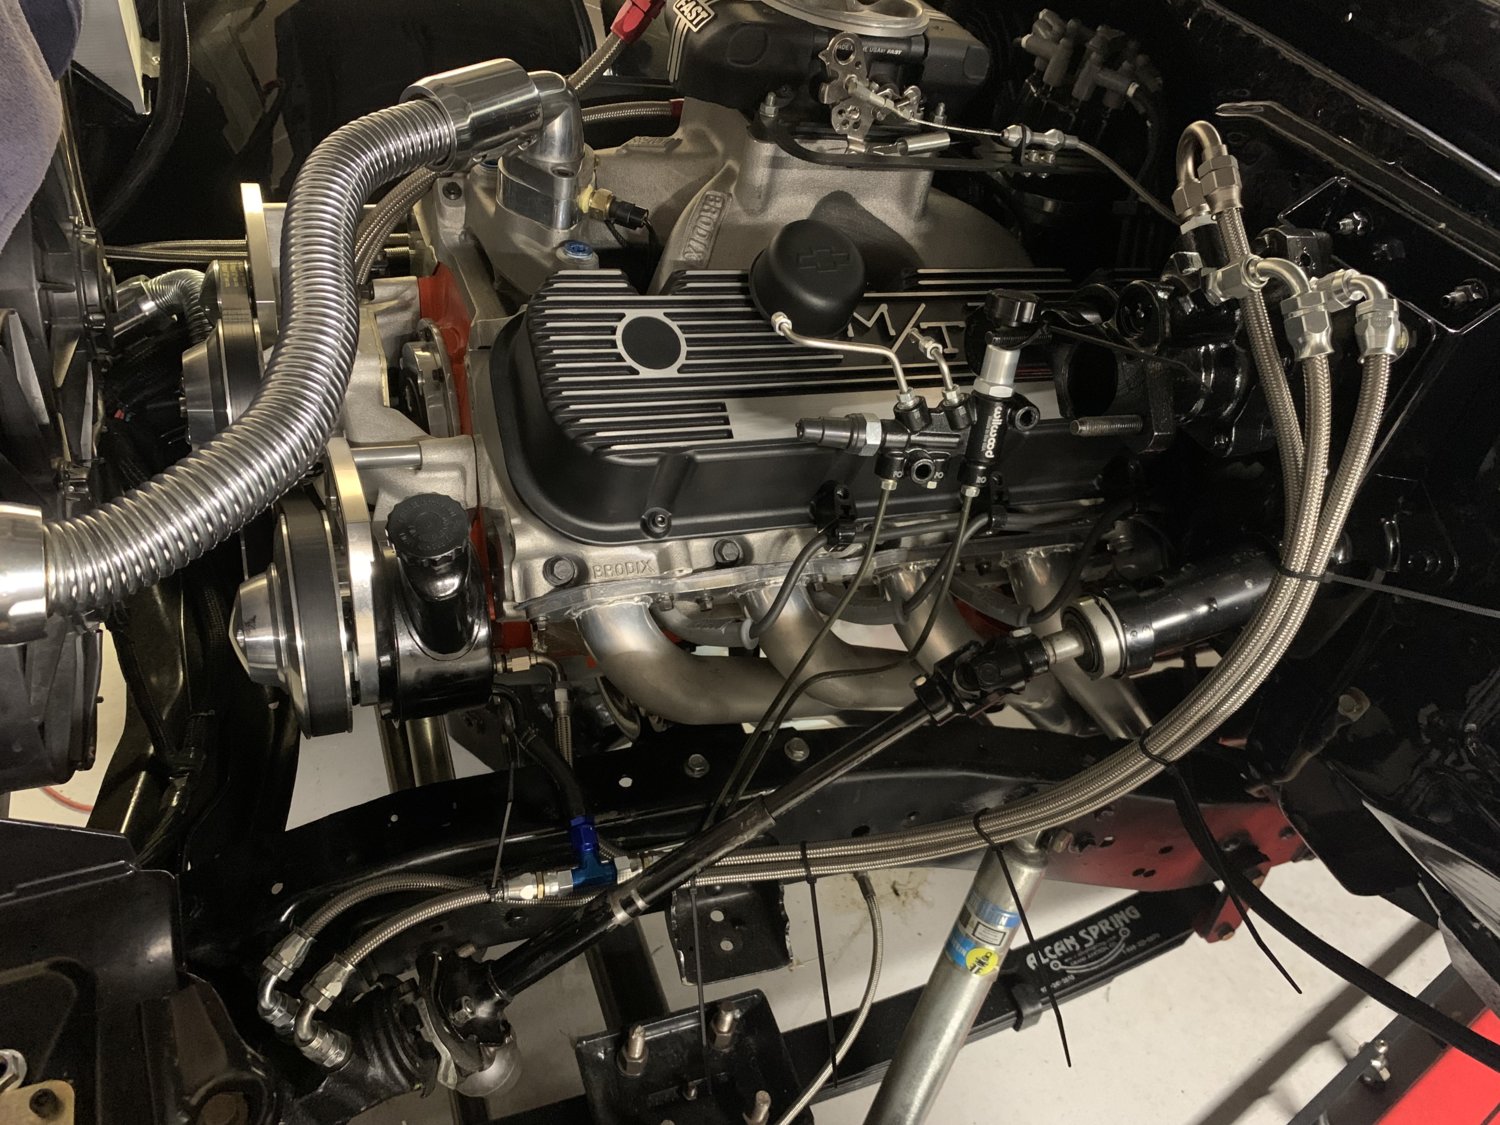
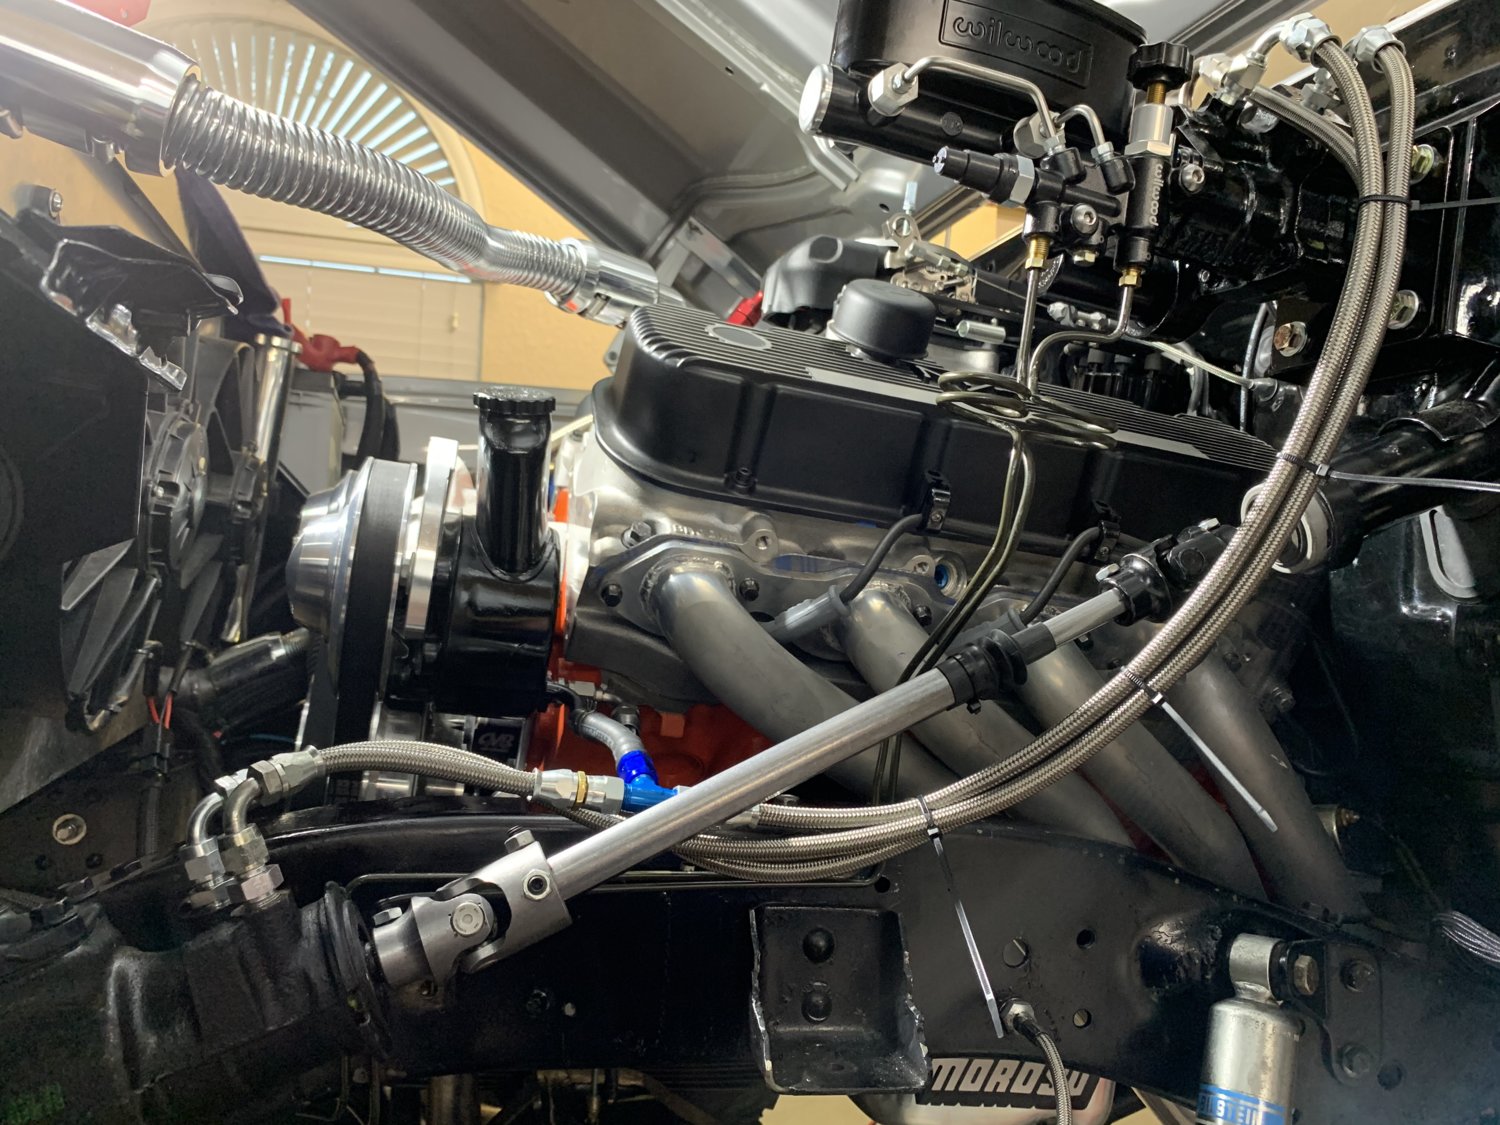
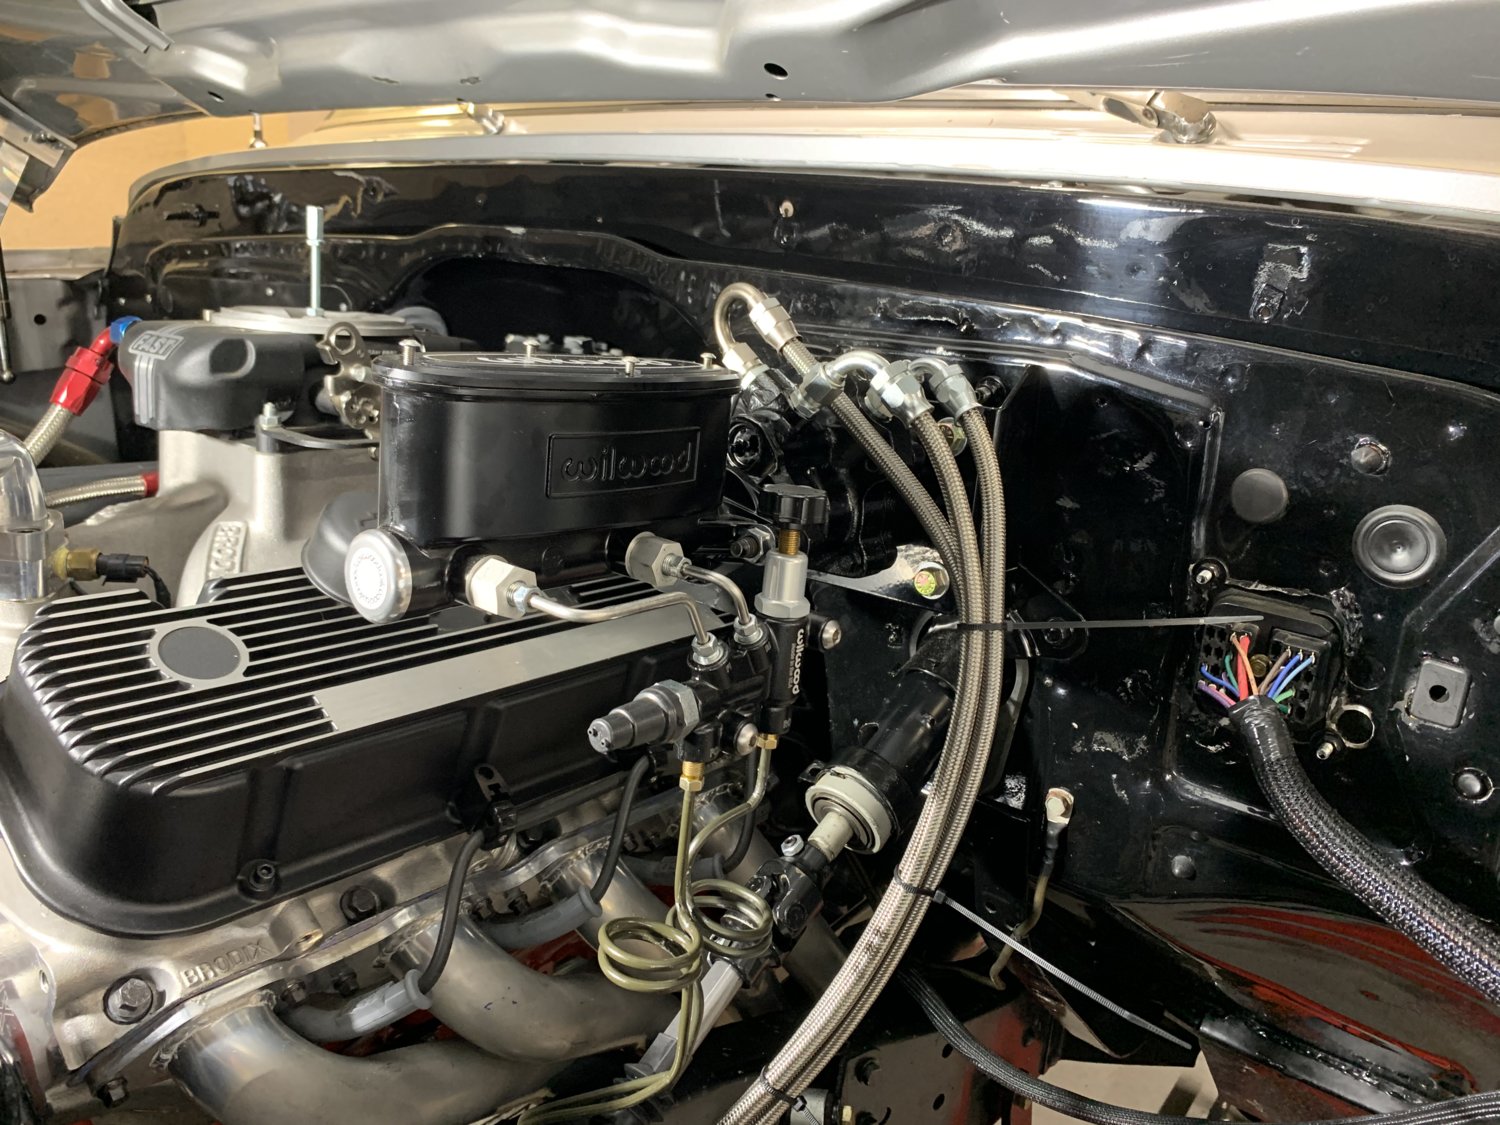
I like what you did with the lines. Very clean routing. That 180* bend is slick.
 
Nice clean install AJ. I two like the 180 degree bend, might have to look into that. So, how does it stop...
 
Nice clean install AJ. I two like the 180 degree bend, might have to look into that. So, how does it stop...
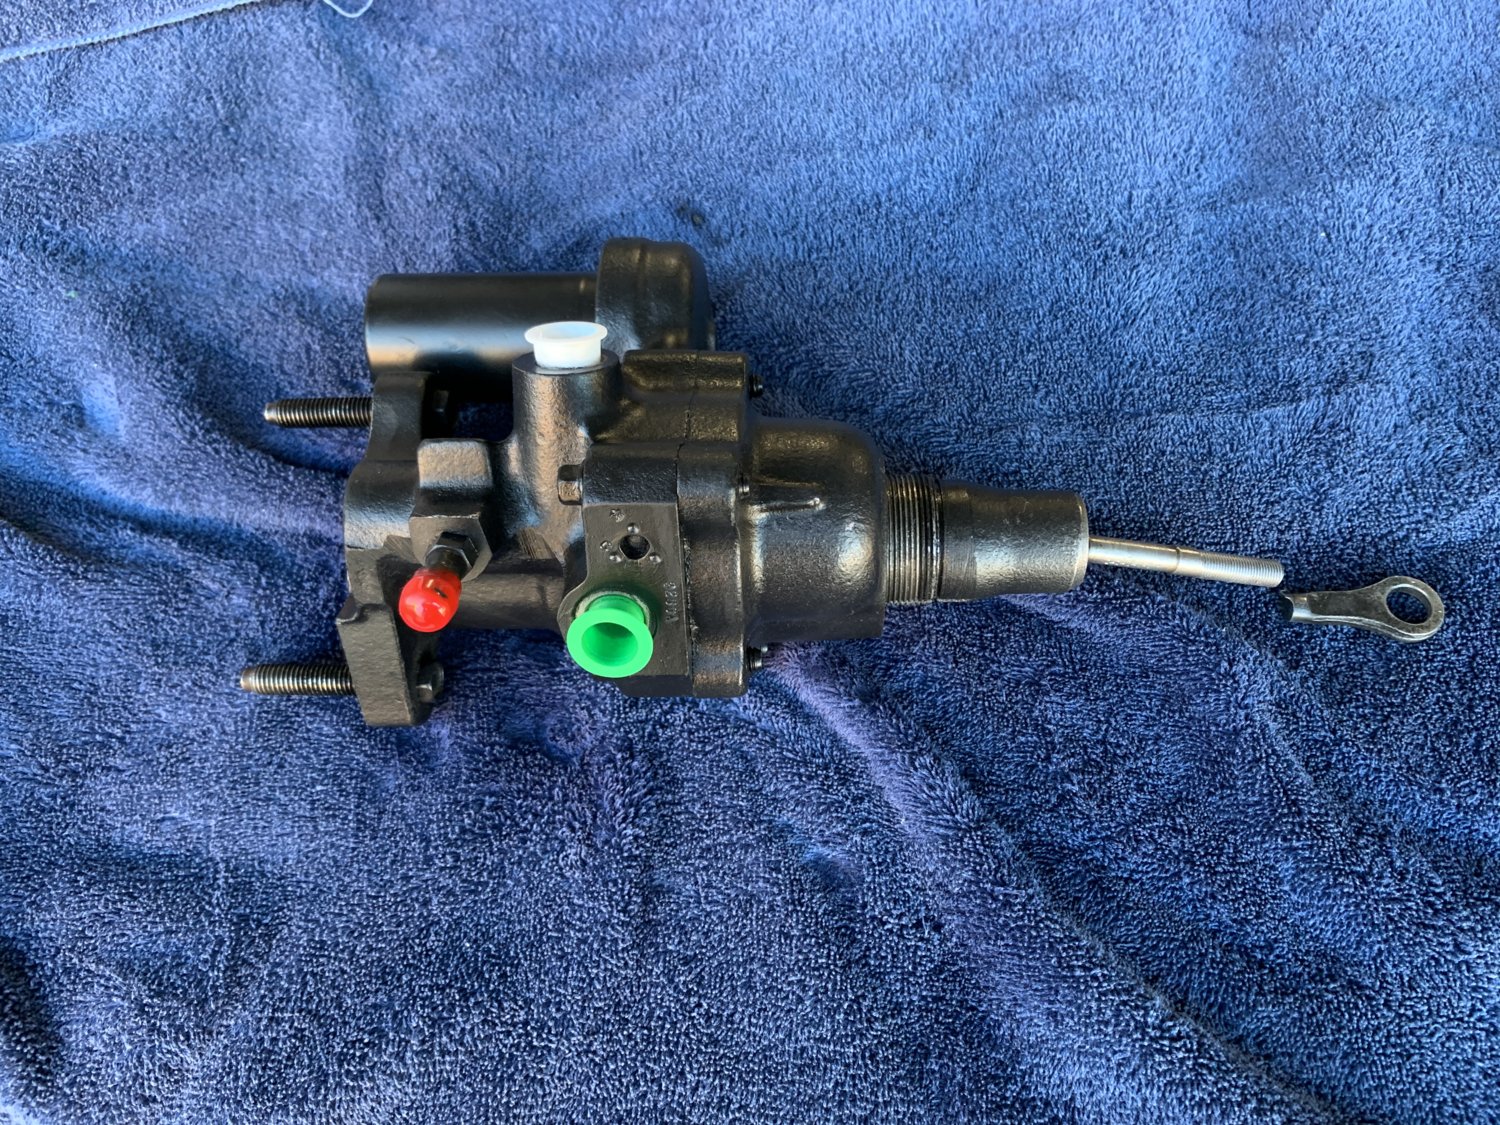
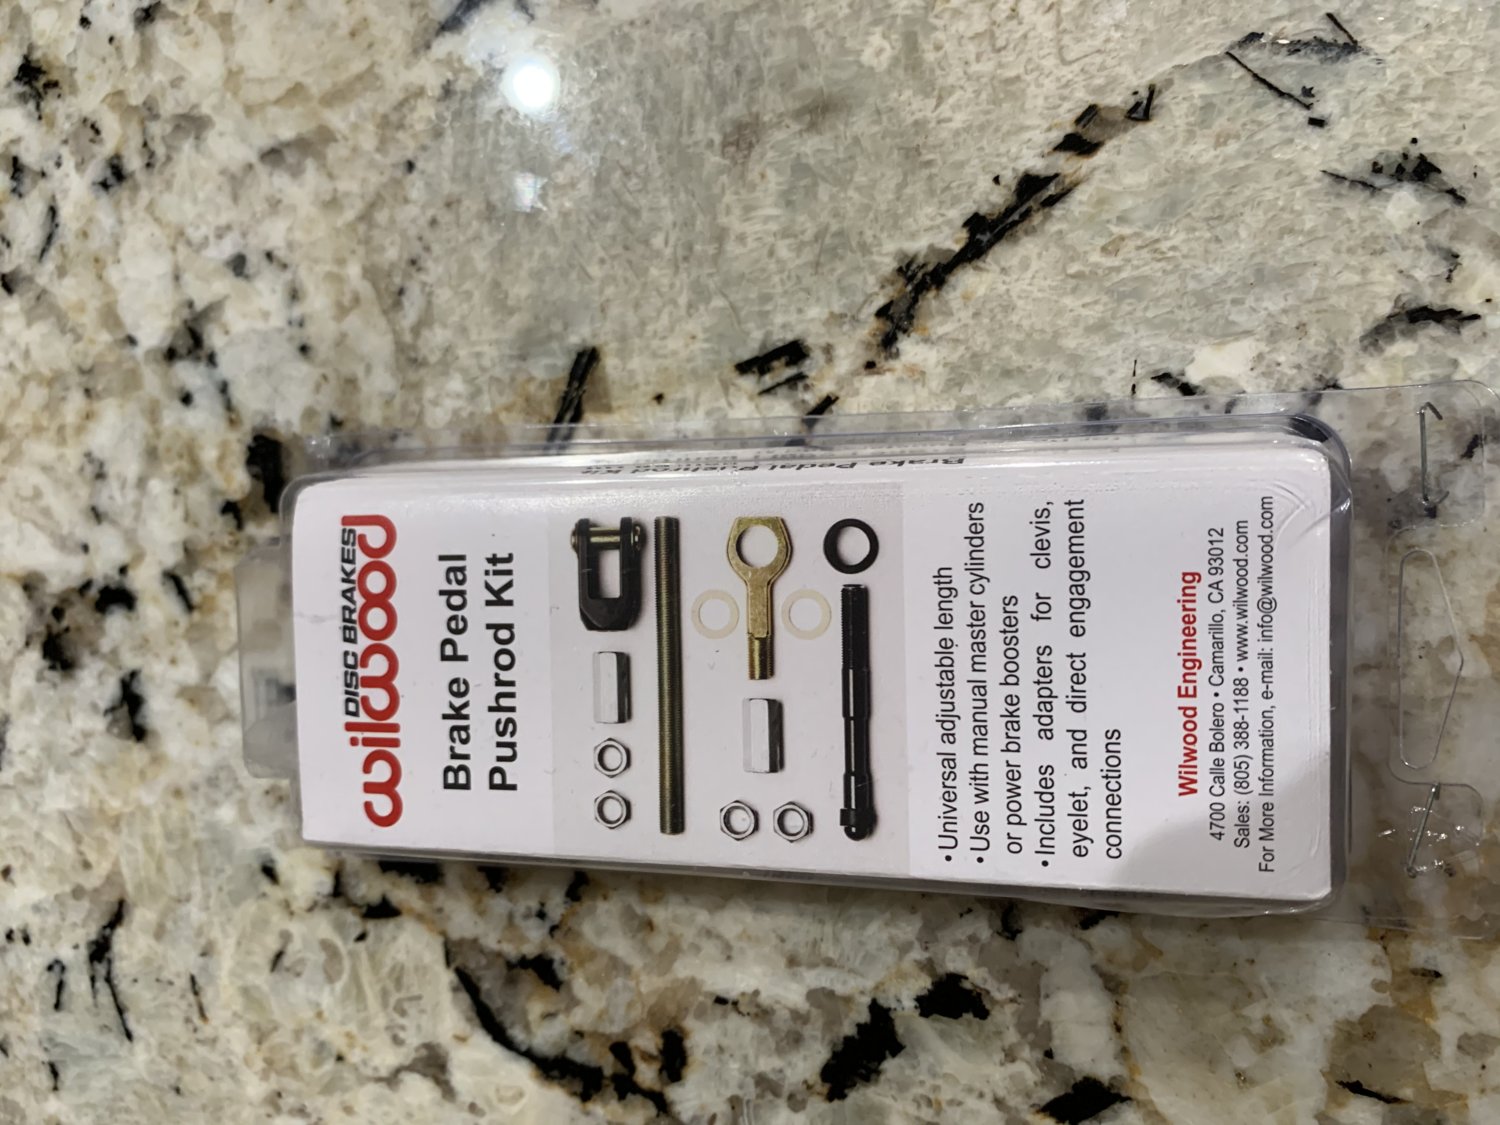
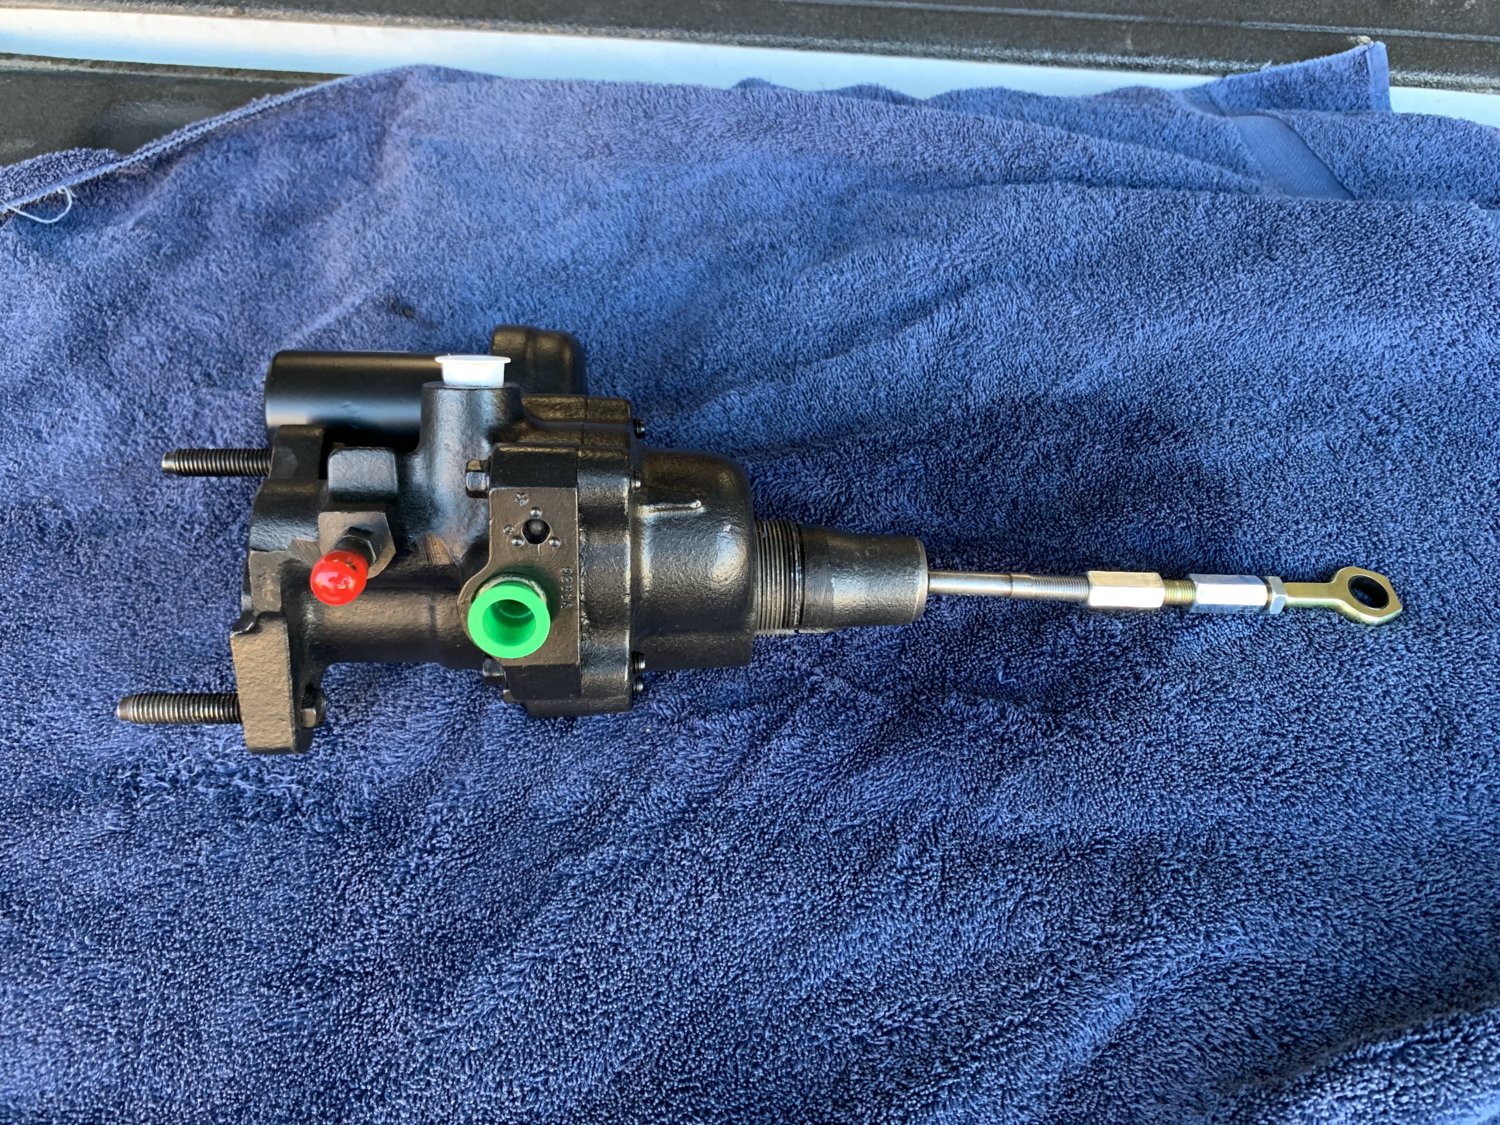
Don't know yet Jim. Still have to bleed the brakes. Gonna bench bleed the master again while I'm at it.
 
AJ...just finished bleeding my M/C, bought some 12" brake lines and bent them into a shape to send the fluid back into the chambers, and used my chinese knock off vacuum tool to do the lines. If you want I will send the parts and tool to use if you want
 
AJ...just finished bleeding my M/C, bought some 12" brake lines and bent them into a shape to send the fluid back into the chambers, and used my chinese knock off vacuum tool to do the lines. If you want I will send the parts and tool to use if you want

Thanks Jim. I pulled some lengths out of the tuition pile to do exactly that. I have one of the cheap vacuum pumps for bleeding too... no need to send but great offer. I still like to bleed the old fashioned way after vacuum bleeding.
 
Top Bottom