CK5
Register an account today to become a member! Once signed in, you'll be able to participate on this site by adding your own topics and posts, as well as connect with other members.
That’s looking really good!

Easy peasy Eh!


After 30 - 40 hours of practice, it becomes easy....

Experience is funny like that. :)


I really do enjoy putting these new skills in my arsenal of knowledge. Metalshaping has been a technique I've wanted to learn for a long time and I am really pleased with the results I'm finally starting to get now.


-G
 
Greg, any thoughts on softening that leading edge, like so:

greg1.png


That may be a bridge too far, I have no idea, but it seems like it would finish it off nicely.
 
Greg, any thoughts on softening that leading edge, like so:

View attachment 374745


That may be a bridge too far, I have no idea, but it seems like it would finish it off nicely.

That edge is sharp admittedly. Its a corner-to-corner weld and once its metal finished that profile will be softer.

-G
 
That edge is sharp admittedly. Its a corner-to-corner weld and once its metal finished that profile will be softer.

-G
Consider tacking with 70S-6, and using silicone bronze to do most of the “welding” work. You can blend it very easily, and you put a lot less heat into the work. It’s akin to how old school hotrodders used to braze quarter panels when doing a section.

David
 
Consider tacking with 70S-6, and using silicone bronze to do most of the “welding” work. You can blend it very easily, and you put a lot less heat into the work. It’s akin to how old school hotrodders used to braze quarter panels when doing a section.

David
Interesting!

Was not aware of that technique, but I will look into it. Brazing from the inside of the seam to allow for a larger blended radius on the outside edge?


-G
 
Interesting!

Was not aware of that technique, but I will look into it. Brazing from the inside of the seam to allow for a larger blended radius on the outside edge?


-G
That’s kind of how I was thinking. Braze the inside, blend to a general profile, braze the outside as needed to smooth. Alternatively, a nice pulse setting using 0.35 70S lay wire would also work just fine. Go an inch, air quench, repeat, smooth, planish, and there’s your Saturday. Repeat again on Sunday.

David
 
2021.04.19 - UPDATE! - 200% COMPLETE - FENDERS FOR BOTH SIDES !!!


Spent about 4 hours building a driver's side flare, instead of the 40 hours it took to design/build/template the passenger side version.

full


Laid out with some gaffer tape just to get the parts aligned

full


In the vise to simplify the taping process

full


New progress and previous progress in one photo...

full


TIG is still really new to me, but with 60A and a 1-second burst (on a very tight fitup) it does puddle and join the parts cleanly and beautifully.

full


Sample of the crease that still needs to be grafted into the main fenderlip. Getting that detail and wrapping the fender underneath will give it a much more finished look.

full


Still lots of welding (and silicon bronze brazing!) left to do... but it was satisfying being able to knock out this much progress in a single garage day.


-G
 
cool stuff.....

how do you think the new neighborhood is with grinding noise?

So far....so good. :waytogo:

I try to do a couple of basic things that are just common sense...
1. Be friendly and get to know my surrounding neighbors. Help them with small tasks if I've got a specialty tool that makes the job easy. A little goodwill goes a long way.
2. Be cognizant of the time-of-day when doing the noisy stuff. My neighborhood is full of "curb appeal lunatics" who edge, mow, powerwash and leafblow most of Sunday anyway... my noise doesn't really break the silence. :haha:

The two big changes that really help recently are the addition of the cordless metal shears and the new arbor press metal former. Without the shears, I'd be cutting large sheets with either cutoff wheels or a reciprocating airsaw... and that would be super loud and annoying for an extended period of time. The shear is SO quick and clean that there's almost no grinding to get rid of excess material outside of my blue sharpie lines. The arbor press replaces the leadshot bag and deadblow hammers for putting rough shapes into parts... that one is self-explanatory.

I'm starting to plan ahead a bit more for noise also. I cut this plate out for the driver's side footwell, and already have my flexible shape pattern ready to go... so in the evening if I get some time I can build the mirror-image panel (that was already installed on the passenger side) for the drivers footwell in relative silence... won't matter if Charlie is sleeping or not. New new arbor press and English Wheel are super quiet.


IMG_4499.JPG


-G
 
2021.04.27 - UPDATE! - SQUISHING 16GA STEEL....!!!

Pretty solid progress yesterday...

Got the driver's side flare CLECO'ed in place, marked the curve and removed all the old metal that was no longer needed...

full


Deburred, and reinstalled the flare... and called it good enough for now.

full


Then it was time to hack an enormous hole in the driver footwell for tire clearance.... just like the passenger side already has.

full


...and then a real test for the new Arbor Press shrinker... some flat 16GA that needs a HUGE domed profile...! It's hard to see in this image, but the flexible shape pattern (top) is actually laying on top of a fresh piece of perfectly flat 16GA underneath.

full


What happened next was nothing short of amazing. Starting around the perimeter, the press was used to squeeze in some good "wrinkles" into the metal and initiate the formation of the deep shrink that this panel needs. One hard lesson learned from the last 20+ hour project building the passenger side panel is that it's just about impossible to create a dome shape THIS big using only stretching in the center of the panel. I suppose it's possible if you are stubborn enough and have lots of hours to waste... but in reality, it's a LOT faster to shrink the edges AND stretch the middle also.... using two techniques is a full order-of-magnitude faster... at least it was for me.

It took only about 30 minutes to get a crude, rough shape into the panel (mostly because 16GA is stupid thick and hard to work with).... and then another 90 minutes with the English Wheel to smooth out the profile and match it up more closely to the flexible shape pattern and cardboard profile templates.

full


No matter how you look at it, going from 20 hours down to 2 hours is a HUGE victory... and the whole thing happened in complete silence without a single hammerblow to disturb the neighbors (or my aging elbow joints!!!)


A little more finessing on this panel and it should be ready to start fitting into place, so that the upper firewall patch panel can be templated and installed with it.


-G
 
What’s your plan for the front marker lights?
Needs a fix, clearly. A little up a little forward should take care of it. The “K5 Blazer” fender badge isn’t going to fit in the stock mounting holes either....

There are bigger fish to fry at this point but will address it at some point later on.


-G
 
How many hours of practice do you have on that English wheel before you could make panels like that? I've always assumed that would be a time intense tool to learn to use correctly. Your presentation here is of the successes, but I assume there's a good bit of time just learning the tool? Just curious what the learning curve was like.
 
How many hours of practice do you have on that English wheel before you could make panels like that? I've always assumed that would be a time intense tool to learn to use correctly. Your presentation here is of the successes, but I assume there's a good bit of time just learning the tool? Just curious what the learning curve was like.
Good question. :waytogo:

I try not to be like one of those TV Reality shows where everything seems effortless... and I hope that when you see how slowly progress is made that it's because I'm struggling A LOT.

The English Wheel is a "Zen Tool"... and you don't really "think" about how to run the metal through. As you practice (and skate off in the wrong direction a bunch of times) you eventually realize that it's like constantly backing up a trailer... all the motions are "backward" from what you expect. And if you try to think about how to get to a particular location on the panel it seems like it will never get there.... you just have to screw around with it for a bunch of hours over the course of a few days and then one day it will just sort of "click" in your head... Suddenly, you won't be thinking anymore... you just look at the spot you want to shape and your hands will know how to get the panel lined up automatically. It's quite a cool feeling.

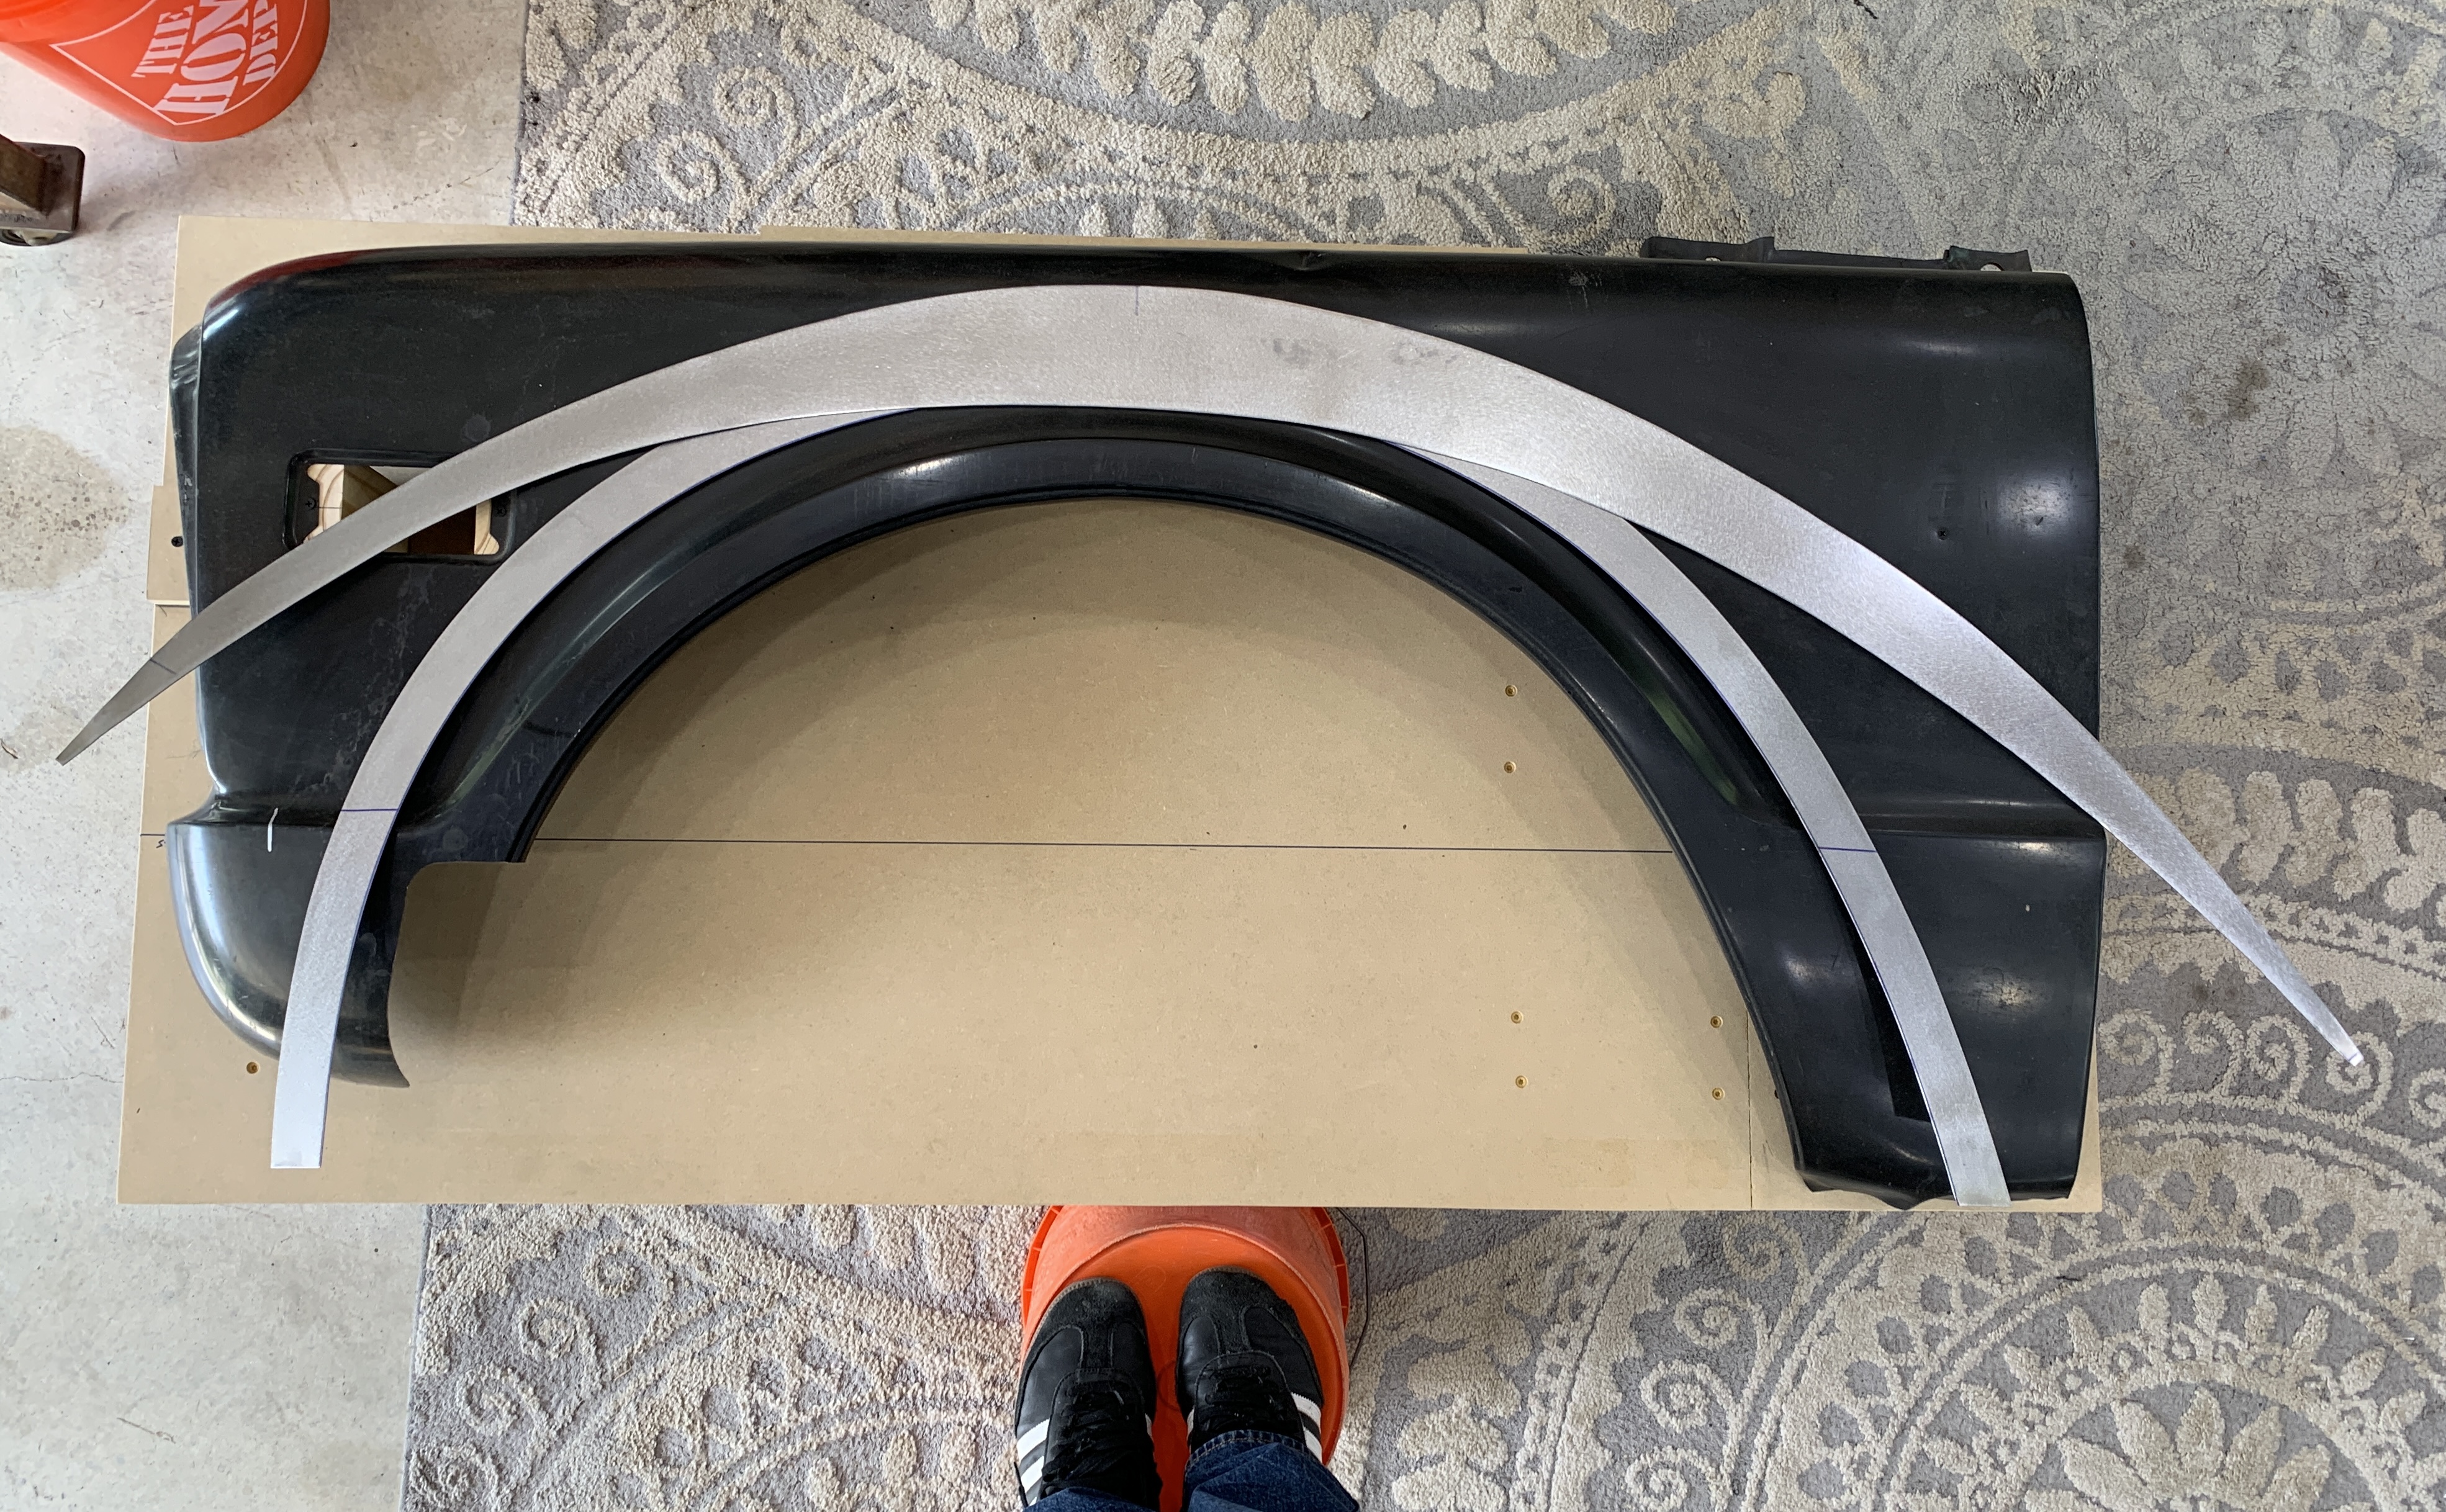
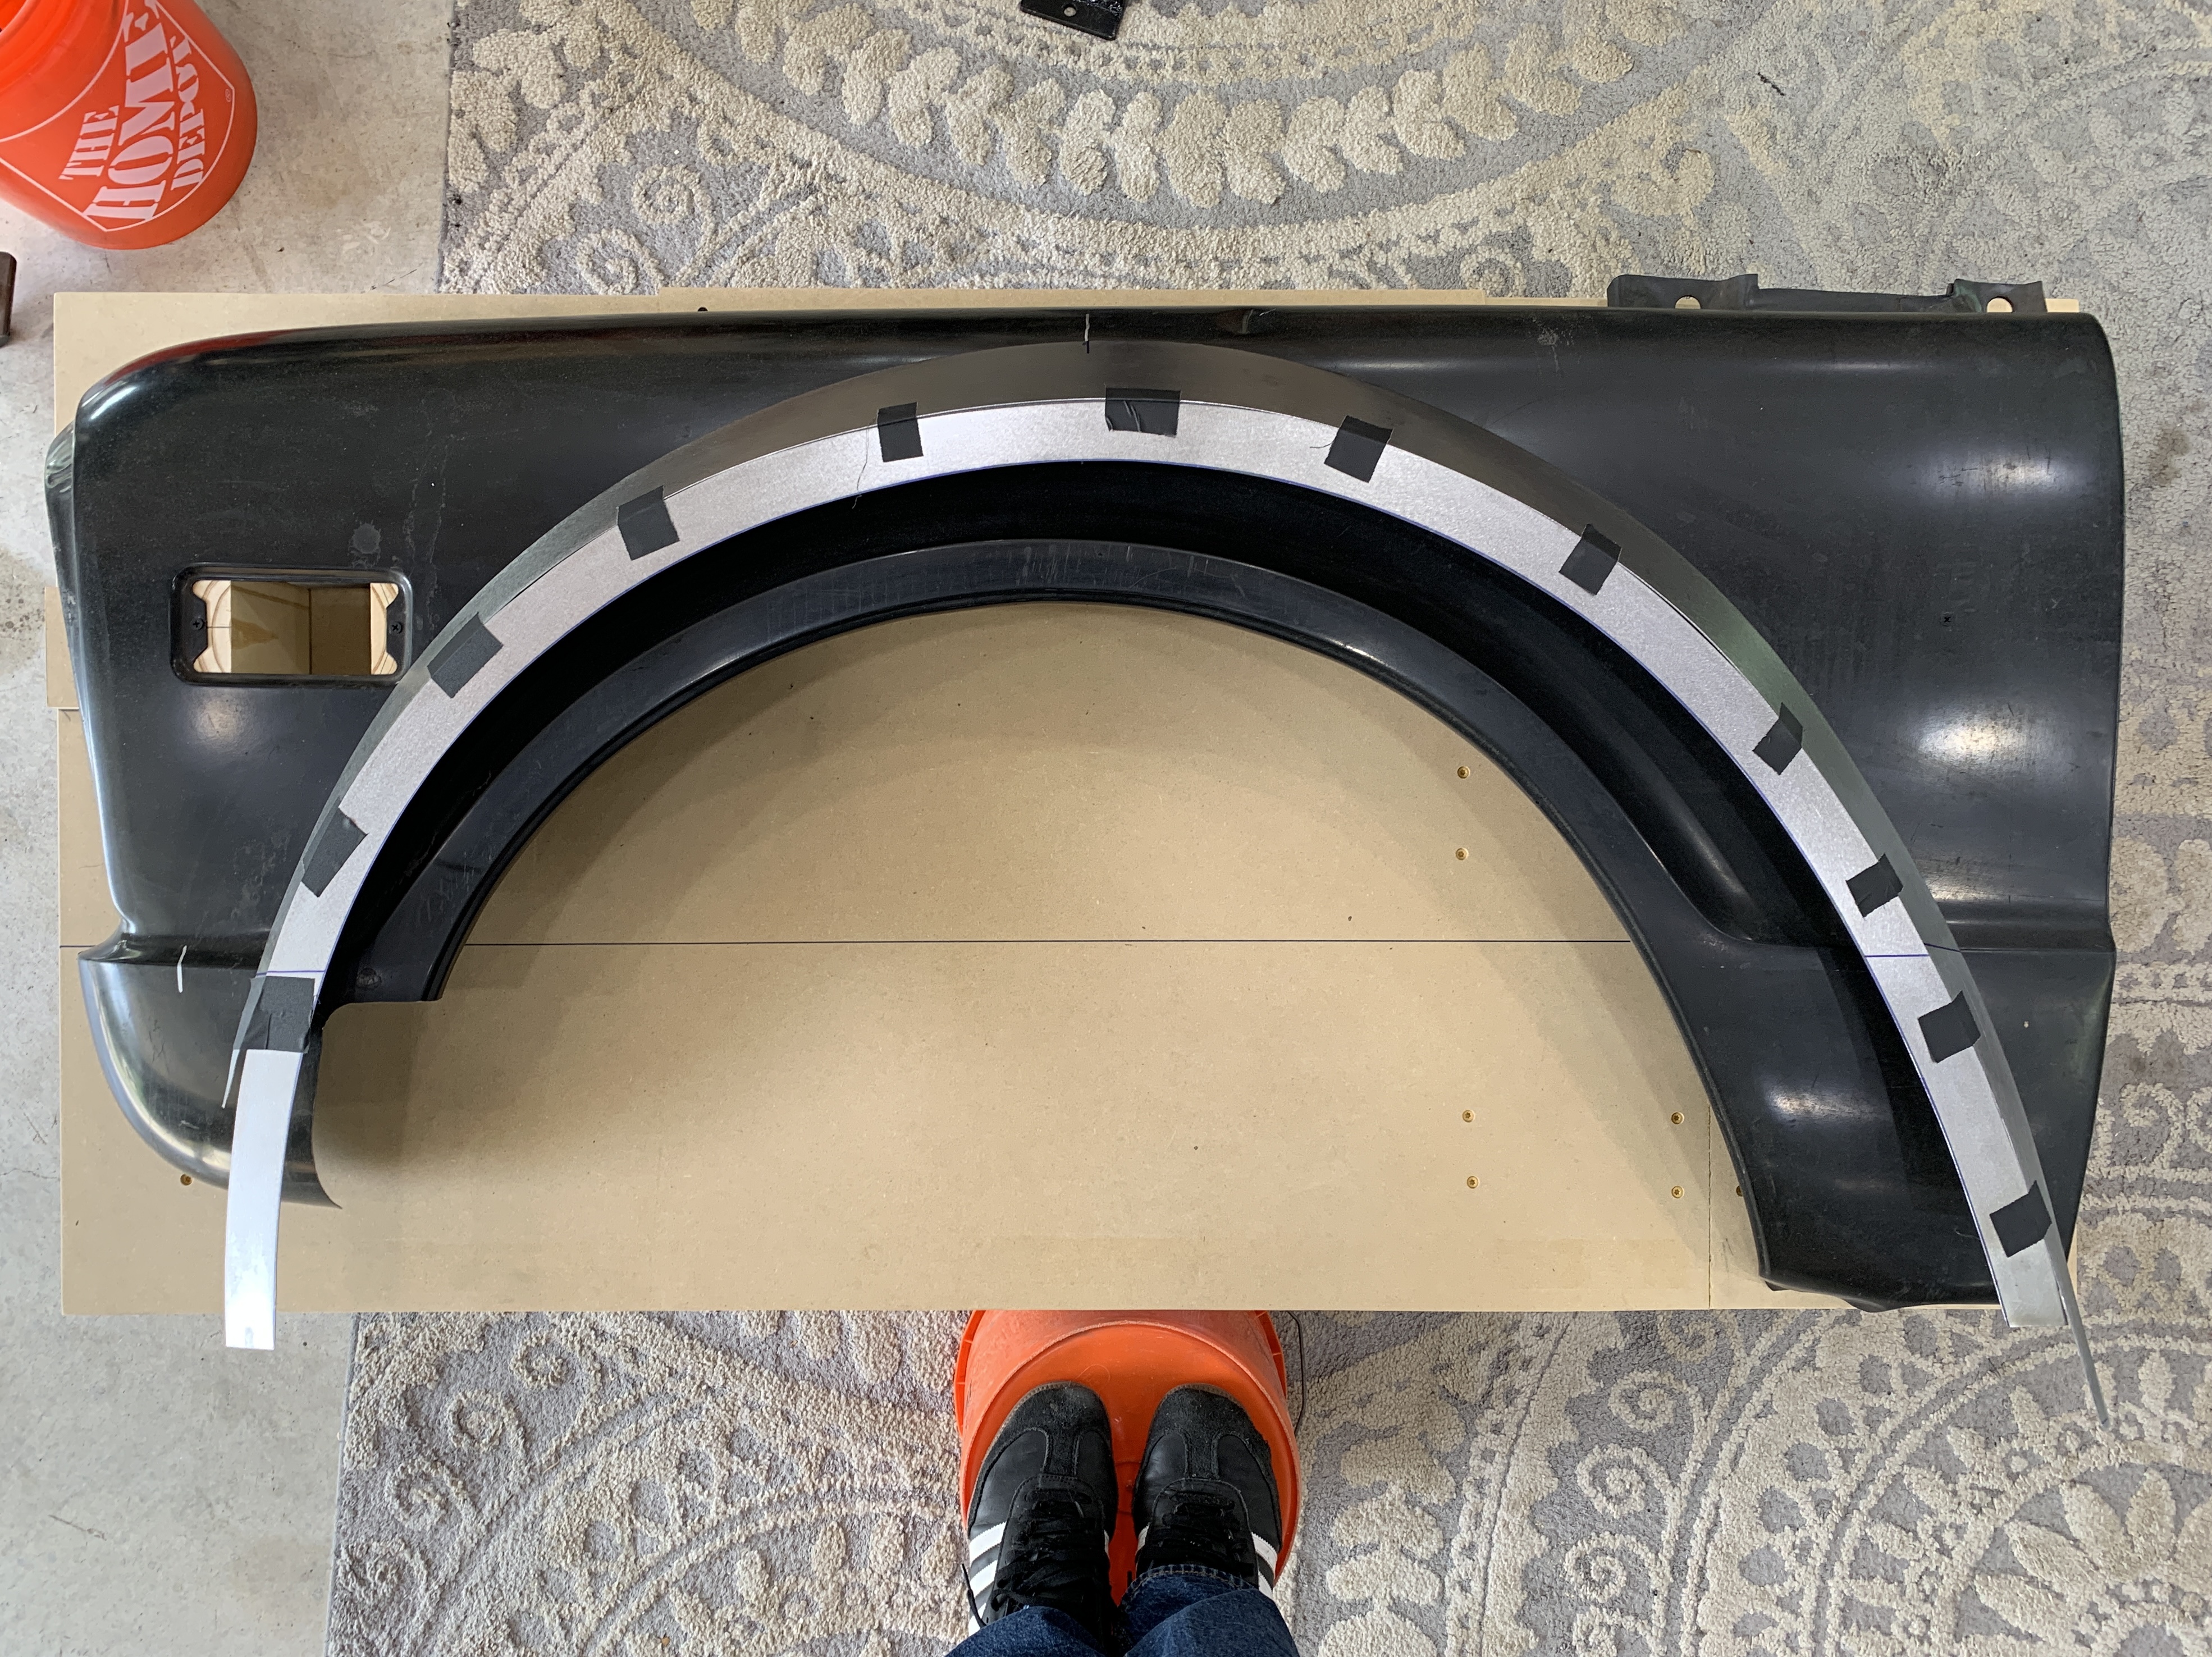
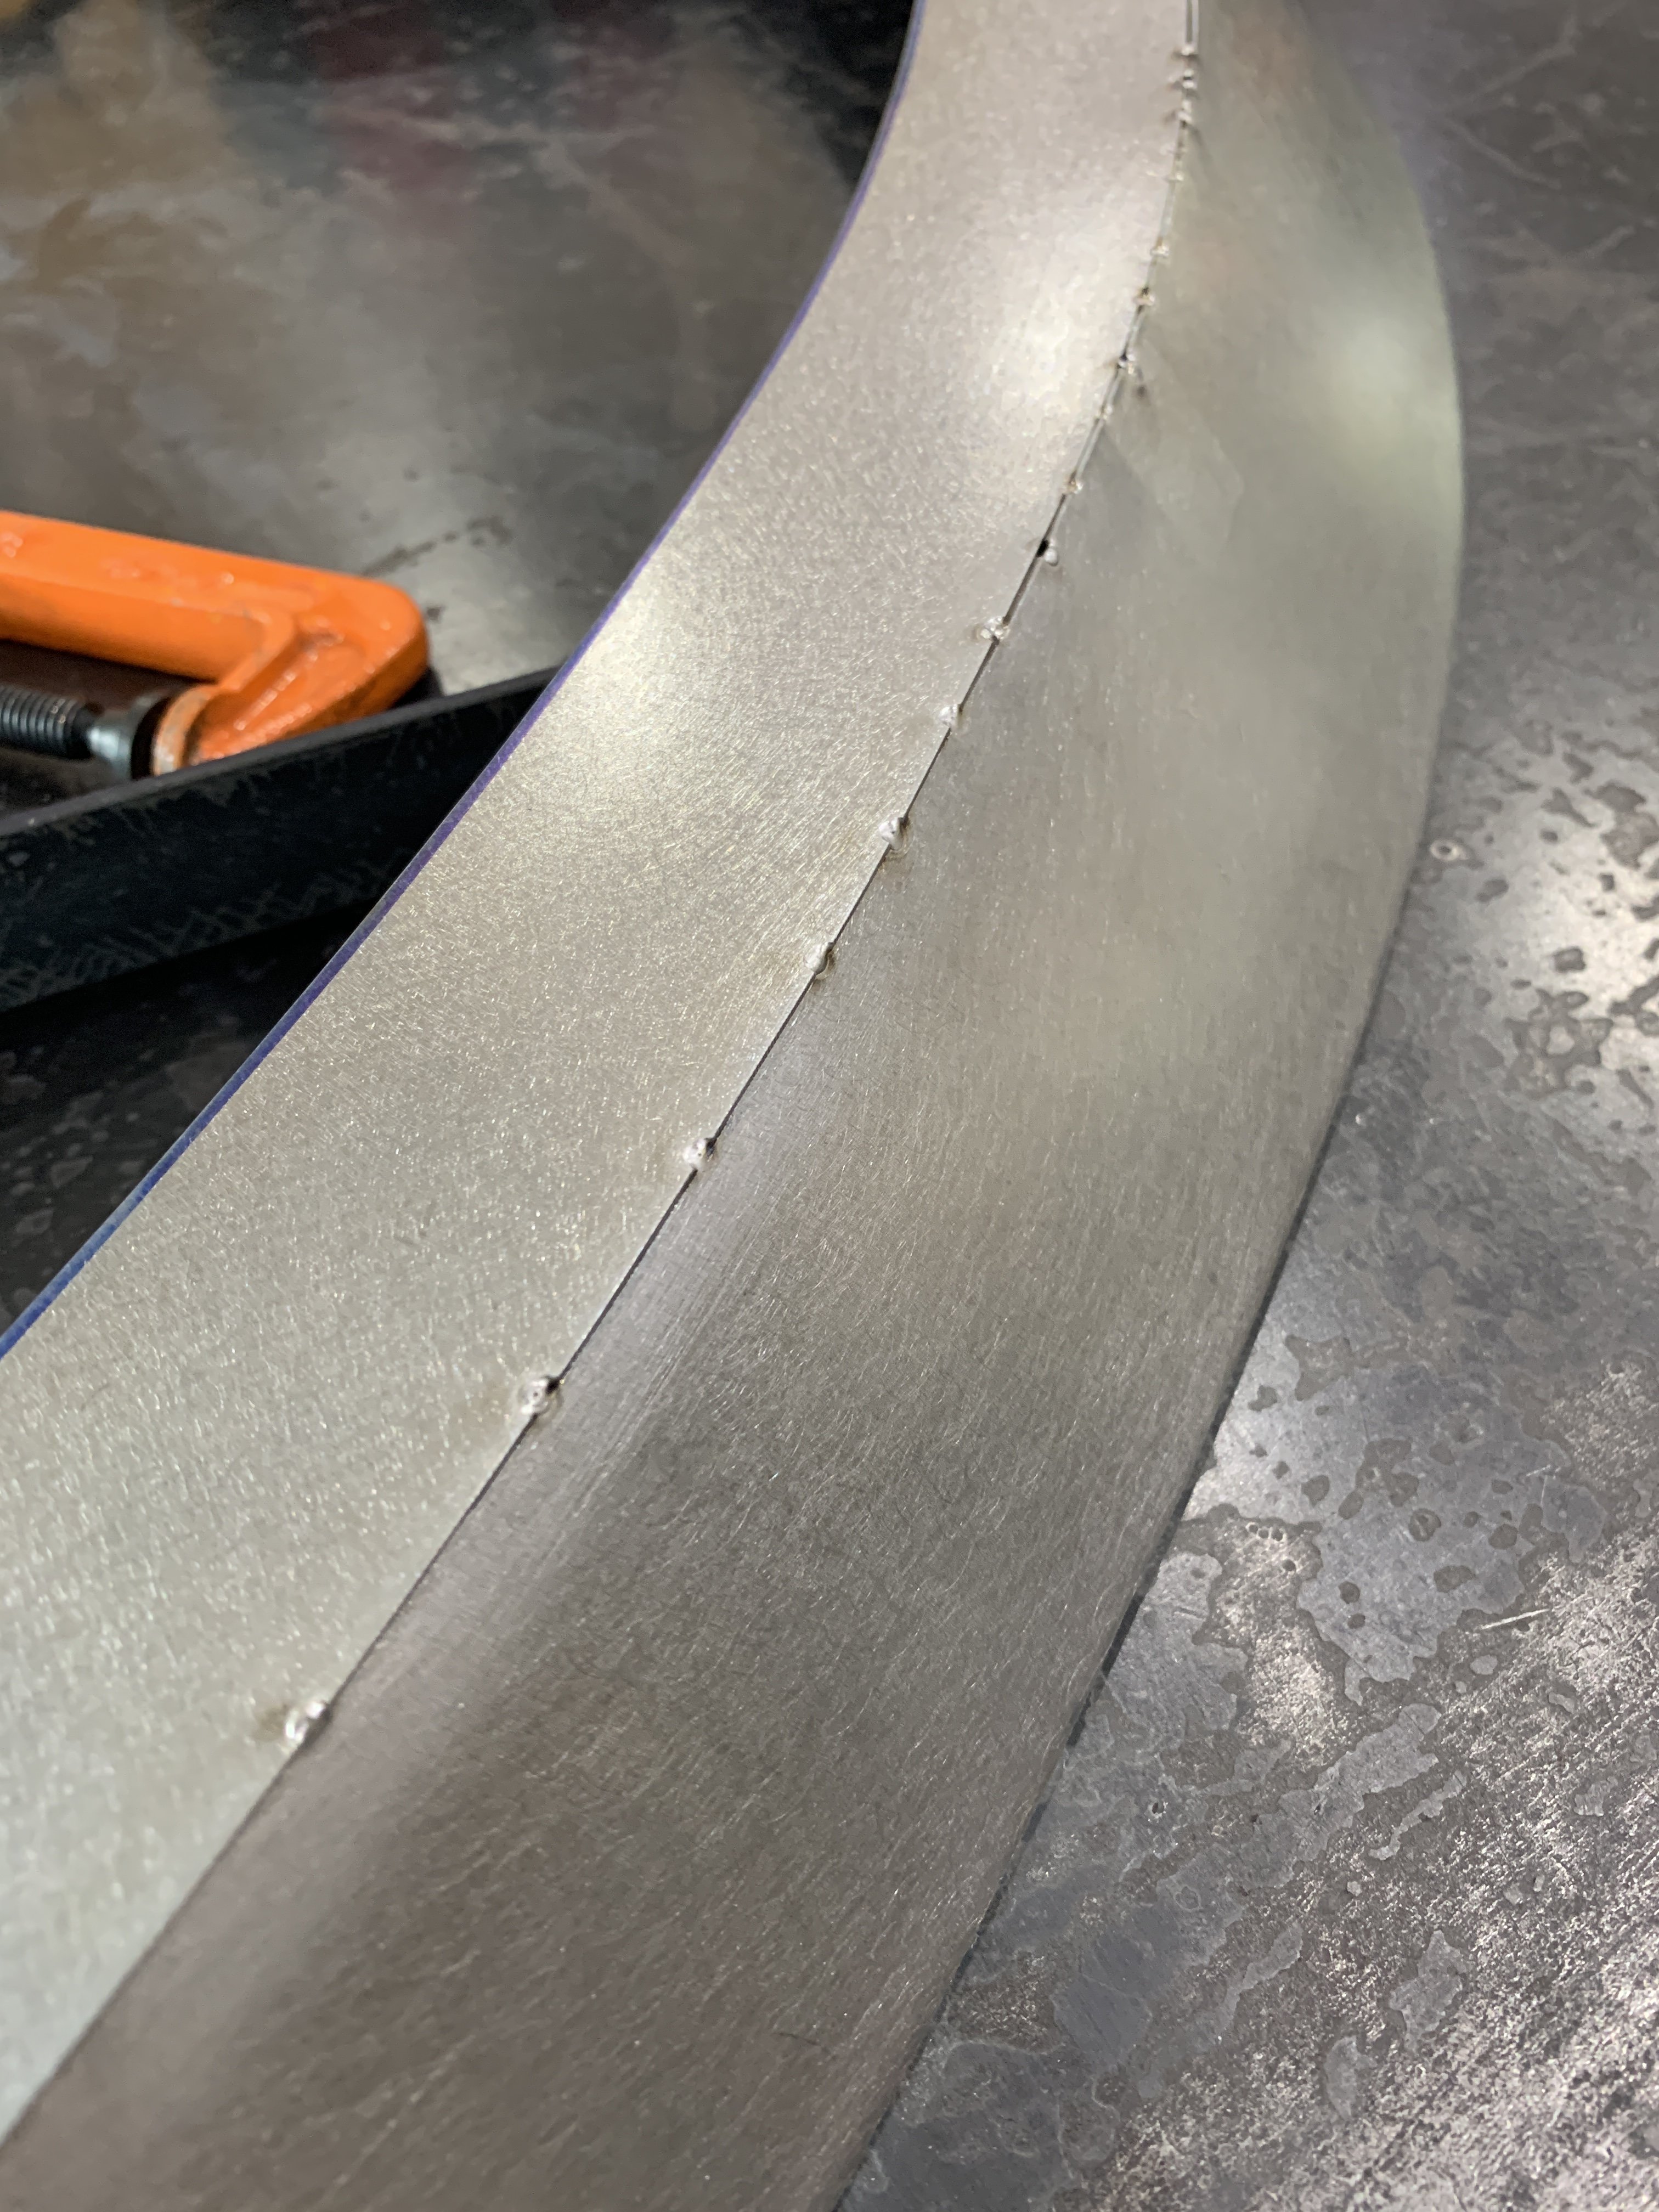
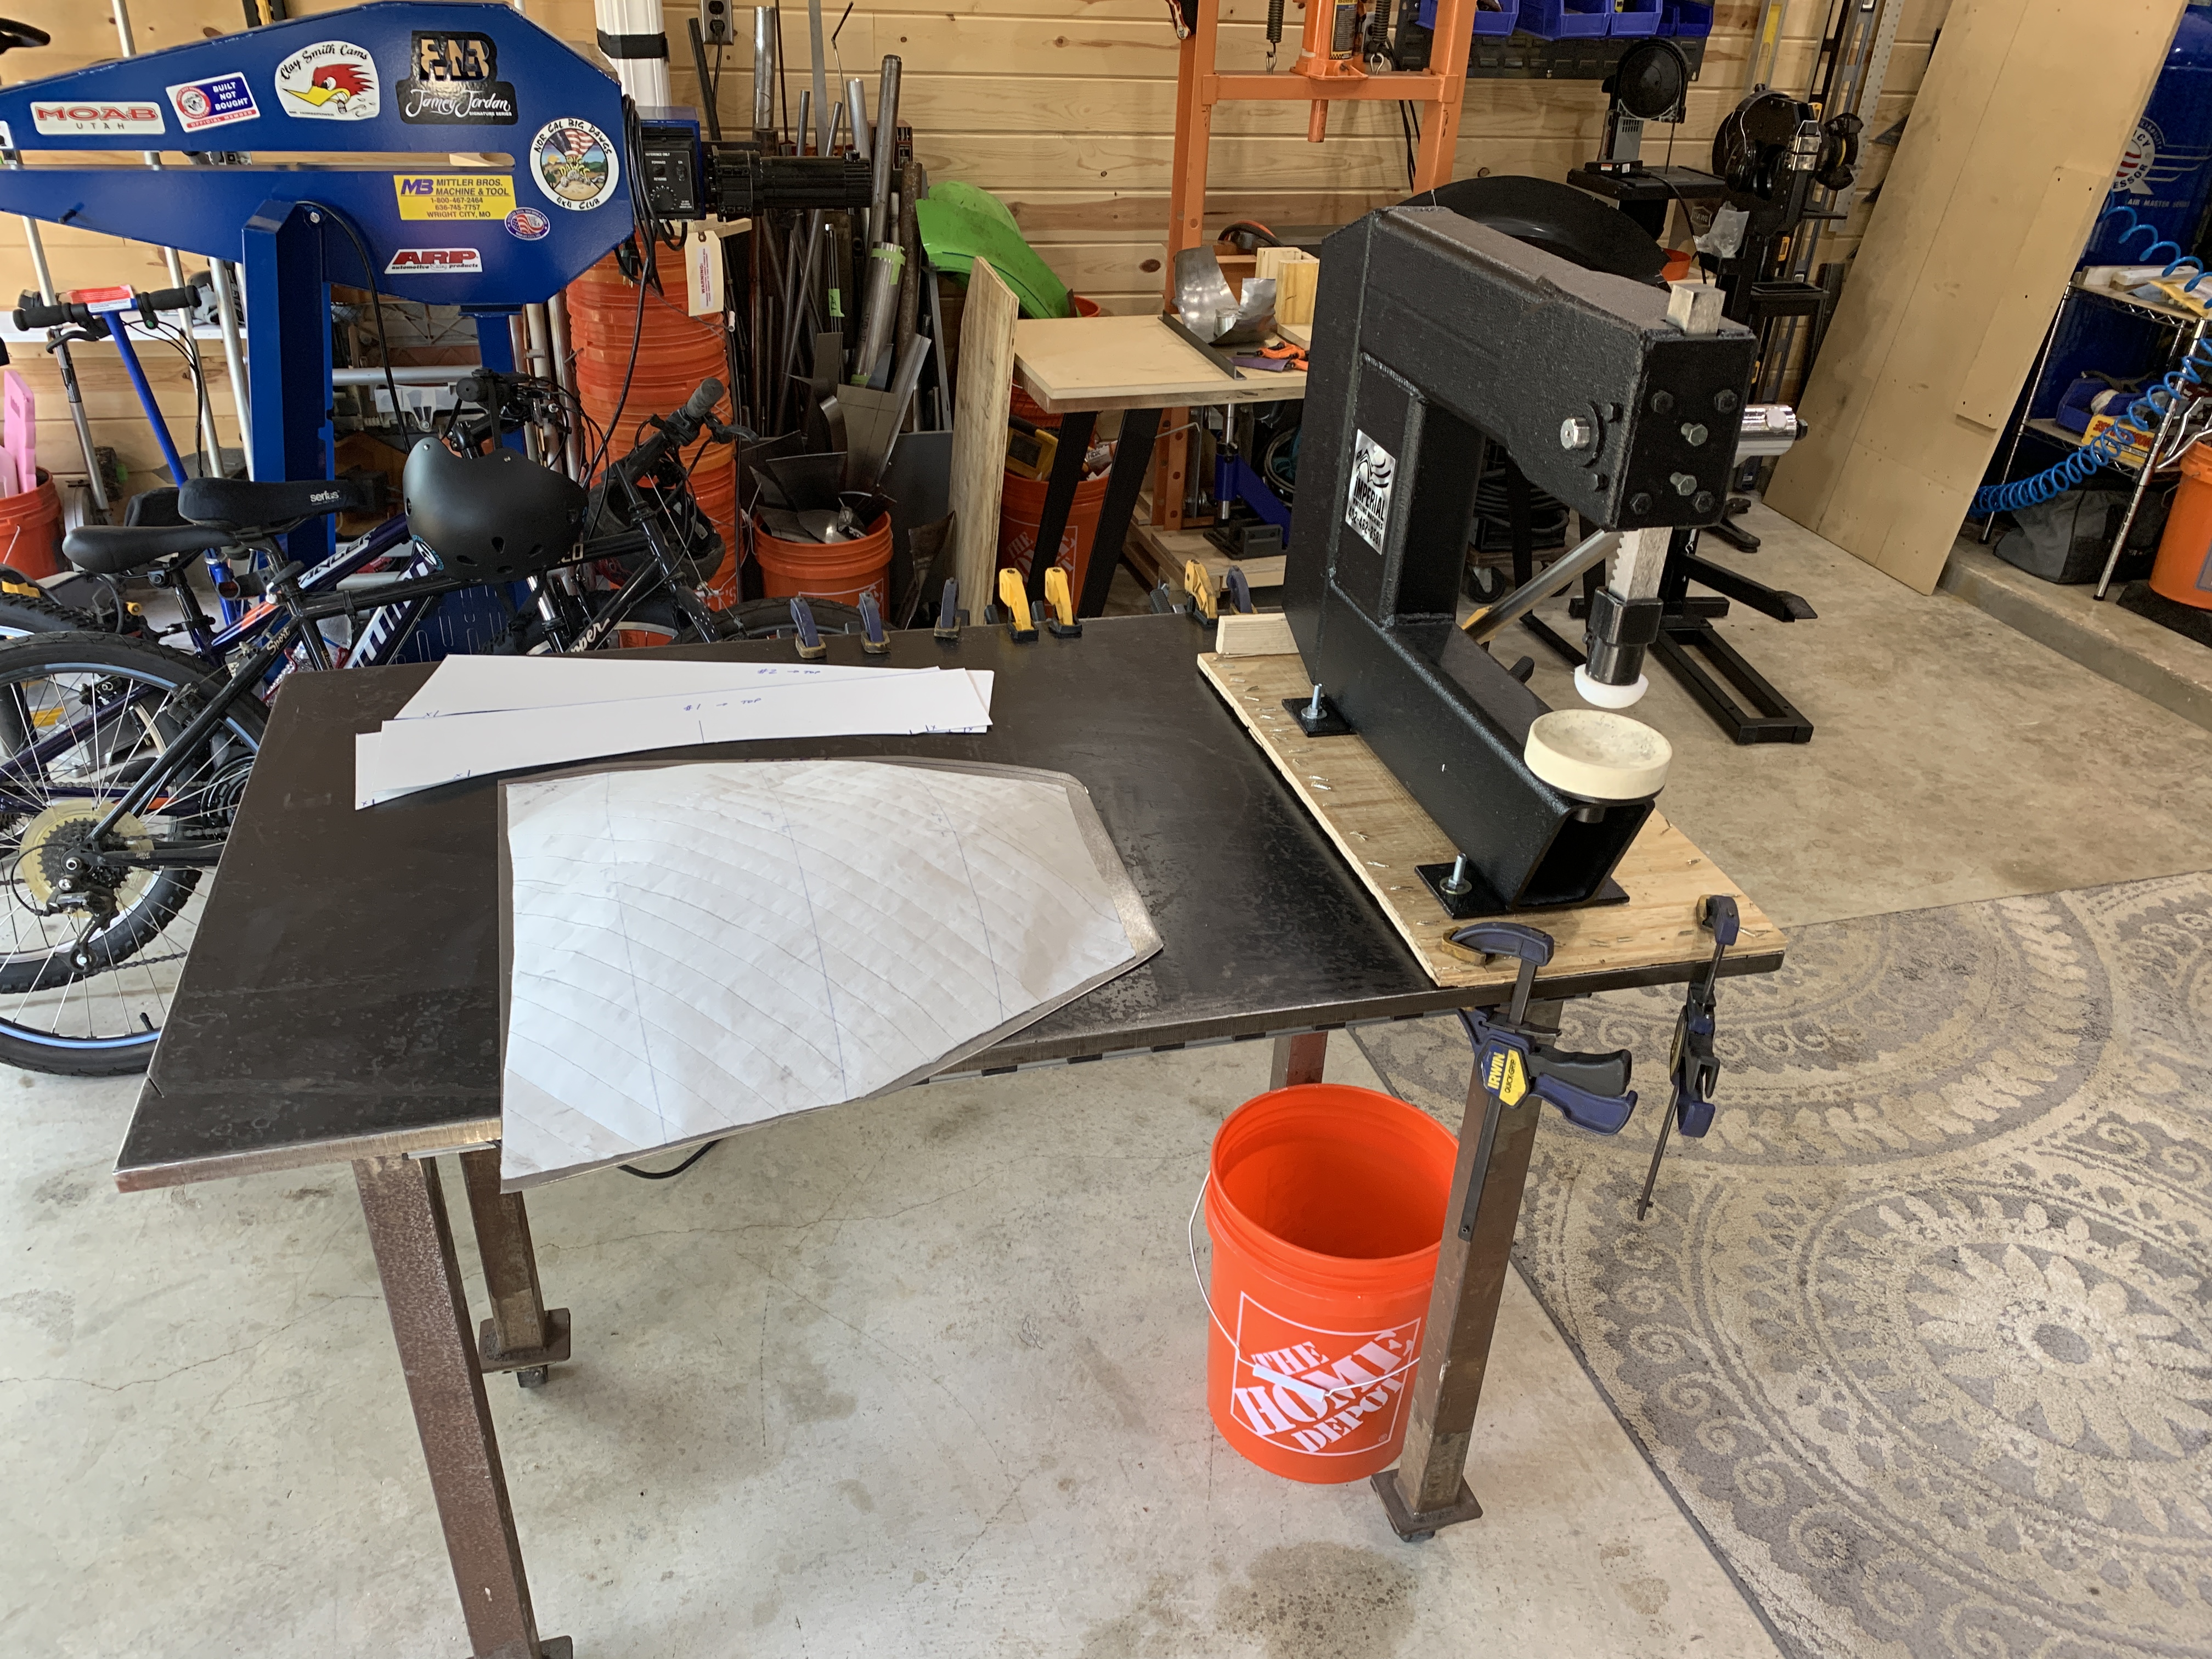
So that's Step 1. Putting curves in a panel gets you started, but you need to have some kind of a plan to get the shape that you really want. That's Step 2 in the learning process. For me, that started out as a wireframe template.... and I suffered a lot trying to get the proper crown in the center of the panel. I'm sure you remember that... 16GA is thick and doesn't want to stretch., and even with heavy hammers it's hard work to get a strong dome shape.... and if you work too close to the edges of the panel accidentally, you will relax the metal that is helping to hold the center crown profile for you and the entire panel will just start to flatten back out again. (Made that mistake a bunch of times before I saw a YouTube video that explained it).

I watched dozens of hours of video from Lazze and ProShaper.com and really studied what they were doing. But you can't just watch them once and then go do it yourself. You have to try it for a few hours, fail miserably... then come back and watch again. You will SEE so much new information that second time and understand the way they work a panel vs. the way you were doing it. It starts to make more sense each time. Go back out.... do better on a panel... come back and watch a few more hours of video.... learn some new tricks or techiniques..... then go out and try again.

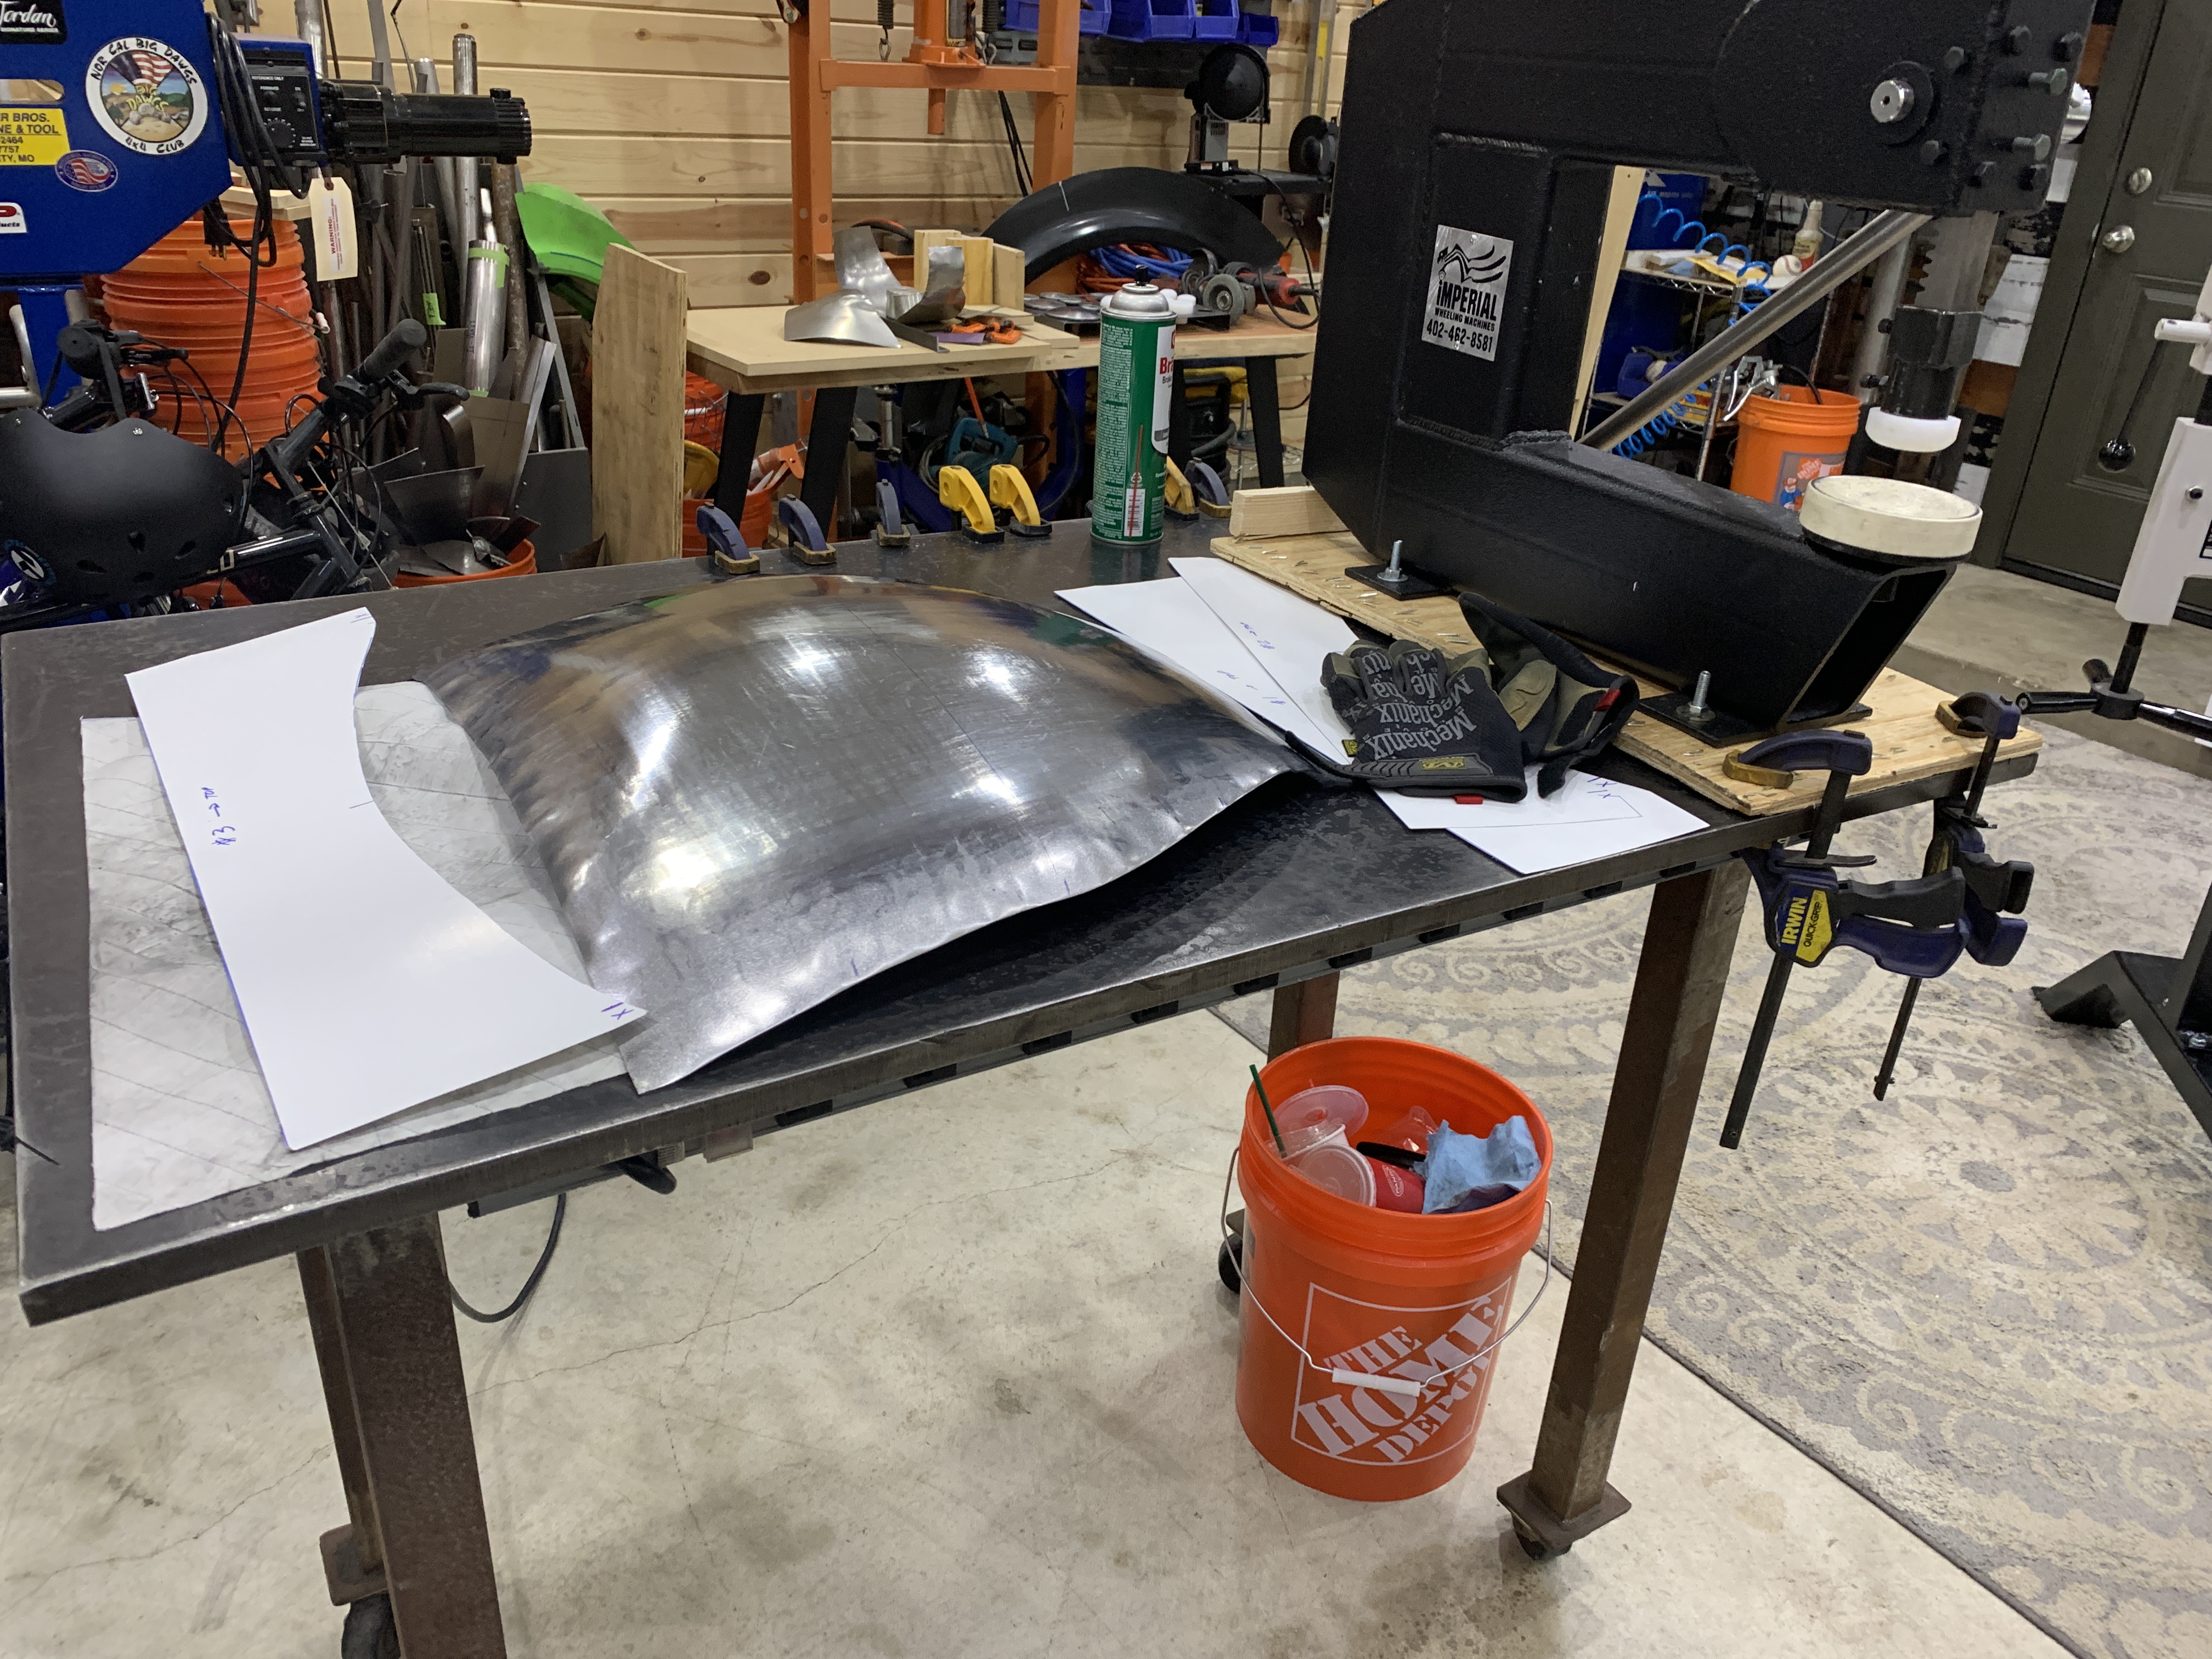
That's what the last month or two have been for me. I could take photos of the same panel over and over for 20 or 30 hours, but it won't really mean anything to the casual observer... each photo will look practically the same. (By the way it is VERY hard to photograph a curved panel in a way that accurately portrays it's shape and profile)... so it's not that I'm trying to hide the failures from CK5, they just aren't that easy to understand unless you are someone who is already well-versed in metalshaping.

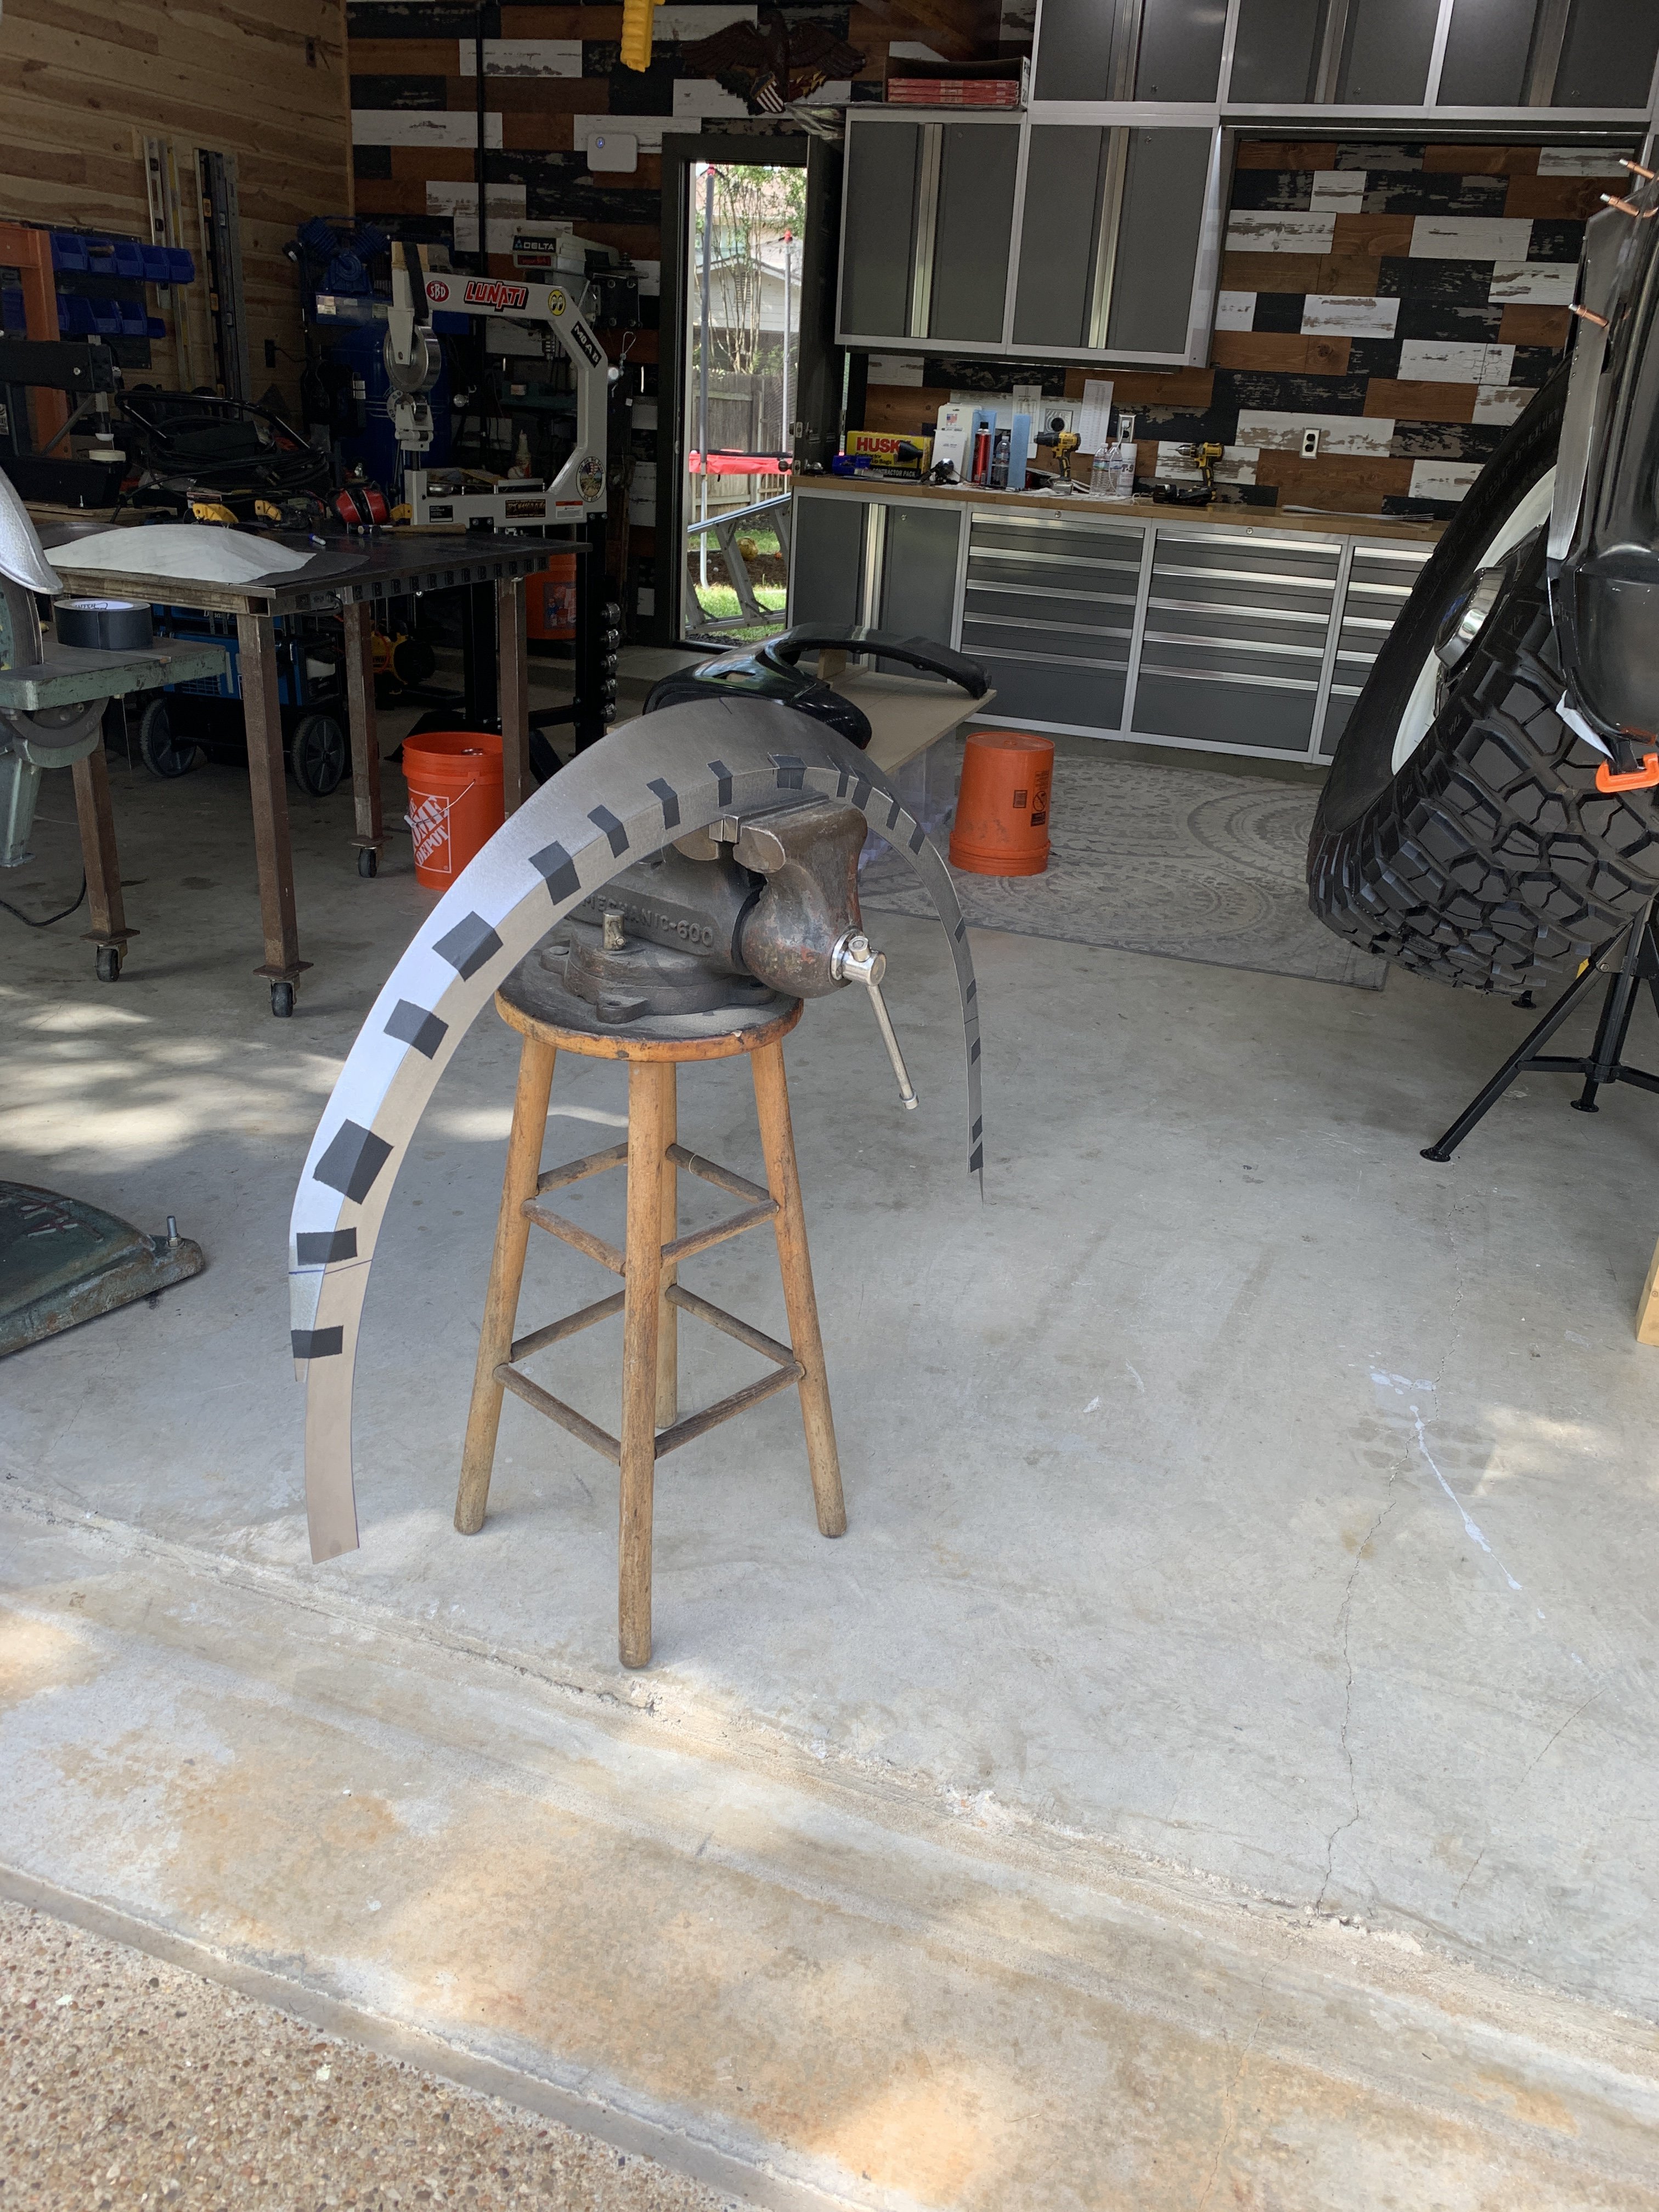
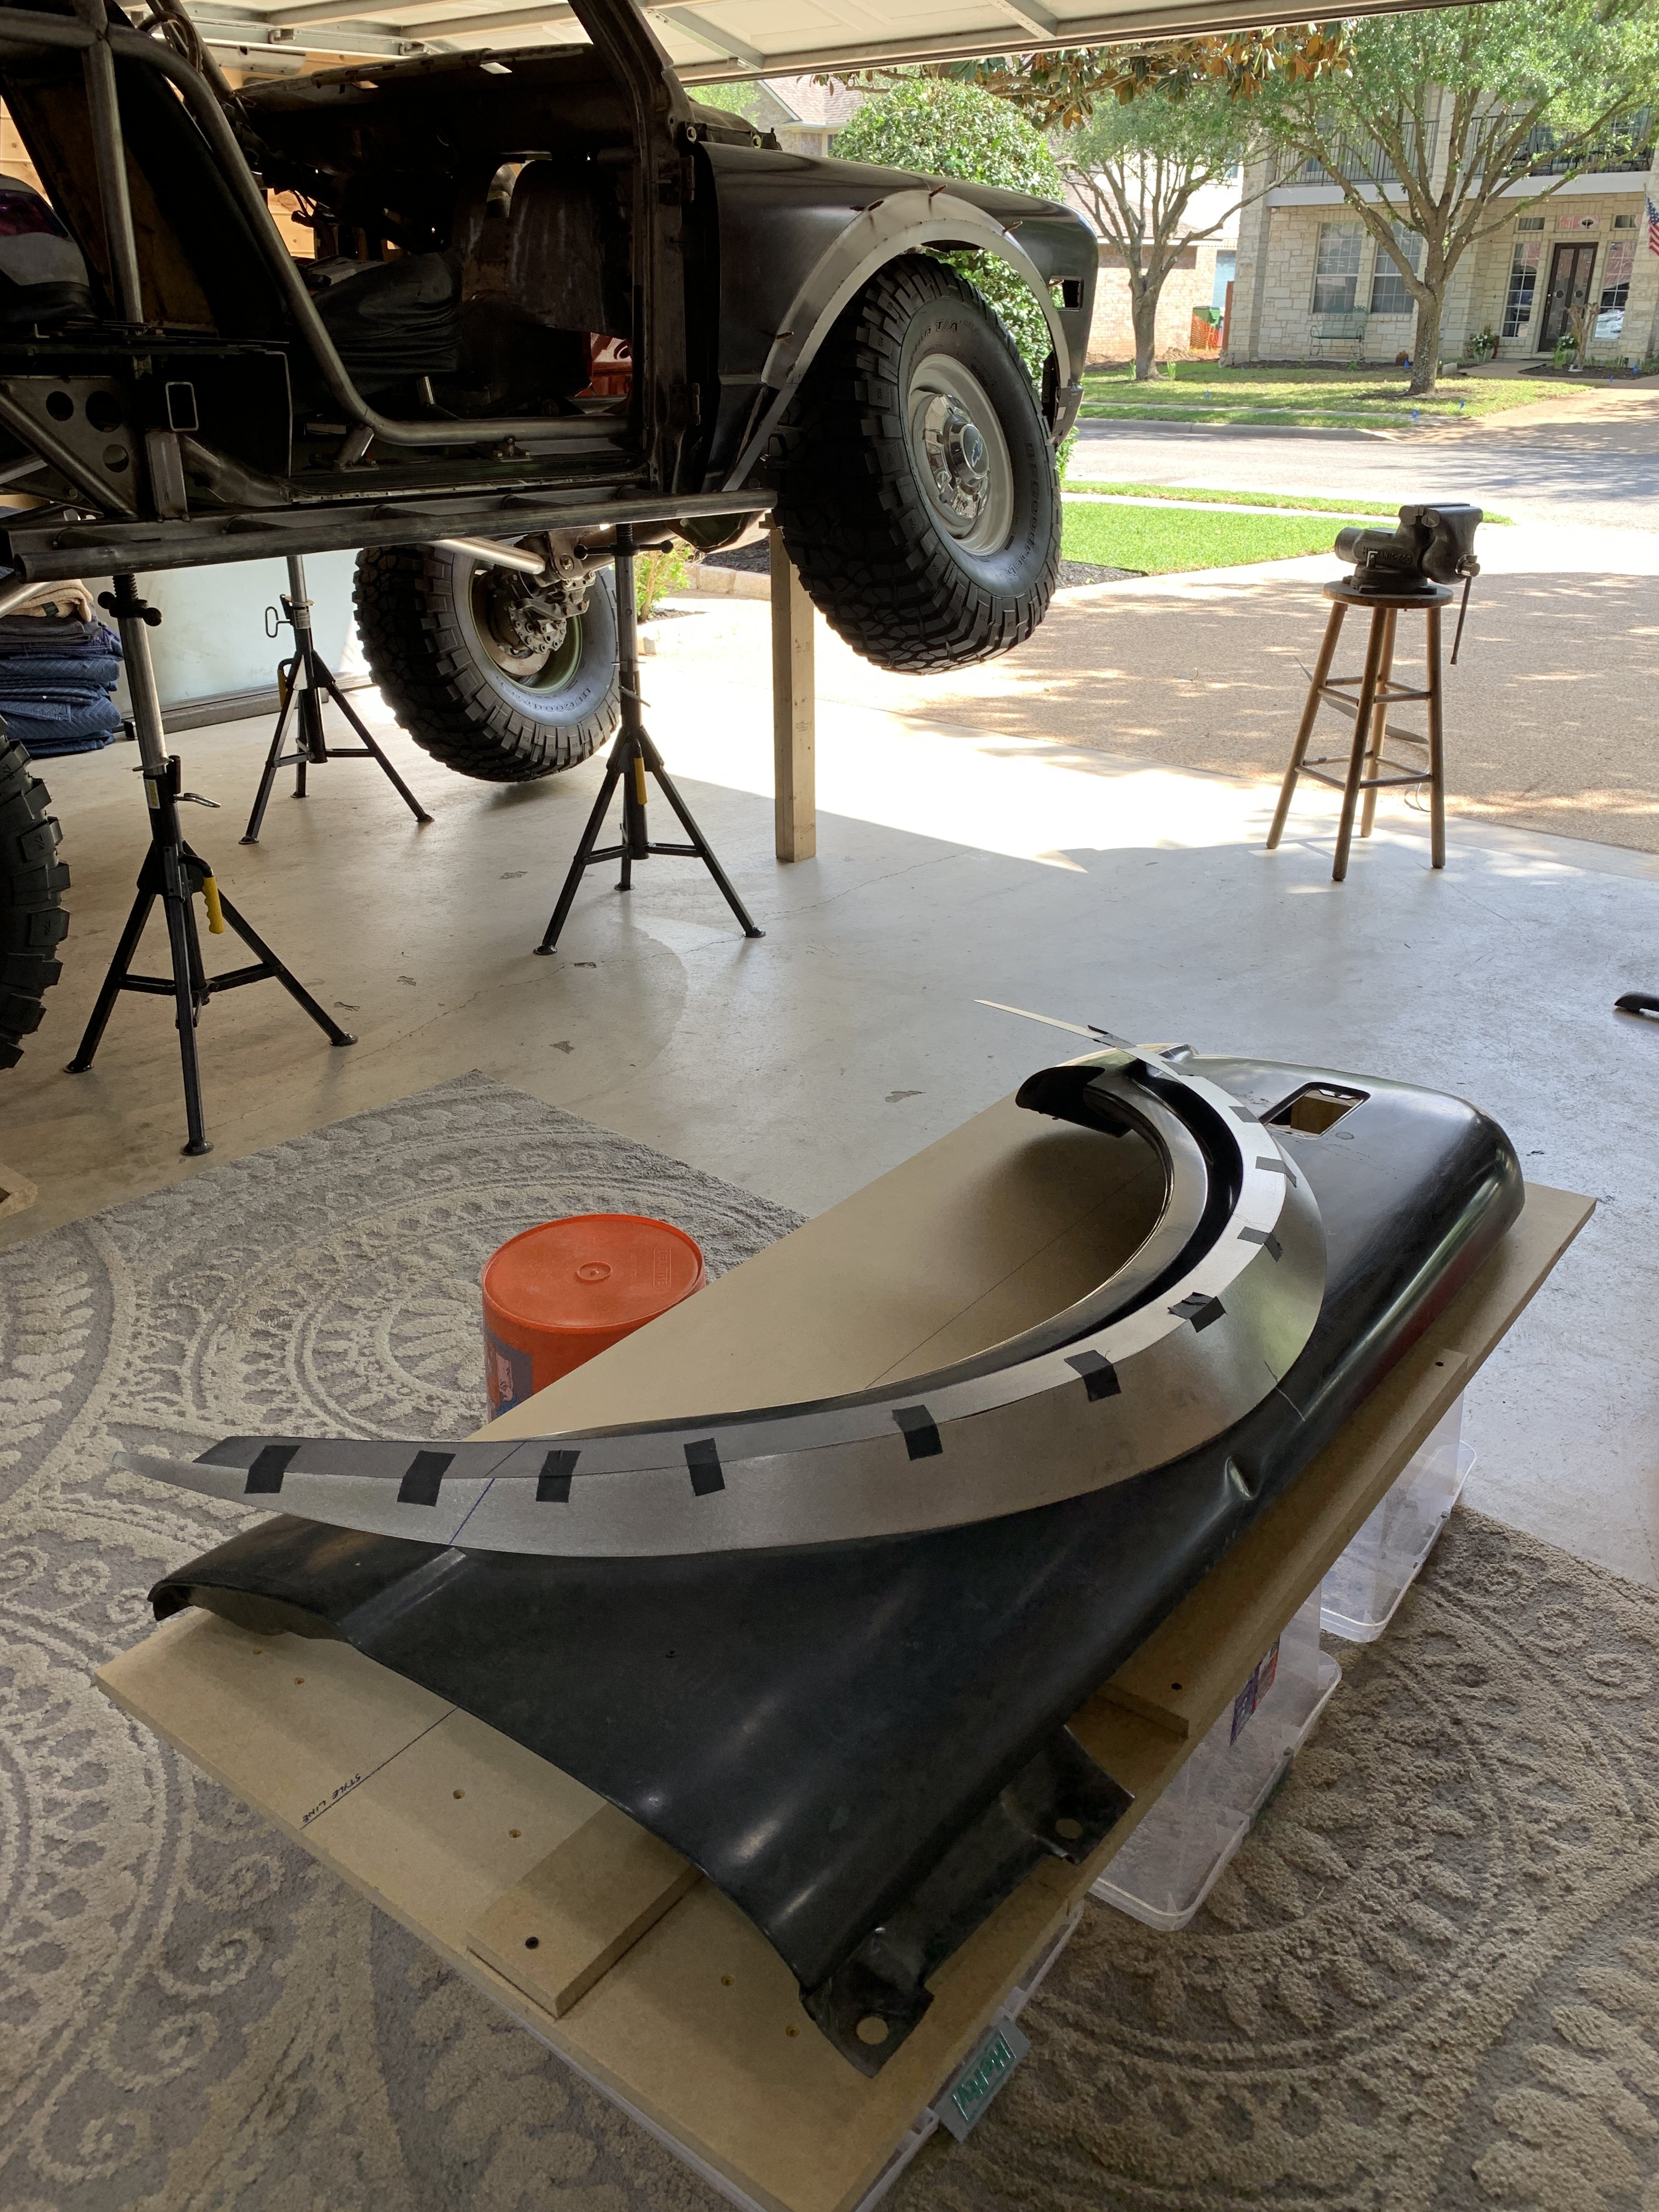
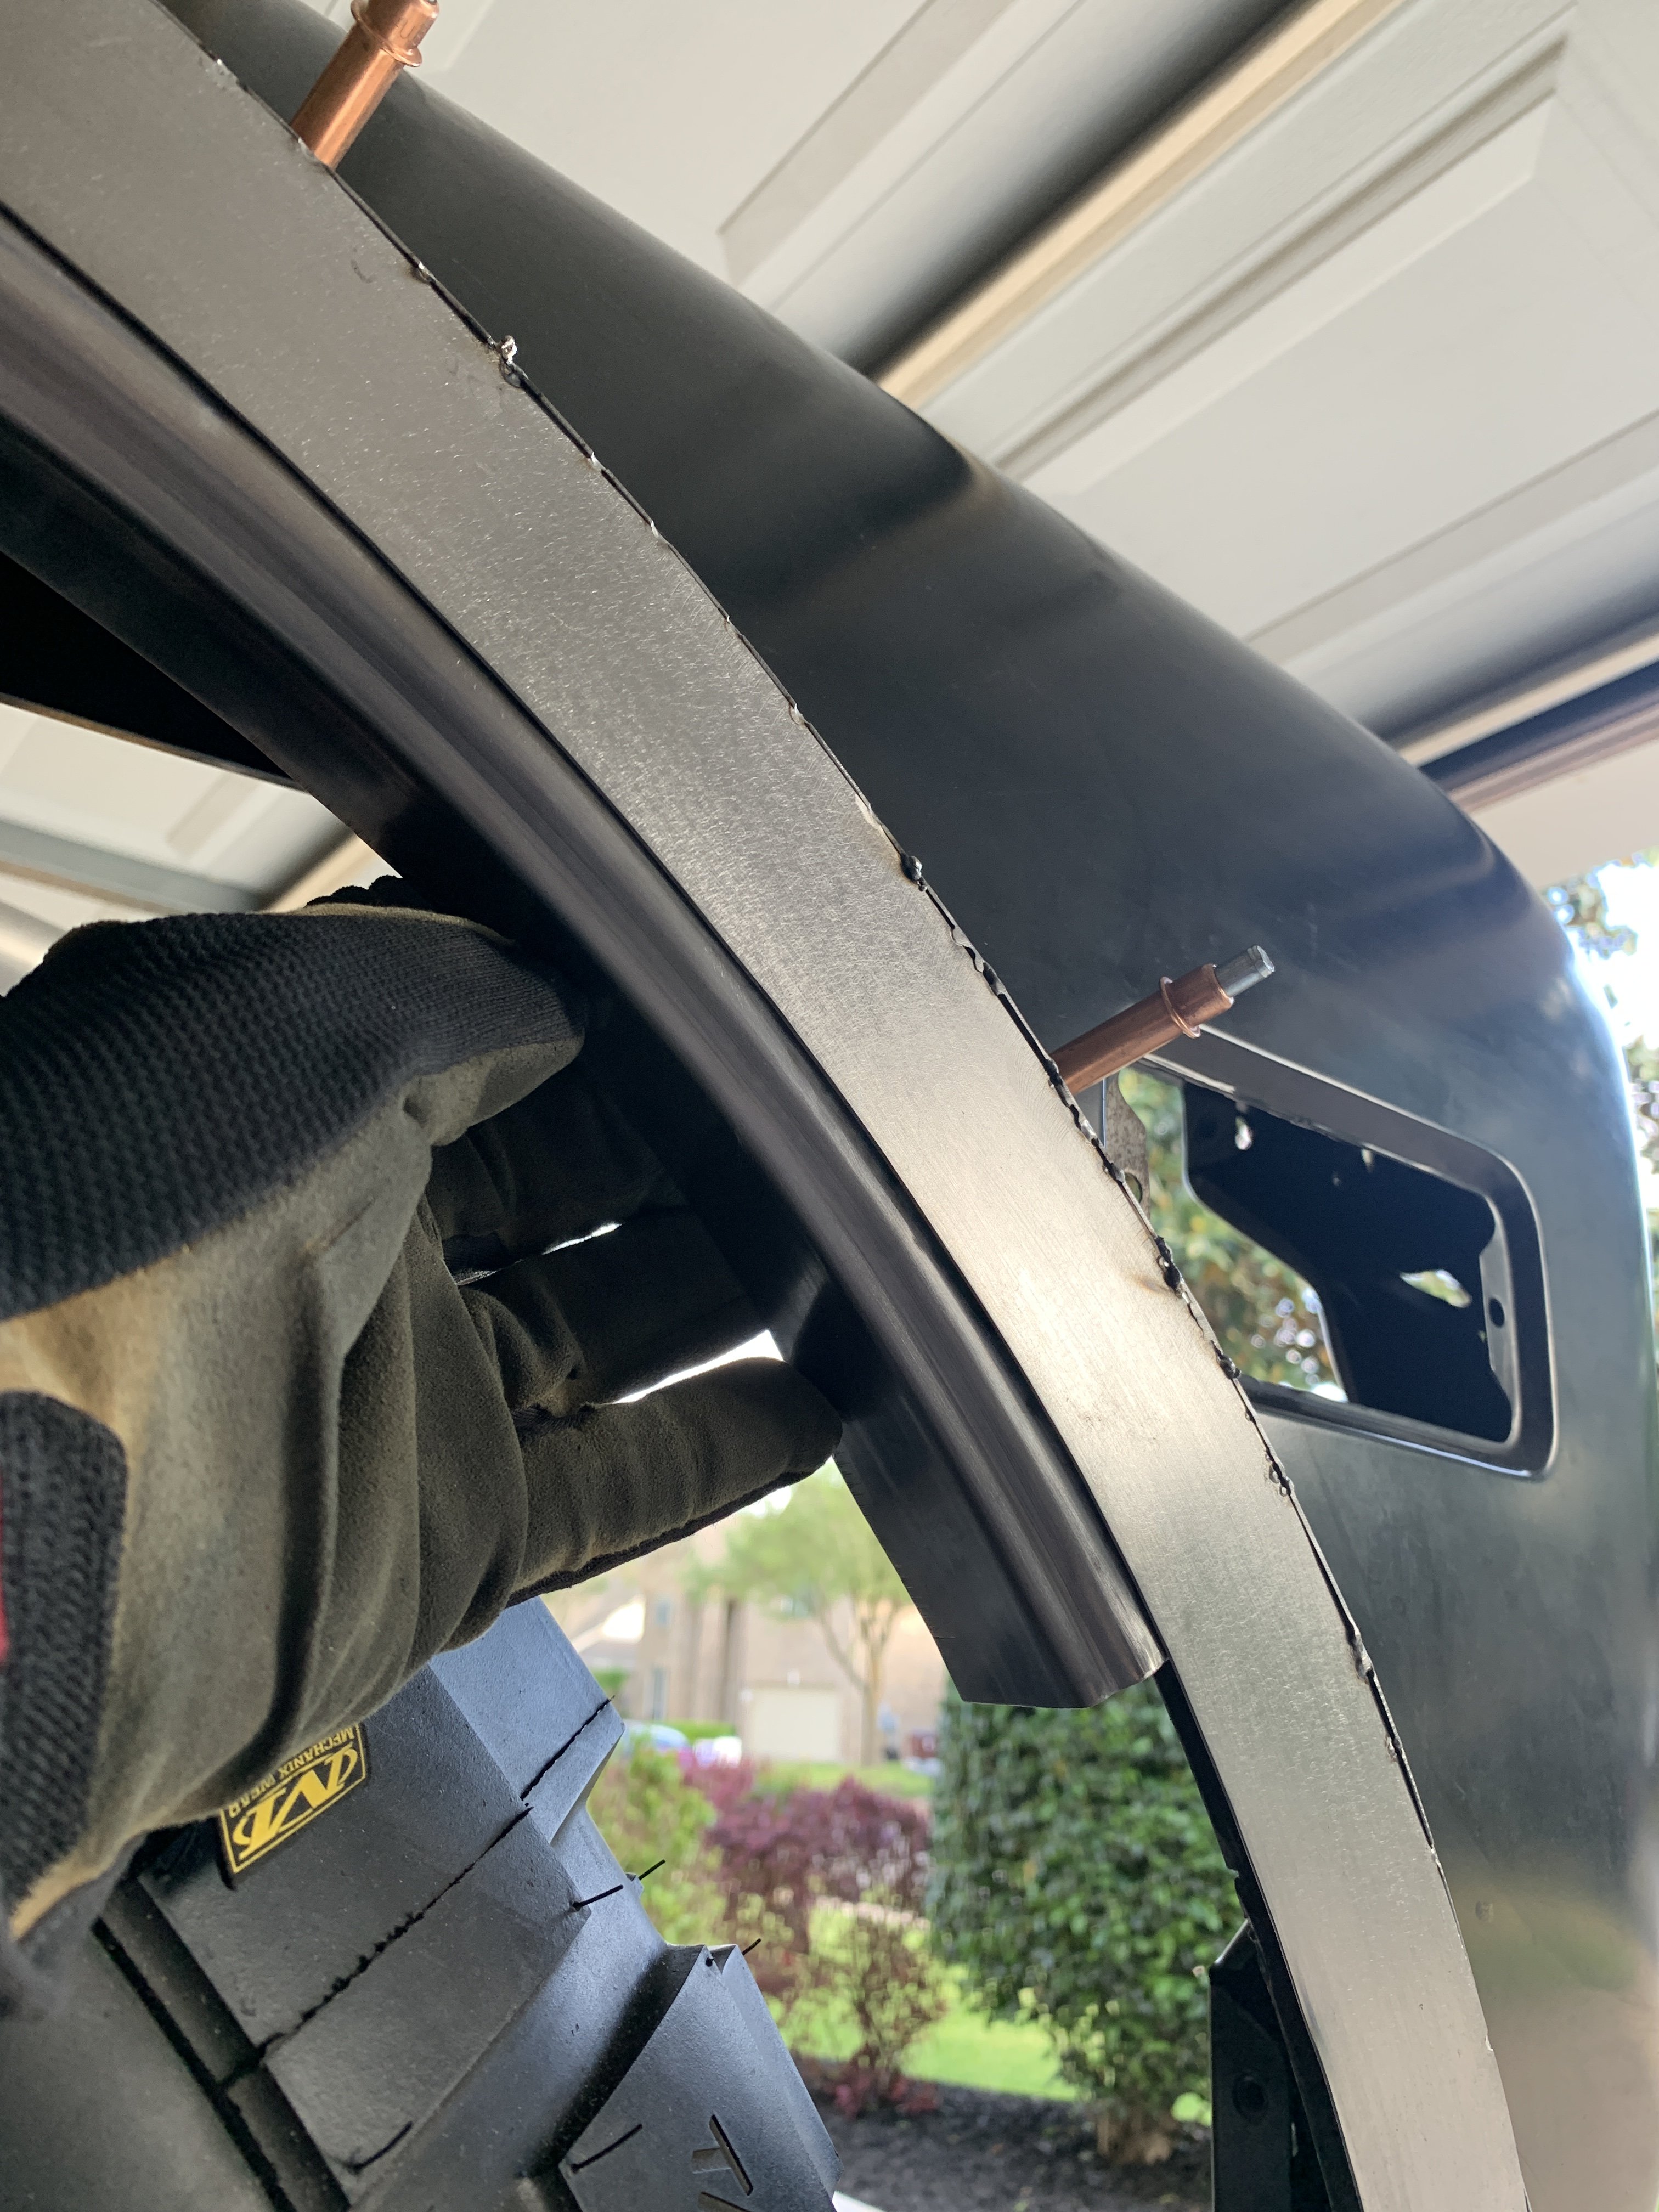
I'd say that maybe at this point I've got 60 hours of practice shaping metal, and I skipped over a lot of suffering by purchasing the Arbor Press shrinking tool. If you were only working with 20GA or thinner materials you probably wouldn't need it so desperately, but you'd be doing a lot of hammering... and I really don't enjoy that (and neither do my neighbors). Maybe I'm in Step 3 now...... I can build a panel from a flexible shape pattern, find the low spots and know how to effectively raise the low spot on the Wheel using leverage and proper positioning of the part. I'm starting to look at the reflections in the metal from the overhead lighting and using those distortions to inform me about how close I'm getting to the desired shape. It's getting more fun, and I can really make forward progress on a panel in just a couple of hours.... and that keeps me motivated.

I guess ultimately, there are no revelations here. You have to invest time in yourself to learn new skills. But I guess the part that IS helpful might be the concept that you need to try for a few hours.... then stop and let your mind absorb what it learned (subconciously) and the next time you try again.... your hands/arms/brain will just seem more able to do the work you want to do.... study YouTube in bursts also.... learn and absorb for a while, then get away from it and practice.... then come back and watch with a new perspective.... even the same videos will seem different and more educational after struggling on your own for a while.


-G
 
Thanks for the very thorough answer! I hope I didn't imply some intentional deception on your part- i just assumed, like you said, that 20 or 30 pictures of a panel you're learning on or are going to throw away aren't all that exciting to post, not to mention the time it takes you to photograph and then post something that ultimately doesn't contribute to the build.

Thanks for the inspiration, too! Definitely cool to see what someone with no formal training or experience (at least that has never worked in metal shaping) is capable of. Definitely some motivation to up my game.
No offense taken.....it's all good. :waytogo:

The reality of the process is that you really don't know in advance what to photograph, or if you are really making progress in the moments when you are struggling.

Reflecting back, it's easy to see the various stages of progress and what was being learned... but when you're in it and just struggling along, it doesn't really feel "post worthy" and it taking a lot of photos of bad outcomes is sort of demoralizing.

Ultimately, my message to you would be..... if you want to learn the English Wheel, buy a cheap one and get started. My NorthernTools one is perfect and was only around $400.... you don't need a really beefy one (or a huge one) and in fact you WANT there to be some "flex" in the frame so allow you to get the metal between the anvils and to act as spring-loaded pressure against the part. An ultra-stiff English Wheel wouldn't really make sense because you'd constantly have to adjust the lower anvil pressure as you worked a panel. Also, it was kind of a waste of money to buy a $500 lower anvil set at the beginning.... really all you need is a single good "all purpose" anvil that has a low-crown and you can build almost anything. The experts suggest using the lowest-possible crown anvil you can get away with for the profile you need. Using a high-crown anvil just puts track-marks all over the part and makes the surface finish a lot more inconsistent.

If you want to learn English Wheel techniques... just jump in and get started. A few months from now, you will either be the same guy wishing he knew those techniques.... or you can be the guy who is already becoming accomplished at metal forming. Life is short, don't put off the things that you really want to do. :deal:


-G
 
Top Bottom