CK5
Register an account today to become a member! Once signed in, you'll be able to participate on this site by adding your own topics and posts, as well as connect with other members.

'89 K5 The Bulldozer

1989 K5, linked, caged, backhalfed, LS3, Hero case, on 42's

Tnsejed

6al4v
 Premium
GMOTM Winner
Joined
Dec 23, 2003
Posts
1,575
Reaction score
3,029
Location
Florissant, CO
Tnsejed submitted a new Build:

'89 K5 The Bulldozer

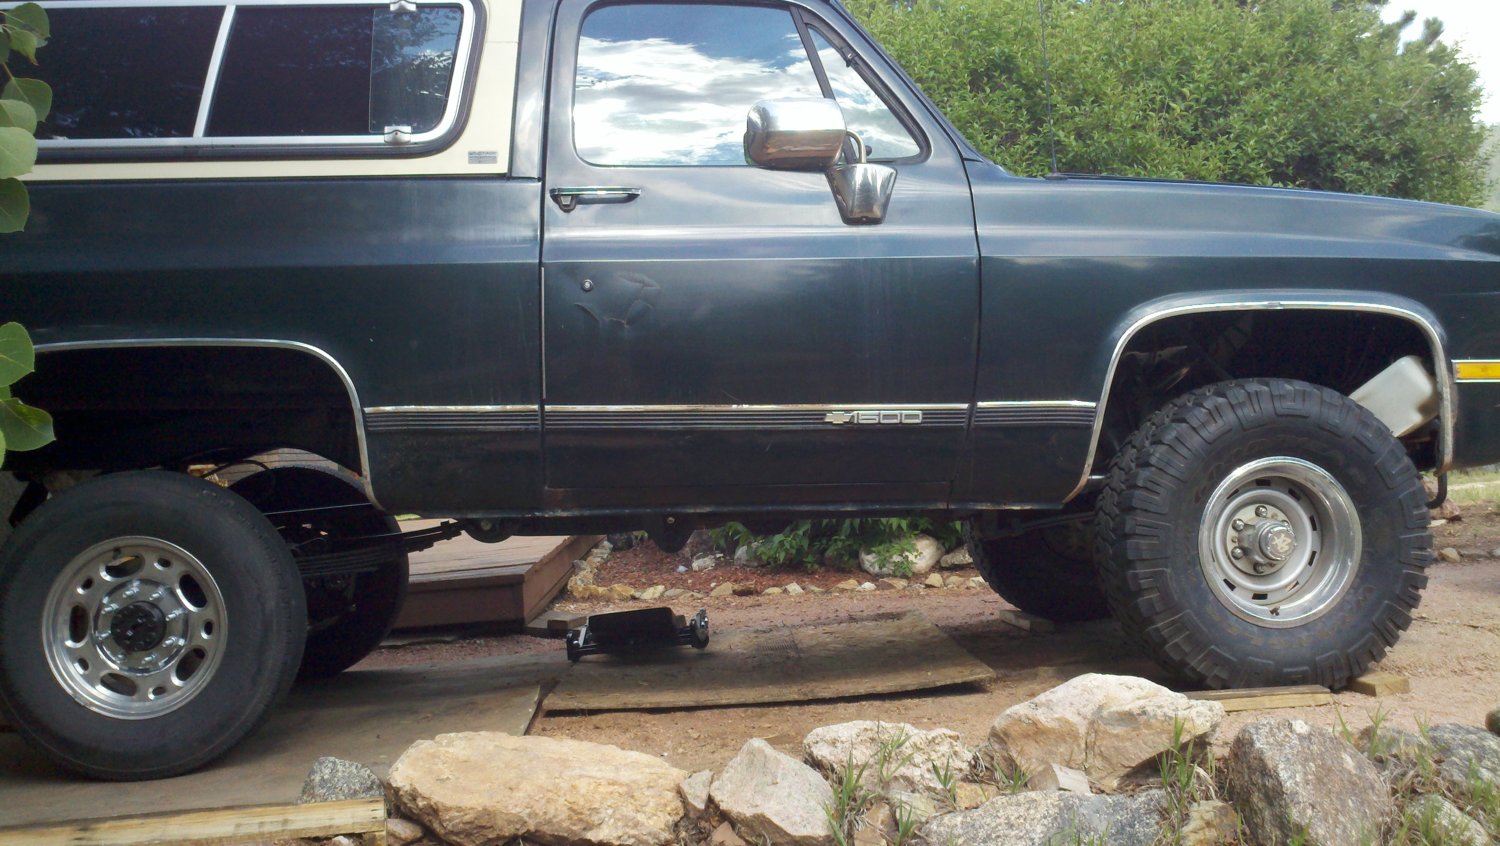
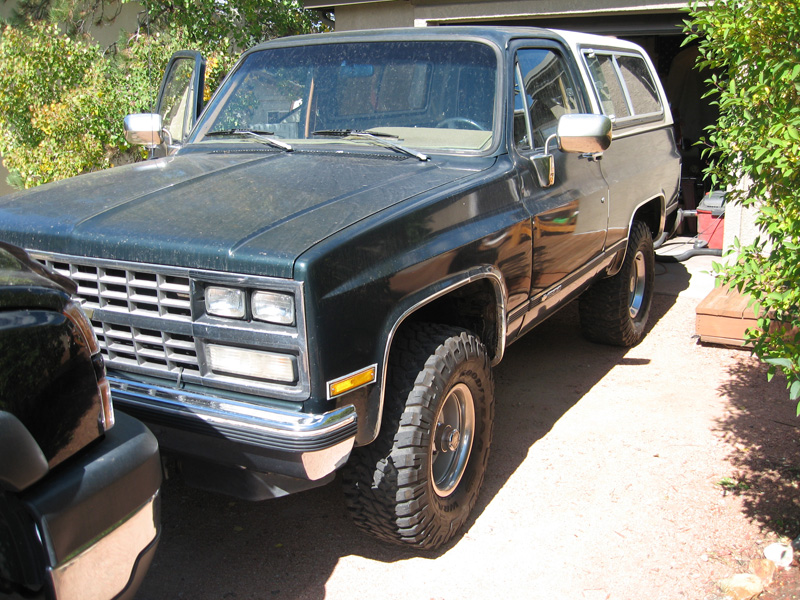
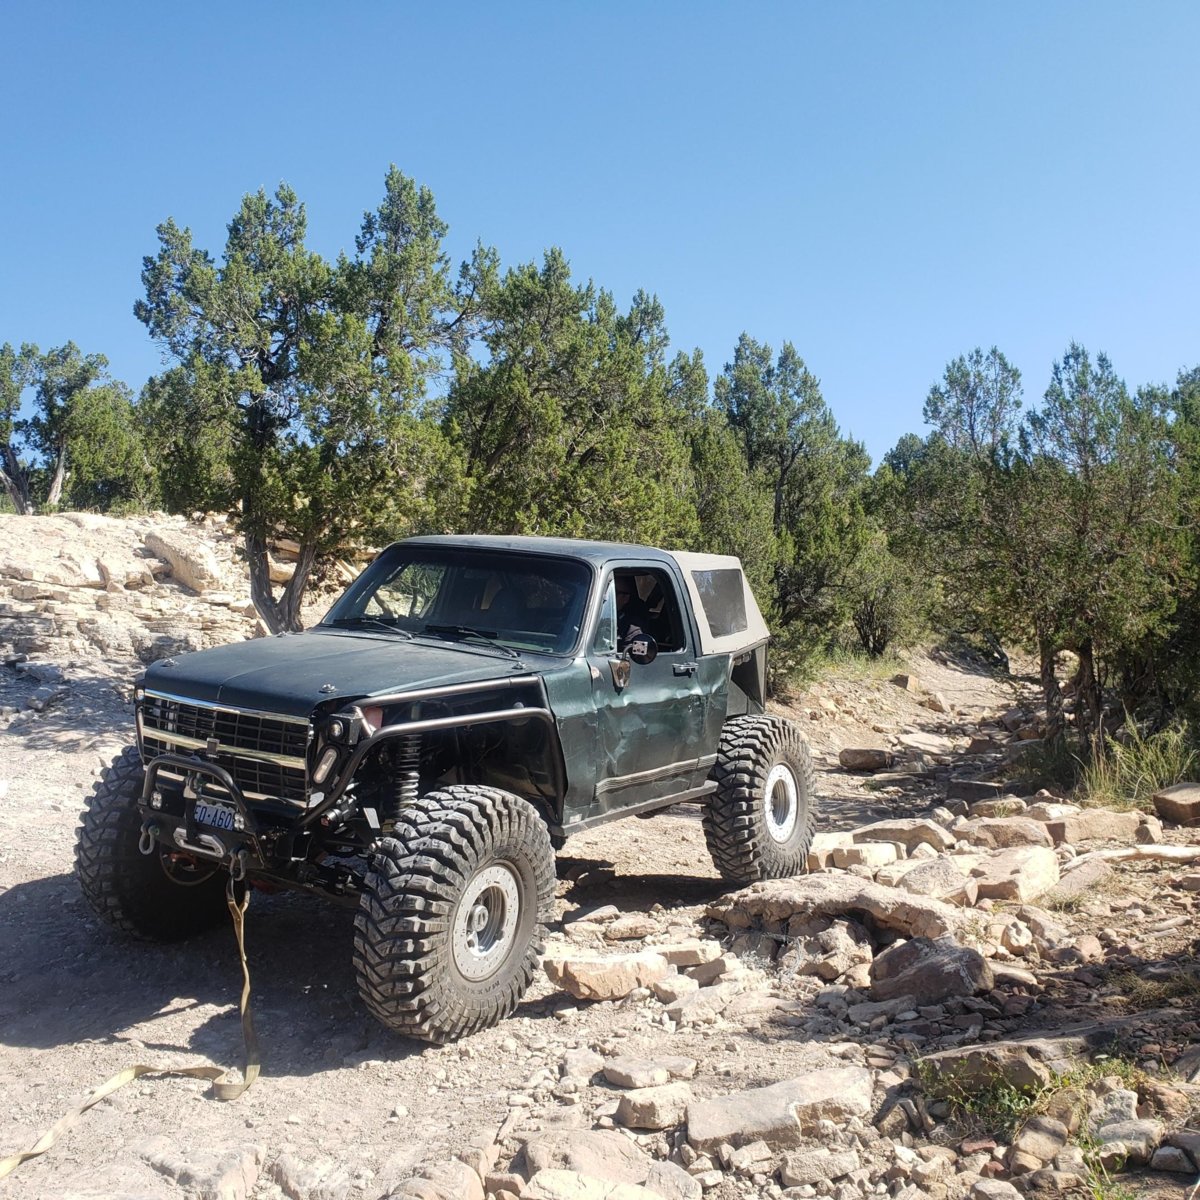
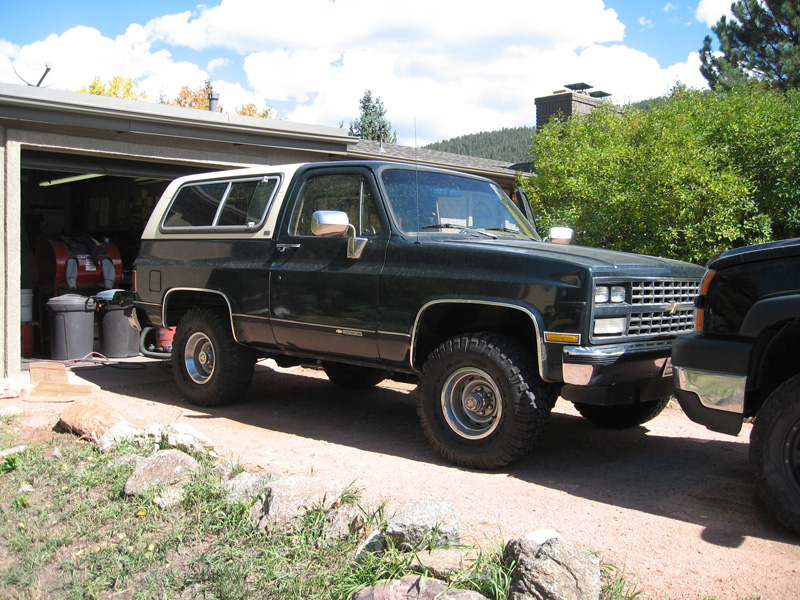
This is the evolution of my truck. Its current nickname is the Bulldozer, which started as a derogatory term from some of my wheeling buddies. I bought this truck the day my wife and I found out we were having our first child. We had been slowly getting into the offroad world and wanted something we could take further into the hobby. Up until this truck I never had a dedicated offroad rig. My entire life had revolved around street or asphalt track cars. I'd owned a squarebody through high school though and knew I wanted to start with one as a platform.

We had talked about the goal for the truck. I wanted something we could run on 95% of the trails in the state and also use to travel on longer trails. From my past I had decided I wanted to not build a truck based around trailering. We also needed to have 4 seats. The rear seats had to be comfortable enough for long trips with the children. With that I wanted the truck to be as safe as possible, able to be loaded down with gear, travel to and from the trail on the road, and hit some hard crawling trails in the state.

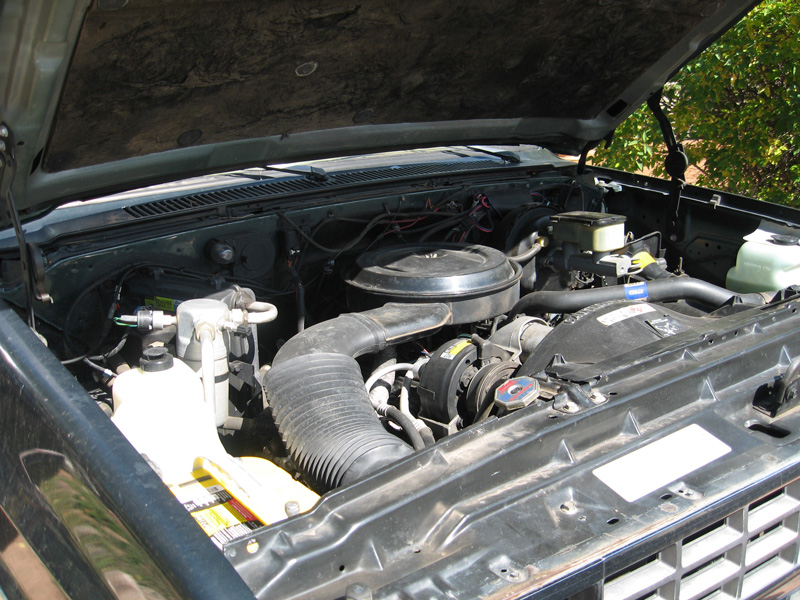
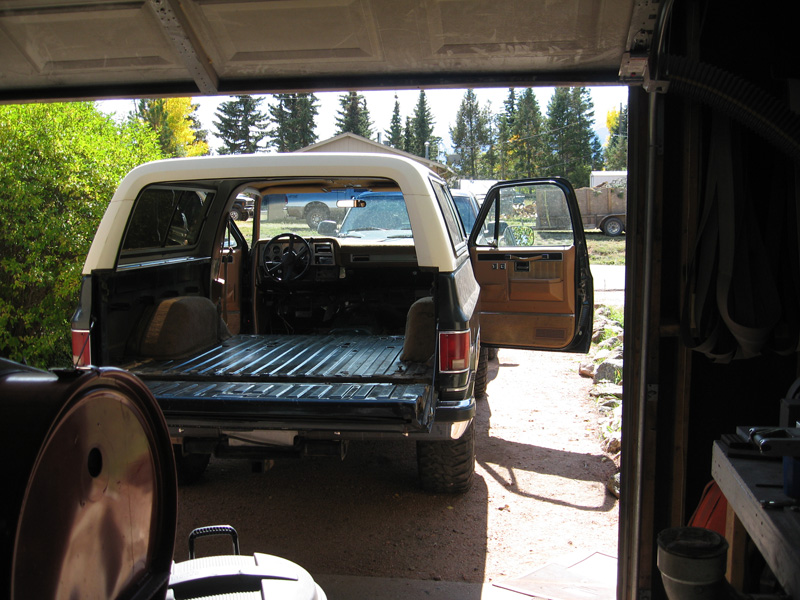
I bought the truck in 2011. It came from Pine Junction Colorado. Which is about 2 hours from my home. I decided to drive it back. Made it 2 miles from home before the battery gave up the ghost due charging system failure pretty much right out of the gate. The truck was as unmolested a truck as I could find. I wanted to start with a clean slate. Little mud in the driver door, but otherwise a stock K5 in great shape. The RPO codes all matched what was on the truck and it had 90,000 original miles. I paid through the nose back then but snagged it for 3200.00. After looking at a dozen of them I was pretty damn happy.

After these years its been a great journey and I really enjoy the offroad world. I've met some amazing people and we have seen some amazing places.

Read more about this build here...
 
This will probably take awhile to get all my pics sorted out, but it will be fun to look back on my build. I remember having a conversation with Stephen and it never occurred to me before how important it is to take pictures. So I made sure to try and take pictures. Some of the other stuff from growing up has almost no pictures as cell phone cameras were not everywhere.

The original build from stock to the first iteration took me about 2 years. I was also knee deep in growing my business and having my first child, and all the stuff that comes with that. We had a small house and I had to build the truck outside.

The truck went from this to this:

full

full
 
Last edited:
Here's the stock truck and starting of the tear down. It lasted all of one day before teardown started.

There were two small standard areas of rust concern. The rear tailpan corners and the drivers side tub in the front of the rear wheel opening. The rockers were pretty damn decent but I knew they were going. Wheel well trim areas were pretty damn good. It was originally purchased by the previous owner in Utah.

full

full


Floorpan and rockers
full


full

full


Gutted the truck and started some work:
full


full


full


I wanted to first start with repairing all of this and having a good tub to work with before any other work was done. With what was in my head I only left areas of concern that would not be used on the finished truck.
Decided a new tailpan was the only way to go as I was going to continue using the tailgate:
full


New one in:
full
 
Last edited:
I'm trying to figure out how to attach pictures through ck5 and then add them to my thread without hotlinking from my website.
You have 2 ways.
Either you upload each picture in the post, there's a button for that, you can upload a bunch in each post but you can not type in between them.
Or you can upload the photos into an album and then link them to your post and you can do whatever you want in the post
 
You have 2 ways.
Either you upload each picture in the post, there's a button for that, you can upload a bunch in each post but you can not type in between them.
Or you can upload the photos into an album and then link them to your post and you can do whatever you want in the post

Got it! Thank you.
 
After that I started sourcing parts. I went with a 5.7l and 2wd 4l80e out of a reservation school bus that we had serviced its entire life. They got some upgrade money and had to use it so the vehicle had just been sitting at our shop forever. The motor in my truck was good but it was easier to grab all of the parts and harness from the van.

Note that some of this may not be in total order. I can't remember exactly how I did everything, timewise. There was alot going on and you just pick away as you can and as money allows.

Before doing anything I rebuilt the 241 and added a slip yoke eliminator.

full


full


full


I also did the ORD frame stiffening for the steering box, which I ended up cutting totally out anyways when I moved the box.
full


Also added the ORD engine crossmember. Small block for the highest clearance.

I remember this day very clearly, it was hot as hell.
full
 
In between all that I was boxing alot of the frame, and adding more gussets to the ORD steering box stiffening setup. Because the truck was outside in front of my shop it needed to be moveable during this time, hence it was still one its axles. Lots of things were happening in my life and picking things away like this was not the most efficient way to do it but circumstances are sometimes that way.

Also as I'm sure most of you know, there's a ton of other things that need to happen, but I didn't take pictures of everything
 
Oh yeah, I also cleaned the whole underside, by hand. Holy hell.

full


Its kind of funny looking back at weird pictures. I wished I was still working at the shop at this time.
 
With this first motor I did motovac before it came out of the bus. Ripped the heads off and did some maintenance.

I had figured stabbing the motor and leaving it in there to work off of for the new angle on the motor-tranny-tcase would work decently well. By angling the drivetrain different than factory I could get my tcase higher into the floor, thus giving me more clearance. Which has been an amazing help and that angle is still on the truck today.
Not to mention it helps the front driveshaft angle, which is in the floorboard now as well.

My wife with our son-in-tow helped me stab the motor.

full


full
 
Started working on the accessory drive and adding the new harness and PCM to the truck. I utilized the bus PCM and vssb drac. Kept the blazer harness and repinned out the PCM terminals for the 1996 engine. Which was still TBI but most of the pins were different. I also had to add a few new wire runs. Of course an entire new tranny harness as well.

full


full


full


Getting the accessory drive stuff going. I had decided to run a PSC hydro-assist setup and quickly made up some brackets to mount that right above the pump. I believe this run is critical for good performance of the system.
full


Thanks to advance auto for the blingiest water neck on a pig of a motor ever. Haha.

Edited to add a question for myself. I wonder why I cut the lip of the core support? I think it must have been ceiling clearance issues to get the motor in.... weird.
full


full
 
After the motor was in I started working on the tranny and transfer case setup. To this day the tranny has been untouched since it came out of the bus. The 4l80e is a Jasper unit put in the bus before they left it at the shop for good.

First thing was to mate the 241 to the 2wd 4l80e. I did not have a lathe that could swing this part ( I work with small stuff), so this was made on my mill.
Really wish I had my Advance MFG die table on the bridgey back then.

Rough stock. 7075
full


Clean stock
full


full


full


full


Cheating off the tailhousing:
full


Test fit:
full


Finished product:
full


Then this whole unit went together with ARP studs.
 
Thank you guys, I will keep going. I also have a problem with my phone (note 8). It cropped up before but now has taken a big toll on things. I lost probably 10% of my pictures from 2017 and on. It also seems to rename files as well when I connect it to the computer. I do think I lost an entire folder as well which was from 2015.

With that said I still have lots of awesome stuff from the modern part of the build. That's all coming. Got back from the range today around 4 and started working on going through the pics for the next batch on the build. Its starting to get into the suspension work and cage/interior work etc..
 
After making the adapter I got the crossmember made and got the tranny and transfer case in.

Also swapped the vac booster for the hydroboost unit out of the van. Used an angled plate to mount to the firewall and give the correct angle. Also had to modify the pedal.

full


full


This was the first box, I ended up remaking it as it was too close and I needed driveshaft room. I think I may have done that with the hero case though, can't remember.

full


Hydroboost and complete engine.

299921-9e28de0f6a938141184081a9074b2f75.jpg


Motor's all complete
full
 
After that I did the rear axle and rear 64 swap and made a new linkage bar for the Tcase on the 2wd tranny

2004 14bff
full


ARB's baby :)
full


full


full


Getting the new spring hangars in.

full


full


Out with the old one. So I had the jacks on the front and I had jacks on the rear frame horns, but I couldn't move the axles out and the new one back under unless I moved those jacks. Sucked doing it in a really small dirt driveway. But I had found I was good at Jenga.

I installed the rear axle utilizing a stock chevy 64 pack. During tuning of the truck I started swapping springs in the packs out to make my own bastardized pack which worked pretty well.

full


full


full


full


full
 

Latest Posts

Top Bottom