CK5

You are using an out of date browser. It may not display this or other websites correctly.
You should upgrade or use an alternative browser.
You should upgrade or use an alternative browser.
'89 R3500 Crew Cab 2wd to 4wd conversion & beyond
- Thread starter mrk5
- Start date
Started out with 2wd TBI350 with SM465 to current 4wd with 454, 700r4, NP241
i would ask @Greg Ducato on the shift kit or improver stuff.
i know i have always liked the no yoyo stuff for a kit that works but dosnt rock your neck in to a brace from whip lash .
http://www.transgo.com/products.php...meinclude=catalog&category_id=98&parent_id=98
but also the aftermarket controlers let you play with some stuff so make sure you dont go to crazy and then program crazy and fry somthing .
At first I thought @Bent77 had hijacked your account. I thought "this doesn't sound like Todd..."I threw in the orange for Bent")

- Joined
- Mar 3, 2000
- Posts
- 9,153
- Reaction score
- 7,182
many people make the mistake of using NPT for those cooler fittings causing a cracked case. Imagine that ofukmylife moment.....lol
Yep been involved in something similar......
I replaced the manual shift shaft with the shorter version. Took a little modification work. Big thing was notching the corner of the plate to allow the pin to be extracted.
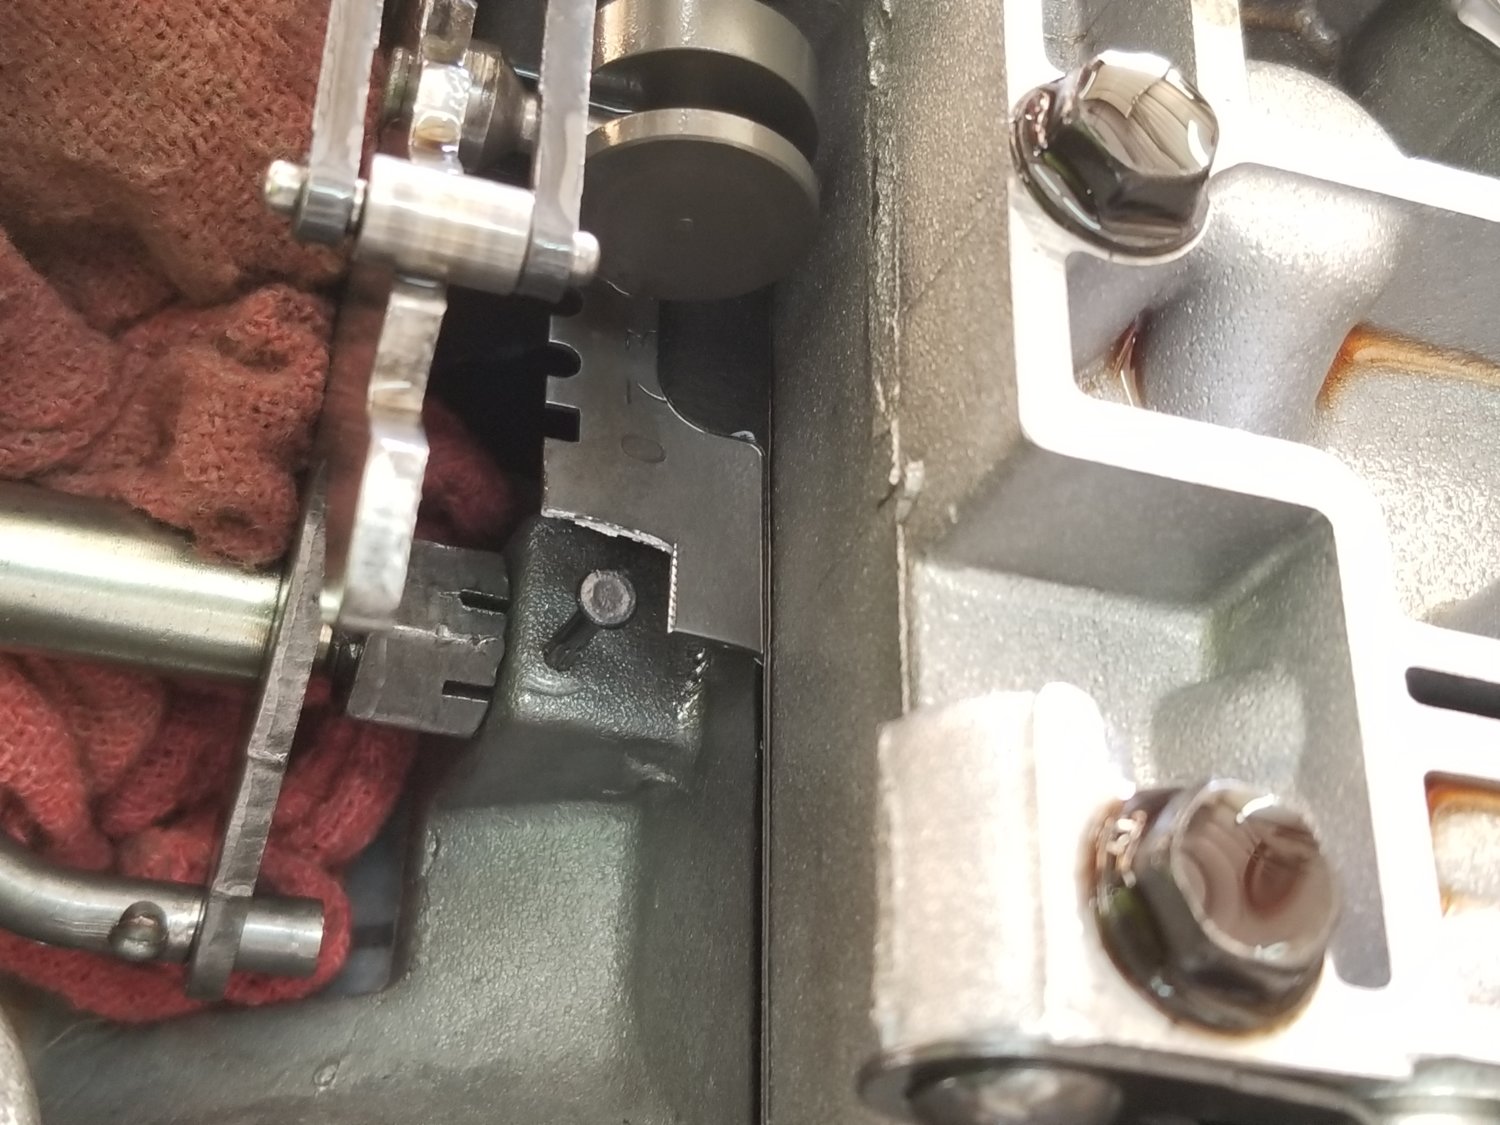
I tried first to see if the pin was up far enough without modifying the plate but it was not. This is what the pin looks like in case you're thinking it's just a nail.
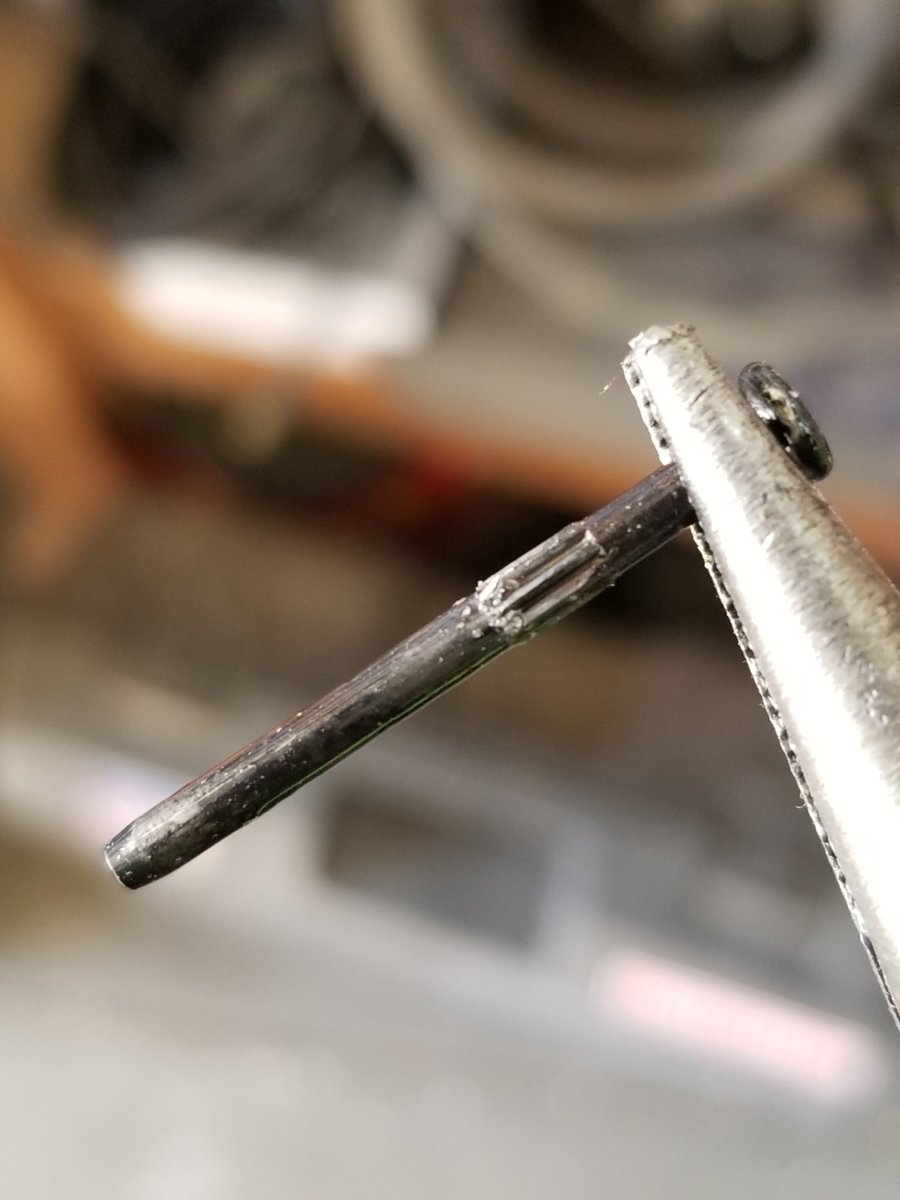
I pulled it out with a pair of diagonal cutting pliers under the head and prying on that with a screwdriver.
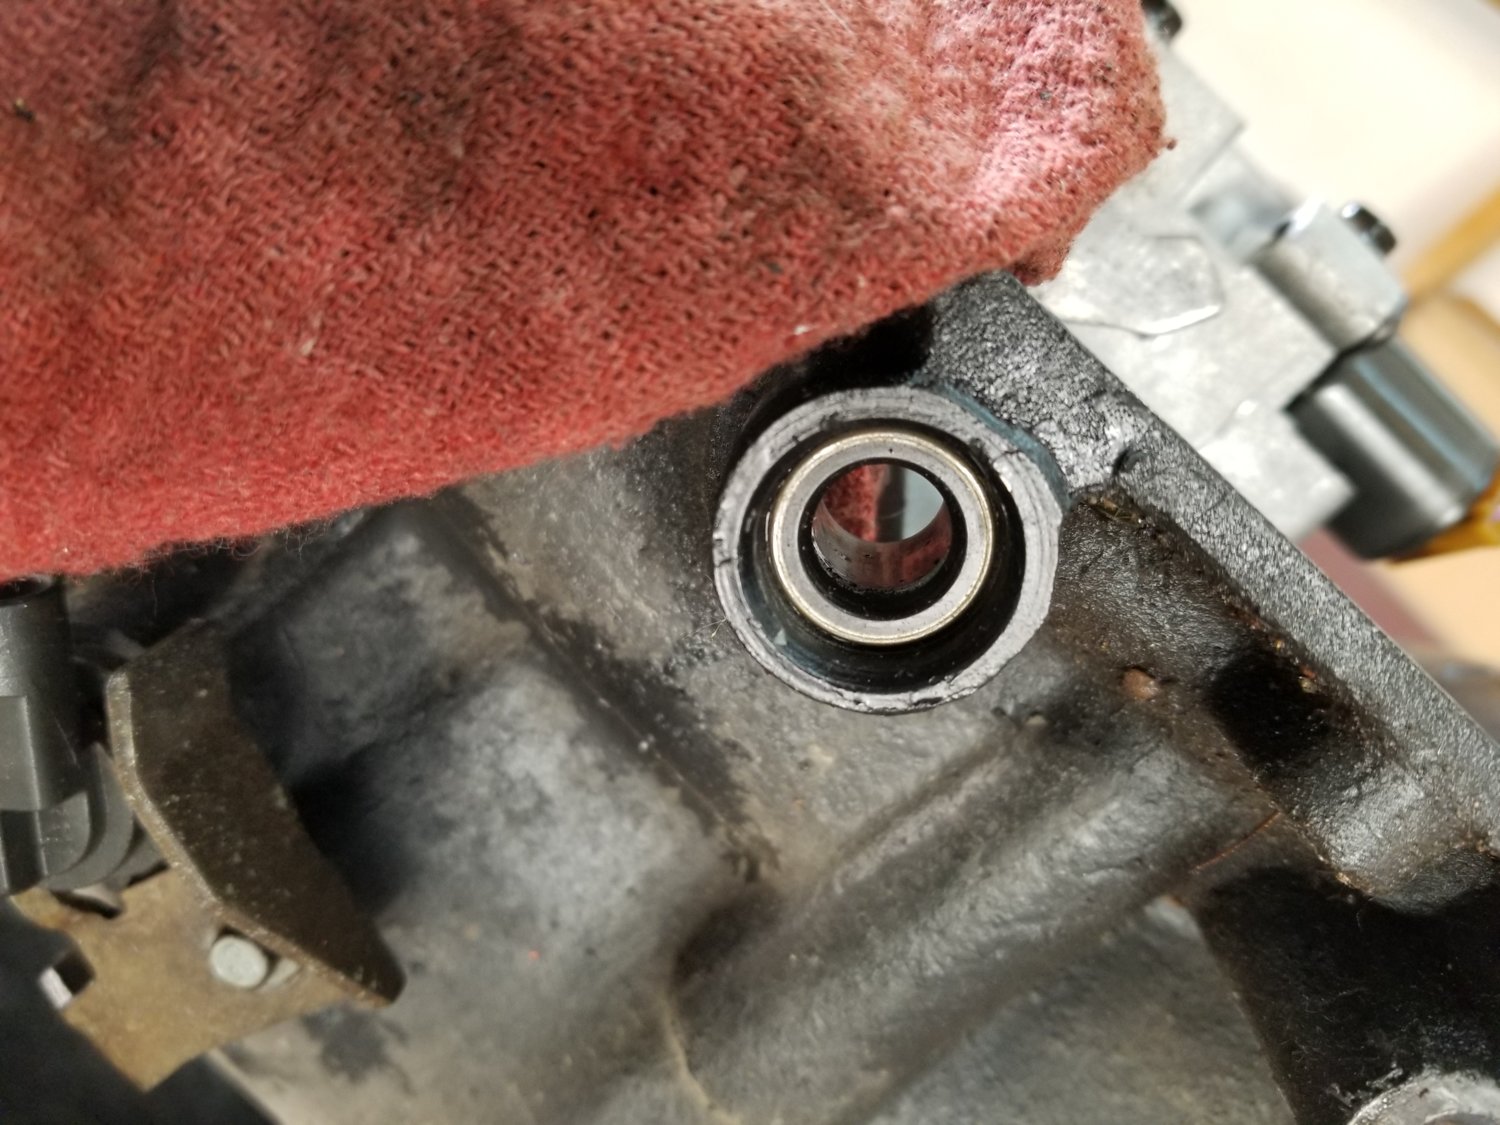
While the shaft was out, I replaced the seal.
A 14mm 1/4" drive deep socket was a perfect driver.
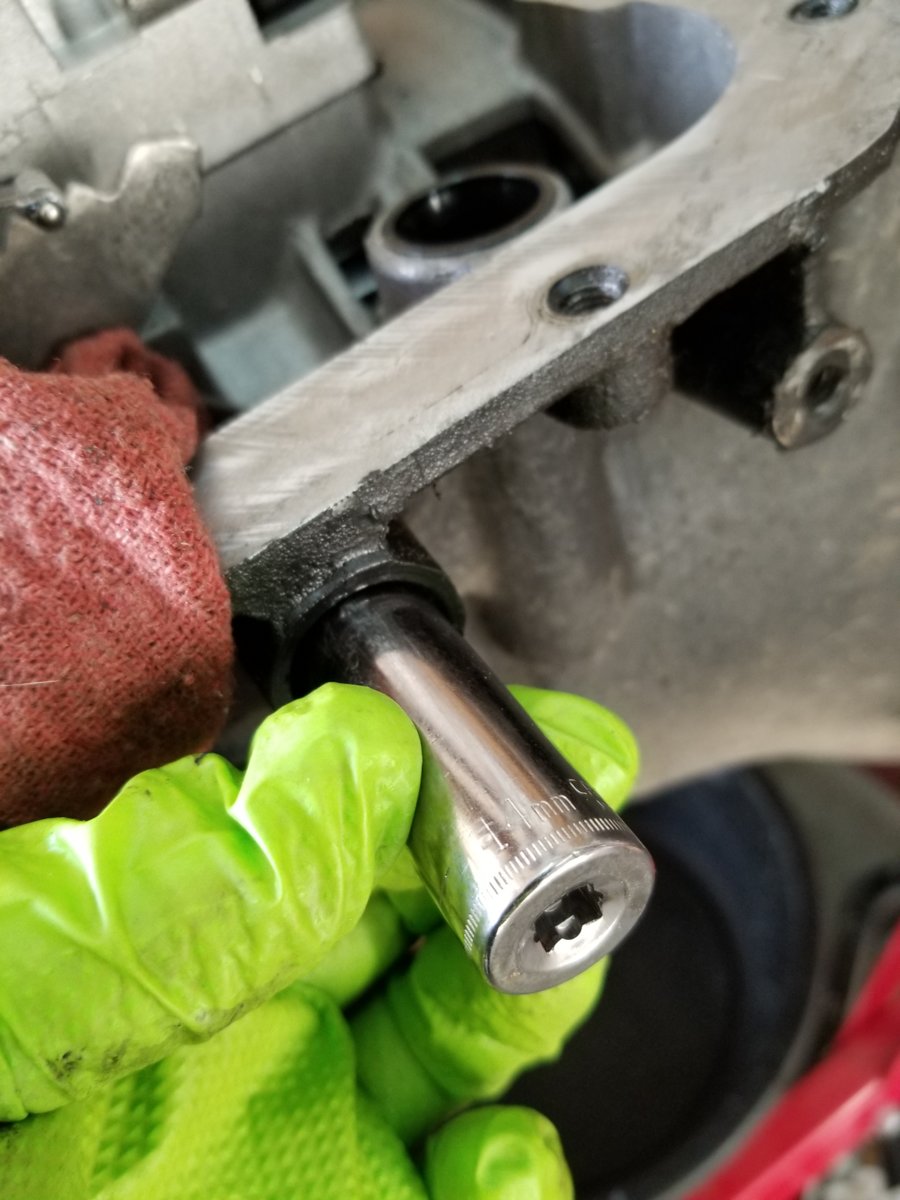
All done.

I tried first to see if the pin was up far enough without modifying the plate but it was not. This is what the pin looks like in case you're thinking it's just a nail.
I pulled it out with a pair of diagonal cutting pliers under the head and prying on that with a screwdriver.
While the shaft was out, I replaced the seal.
A 14mm 1/4" drive deep socket was a perfect driver.
All done.
Looks good.
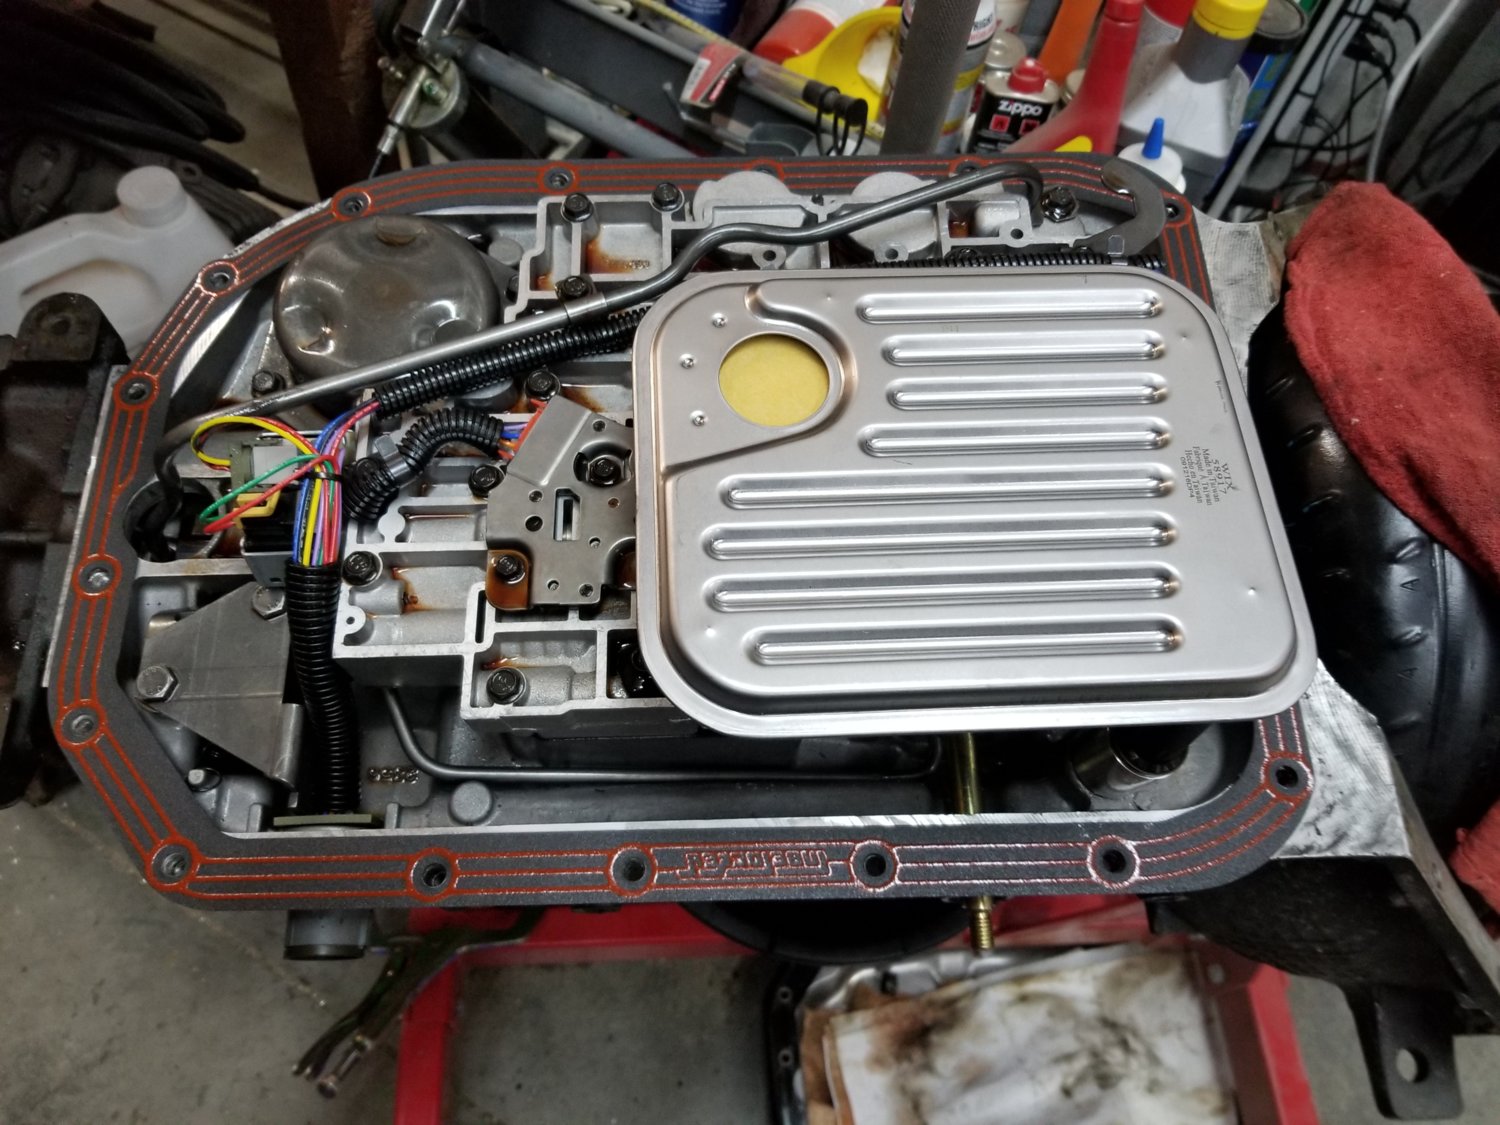
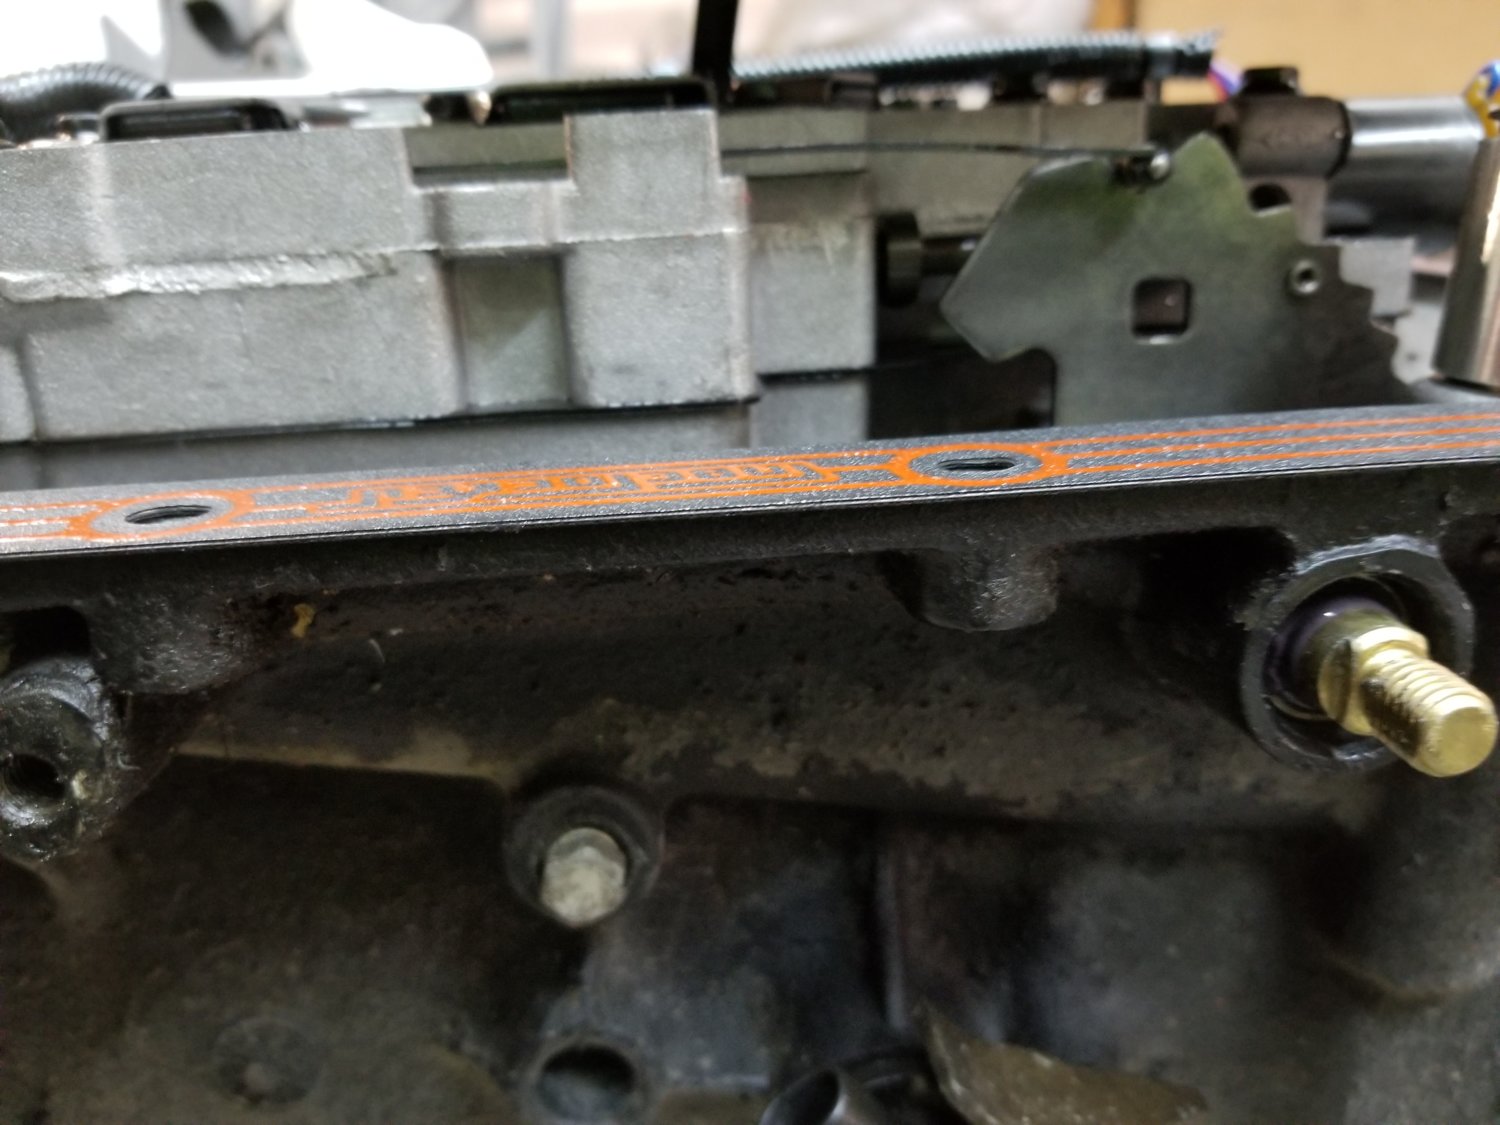
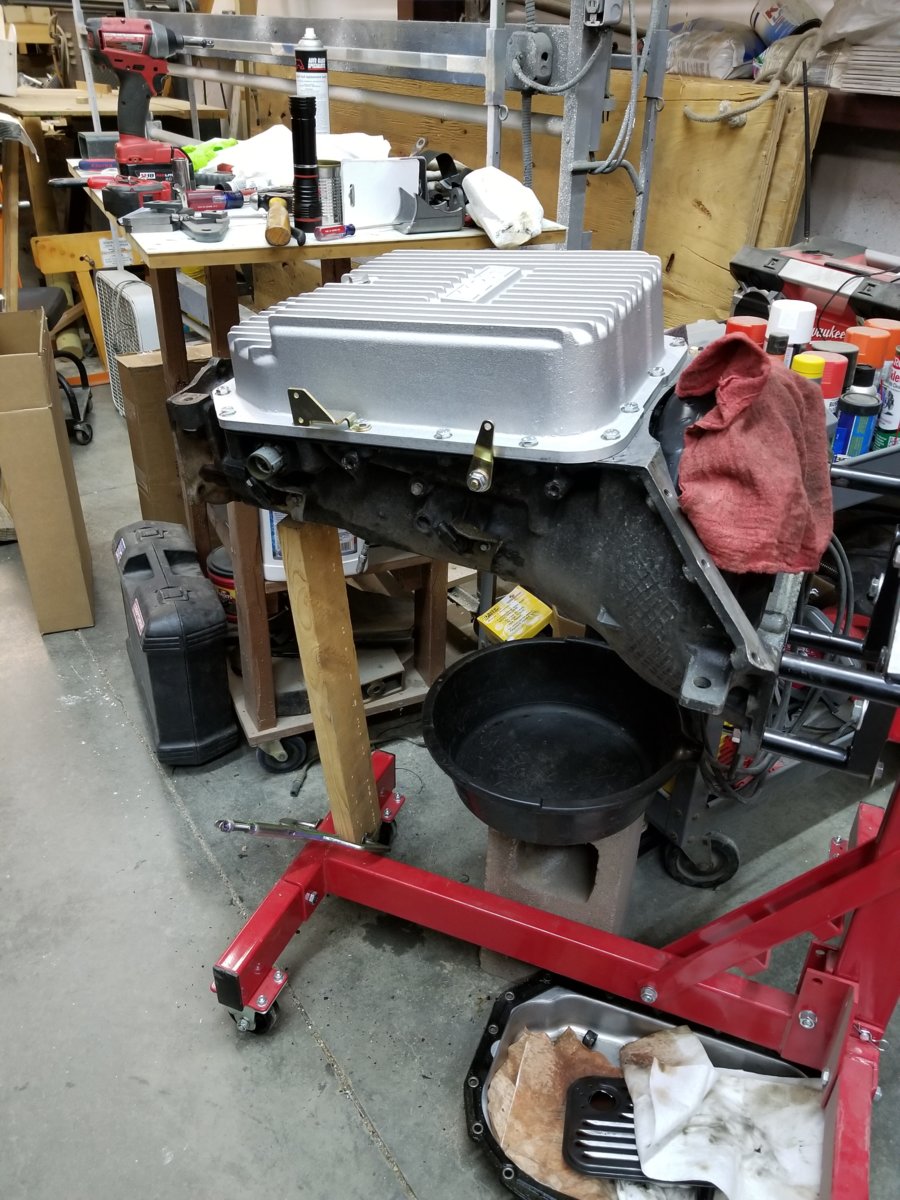
Buttoned up the transmission. Heard of the Lube-Locker gaskets, but this is my first time using one.
I picked up new linkage for the Art Carr (now Winters) shifter. I wasn't sure if the brackets would be the same and new ones were about $20. This way it's all set up and ready to go. I had been wondering how I'd know which holes to use without the cable. There were instructions with the brackets, but not a lot of detail. Luckily it will only go in 1 spot.
Not here:
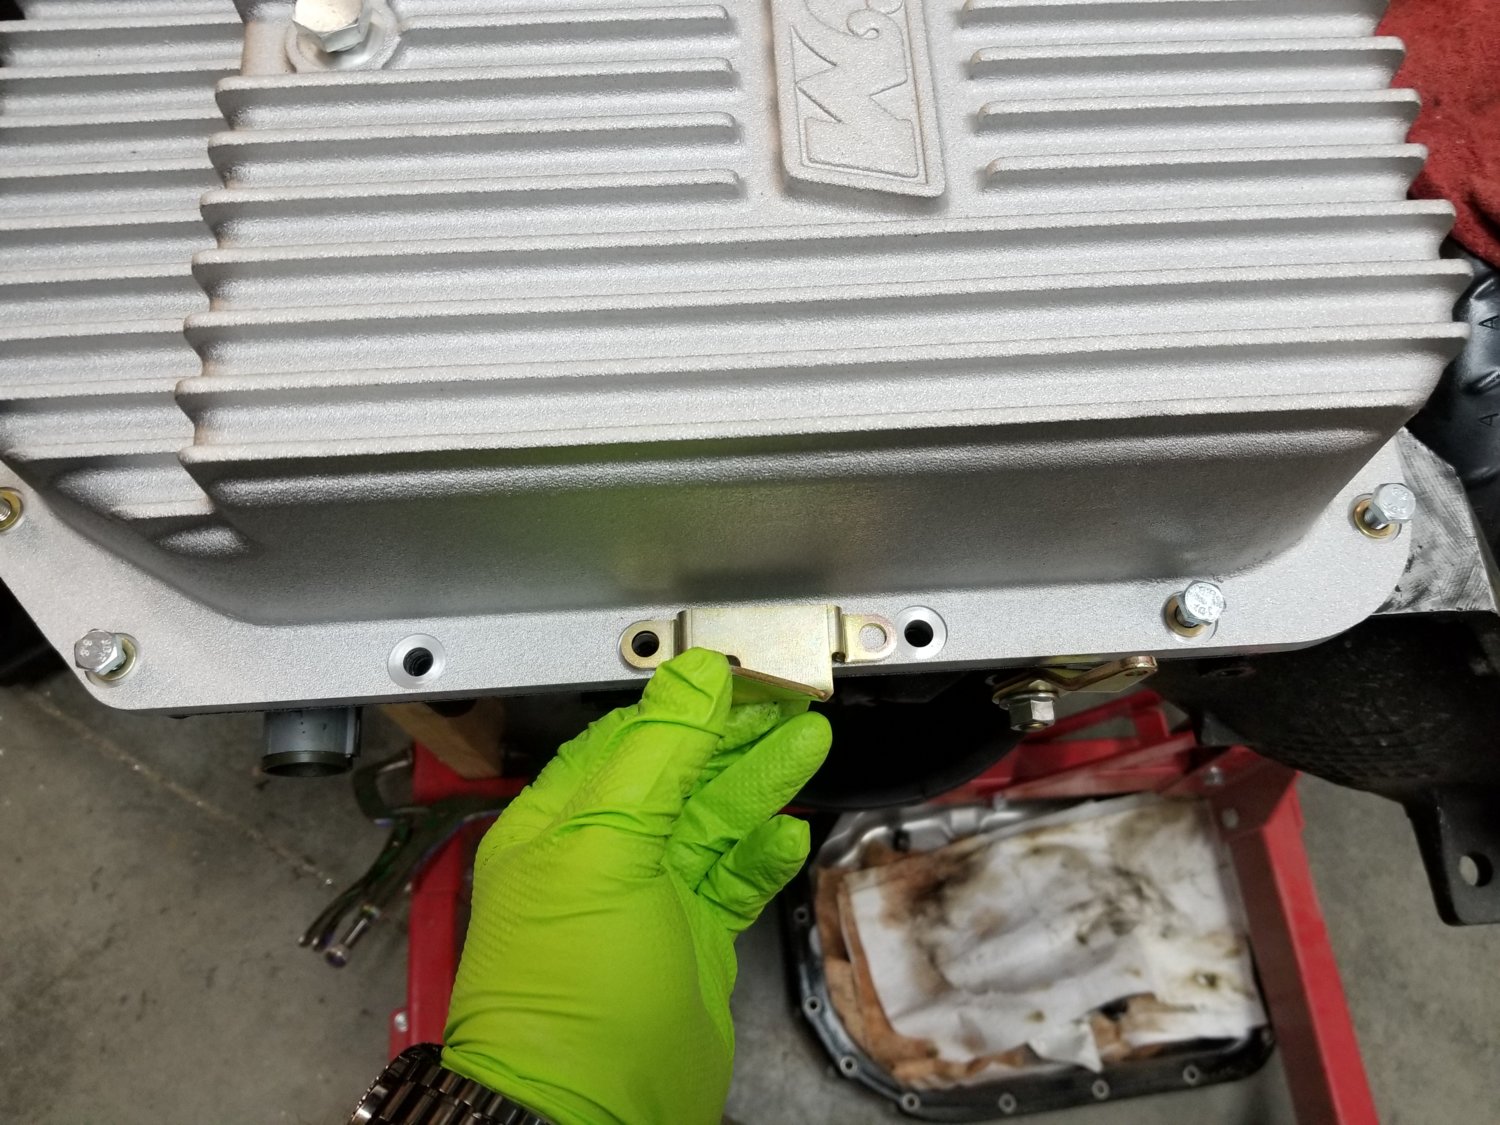
This is the spot:
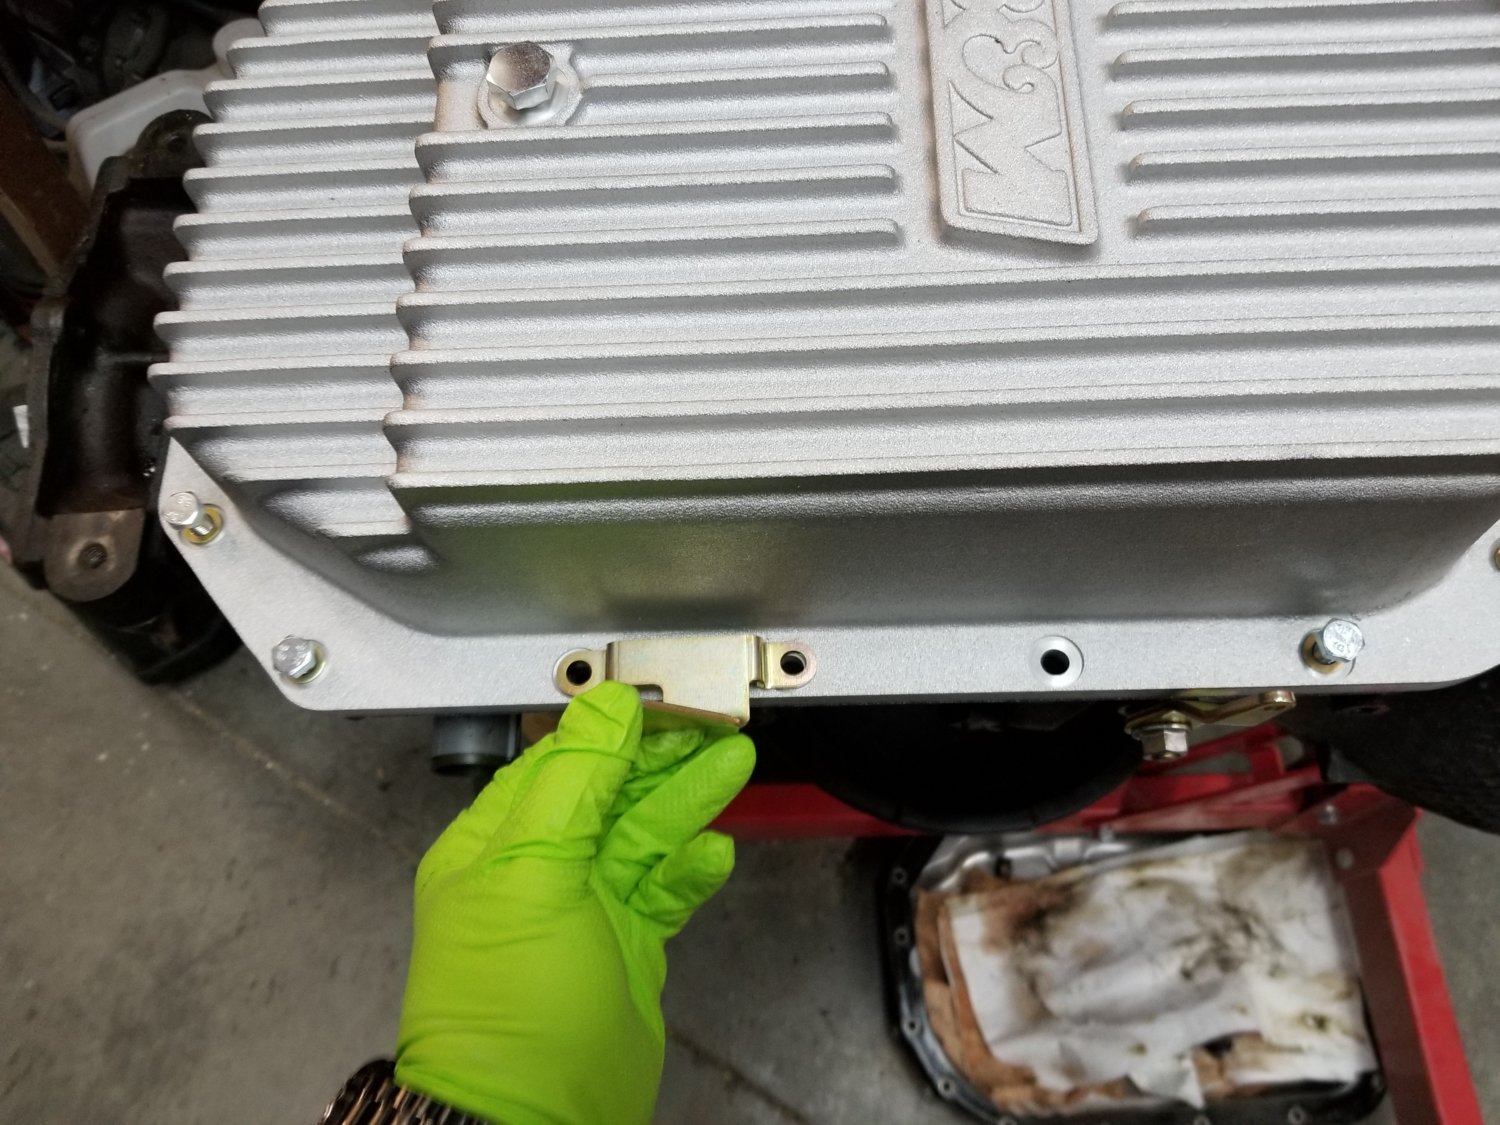
The bolts that came with the pan had washers. Because the mounting holes have the recesses I put the washers under the bracket.
I picked up new linkage for the Art Carr (now Winters) shifter. I wasn't sure if the brackets would be the same and new ones were about $20. This way it's all set up and ready to go. I had been wondering how I'd know which holes to use without the cable. There were instructions with the brackets, but not a lot of detail. Luckily it will only go in 1 spot.
Not here:
This is the spot:
The bolts that came with the pan had washers. Because the mounting holes have the recesses I put the washers under the bracket.
Post this here for future use. Most of it is obvious, but some of the numbers at the end are handy to have.
Torque Converter Installation
1. Using a lift or jack stands raise car off the ground far enough to be able to slide transmission out from under the vehicle.
2. After the vehicle is raised, drain the transmission fluid into a drain pan by removing the pan bolts from the rear half of the pan then slowly loosen the remaining bolts to allow pan to tilt down towards the ground allowing the fluid to drain into the drain pan.
3. Remove the battery cable, starter (if necessary), driveshaft, torque converter bolts, exhaust (if
necessary), cross member and all of the transmission bolts except for one near the dowel pin.
4. Raise the transmission up slightly by placing a suitable transmission jack under the transmission.
5. Remove the last bellhousing bolt and remove the transmission.
6. Check the flexplate for cracks and chipped teeth on the ring gear. Take the new torque converter and hold it against the flexplate to see if the application is correct by checking that the pilot size and bolt circle are correct.
7. Add a quart of new transmission fluid to the torque converter. Using the aid of a helper, stand the transmission on the tail shaft and carefully install the torque converter onto the transmission. Spin the torque converter and listen for 3 distinct clicks as it drops into the transmission. The following are measurements you can make to insure the torque converter is all the way in the transmission:
GM-TH350, Powerglide=1.125" from bellhousing to the converter pads.
GM TH400 = 1.187" from bellhousing to converter pads.
GM 700 R4, 4L60E, 200-4R = 1.125" from bellhousing to converter pads.
GM 4L80E = 1.030" from bellhousing to converter pads.
Distance may vary ± .050".
8. Remove any debris in the crankshaft pilot hole and lubricate. Clean and lubricate the dowel pins. Check to see that dowel pins will be in the transmission bellhousing by more than .250".
9. Mount transmission to the back of the engine block making sure the bellhousing fits squarely against the block. If it does not, find out why! Is there something between the bellhousing and block or has the torque converter slipped out of the transmission? DO NOT PULL UP THE
BELLHOUSING TO THE BLOCK USING THE BELLHOUSING BOLTS!!!!
10.After the transmission bellhousing bolts are tightened, check to see if the torque converter will turn by hand. Push the torque converter back into the transmission as far as it will go. Using feeler gauges or calipers measure the gap between the flexplate converter mounting pad and the torque converter mounting pad. If gap distance is between .060" and .187" it is OK to bolt up the torque converter. If the gap is greater than .187" install a .060" flat washer between the torque converter and flexplate.
11. Finish installing the cross member, exhaust, driveshaft, etc. Add 5 quarts of good quality transmission fluid. Start the engine and immediately add 2 more quarts. Check the fluid and finish filling the transmission to proper level.
What are the odds my flexplate has the 6-hole provisions for the 4l80e(or TH400)? Currently uses just 3 for the 700r4.
pop the cover off and take a look. The last one I bought had both patterns.
I believe that there is a difference in the dual bolt pattern flexplates, and the HD version which uses 6 bolts. I would tell you that I am positive of this, but I am human and subject to error....
for what its worth pull the flex plate . set it on the convertor. it lines up or dont .
my buddy years ago swapped a engine 2x for a guy cause he didnt realize the 350 was from a 1ton 4l80-e combo and going in a 350 4l60 truck the plate was different .
my buddy years ago swapped a engine 2x for a guy cause he didnt realize the 350 was from a 1ton 4l80-e combo and going in a 350 4l60 truck the plate was different .
It occurred to me I still have the flexplate that was on the 454 from the TH400 it was mated with. I checked it with the 4l80e converter and it lines up. So I should be good either way.
Pretty sure I'm the only one that's ever done done that.Most do. Kinda like putting washers under the shifter bracket on the pan
Was pretty common prectice for me in the racecar yearsPretty sure I'm the only one that's ever done done that.
I used my old TH400 flex plate for my 4L80 - fits fine, so you definitely have a backup.It occurred to me I still have the flexplate that was on the 454 from the TH400 it was mated with. I checked it with the 4l80e converter and it lines up. So I should be good either way.
David
Since you were doing the same as me, you must be a pretty smart dude. Only thing I'm thinking is that with the thickness of the pan flange, I'm wondering how well the cable is going to line up.Was pretty common prectice for me in the racecar years
I'm wondering how well the cable is going to line up.
you're a smart dude, you can figure it out.
Walked into that one!

