CK5
Register an account today to become a member! Once signed in, you'll be able to participate on this site by adding your own topics and posts, as well as connect with other members.

'89 R3500 Crew Cab 2wd to 4wd conversion & beyond

Started out with 2wd TBI350 with SM465 to current 4wd with 454, 700r4, NP241
205 shift sequence when changing ranges, pick up some speed if your going slow, kick the transmission into N, shift front of 205 into N, shift rear of 205 through N into other range with gusto, slam the front into gear, Transmission into gear and peal out.
That's sounds about right for you. :haha:
 
I have noticed a lot of times its dry linkage or shift rails for hard shifting .

I use a little napa chain and cable lube in a spray can to lube them every now and then and it does wonders for smooth shifting .
 
I did grease the rails and I packed a little grease behind the seal.
 
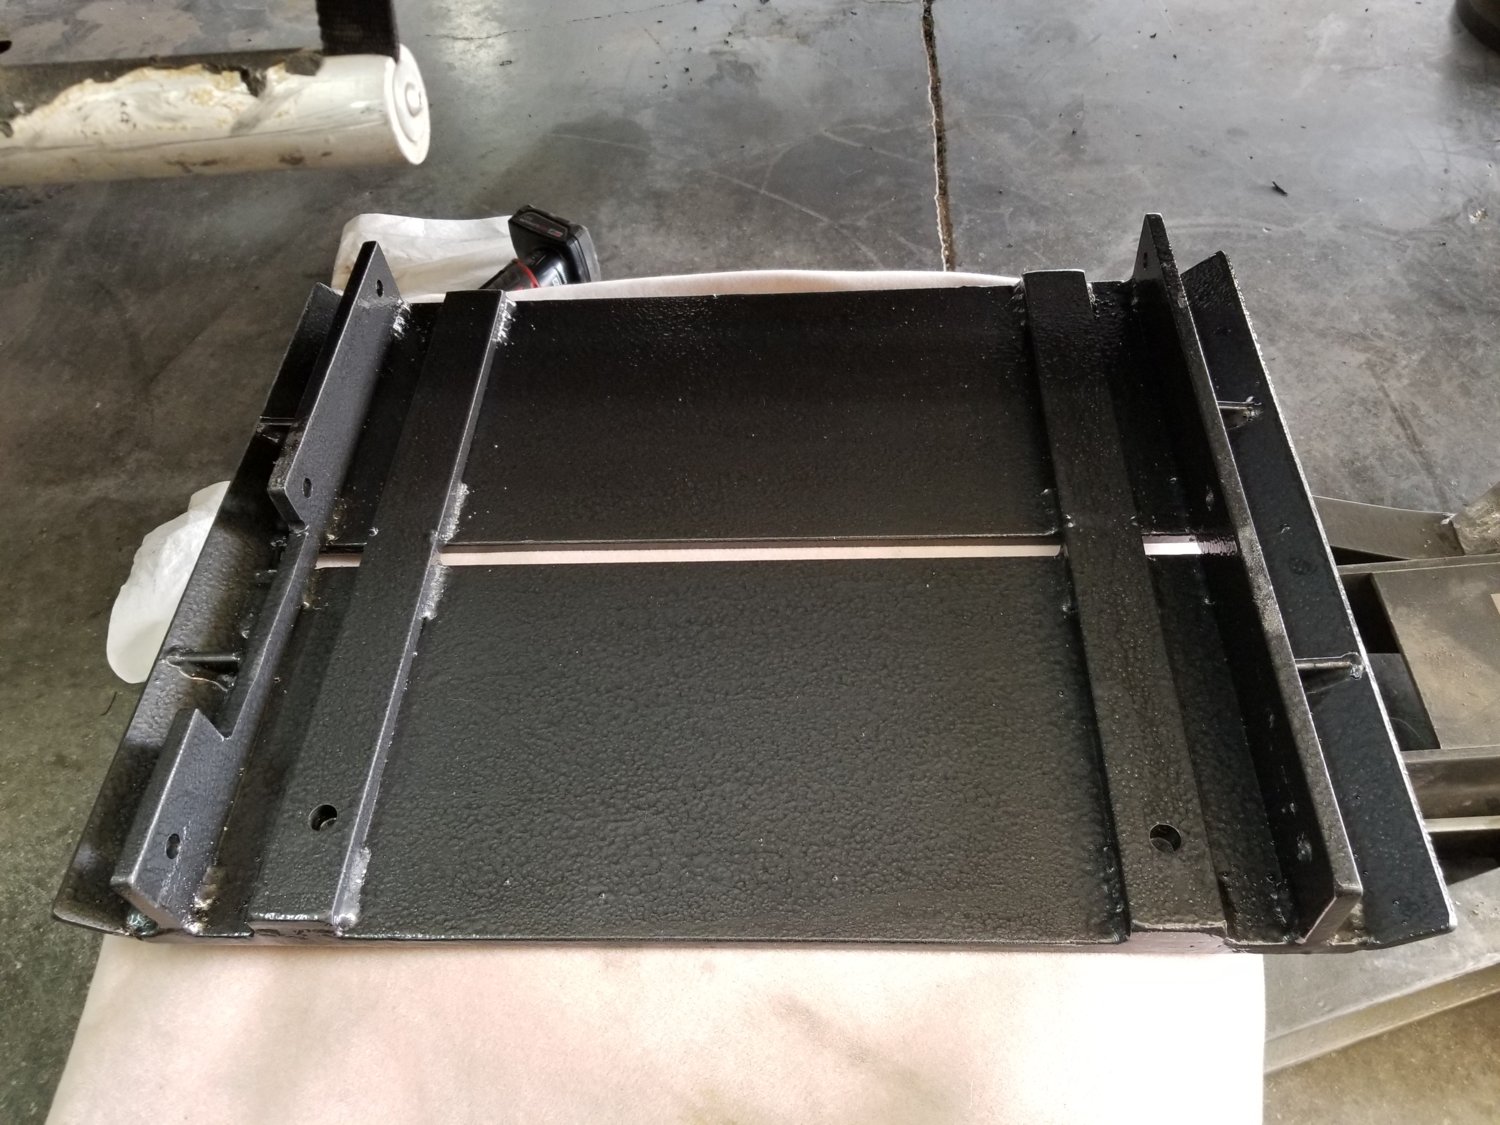
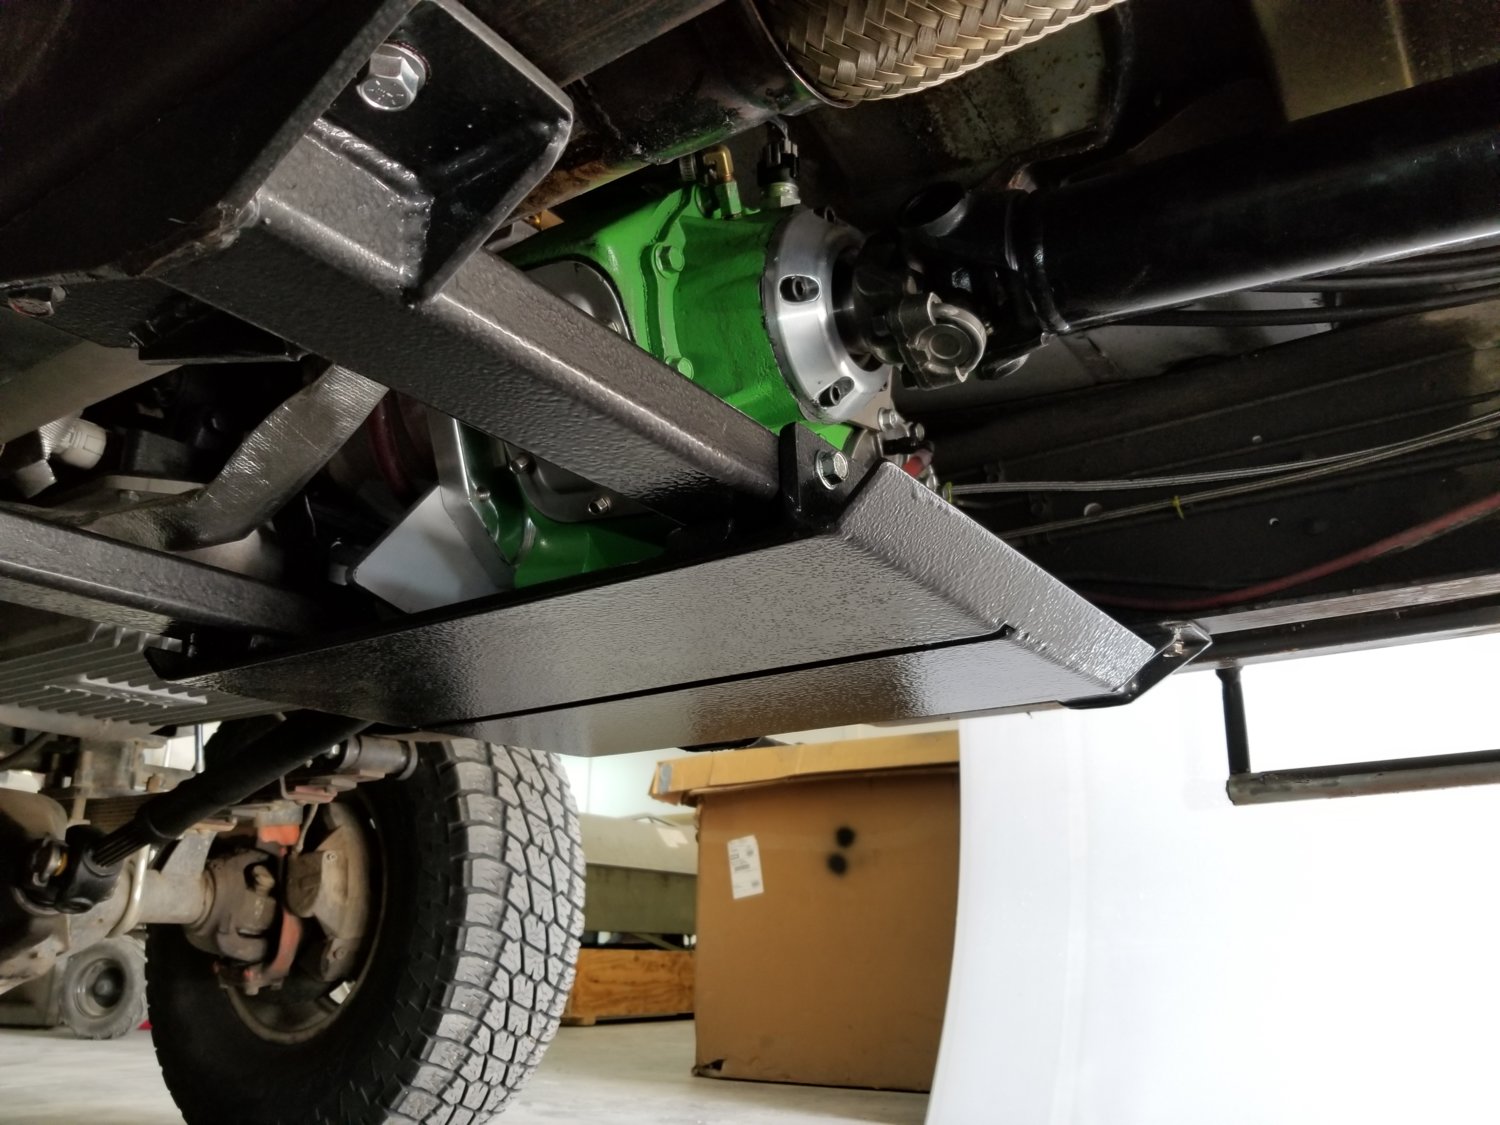
Did some work Sunday afternoon. Finished painting the stuff I rushed to fab before the Chinaman's trip; the skid plate and carrier bearing crossmember.

full


The plate is 1/2" below the crossmembers so I added those 1/2" thick flat straps across so the pressure is on the crossmember and not the bolts. I also added the "ramp" pieces to the front and rear. I thought about doing angled pieces on the sides but I decided to leave it open so dirt and mud can wash off.

I also installed the ORD billet rear output retainer along with a new output bearing and seal

full


Looking at the new and old retainer, I have a feeling I may not have driven the seal in far enough. I think I just drove it flush with the retainer but the recess for it is much deeper than that. On the new retainer I busted out the seal driver and drove it in all the way. I also checked the vent line and it's clear. However I didn't have a hose clamp on it and it's pretty loose so it could have just blown fluid out thru there.

I'm leaning towards the cause of the seal popping out being due to the seal not being driven in far enough. I'm wondering if the early driveline angle vibration issues might have started the seal working its way out. For one reason or another, the seal in the factory output retainer is not tight now.

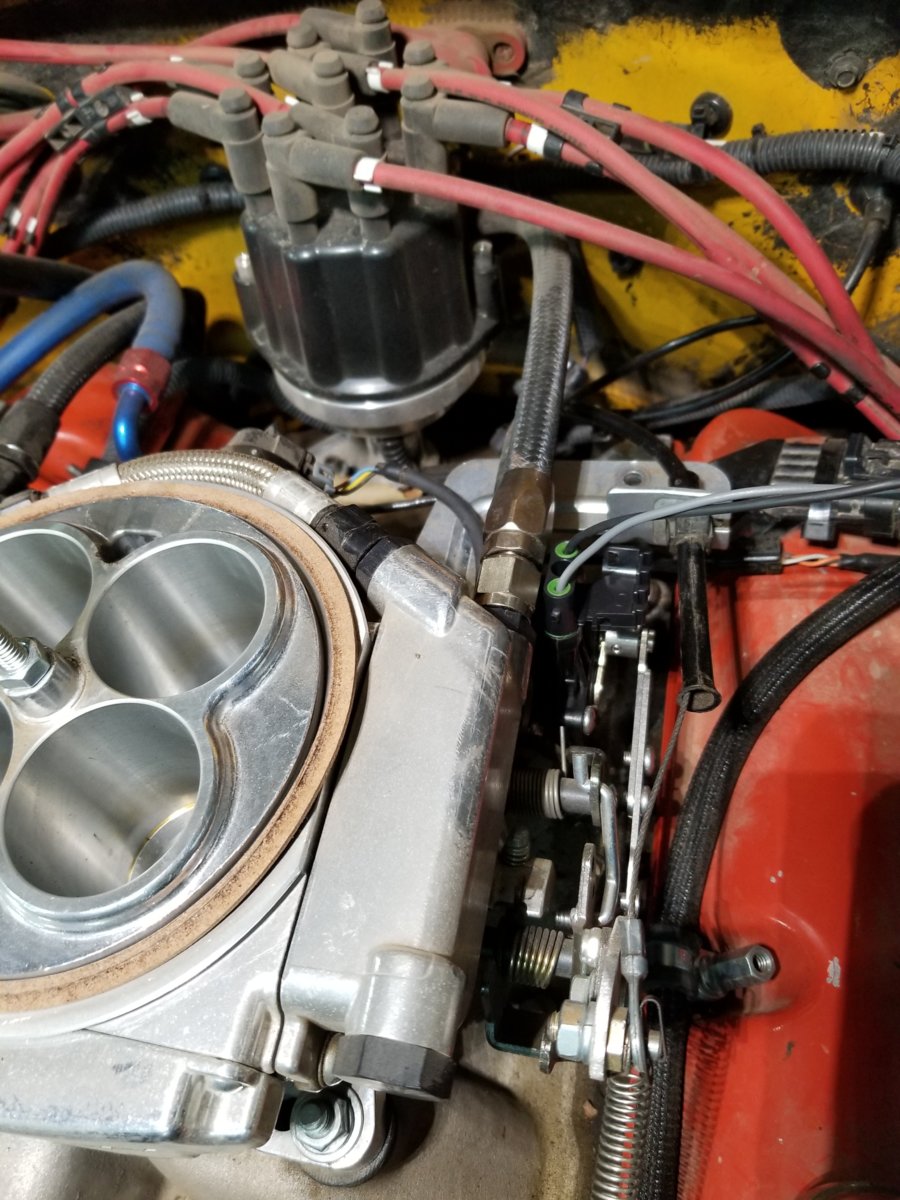
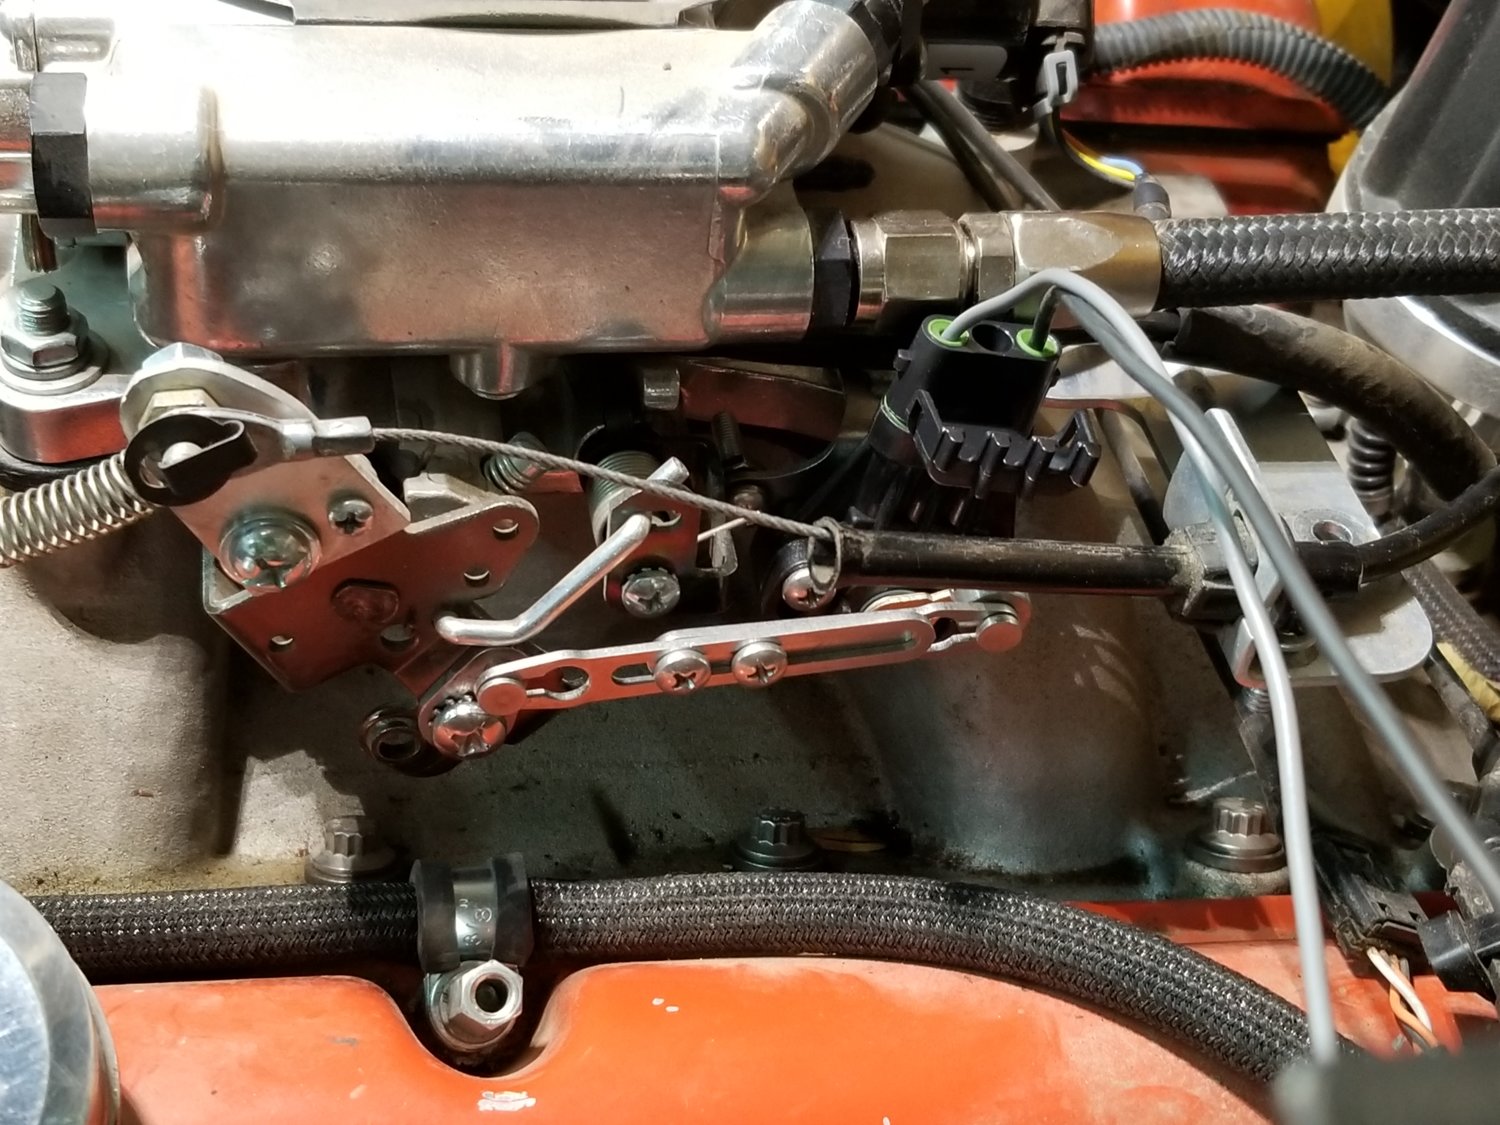
I also mounted up the TPS for the trans controller. I opted for the TPS that comes with a Compushift controller; I just thought it looks like a better setup than the others I see that use a cable and basically mimic the operation of a throttle valve cable on a 700r4. Plus it uses weatherpack connectors which I have so I can wire up the connector nice and neat.

Of course it wasn't all unicorns and rainbows. I had to lose the fuel pressure gauge so the sensor plug will fit.

full


full


I still need to finish wiring it up.

Several months ago I bought the pieces needed to mount a fuel pressure gauge in the cab. I haven't gotten around to installing it but now that I've lost the gauge I had on the throttle body, it's moved up the priority list. I'll mount the sender for the gauge down on the frame rail where the braided line meets the factory steel line.
 
I wired up the Acculink TPS. I'm posting this as much for future reference on my part as anything else.

The weather pack plugs have the terminals labeled with letters. In this case it is A B C.

F8010759-01.jpg

The TPS is labeled the same. So it goes as follows:
A: ground
B: signal
C: +5V feed​
I have another weather pack plug under the dash and I made sure to use the same ABC order on that plug as well. I only wish I would have had the same color wires as what comes off the Quick4 controller.
 
So You've got them labeled:

A: Ground
B: Signal
C: +5v feed


;) This will totally come back to haunt me I know...
 
Last edited by a moderator:
Funny thing is none of those stickers aren’t even straight to each other. Makes me feel better about mine
 
Last edited:
Saturday was the first drive after the new output bearing and retainer. I definitely had a bad output bearing as @Bent77 suspected. The tcase is much quieter now. I'm definitely suspecting a bad output bearing contributed to the seal failure.

I met with @Bent77 at a Trucks, Jeeps, and Java deal the local 4 Wheel Parts was hosting. Couldn't pass up an opportunity for free donuts and coffee. Unfortunately the weather didn't cooperate. This is a sample of what it looked like later that same morning doing a highway cleanup with the local 4x4 club.

2018-04-21 09.05.19.jpg

Before Blazer Bash I replaced the bushings in the rear of the front springs. I didn't replace the bushings in the frame bracket. Well I noticed the other day one of them had a torn up shoulder. So I replaced those today. This is what a bad bushing looks like (in case you didn't know)

full


I also have a confession to make. A while back some commented on how close the spring eyes were to the frame.
Is it an optical allusion or are your spring eyes resting on the frame?

They do look crazy close if not.

Well I finally conceded they were too close. They weren't resting on the frame but they were about 1/4" away sitting in the shop. Apparently this is too close once you start articulating the suspension. I am thinking this is what was really wrecking the bushings.

I had started with 4.5" when I first did the 4wd conversion. Then I went to 5" which is where I was when the observations above were made. I thought about trying 5.5" but since the previous 1/2" jump didn't help I decided to go to 6". Well that made a BIG difference.

full


I had to double check the measurement because I thought they must be 7". But no, they are just 6". I've decided to just roll with it. It does put my caster angle at 9.5° which is a degree and a half more than recommended. Did some reading about caster angle and the only negative to more angle is increased steering effort but that's not an issue with the hydro-assist. So I'm going to try it and see what happens. I definitely won't be having the spring eyes hitting the frame. If it's no good on the road, I'll try 5.5"
 
Oh, and those oil spots are not from the crew cab!

I do however have a rear main leak. I'm wondering if it's because the oil pump pressure is too high. I tried to find a pump that was high flow but not high pressure. Supposedly I did but I think there's no such thing. The oil pressure at higher RPM is 60 to 75psi. I'm trying to decide if it bothers me enough to go to the trouble of pulling the pan and changing the pump. My biggest reservation is if I can get the deep pan out without pulling the engine crossmember.

Or maybe I need to get one of those rear main seals with the offset lip. I don't remember checking to see if the crank had a groove wore in it.

Then I tell myself it's an old motor even if it has been rebuilt. As long as oil isn't pouring out, I shouldn't fret over it.
 
Then I tell myself it's an old motor even if it has been rebuilt. As long as oil isn't pouring out, I shouldn't fret over it.
For me, it would come down to where I park it. Do you park it in the same place every day so you can drop a catch pan under it, or park it where you don't care about oil spots? If so, I'd leave it. New driveway, then gotta fix it. :D
 
I personally don't think that the oil pump pressure will affect it, unless it's spraying out of the rear main that hard. But , ??
And I sometimes get tired of worrying about small leaks, as much as I would like a dry engine.
 
The truck won't fit in my tiny concrete driveway, so it gets parked on the asphalt street, so that's not such a big deal. The 66 does fit in the driveway, but that's a different oil dripping story. Haha.

I should be done working under the truck for a while so I'll probably soon be able to ignore it.... :rotfl: :doah:
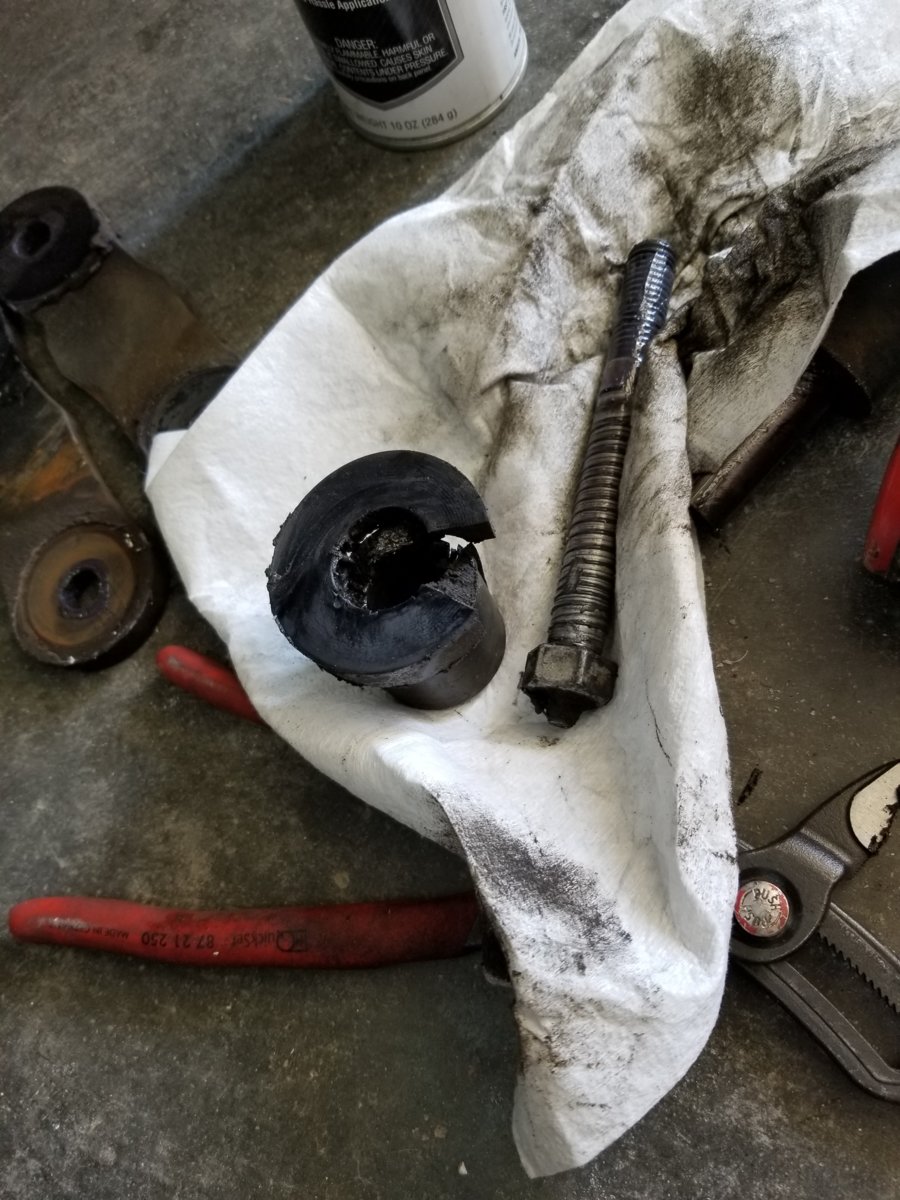
I also remind myself it doesn't leave spots like the truck that left those in the picture.
 

Latest Posts

Top Bottom