CK5
Register an account today to become a member! Once signed in, you'll be able to participate on this site by adding your own topics and posts, as well as connect with other members.

DO NOT OPEN IN PUBLIC, YOU WILL BECOME INSTANTLY ERECT!!!

Back from the dead. Skunked inspired me to get back on this thing and do some work on the belly skid.

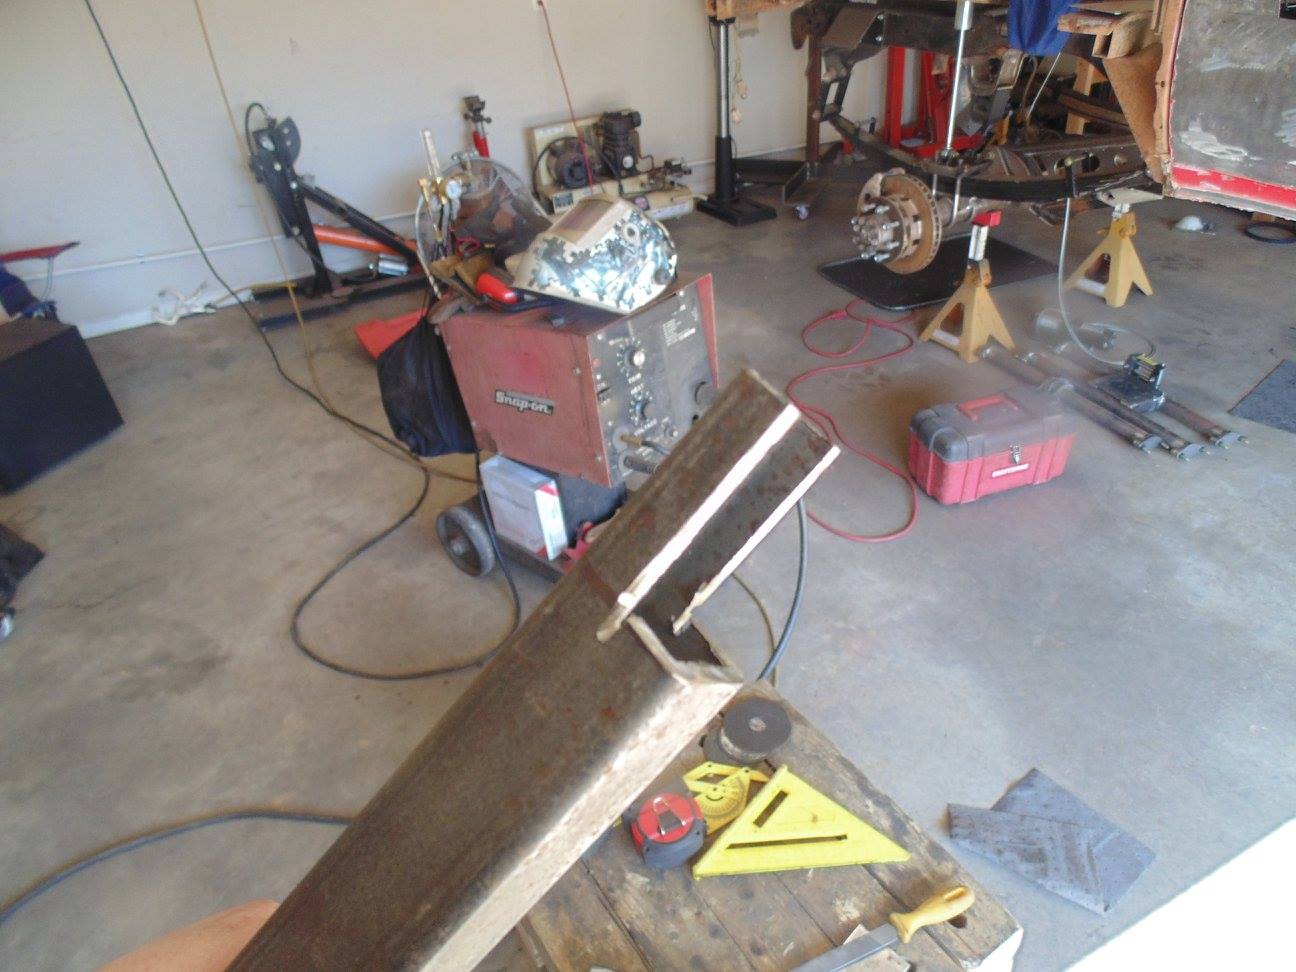
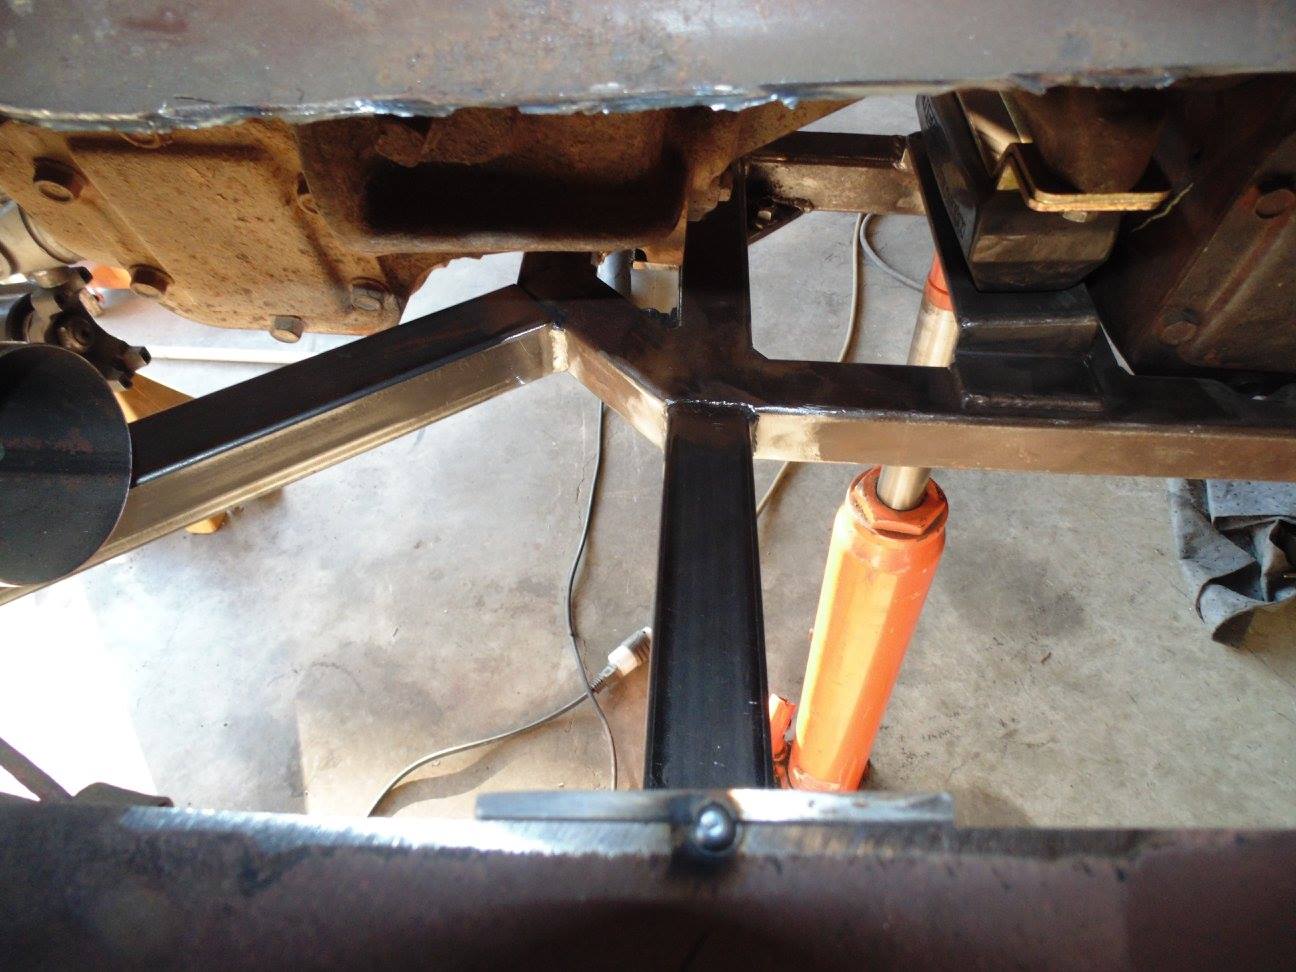
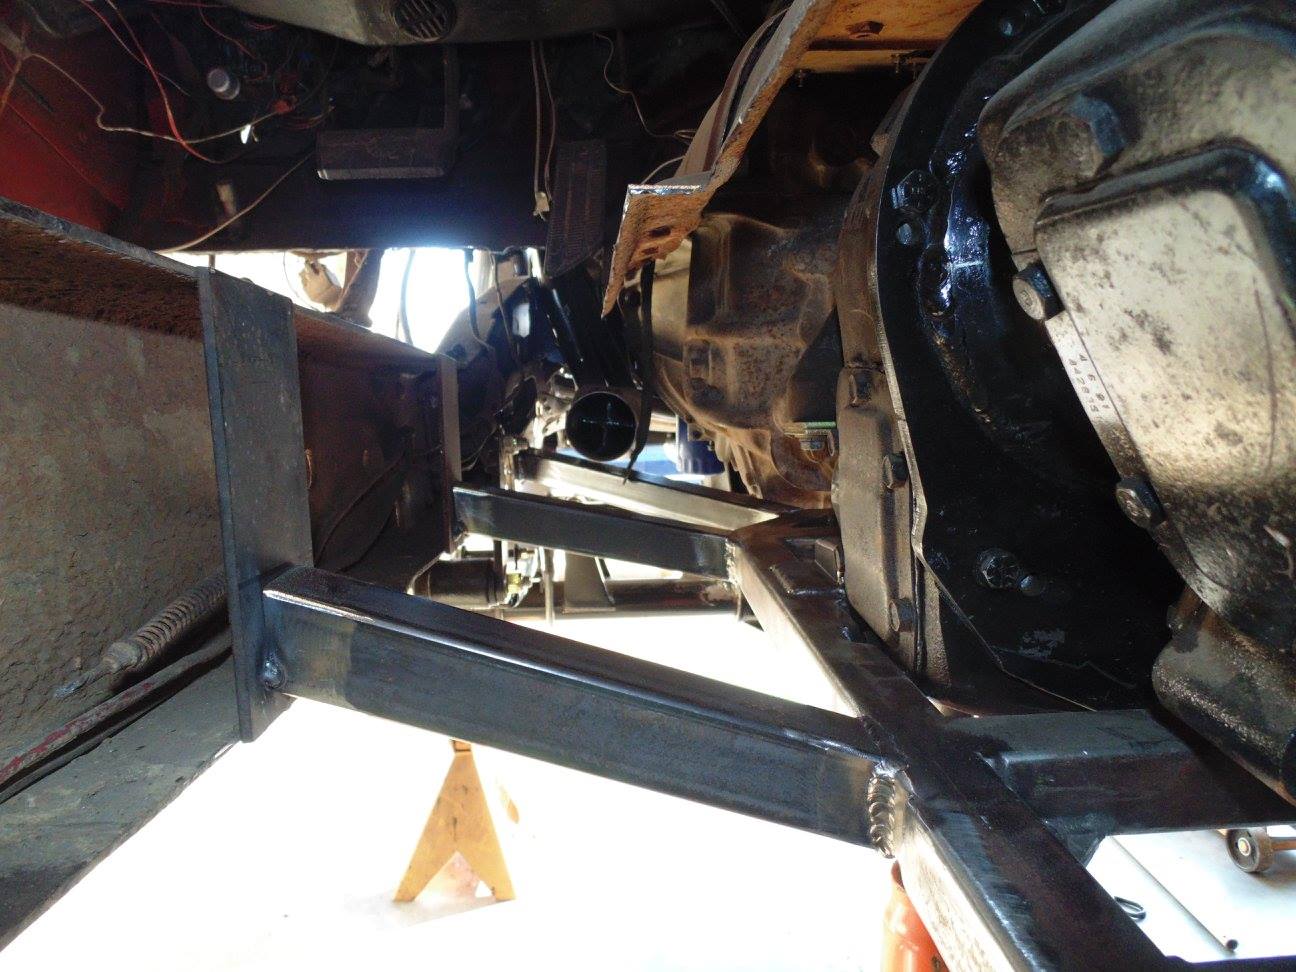
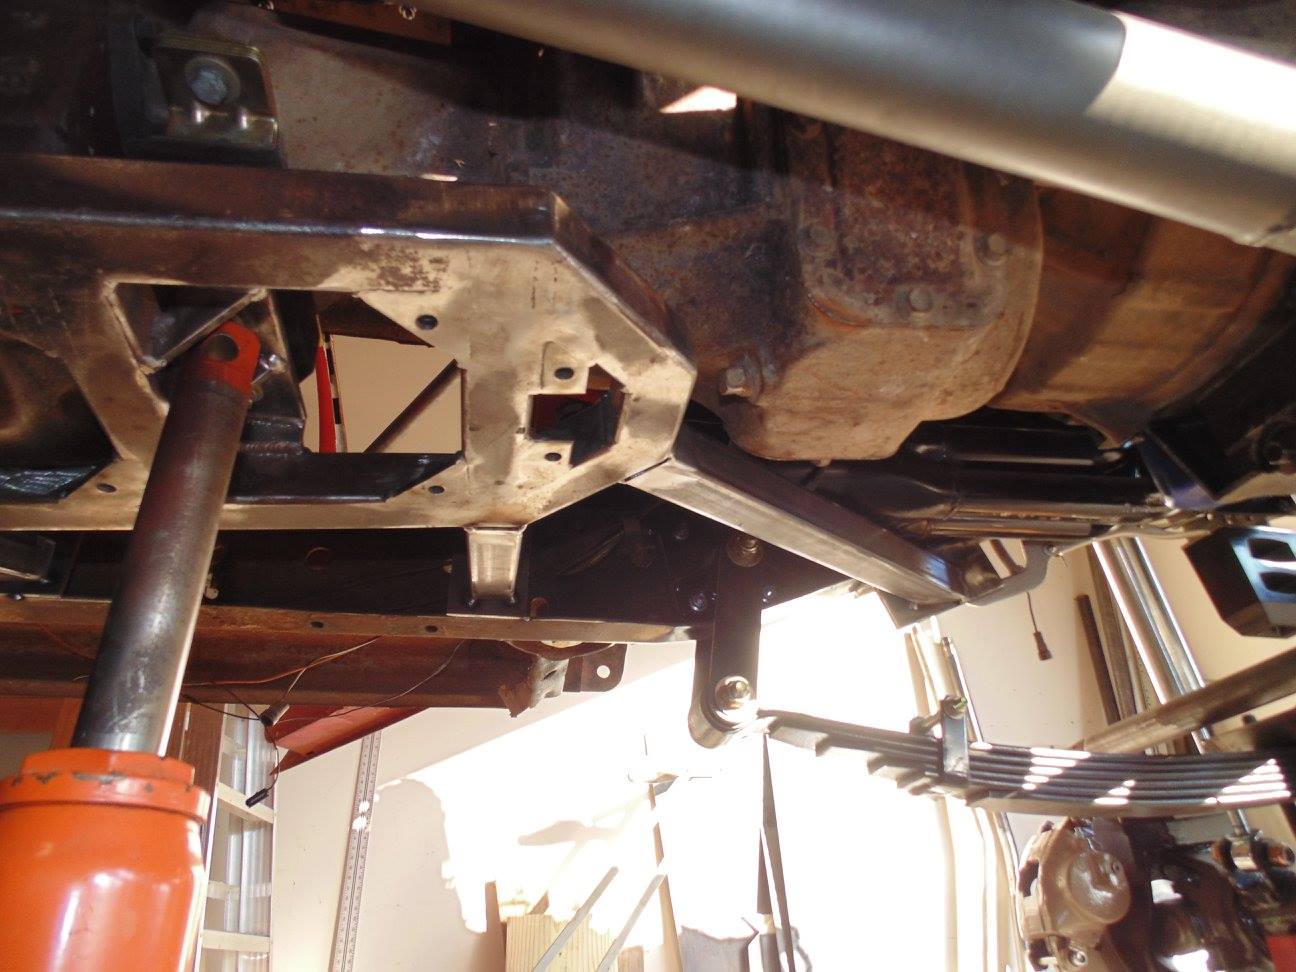
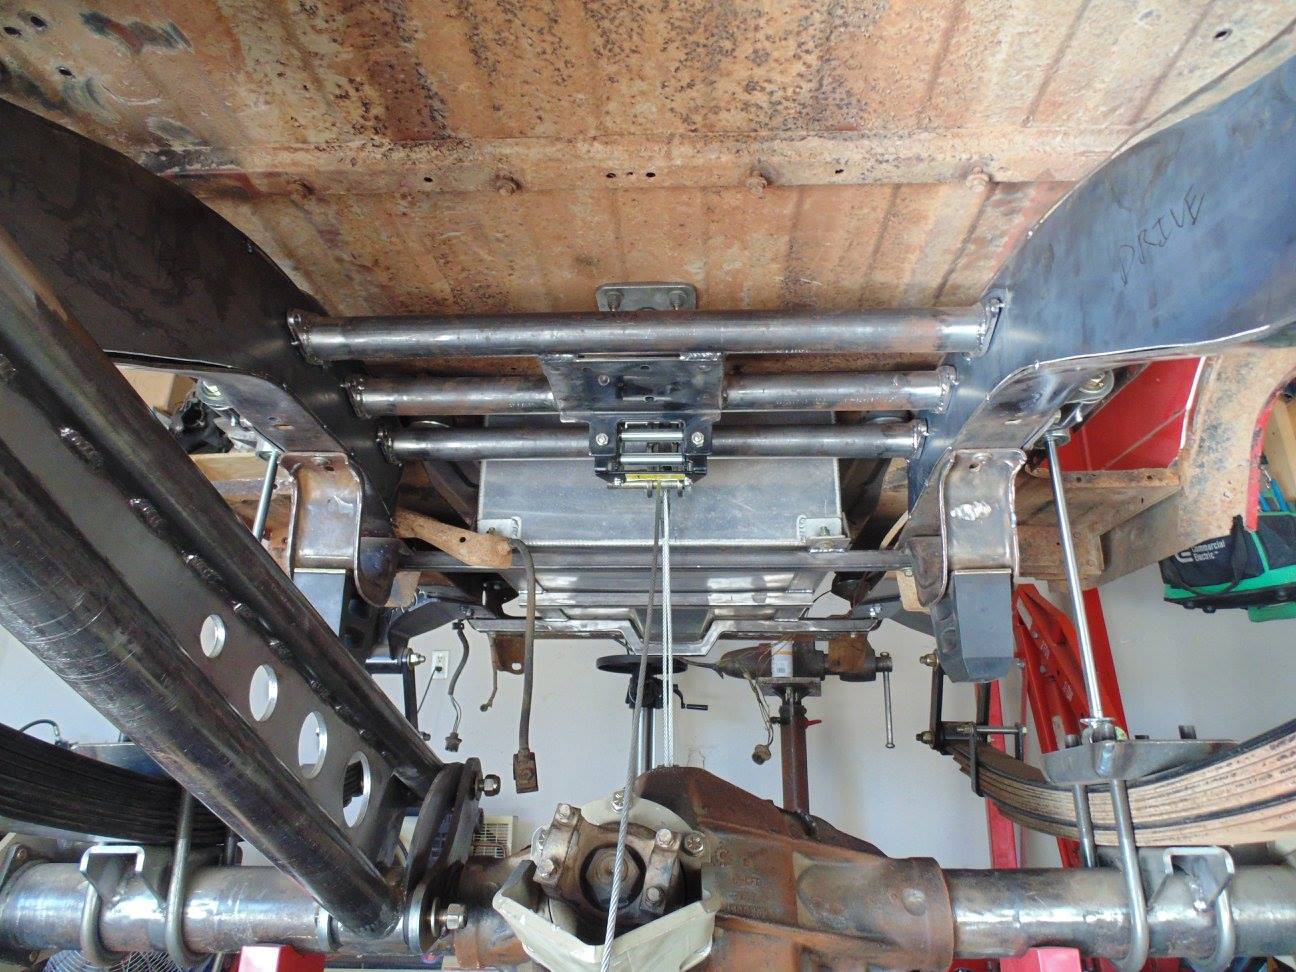
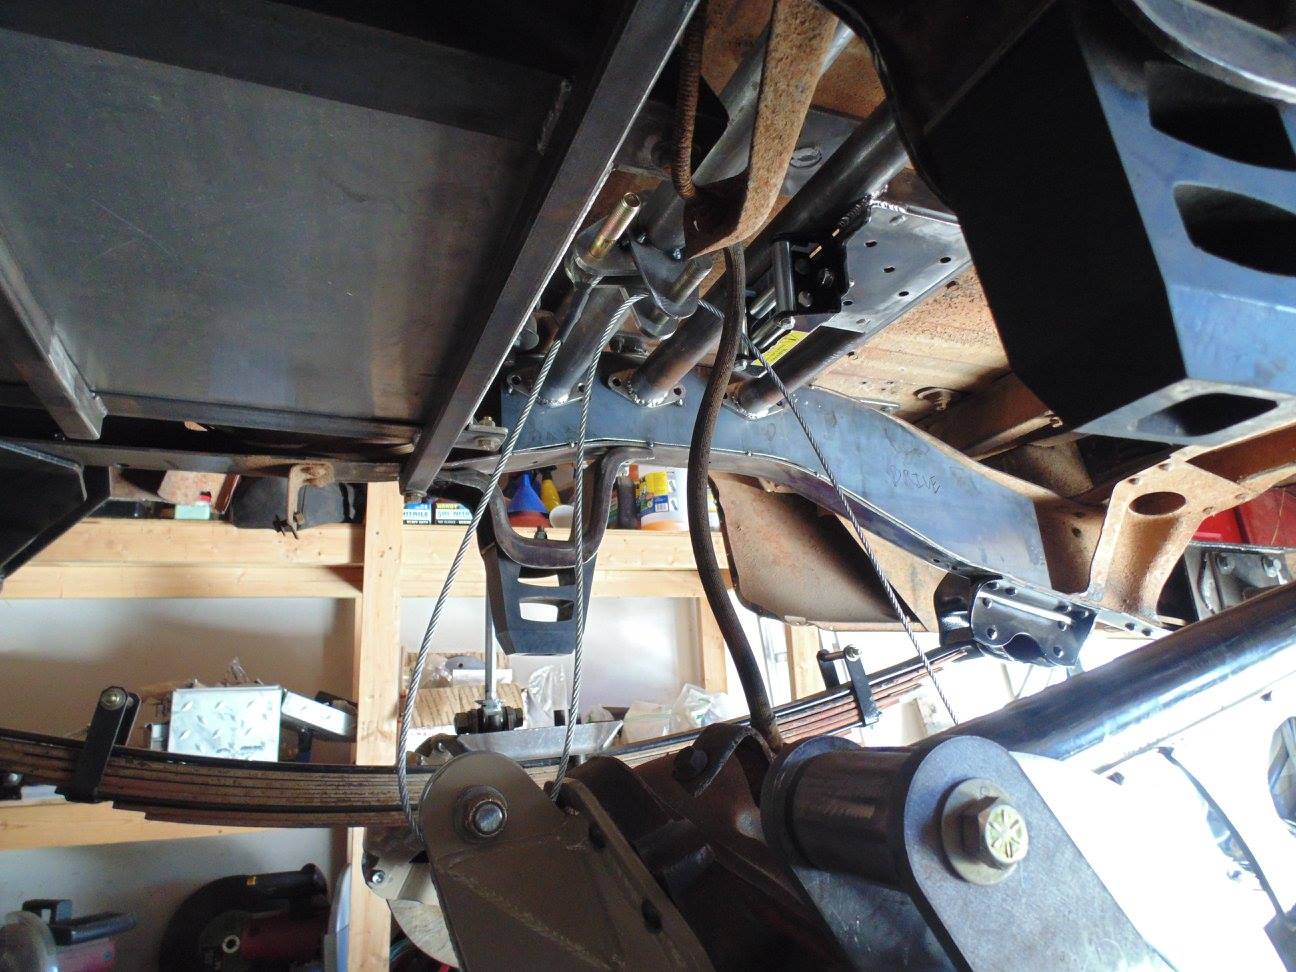
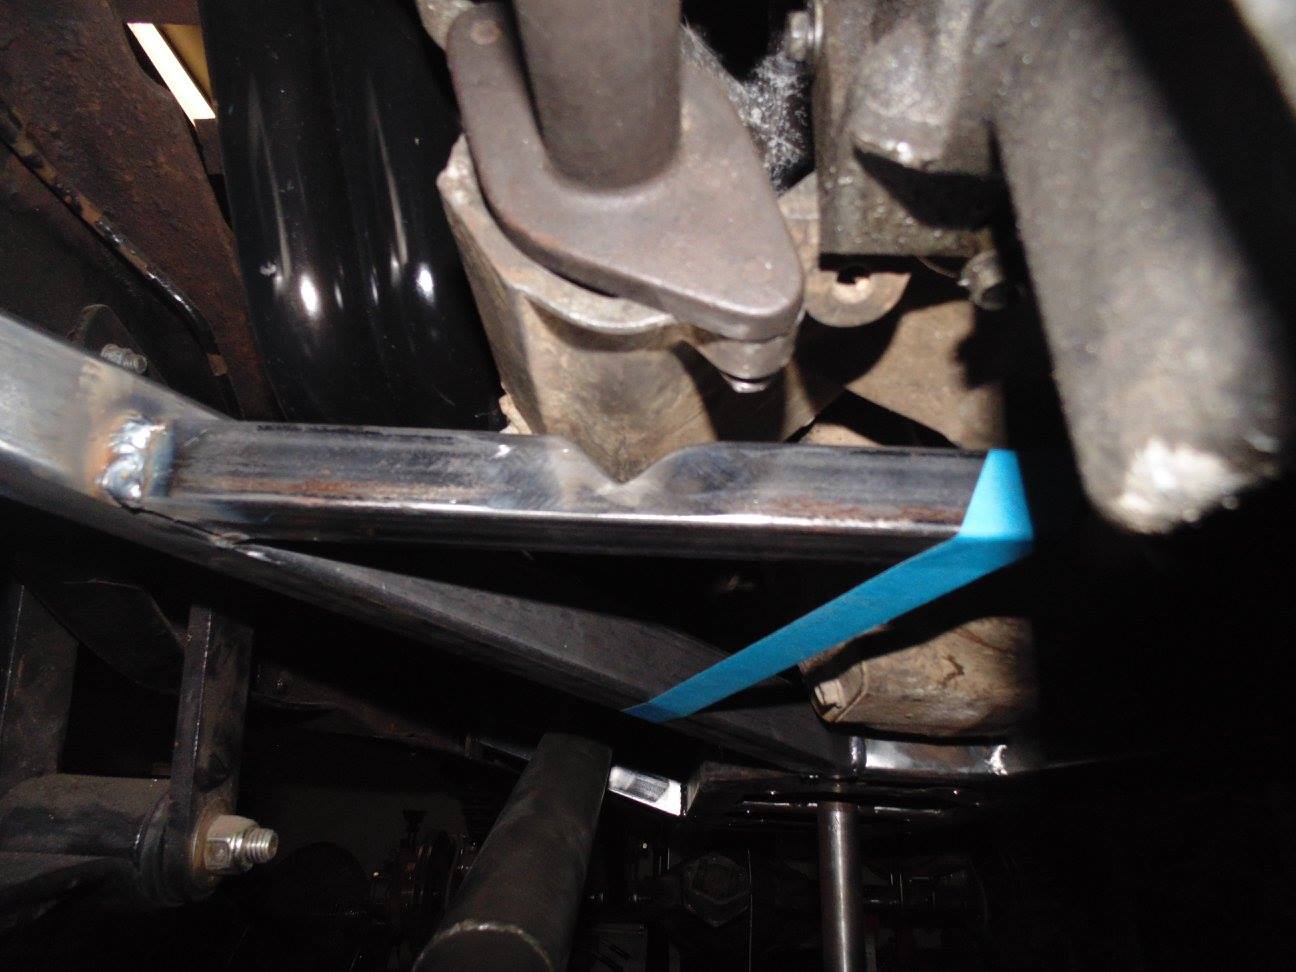
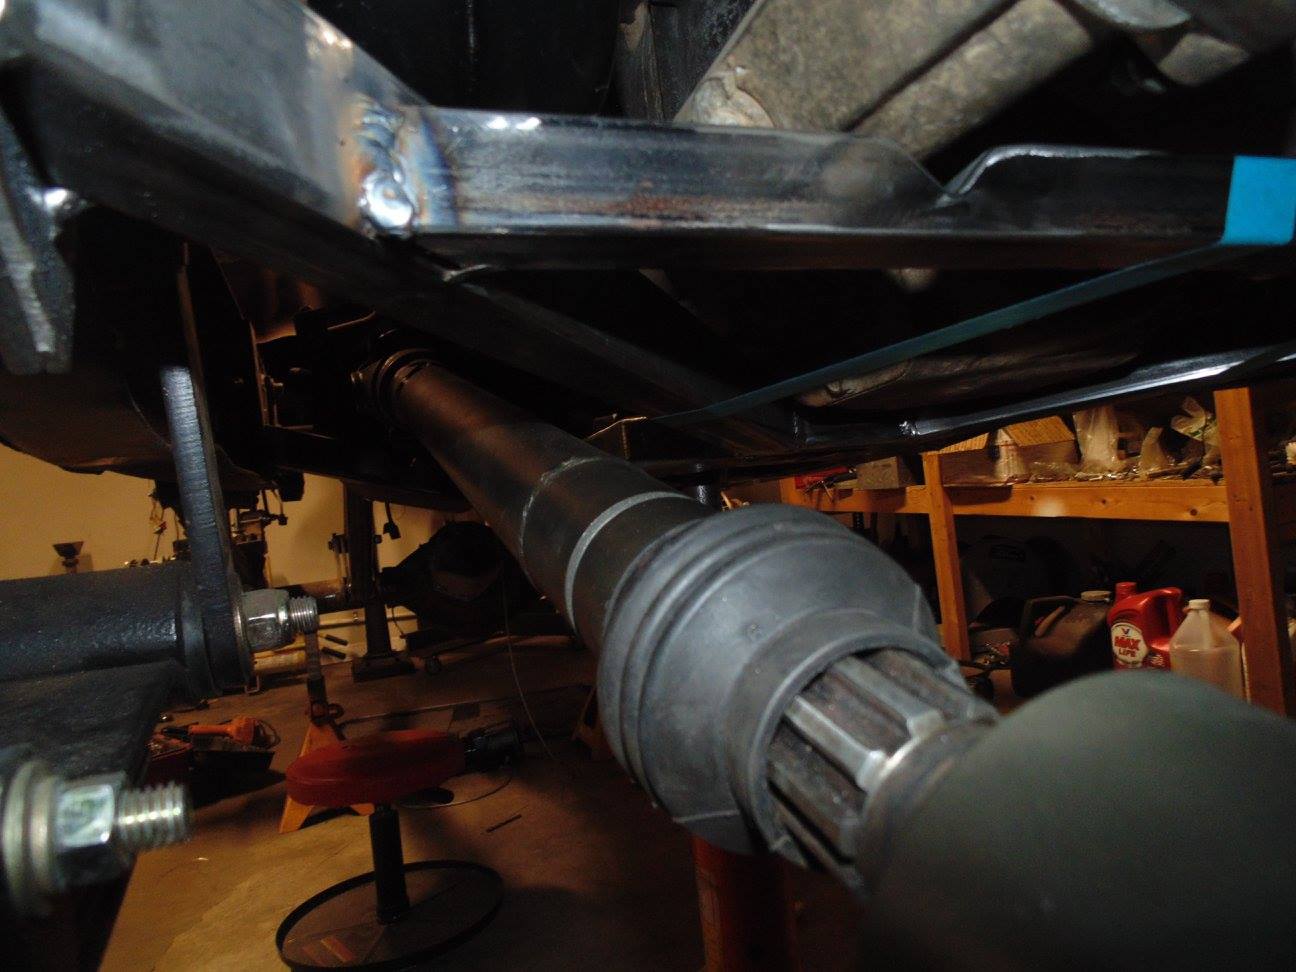
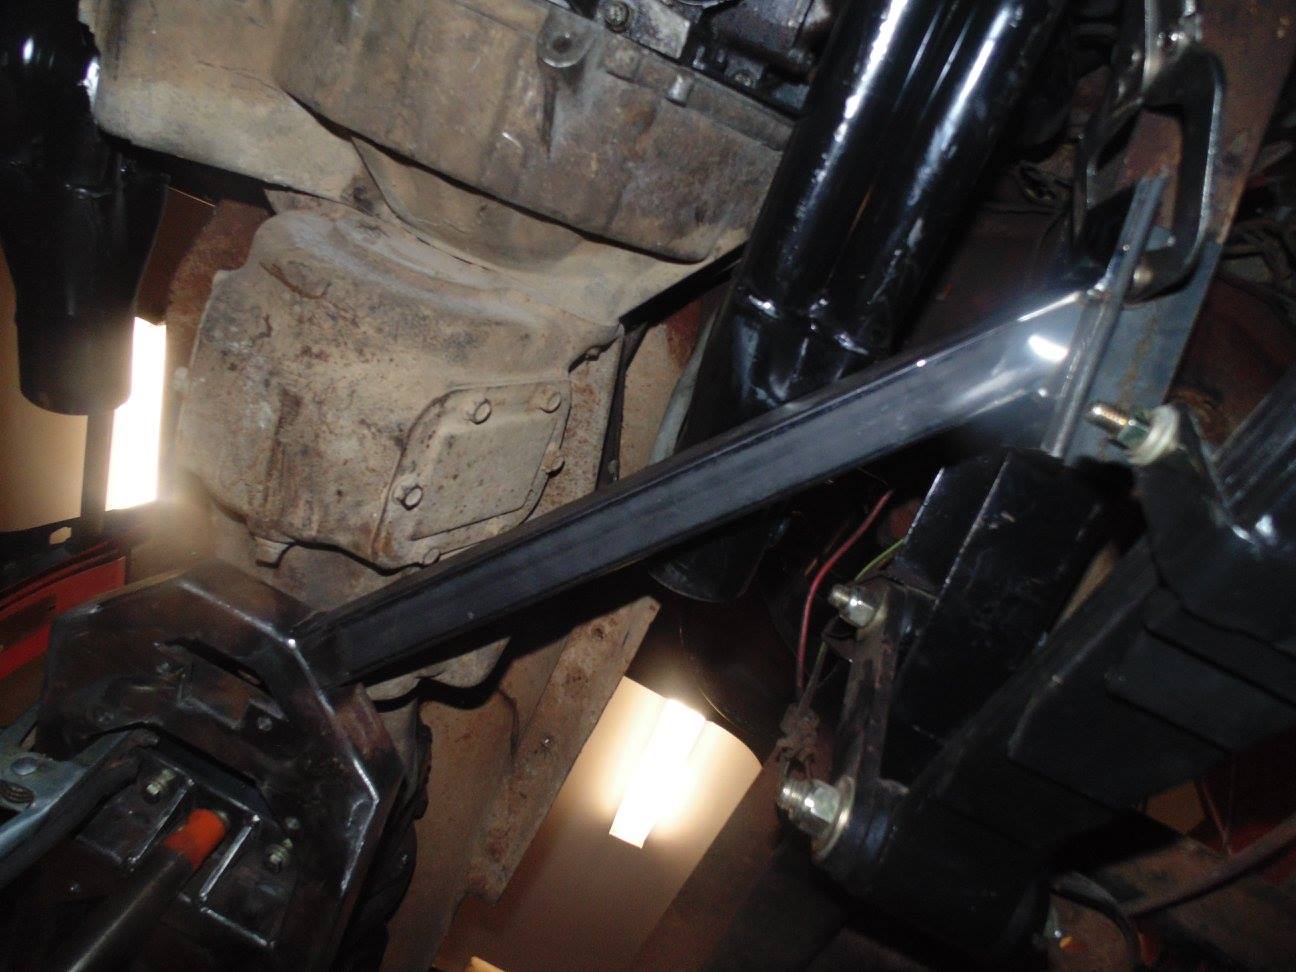
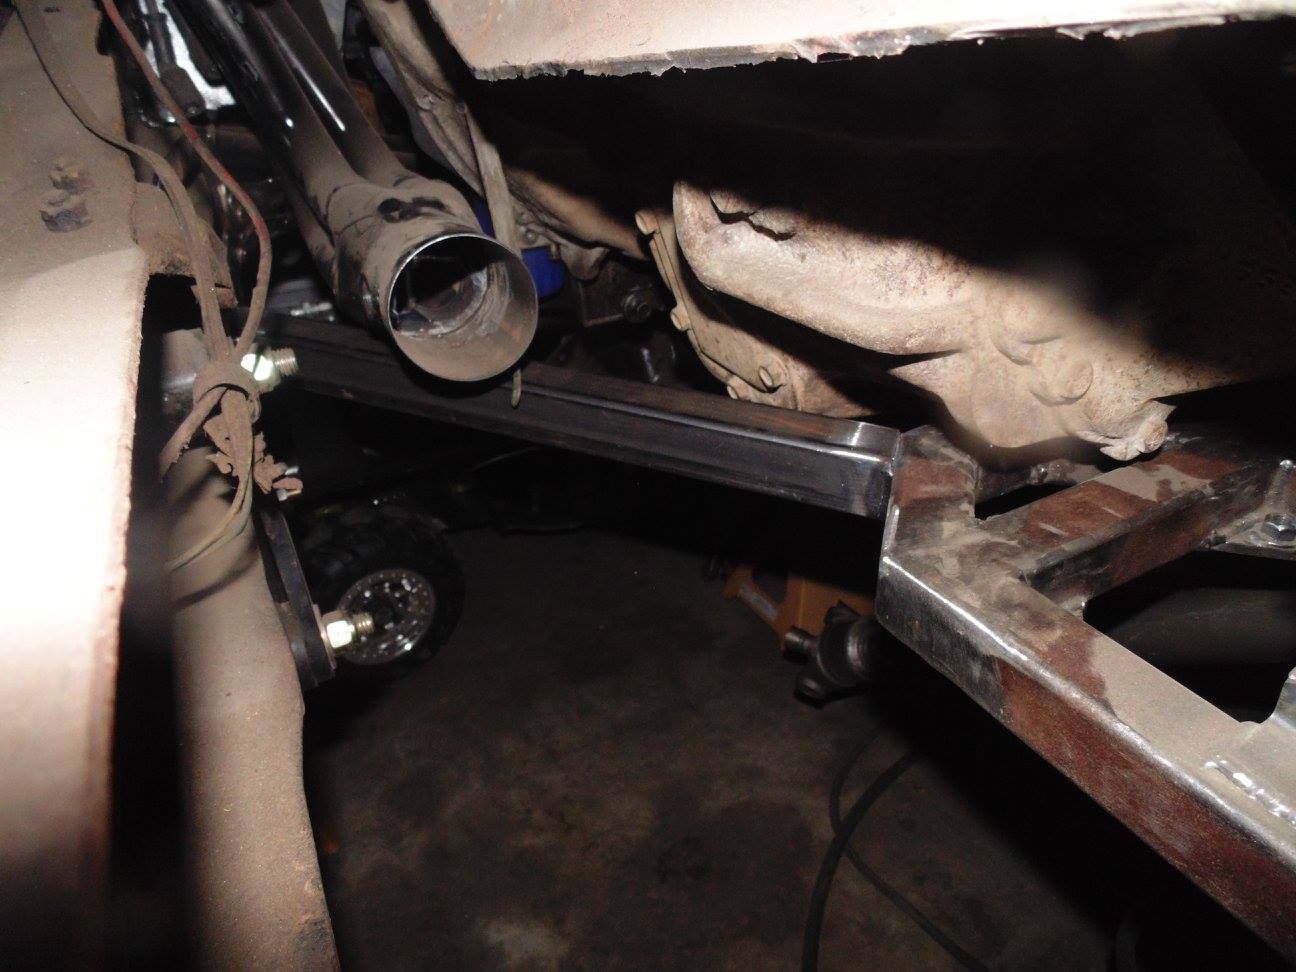
Started to figure out how the heck I was going to support this belly skid up front. I am building it symmetrical as possible so I had to go way out in front of the shackle hanger for the necessary driveshaft clearance on the passenger's side.

I am either going to add another piece of tube or maybe some plate gusseting to brace the long diagonal tube back to the skid better

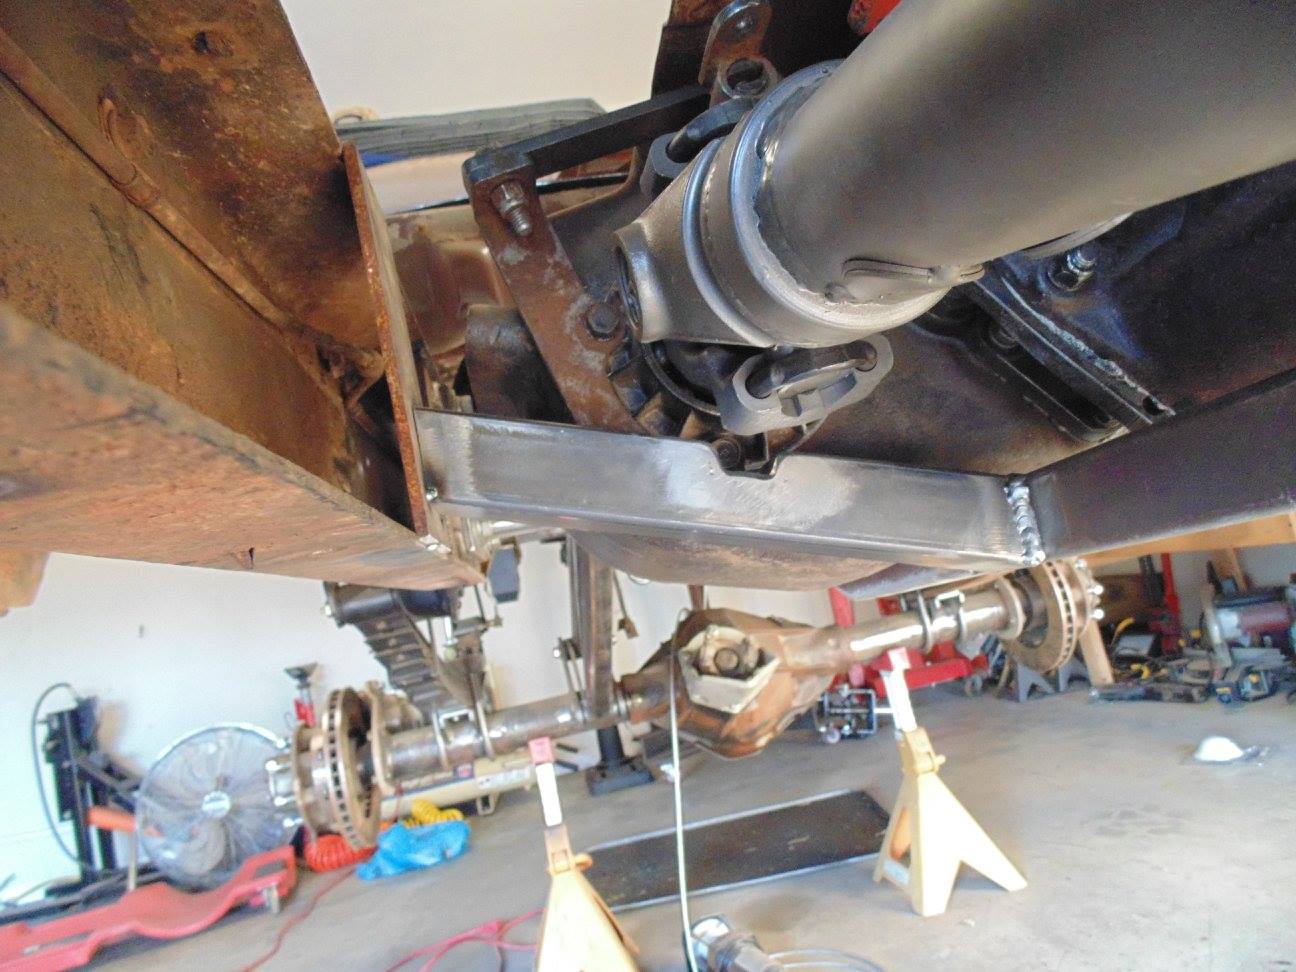
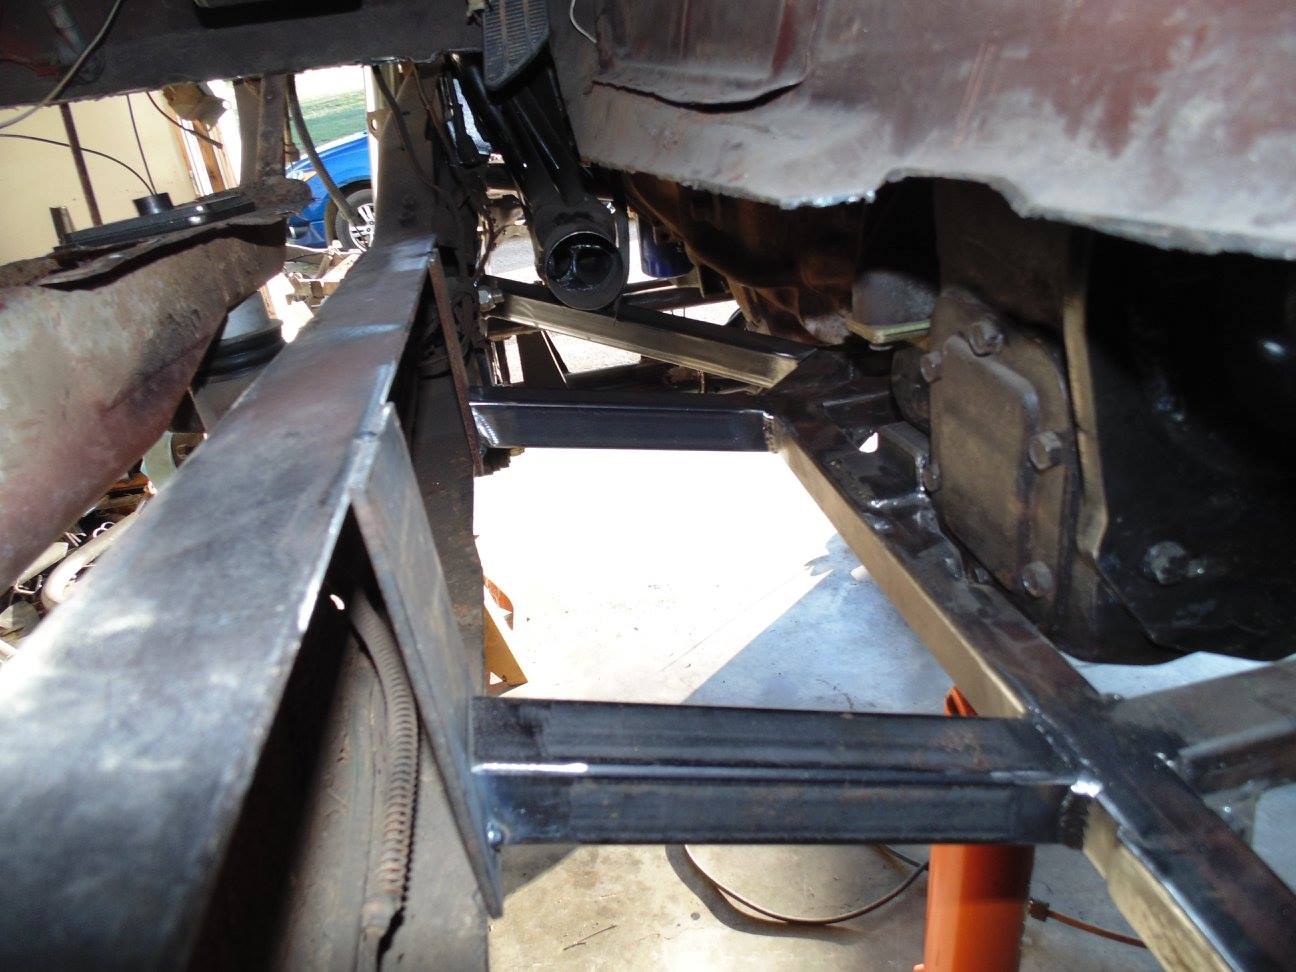
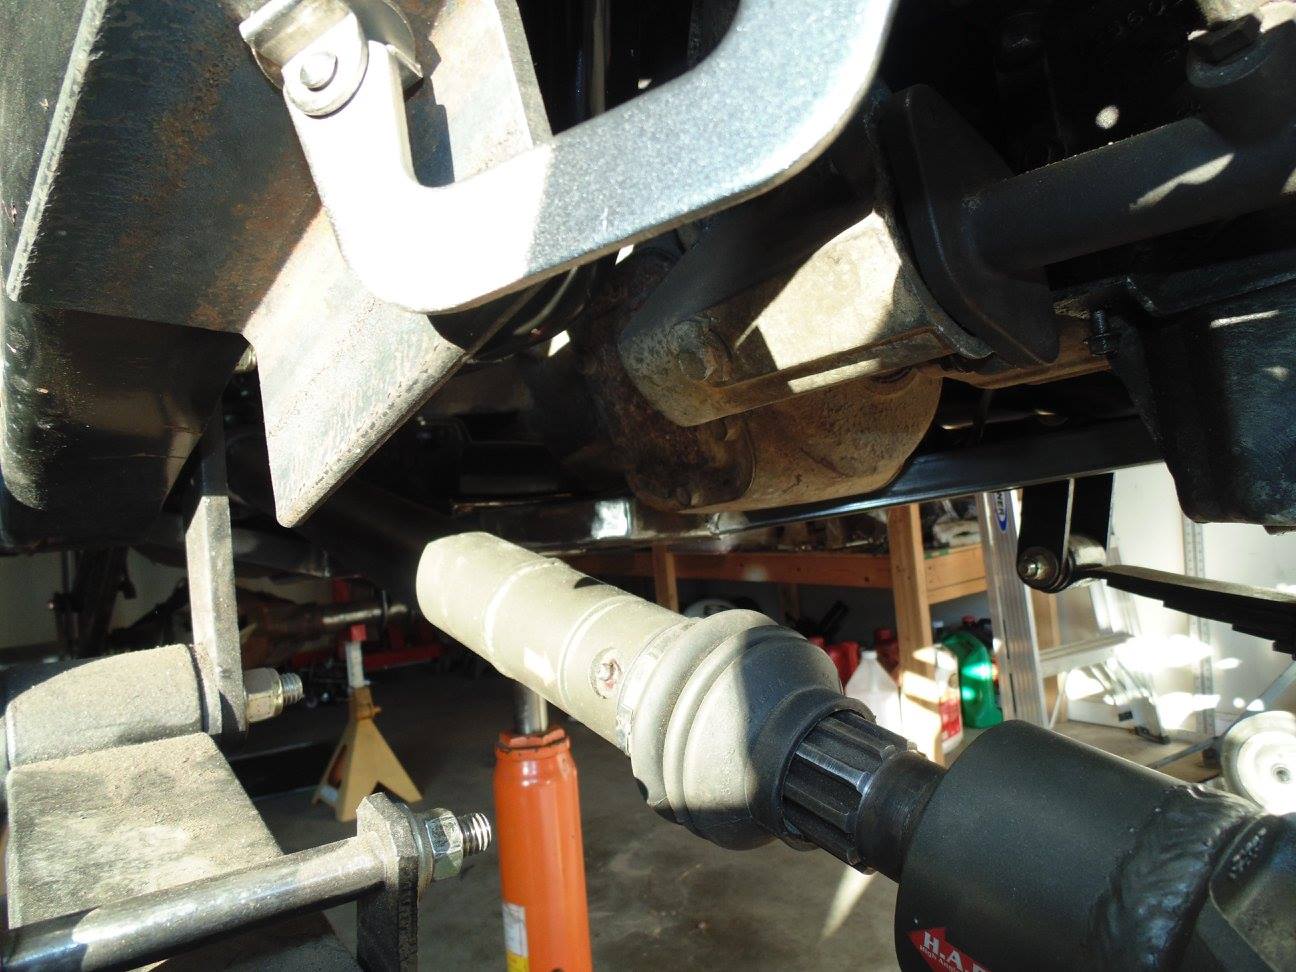
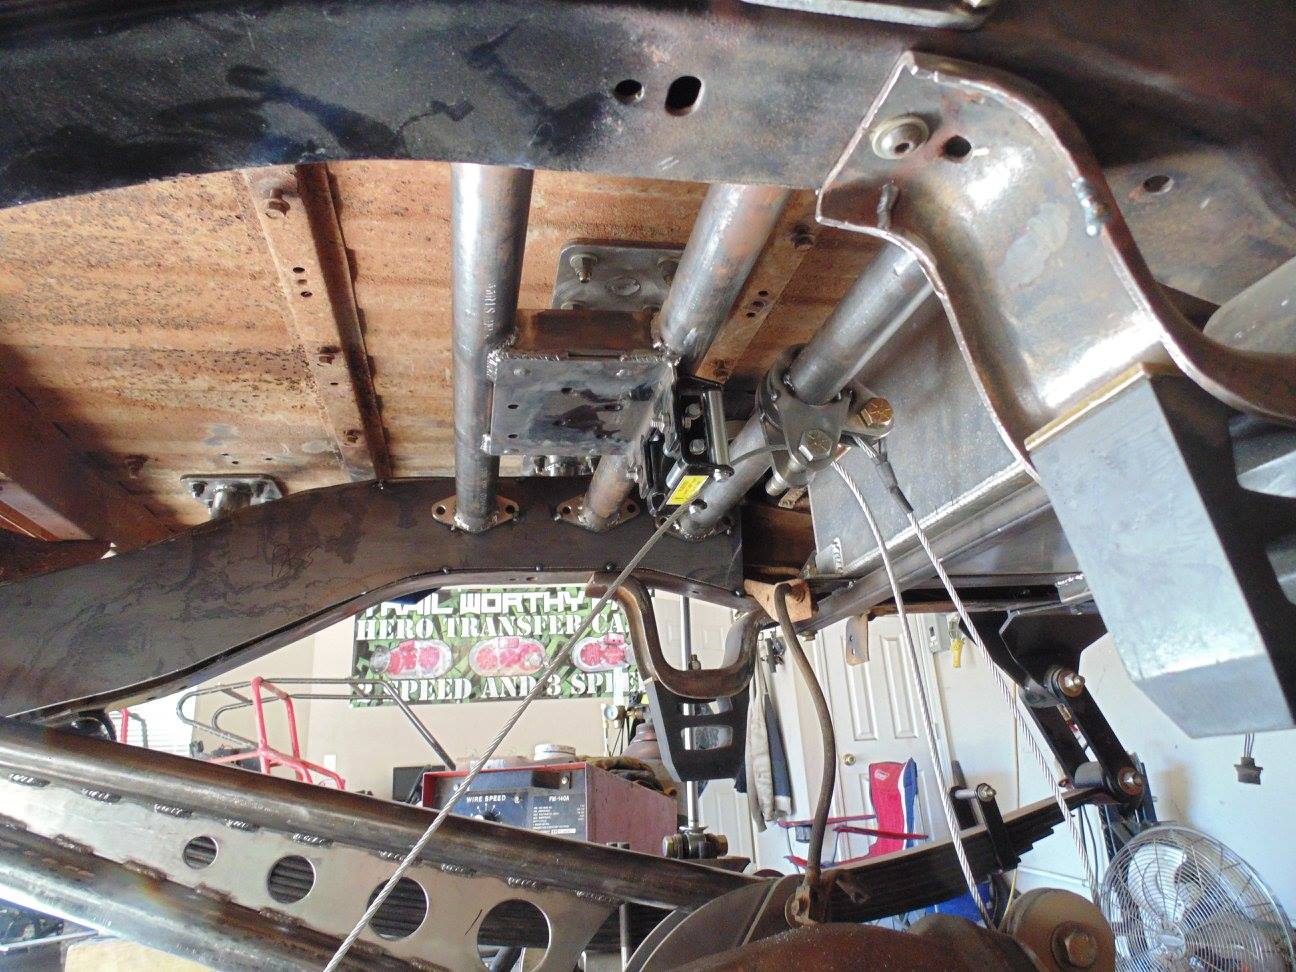
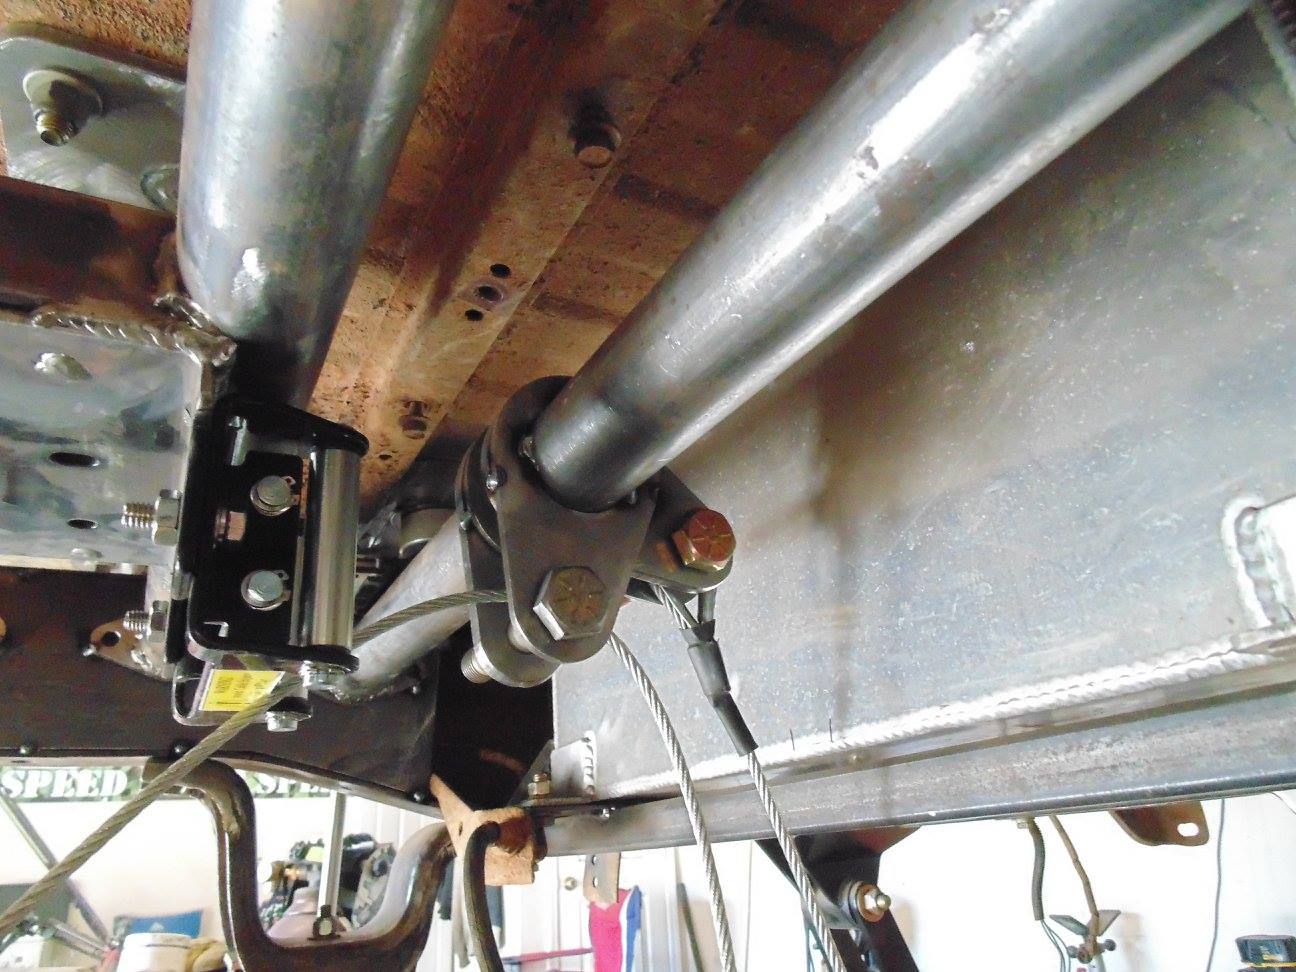
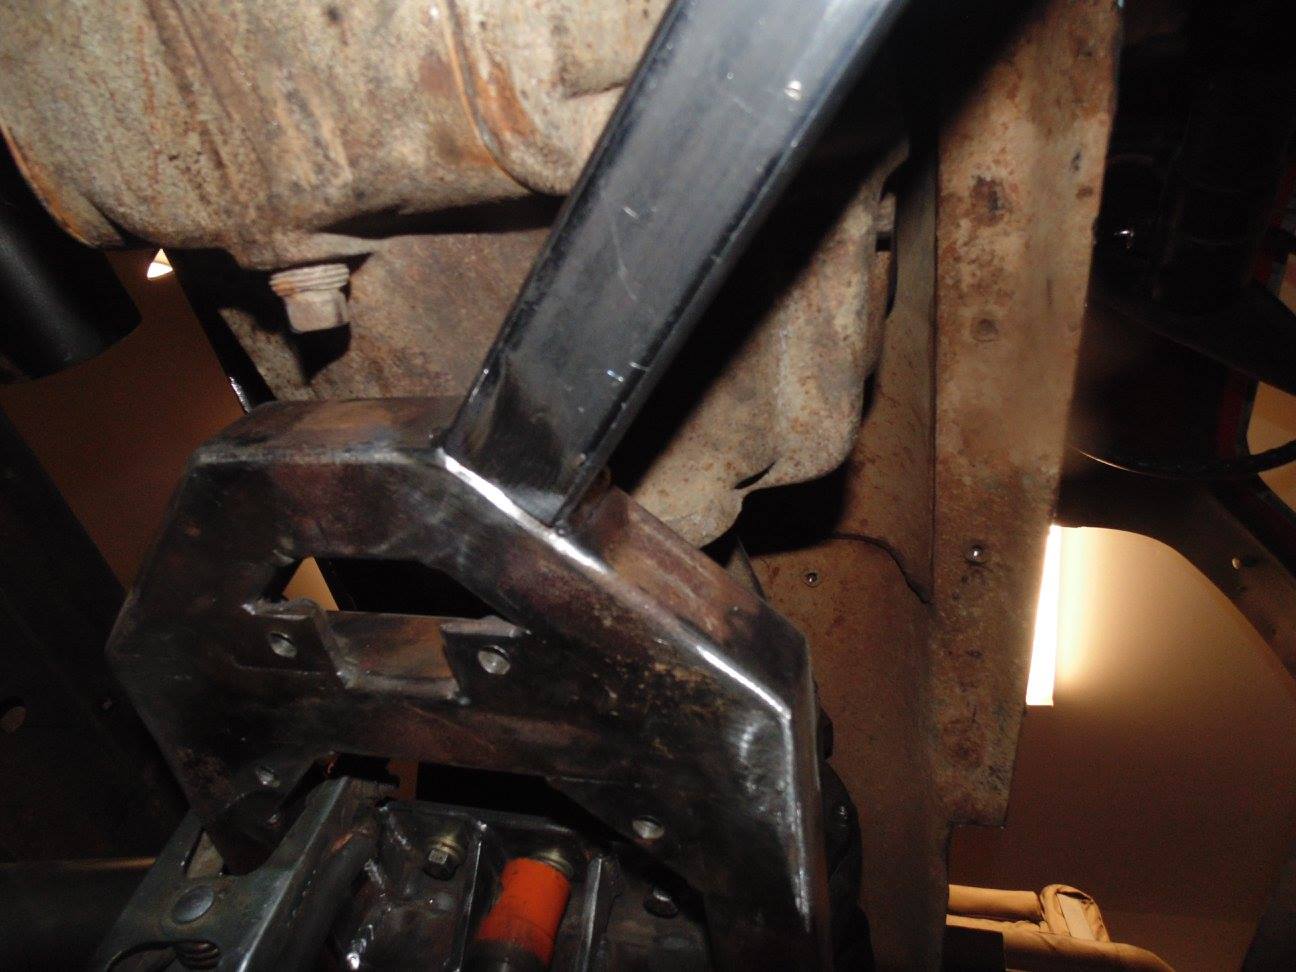
I put this as tight up against the header as I could to leave as much clearance for the spring and driveshaft (on the other side) as possible. This solution is not the most attractive in my opinion but it was the best compromise I could come up with

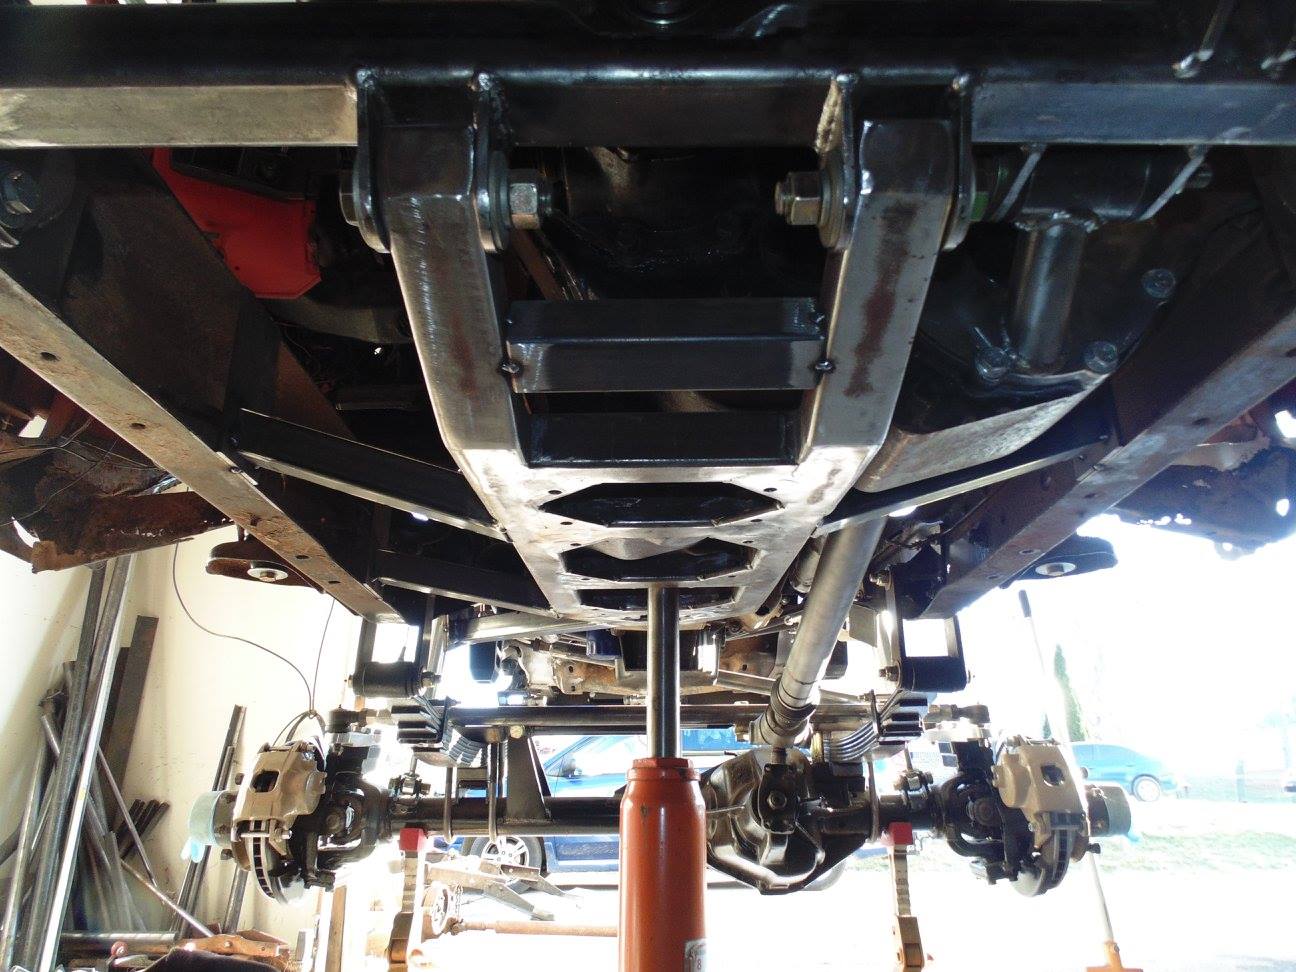
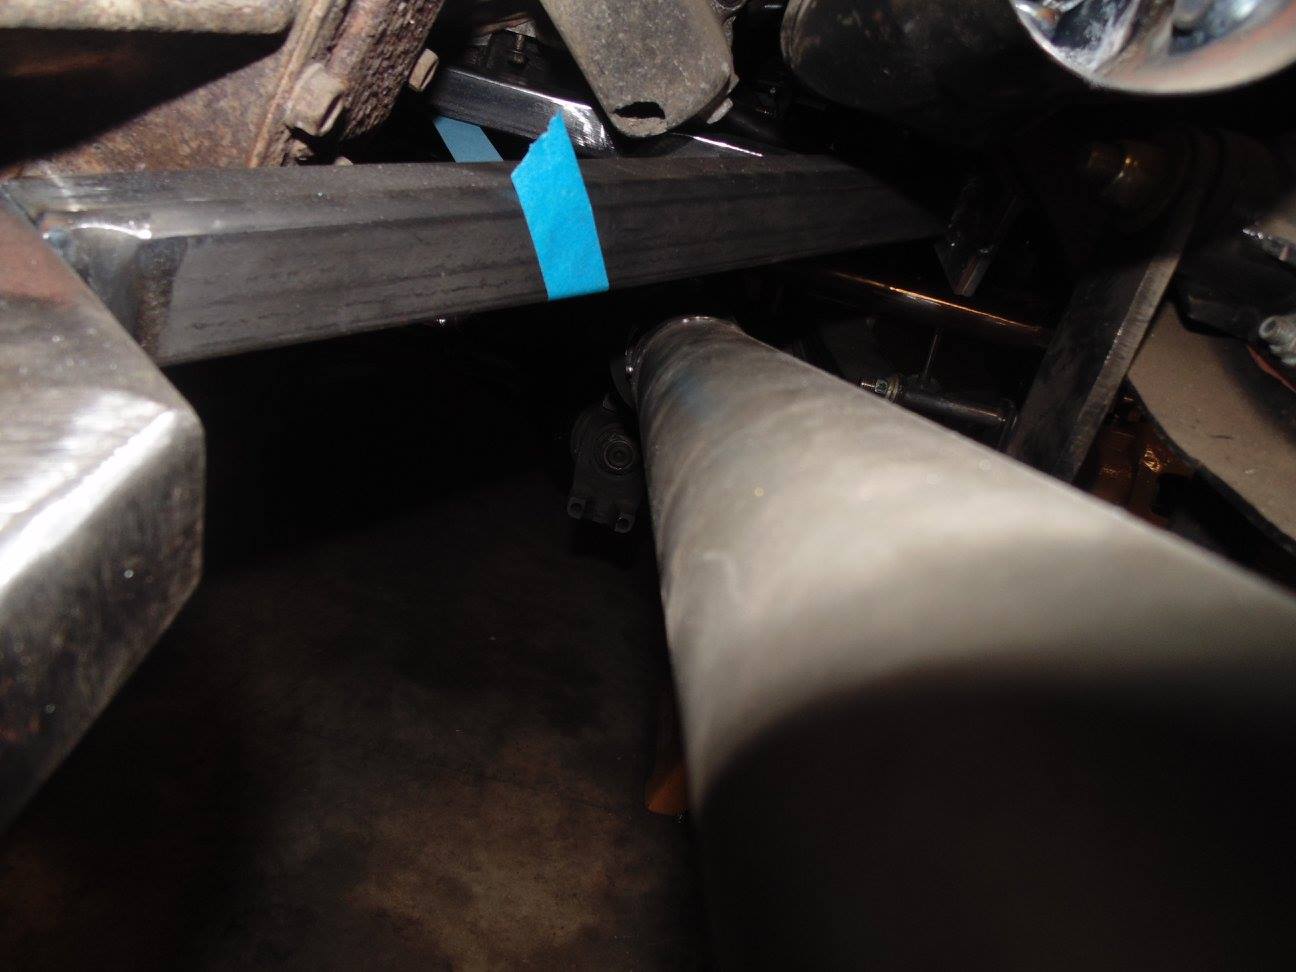
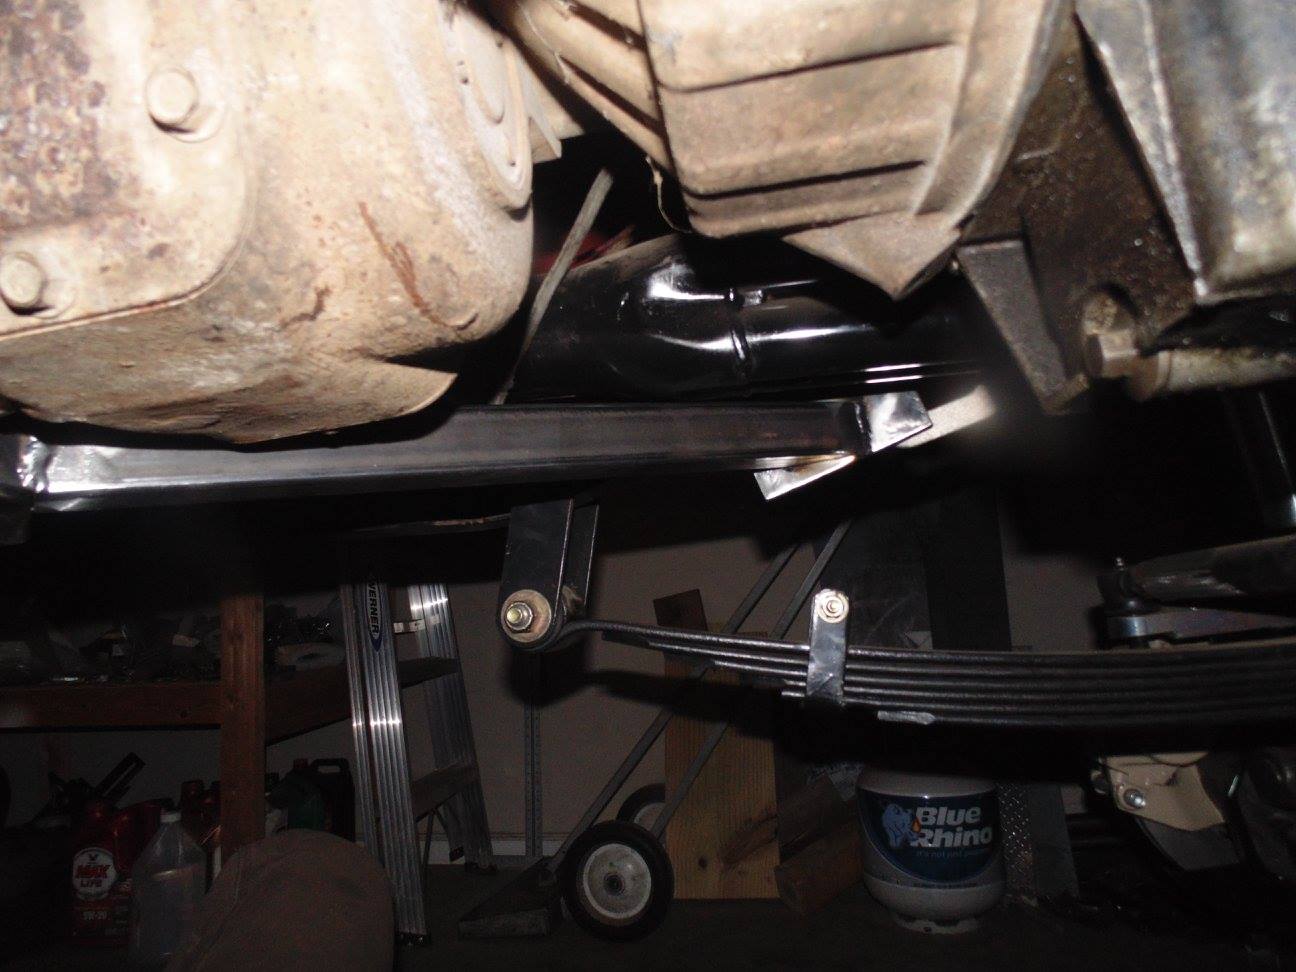
I believe this should still leave plenty of room for the shackle at full droop. I will be gusseting both ends of the 2.5" angle and then welding flange nuts at all 4 corners of the tube side of the 3/16 tie in plate. Bolts will come through from the angle iron side. Not sure yet if I want to bolt the angle to the frame or just weld it on

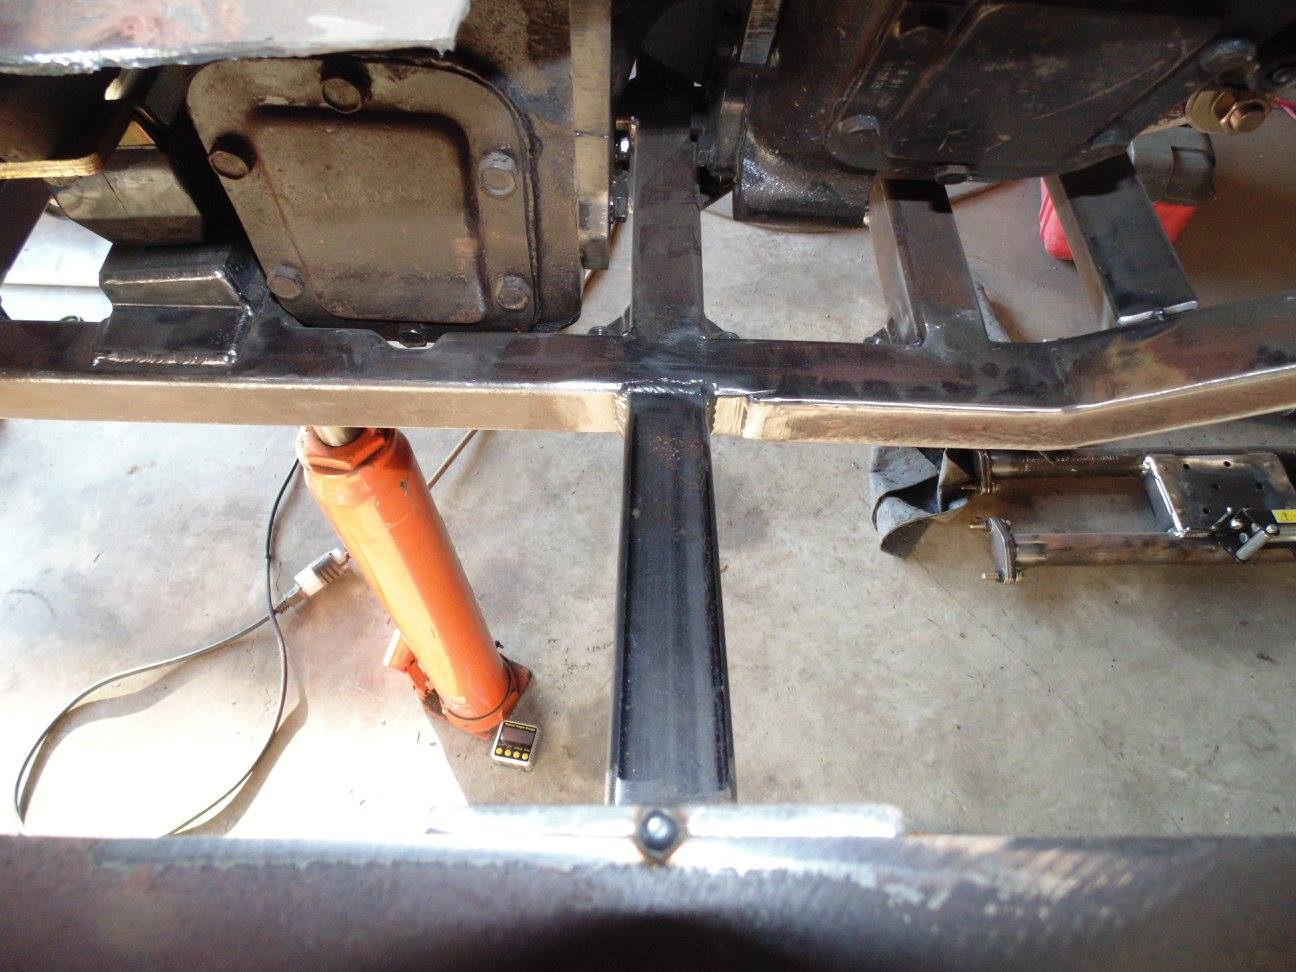
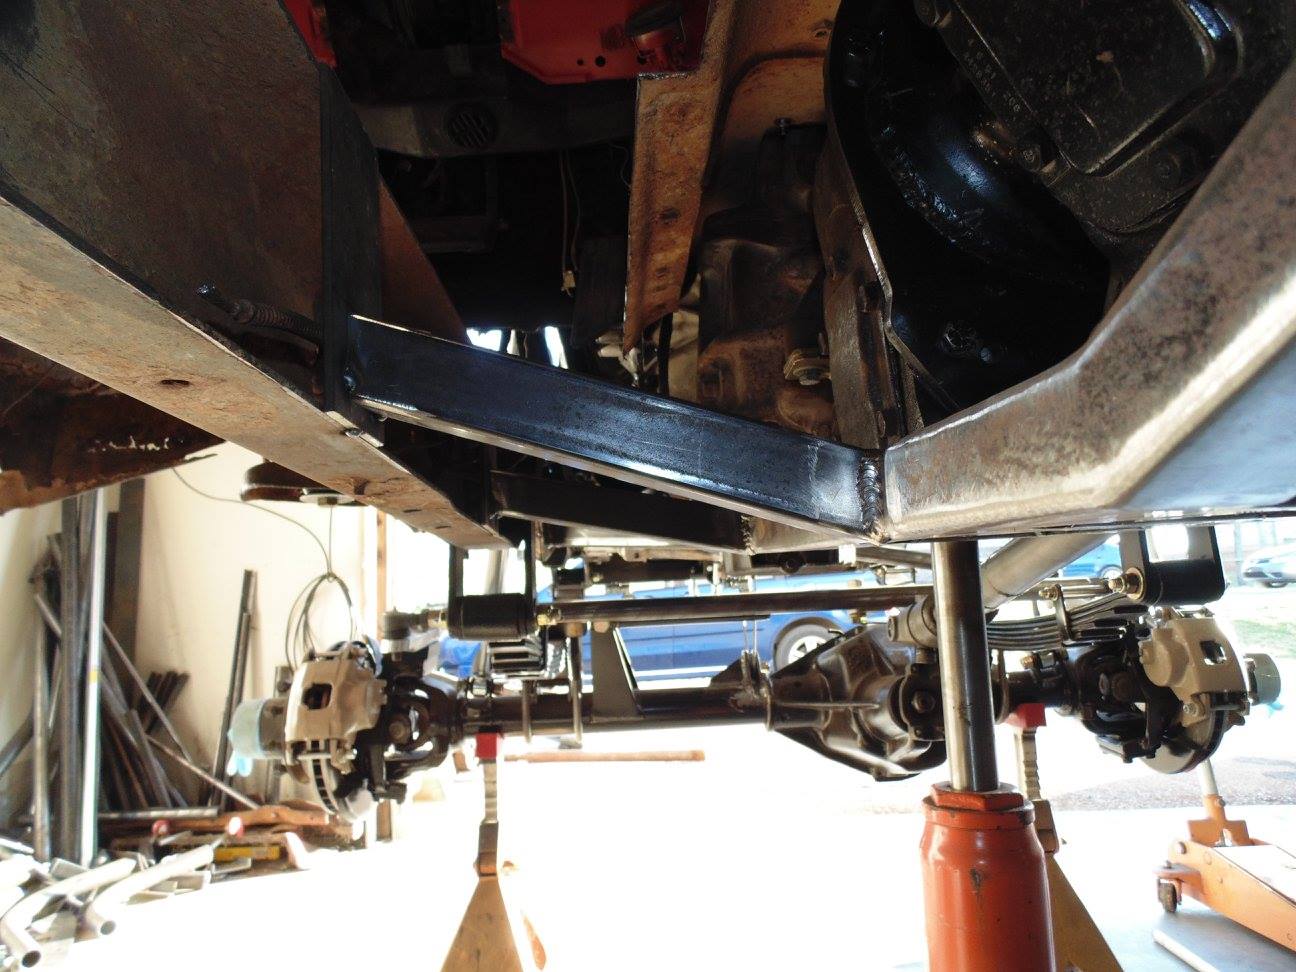
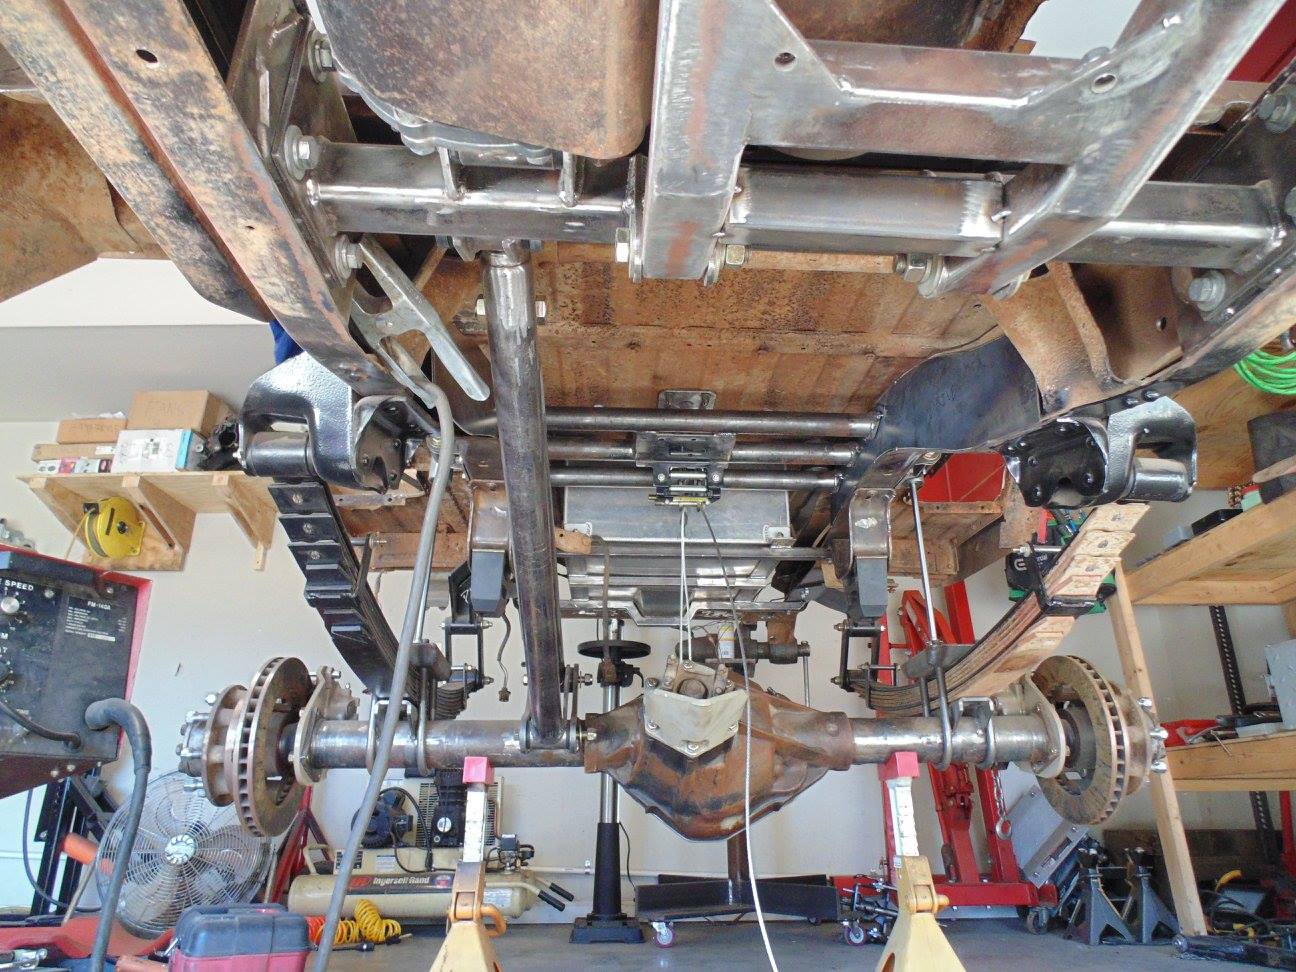
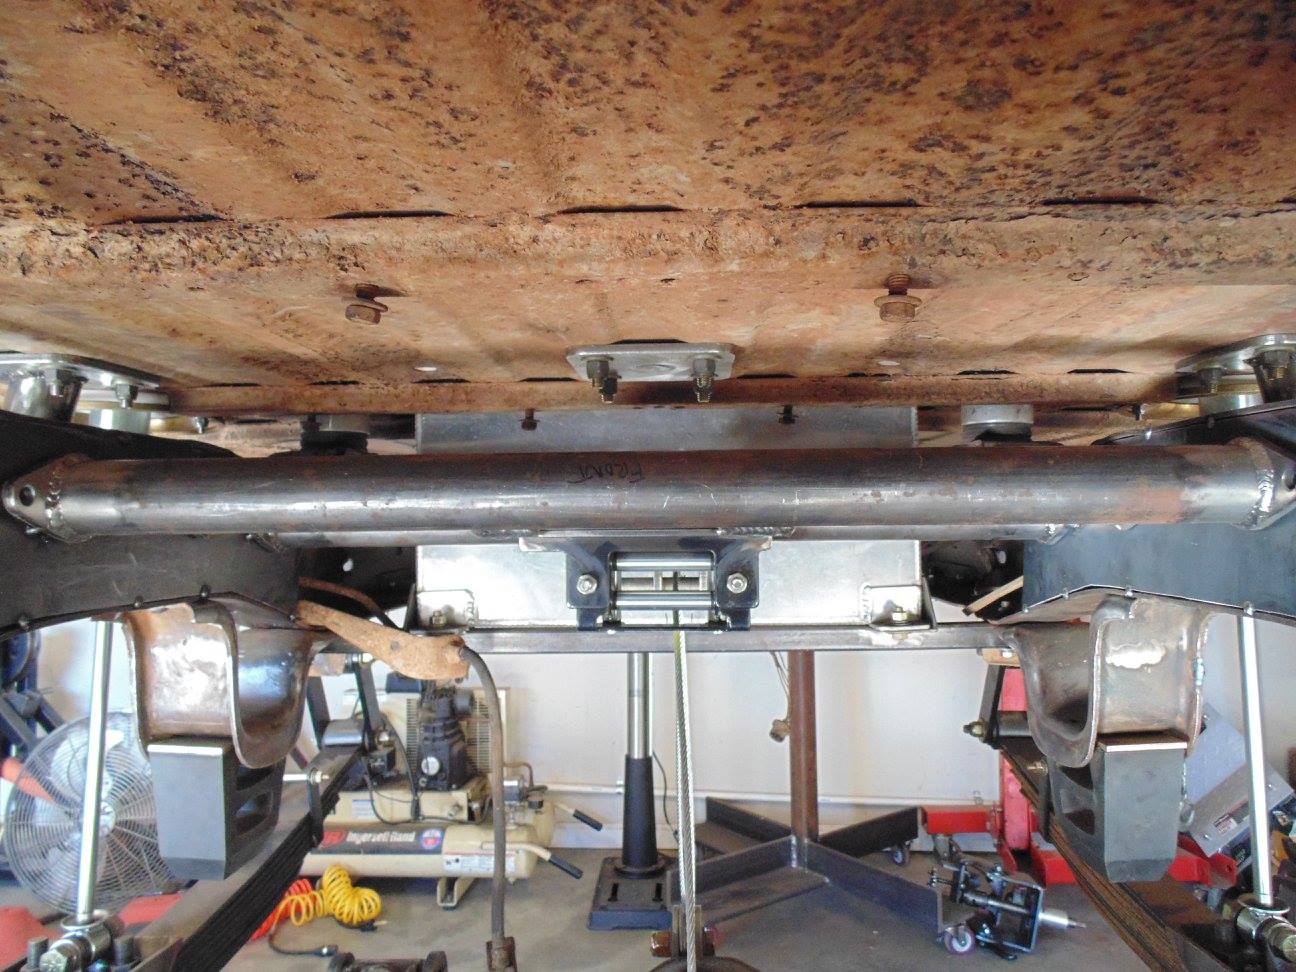
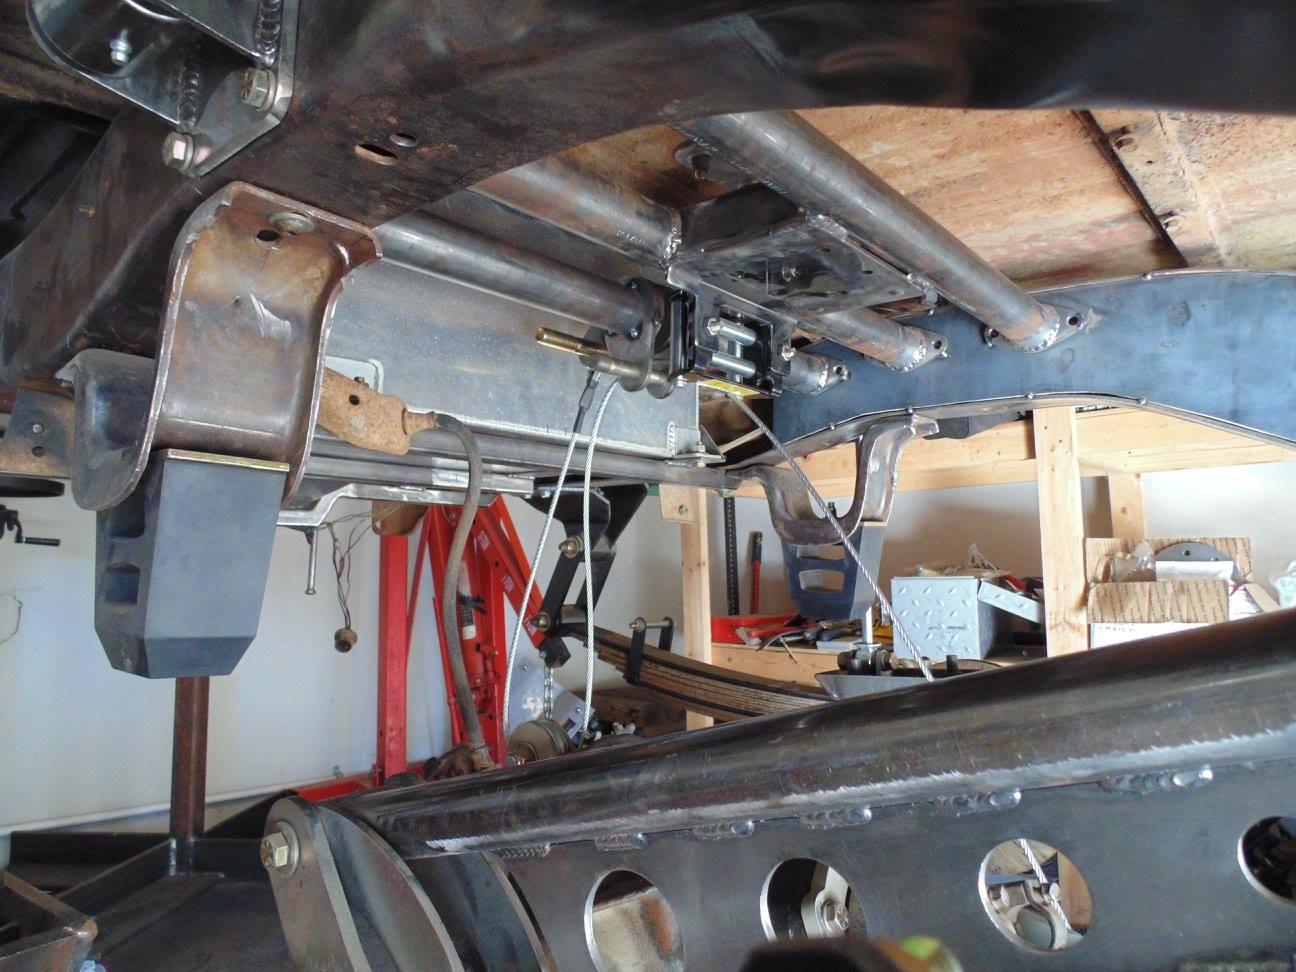
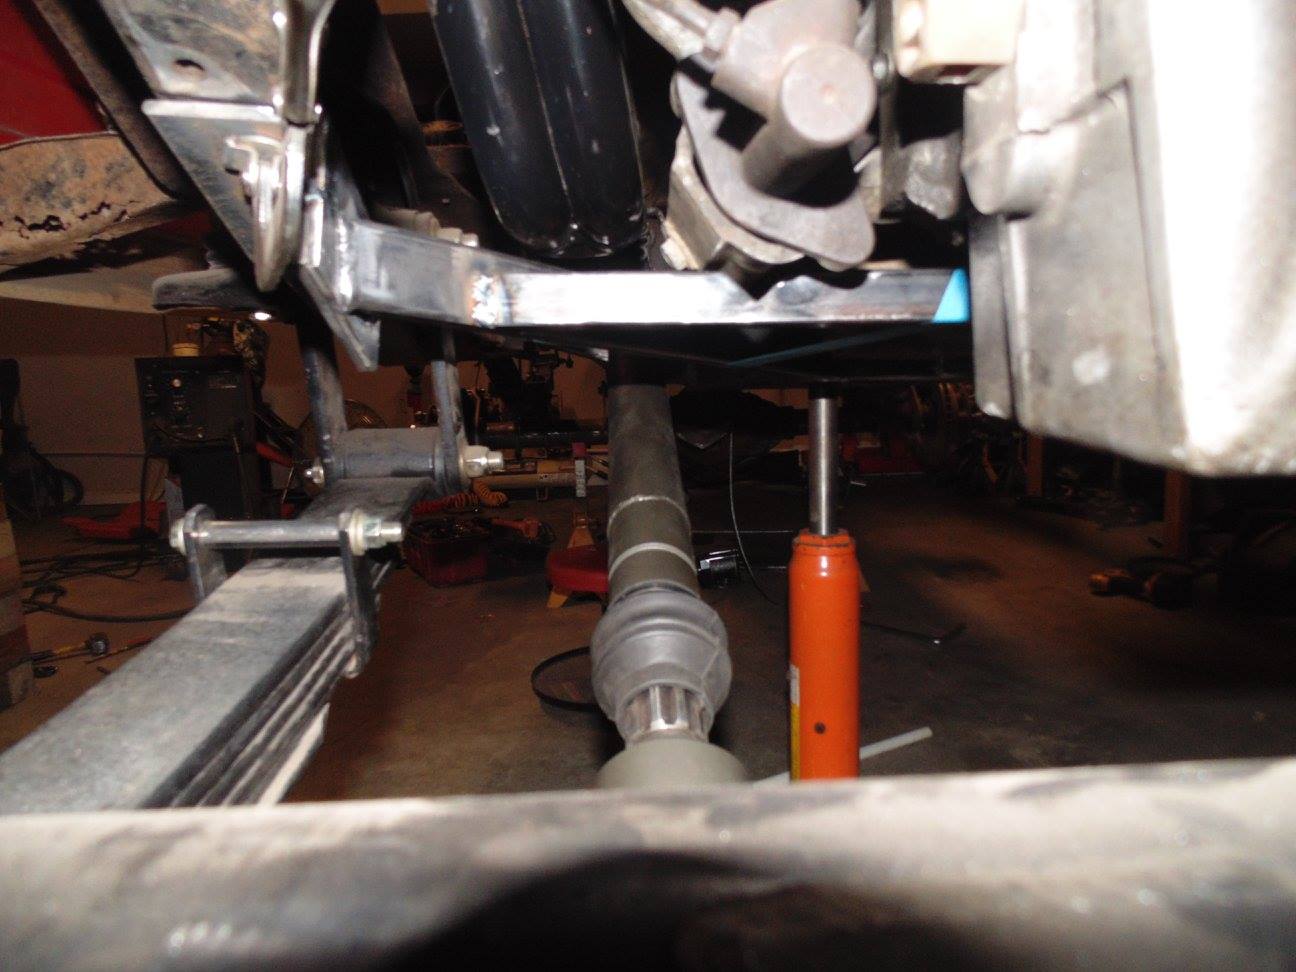
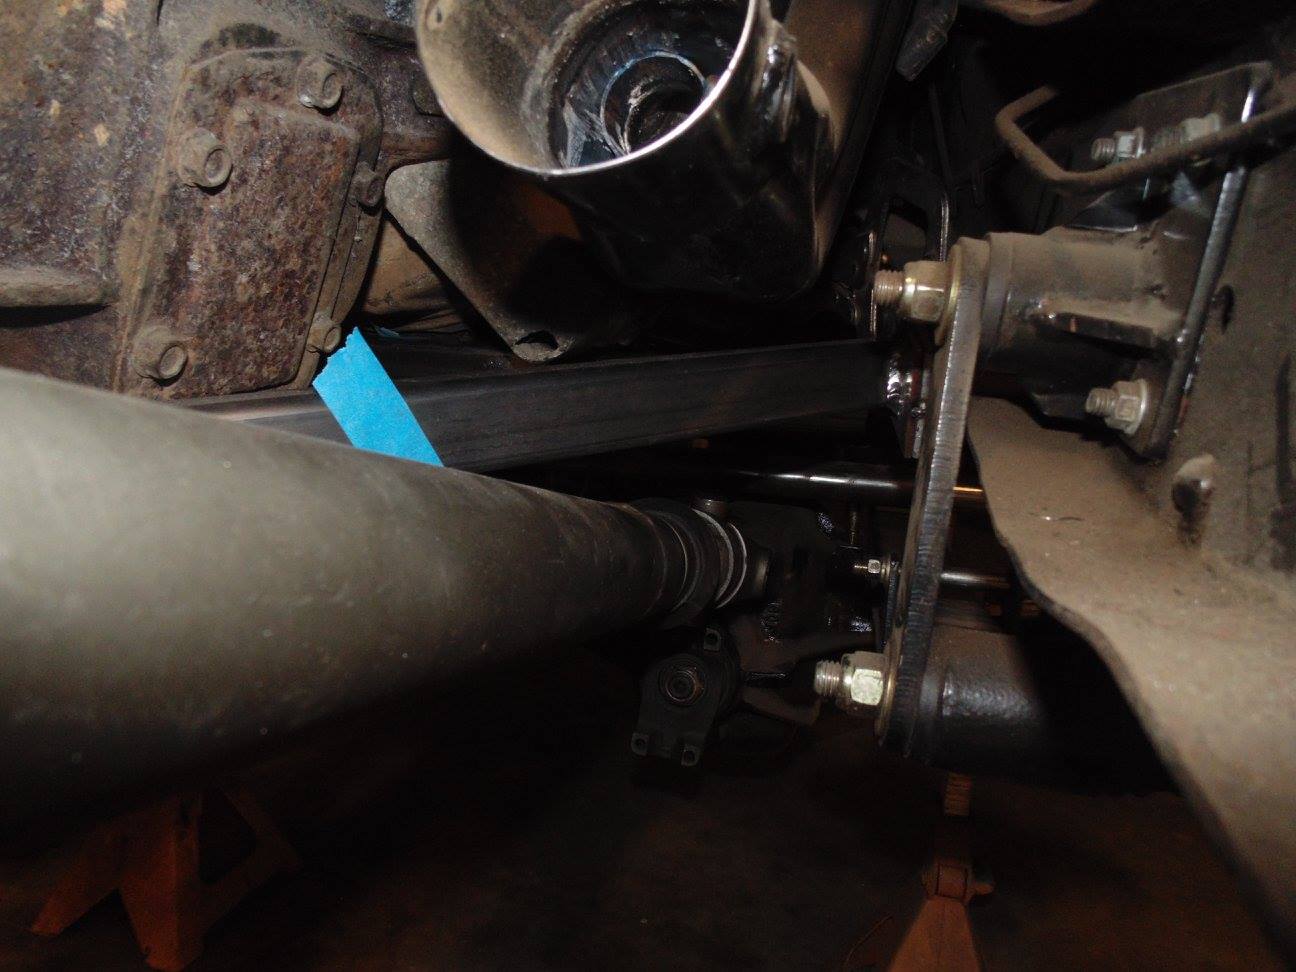
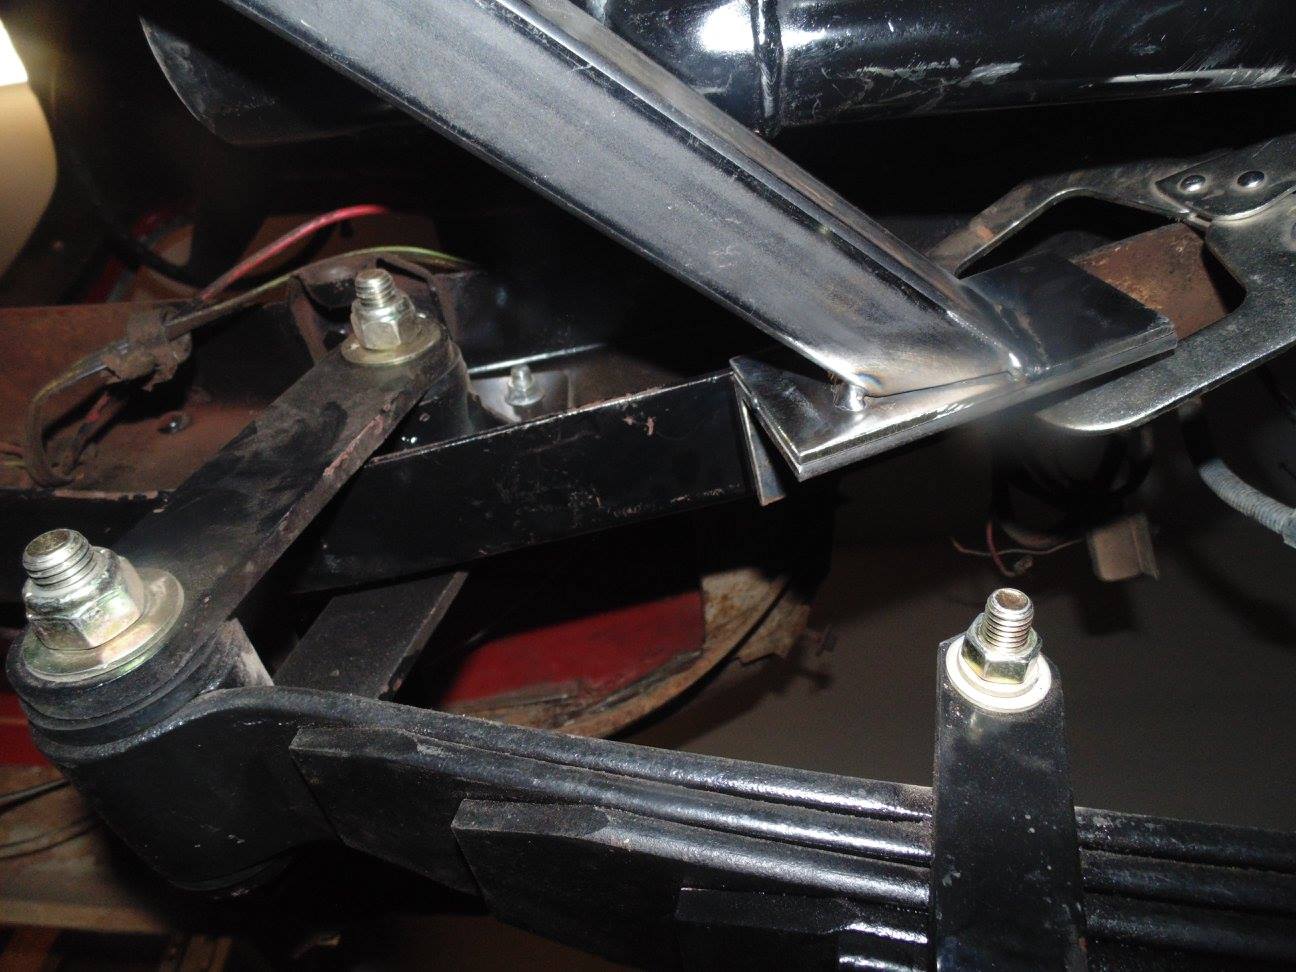
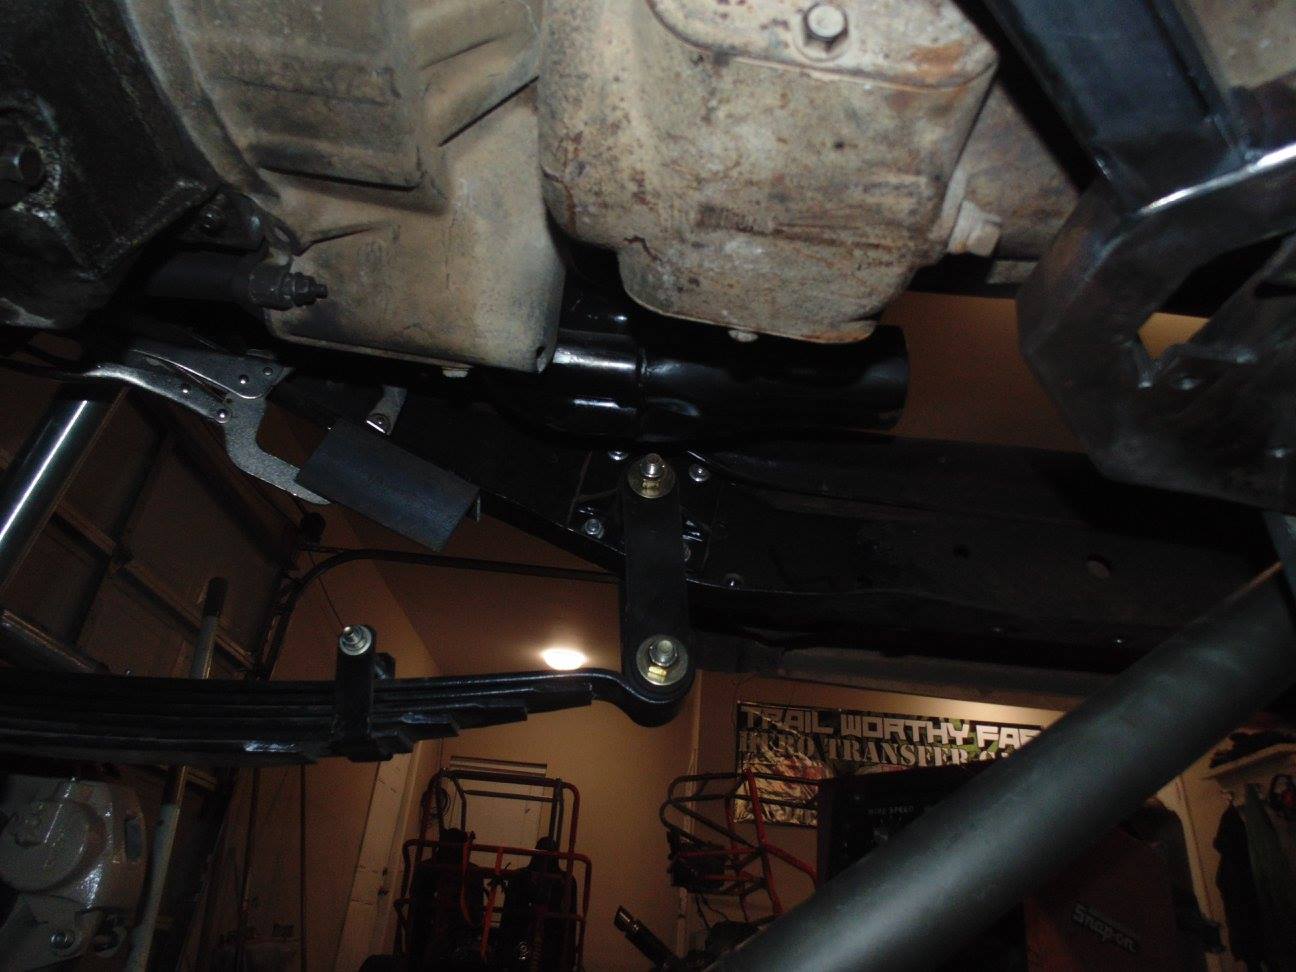
Top side shot of driver's side

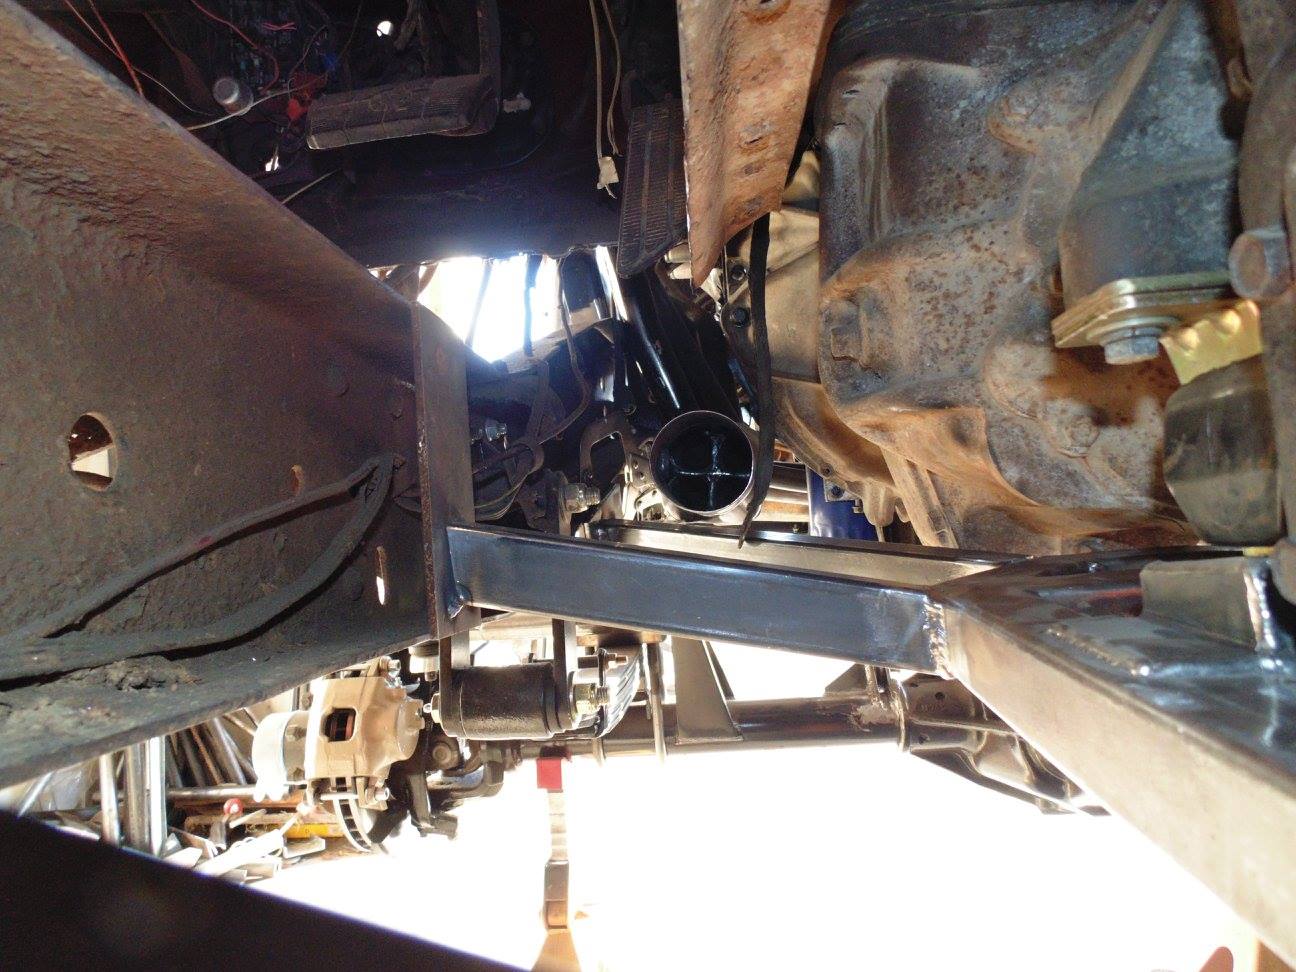
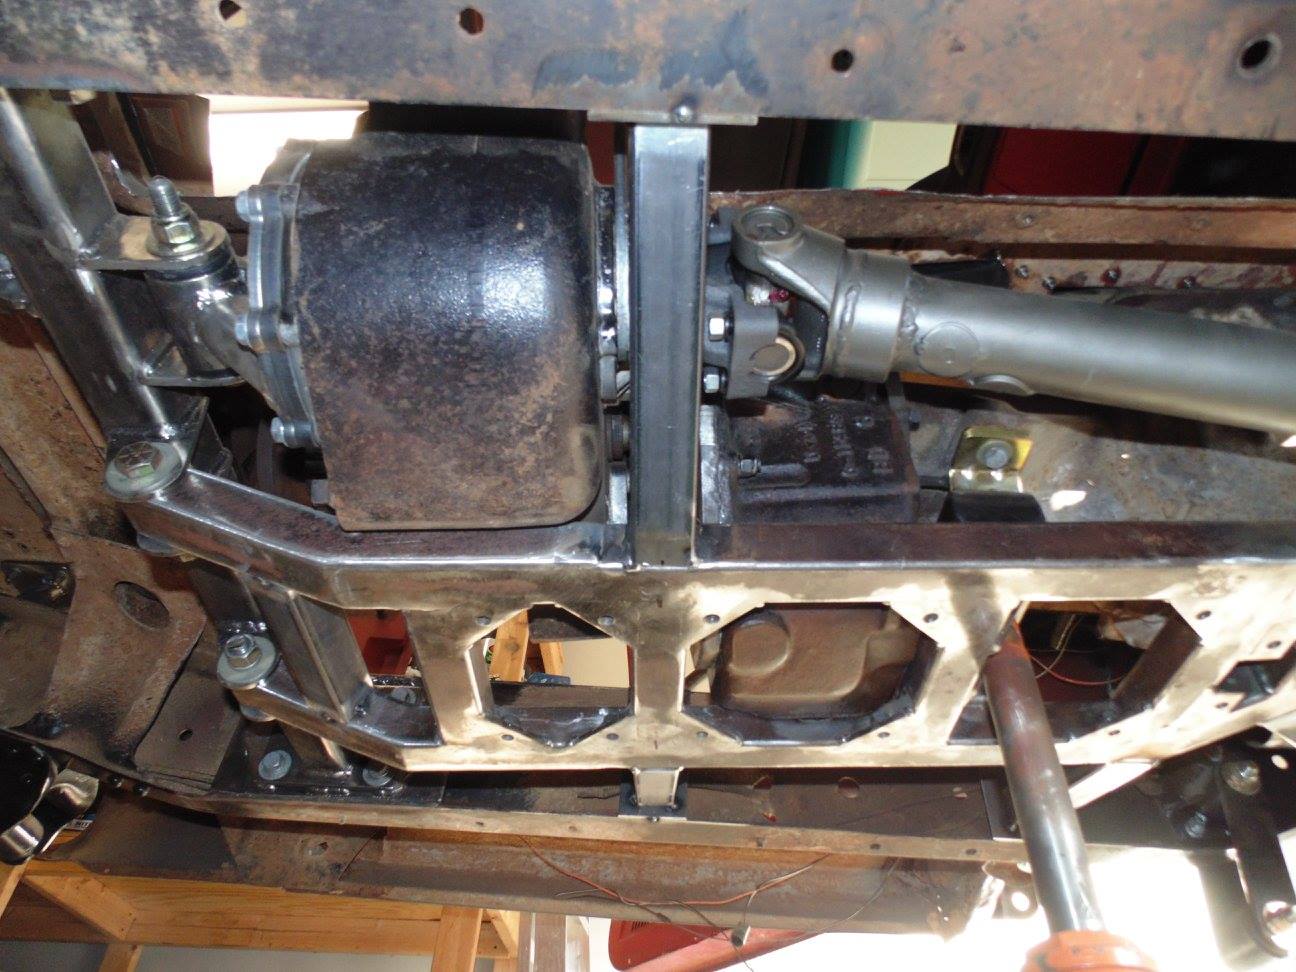
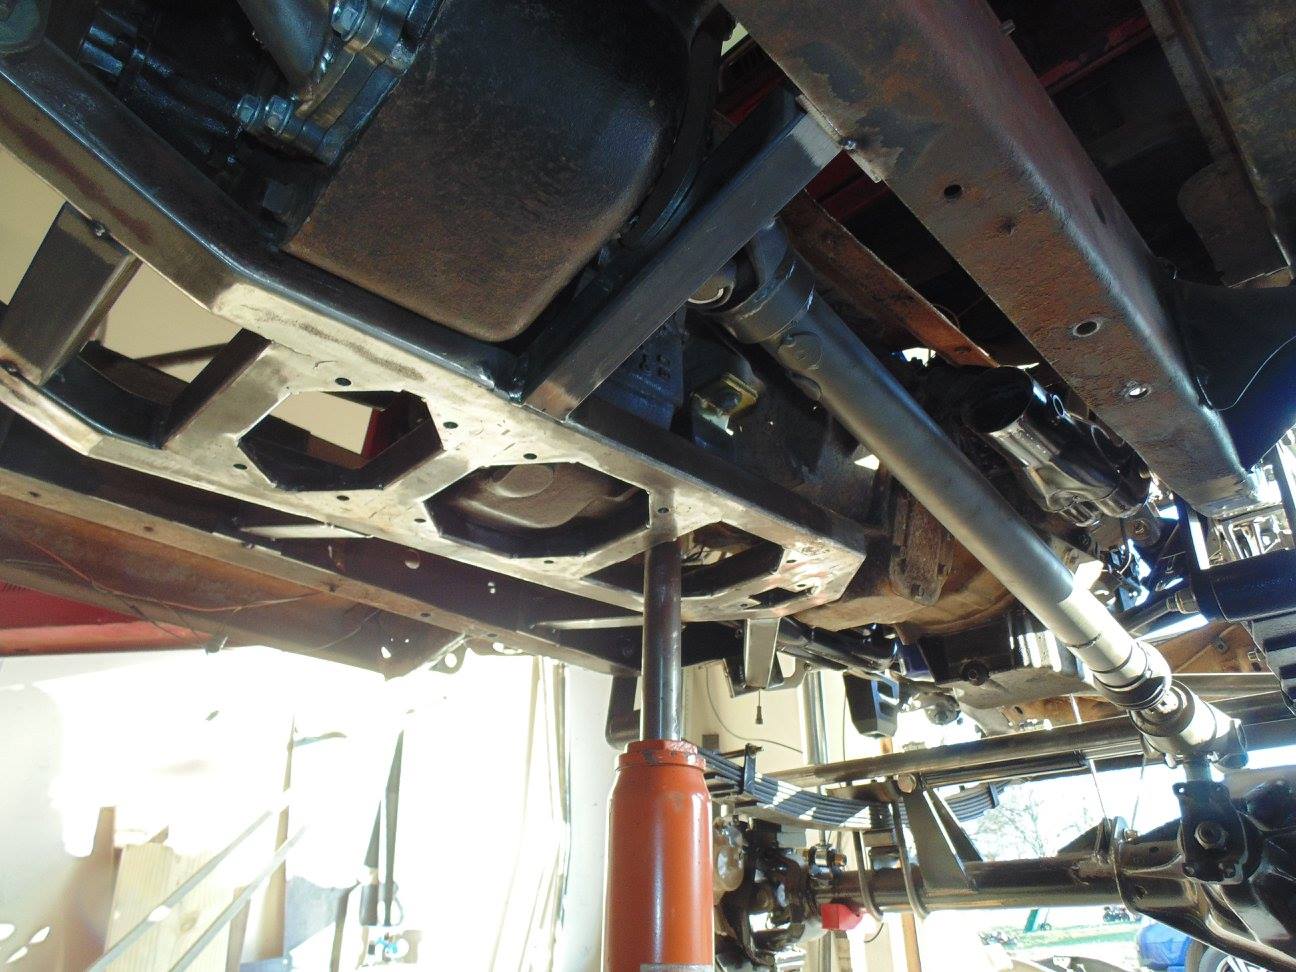
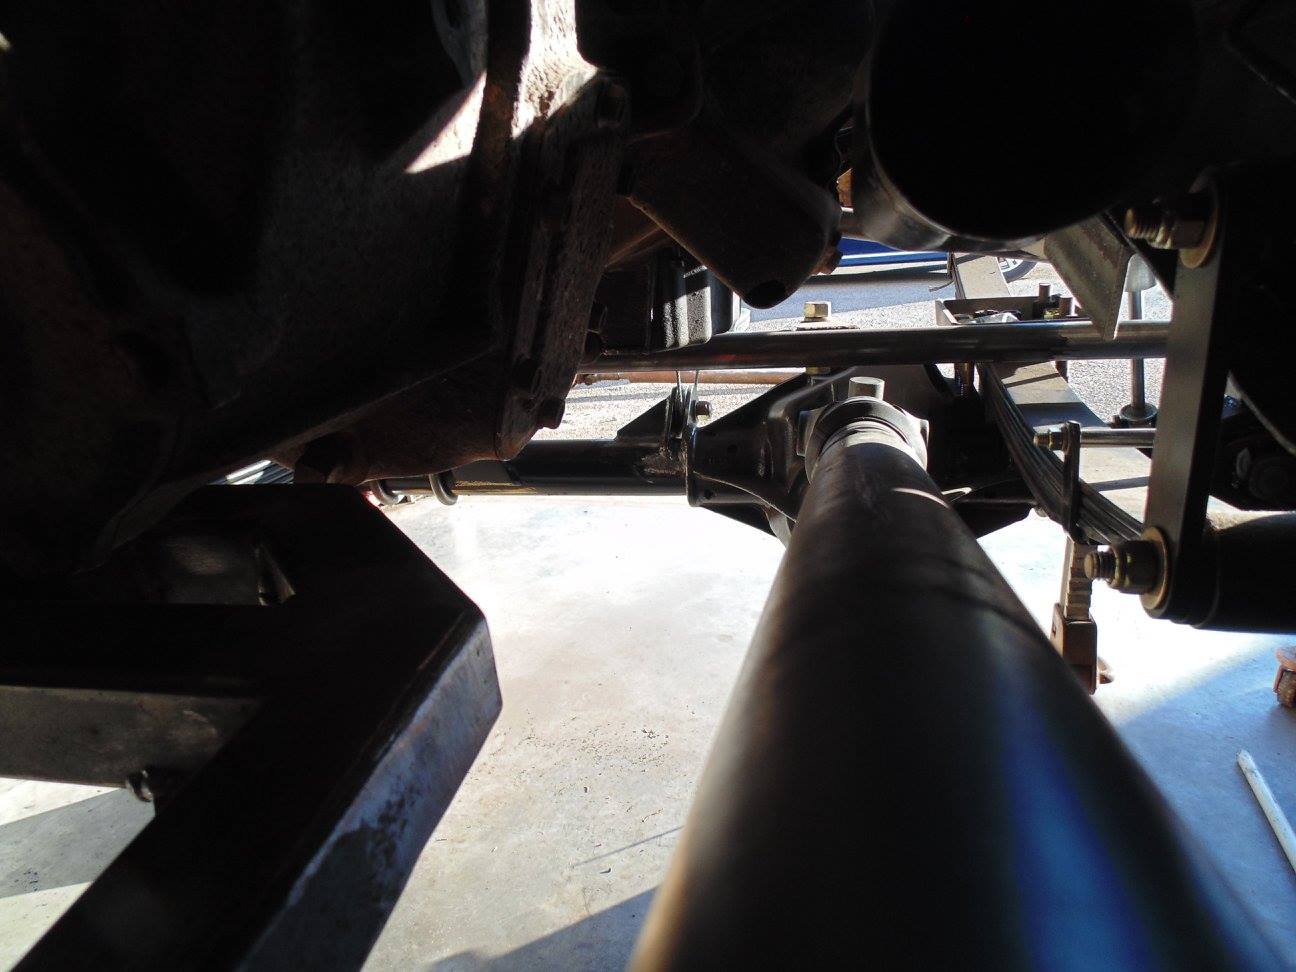
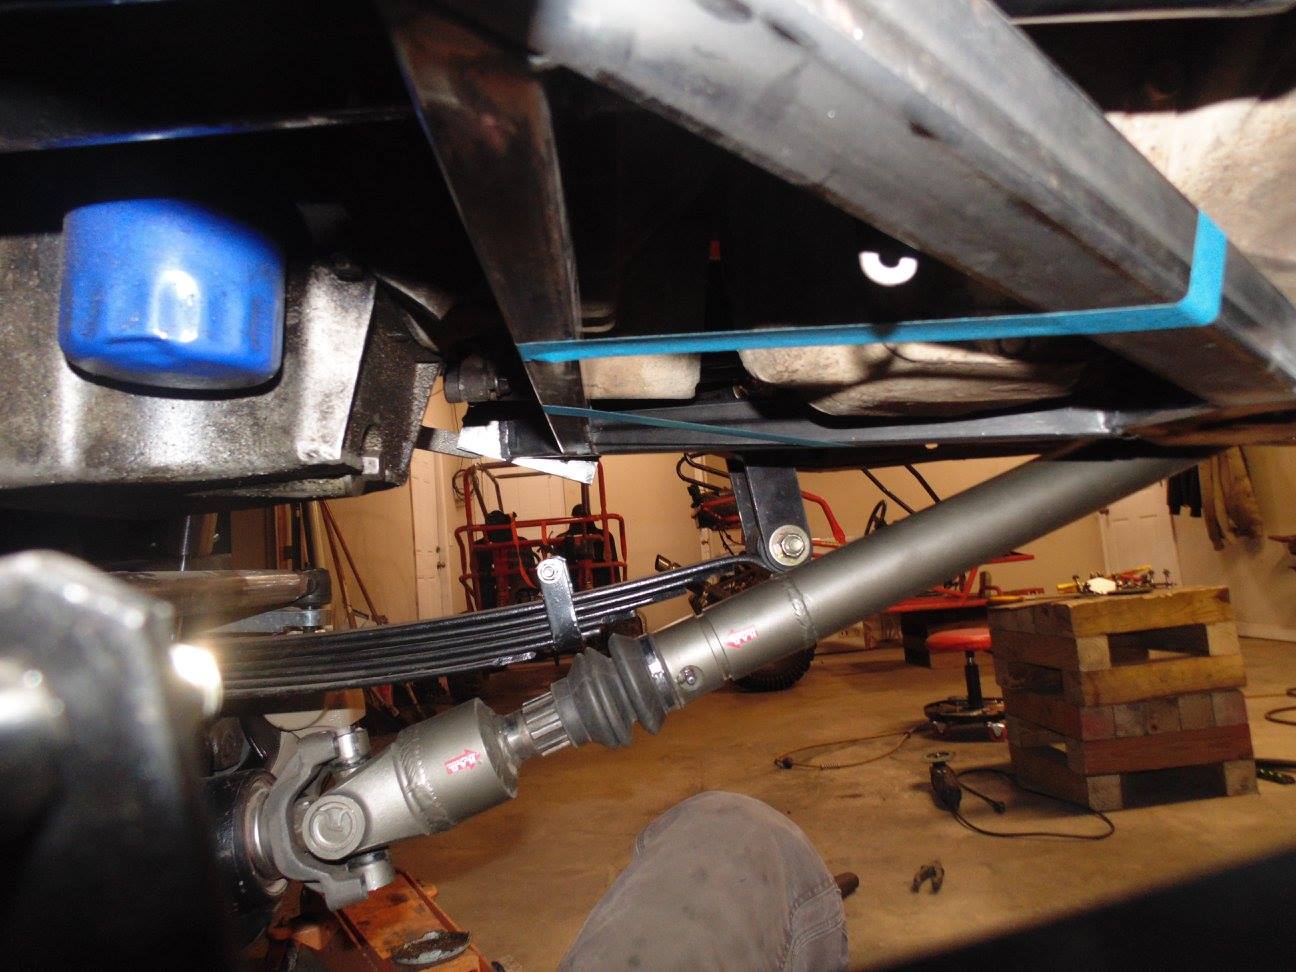
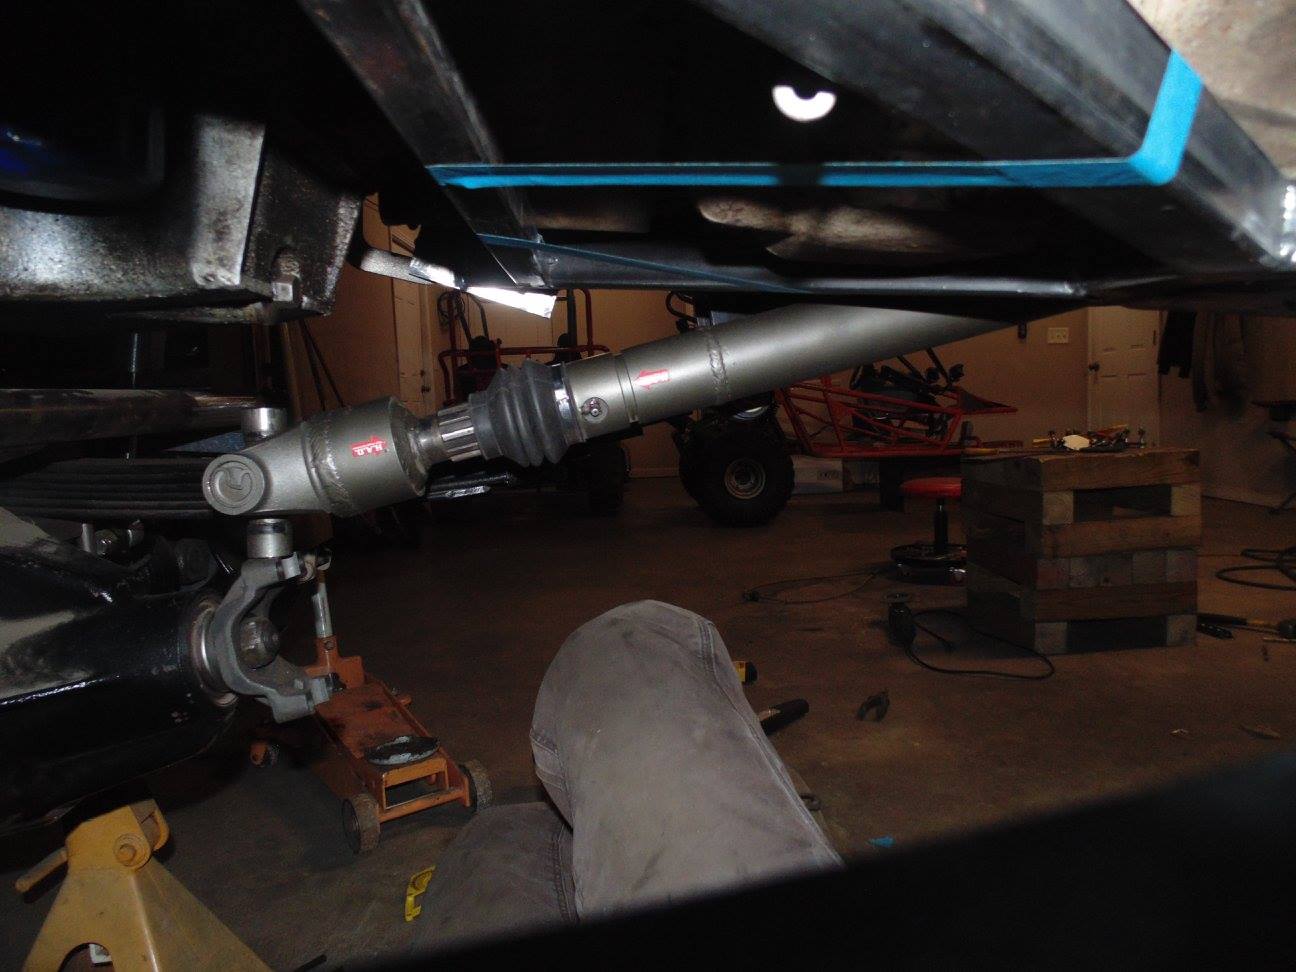
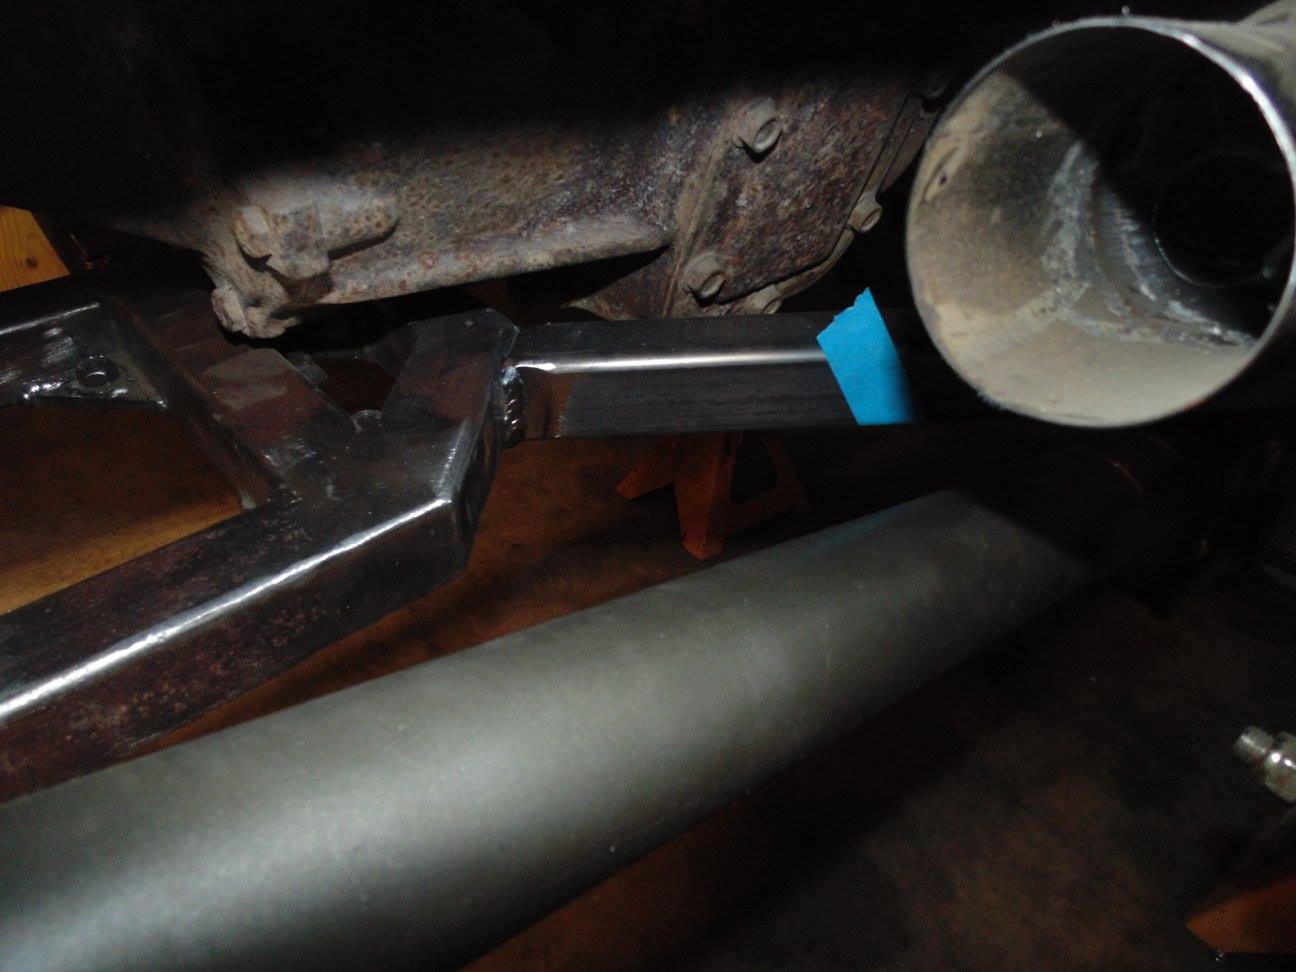
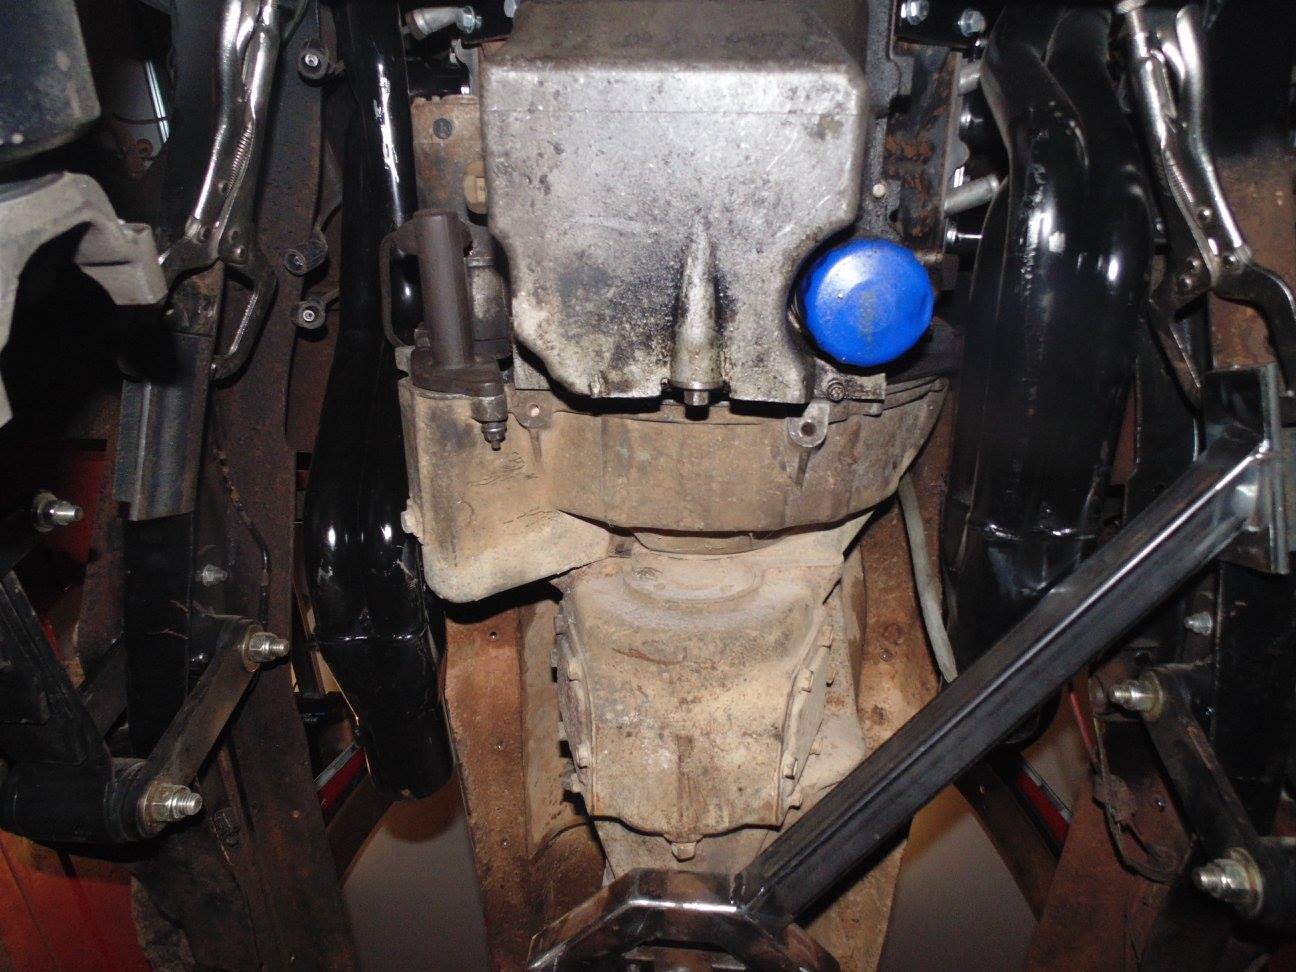
Here is the passenger's side I will be working on next. I put the driveshaft at full bump height when figuring out all these locations, angles, & clearances.

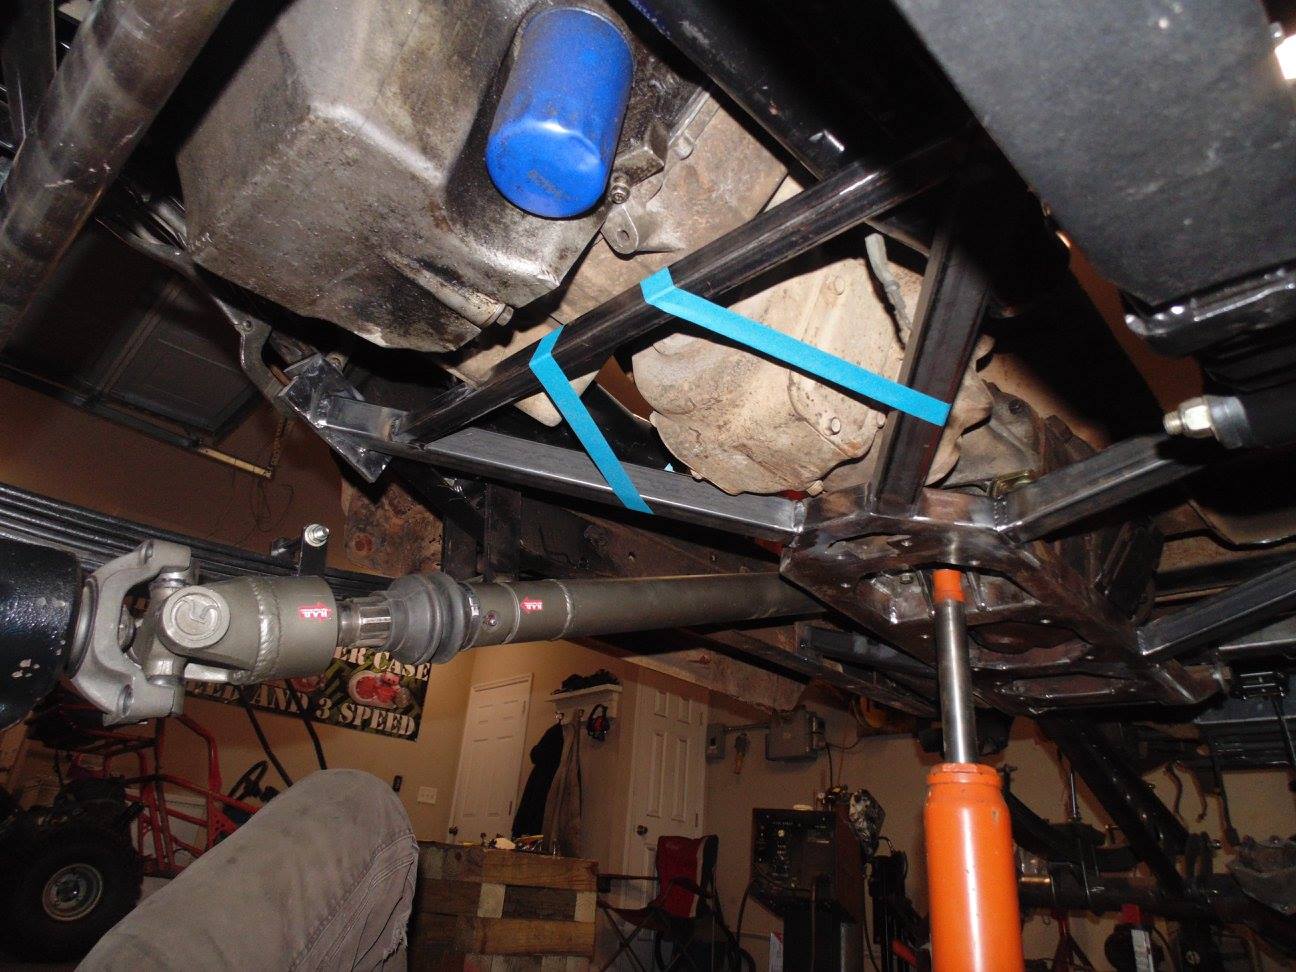
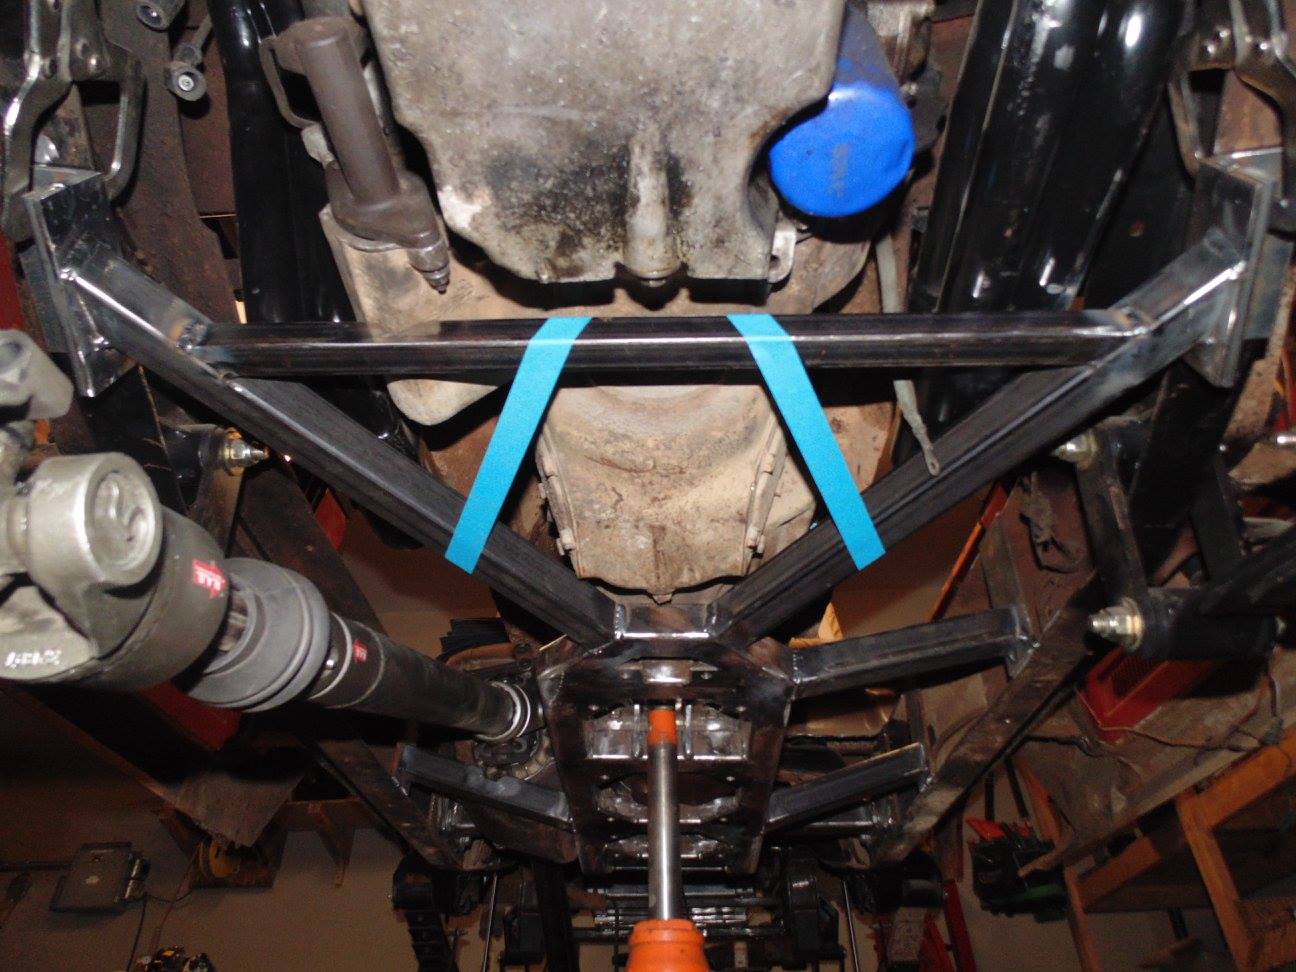
Once the passenger's side is in I am going to put a piece of box tube from left to right underneath the trans to tie the diagonal braces together. I may or may not plate that area
 
Last edited:
Well, couldn't get any more 1.5" 1/8" wall tube today and i am out of cutoff wheels but managed to get quite a bit done with what I had on hand. I will work on the rear suck down winch stuff more tomorrow.

Today's progess:

First thing I had to do today was notch this one brace tube for a bolt head clearance

This was the donor tube for the filler

Installed. That 3/16 plate is just a place holder until I box the frame and do my 1/4" spacer gusset and final 3/16 tie plate design

Matching tube brace on the driver's side

Additional brace on the driver's side

Welded in place

Again, these 3/16 plates are just place keepers. The finished product will have bolted flanges

Since the belly skid is running up hill with the drivetrain I decided it was better to just keep the distance from the bottom of the frame rail the same for exhaust clearance, hence the different angles here

Should be plenty of room for that 2 into 1 exhaust

Still planning on bringing a crossover pipe from the passenger's side right over the nose of the belly skid underneath the t-case adapter

Pretty pleased with how this is turning out so far


All these pics of the passenger side are at simulated full bump on the driveshaft


Just enough room for that other diagonal tube to come through

Even though it is a dark photo this is probably the best angle to show clearance for the diagonal brace tube
 
Last edited:
More over-engineered, heavy parts that will never break, hahaha. Rear suck down winch progress.

Dat rear end doh :pimp:

This is just mockup to get the holes all laid out in the box plates

I only tacked the frame boxing plates in the area I needed for winch crossmember mockup

There will be a fabricated roller sleeving the 5/8" bolt on the downward facing tab pair

It is important to note that I tacked the frame boxing plates flush with the inside of the frame rails but this is not how the final install will be. When I have all the holes drilled and flange nuts welded to the backside of the frame boxing plates there will also be 1/4" spacer gussets welded to the crossmember side of the box plates so the box plates can sit 1/4" inside the frame rail for easier welding and added strength

Tucked the whole assembly as high up as I could

Now just have to get some more cutoff wheels and take the whole thing out for hole drilling and finish welding
 
Last edited:
1350 front U-joint at the t-case? Any idea how much your clocked up?

How are you planning on getting the passenger side exhaust over to the drivers with those long tubes? I see a little space between the range box and the sm465 but it looks tight withe the driveline right there.
 
1350 front U-joint at the t-case? Any idea how much your clocked up?

How are you planning on getting the passenger side exhaust over to the drivers with those long tubes? I see a little space between the range box and the sm465 but it looks tight withe the driveline right there.

1410 single joint at both ends. I will be running a 1410 tom woods flex joint at the case, still need to swap that out. Should be about 2" up I believe but I didn't have anything to compare to before hand and bought the doubler setup used so can't promise exact numbers.

Planning on doing a rolled and maybe tapered 90 out of the collector and under the t-case adapter right in front of the trans support foot
 
I'm interested to see how that exhaust works out, looks really tight but it could be the photos. Will the heat off the exhaust cook the mount?
 
I'm interested to see how that exhaust works out, looks really tight but it could be the photos. Will the heat off the exhaust cook the mount?

Me too, it is going to be tight but I think it's doable. I will sub that work out to an exhaust shop and let them deal with it. I will be wrapping the exhaust with insulating heat wrap probably back to the y pipe connection.
 
Got the passenger's side diagonal brace in today and the cross piece to tie the two diagonals together

I had to use 1" box tube for the cross piece due to clearance issues. I am going to do some more 1" tube braces where the blue tape is and I will make a removable skid plate for that whole area just like the belly skid but will probably just use button head bolts instead of countersunk head bolts like the belly skid gets.

Even using the 1" tube instead of the 1.5" tube, I still had to notch it a bit for clearance. The blue tape tube braces should help reinforce that and give something to support the skid plate

Here you can see the notch in the cross piece and the driveshaft clearance at approximate ride height

This driveshaft angle is the reason I am going to have to use the tom woods 1410 superflex joint at the t case. Damn low pinion differential.

Here is the driveshaft at approximate full suspension bump.

Still a decent amount of room at full bump. All the rest of the following pics are also at approximate full bump

Makes me wonder why more people don't do this kind of skid plate bracing in front of the shackle hanger. I don't think I have seen many (if any) builds use this design.


I am going to take some 1/8" plate and completely box in that open corner on both sides to strengthen that area up
 
Last edited:
Man your winch sucks... Lol sorry couldn't help myself hehe..

I really like how you closed off the corners of the openings at 45 deg.. It's the little things. Like leaving that oil pan all to fend for it self.. Sup wit dat?
 
Man your winch sucks... Lol sorry couldn't help myself hehe..

I really like how you closed off the corners of the openings at 45 deg.. It's the little things. Like leaving that oil pan all to fend for it self.. Sup wit dat?

You talking about the front and rear dedicated harbor freight ATV suck down winches or the 12k Engo up front?

I am probably going to go aftermarket 1/4" oil pan
 
It's really such a rareity you hit the oil pan I don't pay much attention to it.

I have hit mine once.

The one other time we had a rock, have no idea how, punched through an oilpan about half an inch from the flange. Just can't protect some stuff.

Looking sweet. I need a belly skid pretty bad. Well a better one. I'm long enough I get hung up all the time. Be nice to just bounce over
 
Where I lived at the time we were only about an hour from my house. Including the drive off the trail. So we just took an extra long lunch he went to my house grabbed another pan and we wheeled the rest of the day
 
It's really such a rareity you hit the oil pan I don't pay much attention to it.

I have hit mine once.

The one other time we had a rock, have no idea how, punched through an oilpan about half an inch from the flange. Just can't protect some stuff.

Looking sweet. I need a belly skid pretty bad. Well a better one. I'm long enough I get hung up all the time. Be nice to just bounce over

Yeah, I originally wasn't planning to go all the way under the trans with the belly skid but that was really the only way to adequately support the front of it. I guess the big difference in clearance that lets me do that is the shape of the 465. If I were running an auto I don't think there would be enough room.

At first I was going to leave the stock oil pan but I don't like points of vulnerability to crucial systems even if they are unlikely. We all know there is always going to be that one time the odds shit all over us. That is the same reason I will be plating under my fuel cell too. Even though it is pretty tucked up out of harm's way I don't want to run the risk of debris knocking a hole in it or some freak impalement scenario
 
Just ordered this to solve my oil pan concerns. It's an LS swap pan for early GM stuff. Hamburger's website says the sump is pretty much the same width and length as a stock 5.3L truck pan but only 6" deep instead of ~8" which is fine by me since it will keep it further out of harms way. Near as I can tell it is most similar in dimension to a stock H3 oil pan (LH8). I am hoping this also gives me a little more room for the reverse high steer tie-rod to swing back and up under spring compression.

It's steel construction so I can add some more beef to the bottom of the pan for piece of mind and has internal trap door baffling. Very affordable price in my opinion for all the features especially since Pac Fab wants $500 for one of the ones they sell.

http://www.ebay.com/itm/Hamburgers-...ash=item2ca5568cf4:g:fVQAAOSwf-VWYPrh&vxp=mtr

s-l1600.jpg
 

Latest Posts

Top Bottom