CK5
Register an account today to become a member! Once signed in, you'll be able to participate on this site by adding your own topics and posts, as well as connect with other members.

Ryoken's 89 Crew Cab Tubebed build... aka Mutt....

only got a couple hrs in this afternoon as I had testing at the hospital this morn....


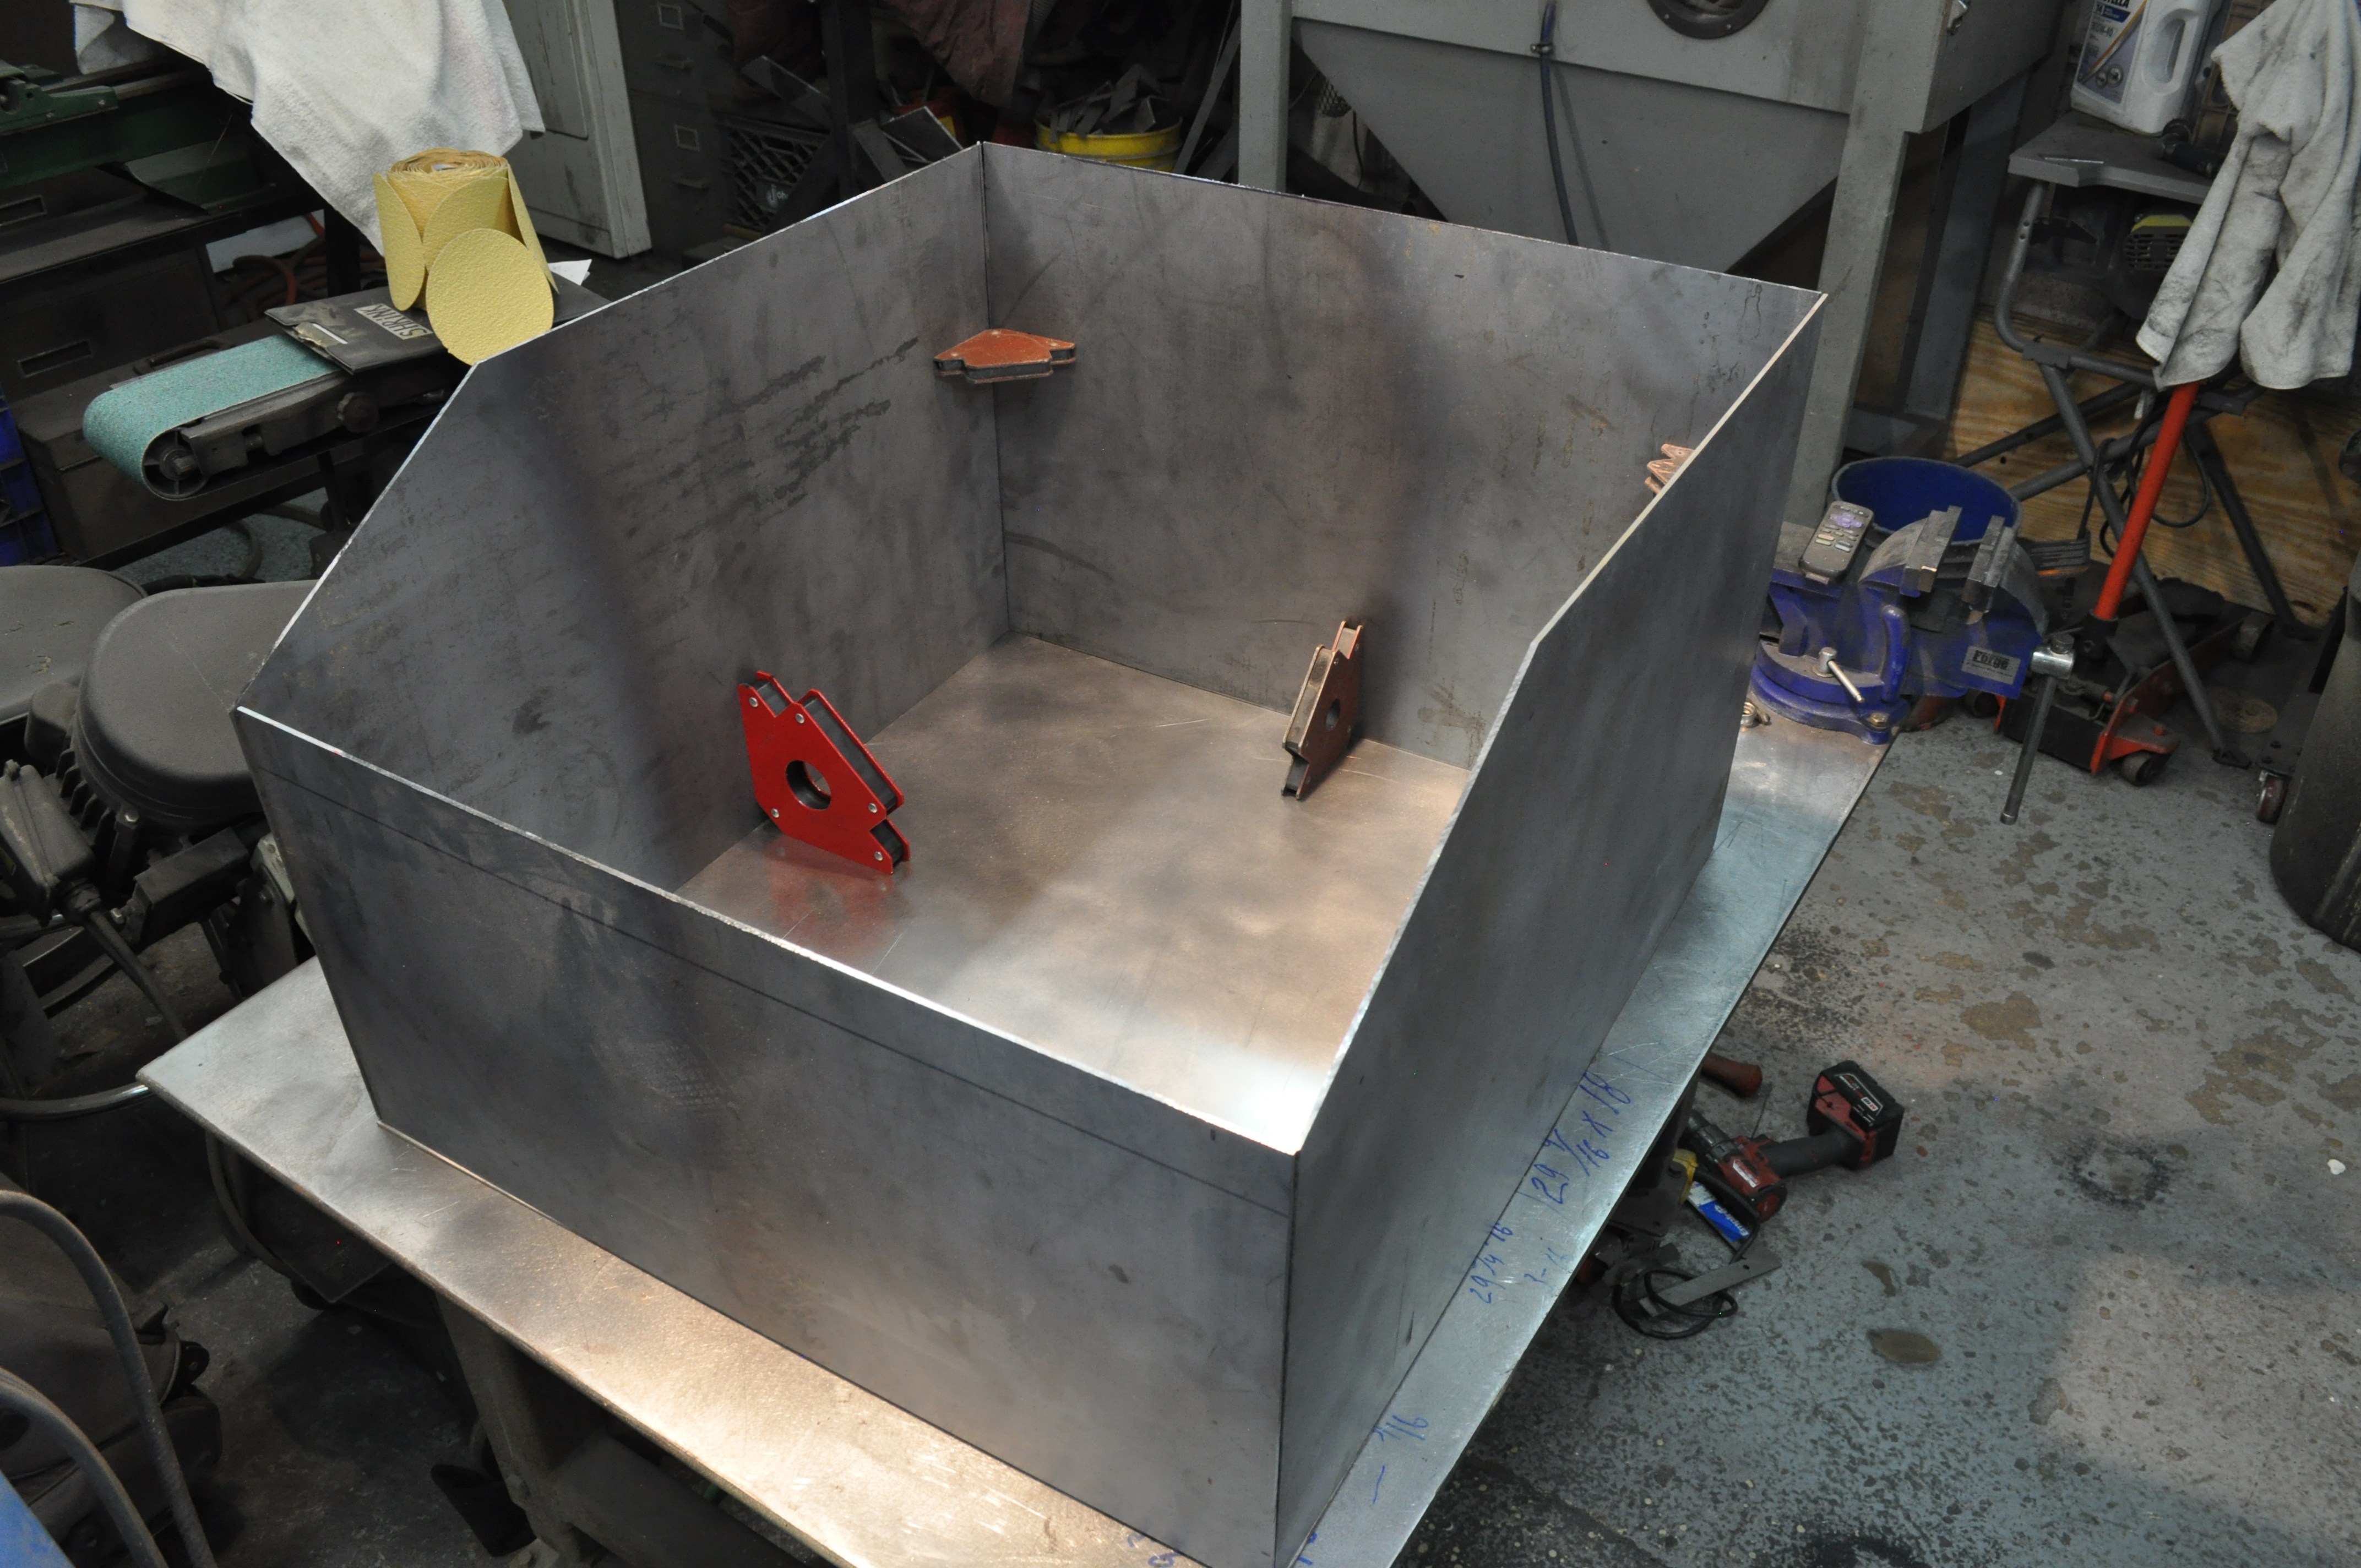
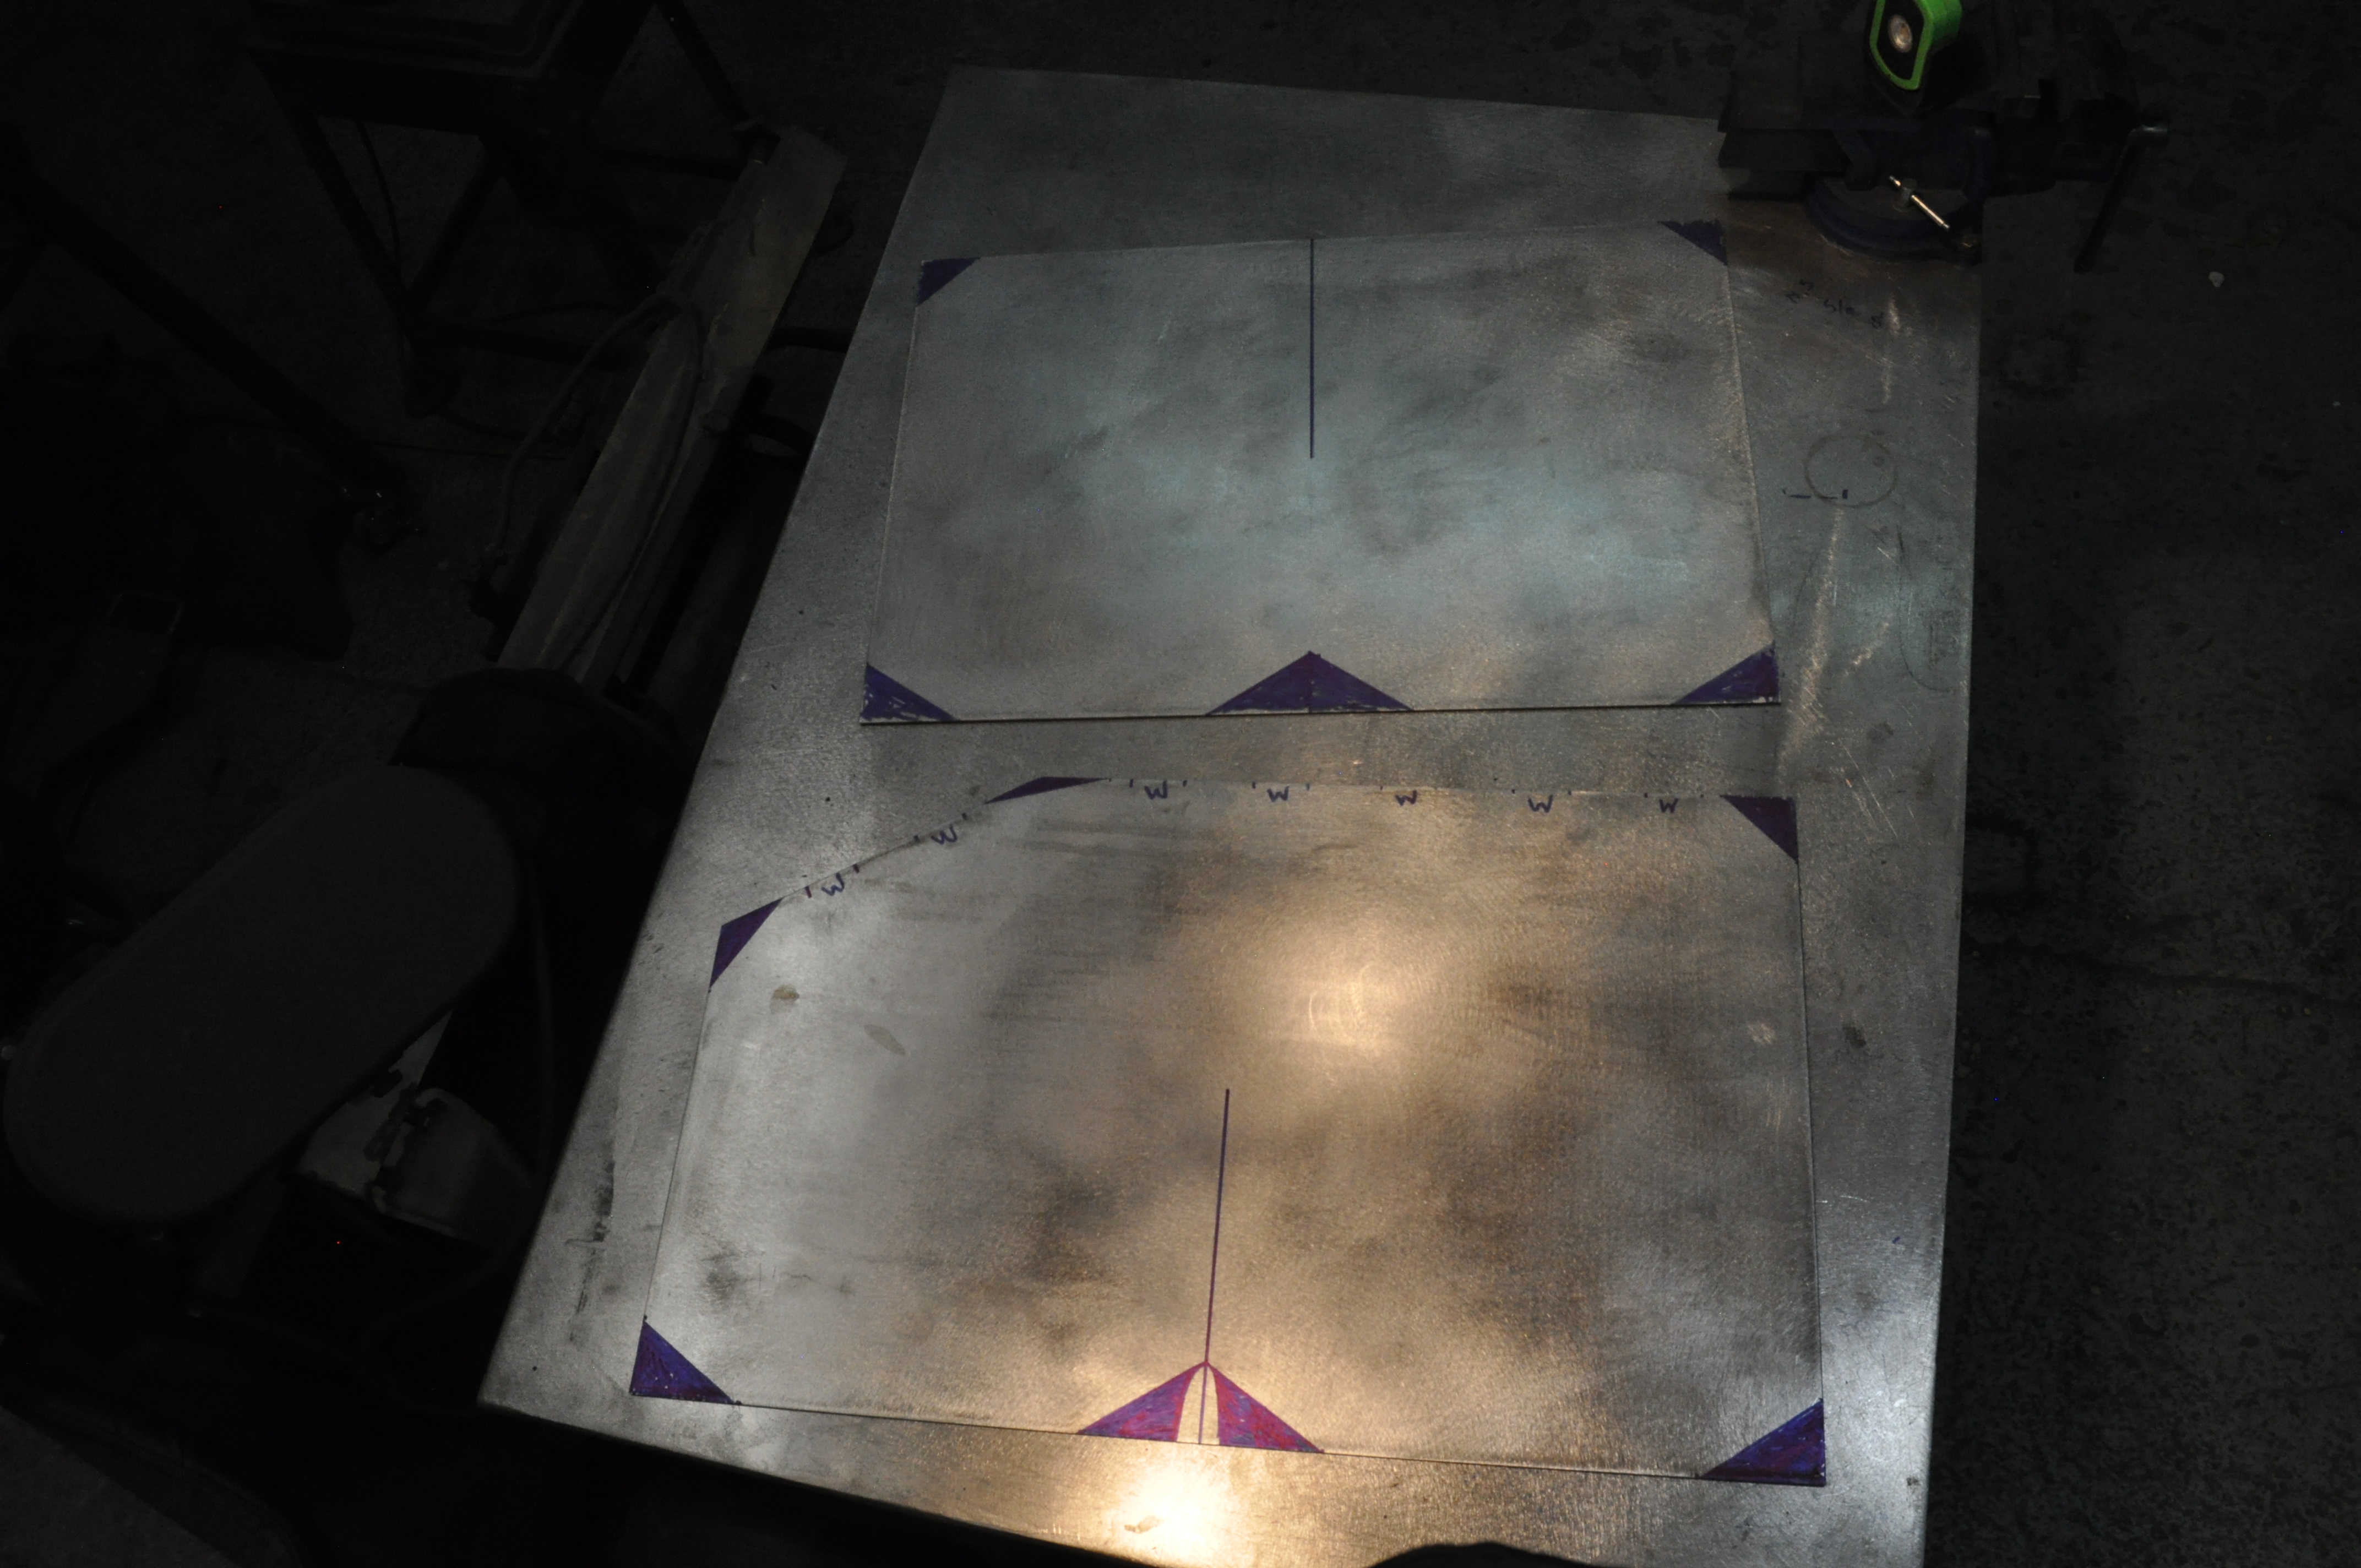
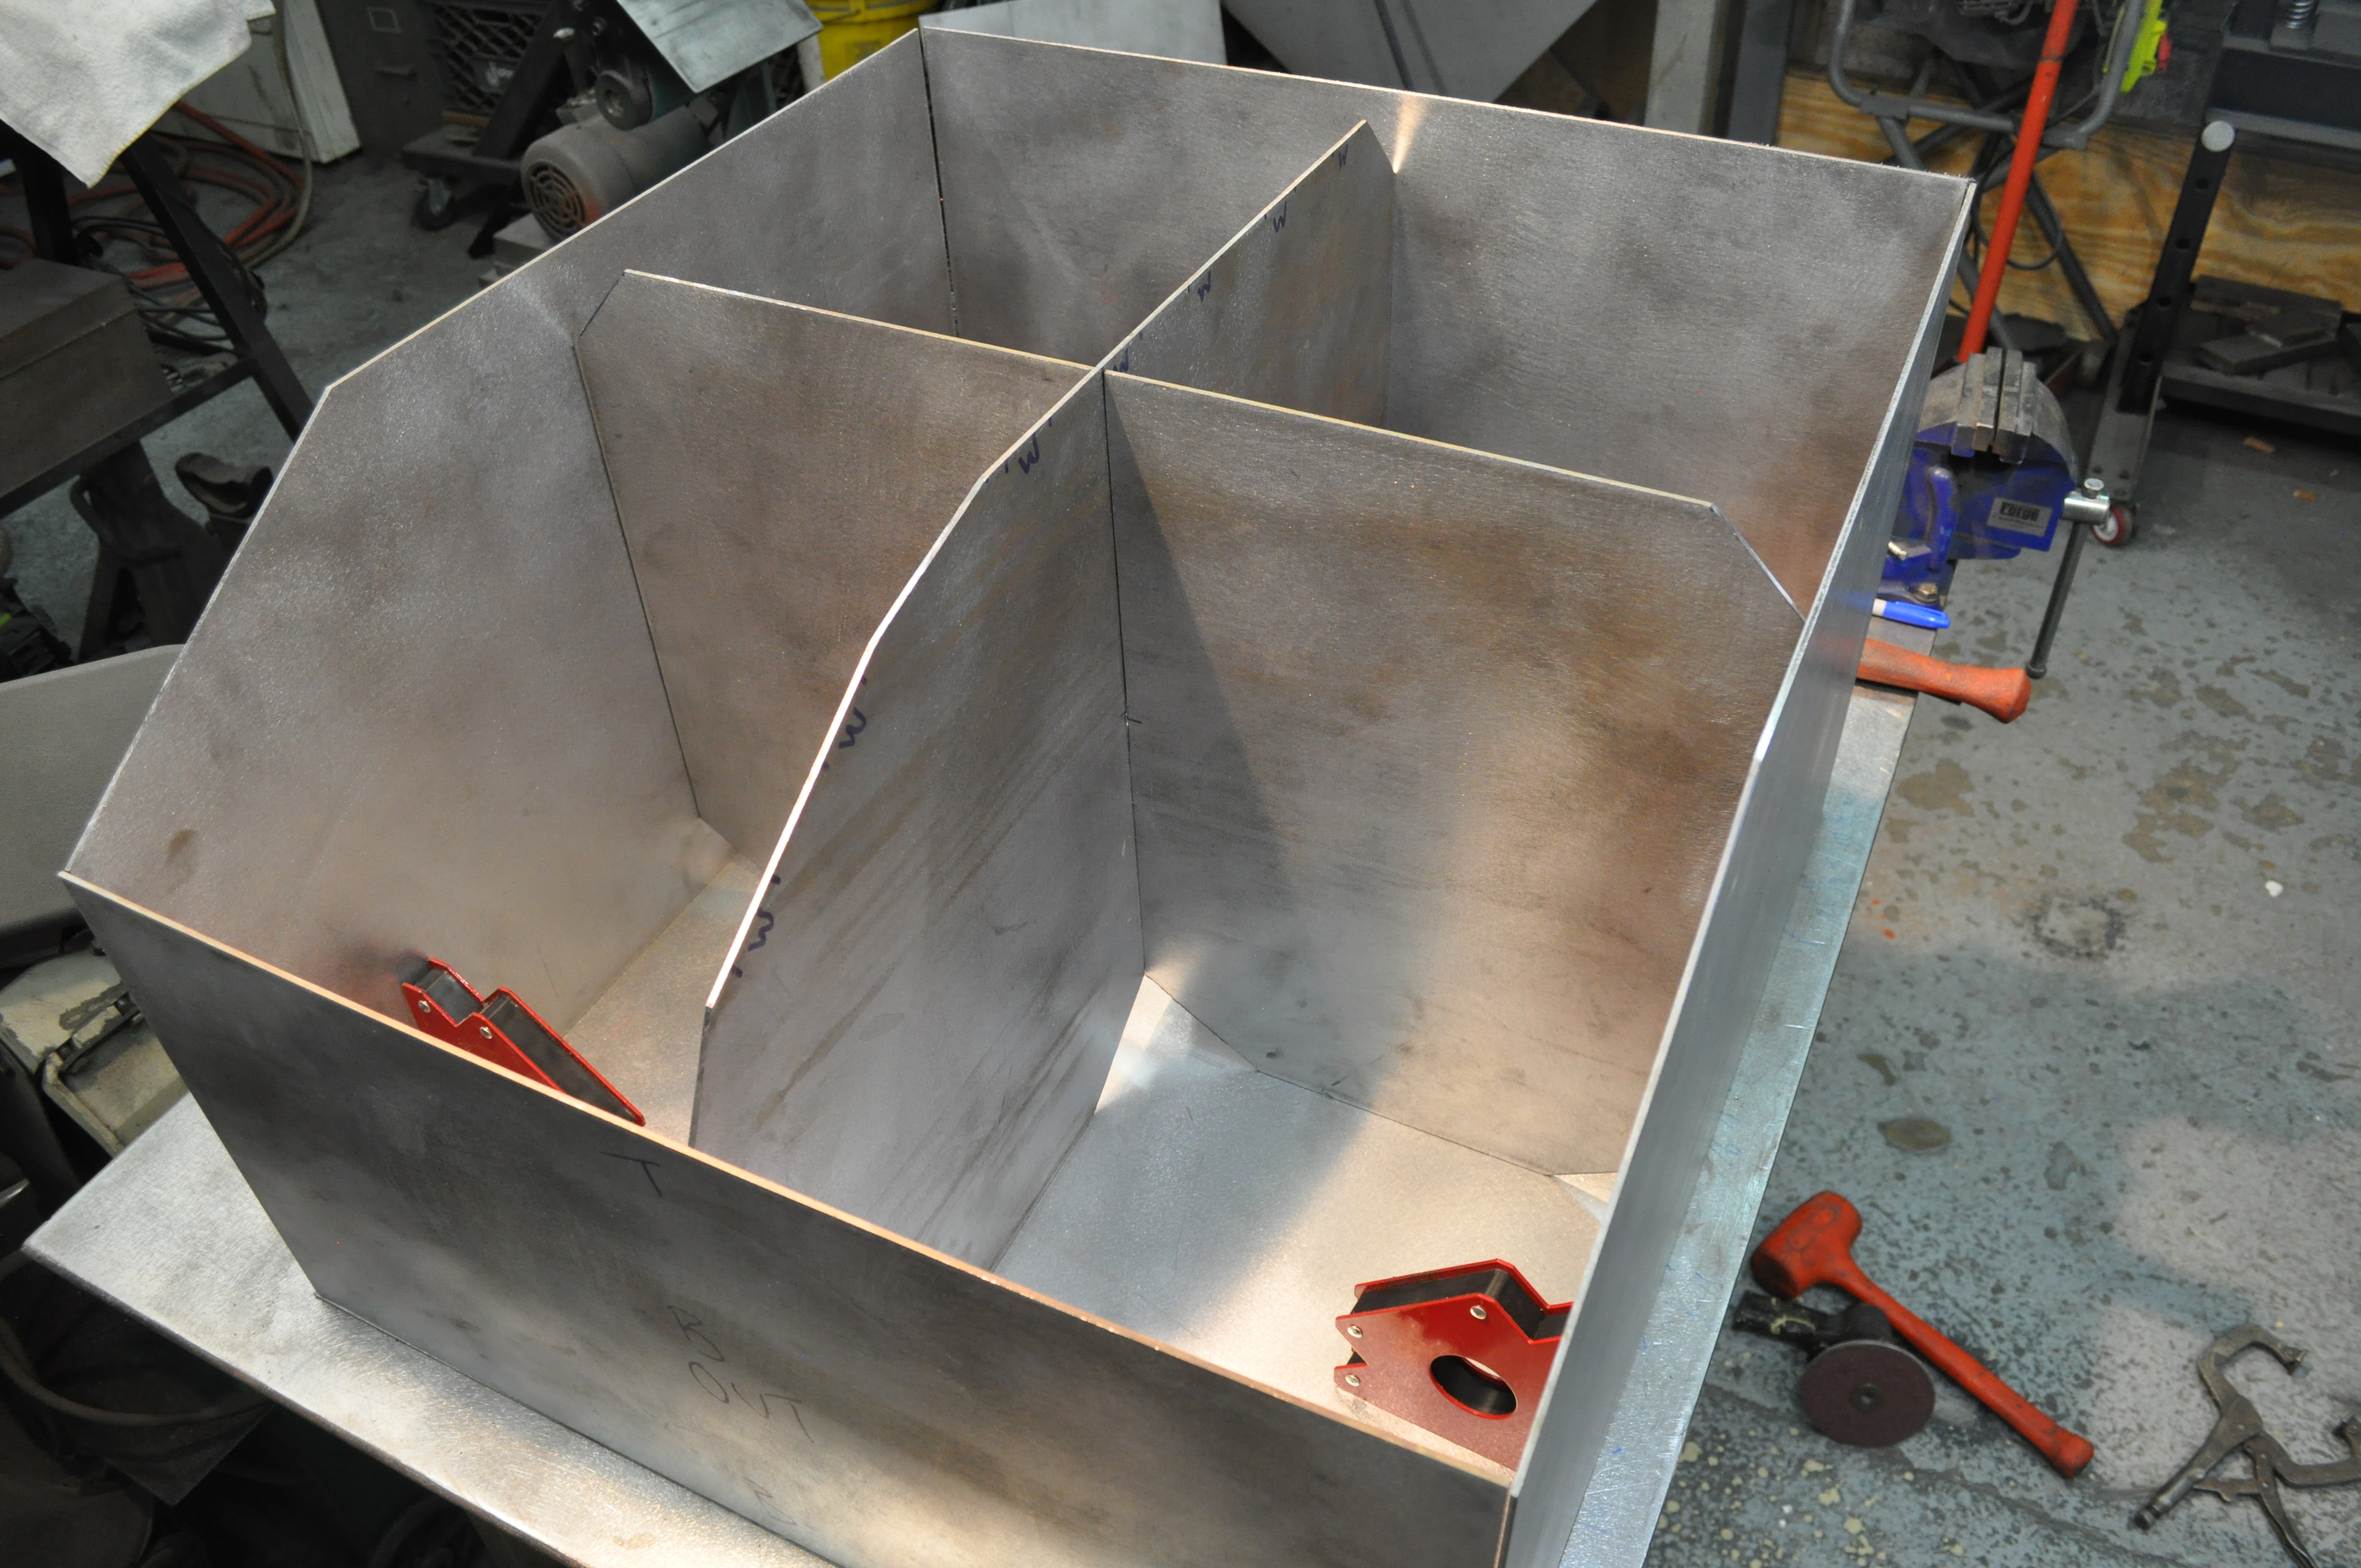
I'm waiting for that other sandpaper to continue on the walls, so I figured I'd play with some "proof of concept" stuff with the fills......


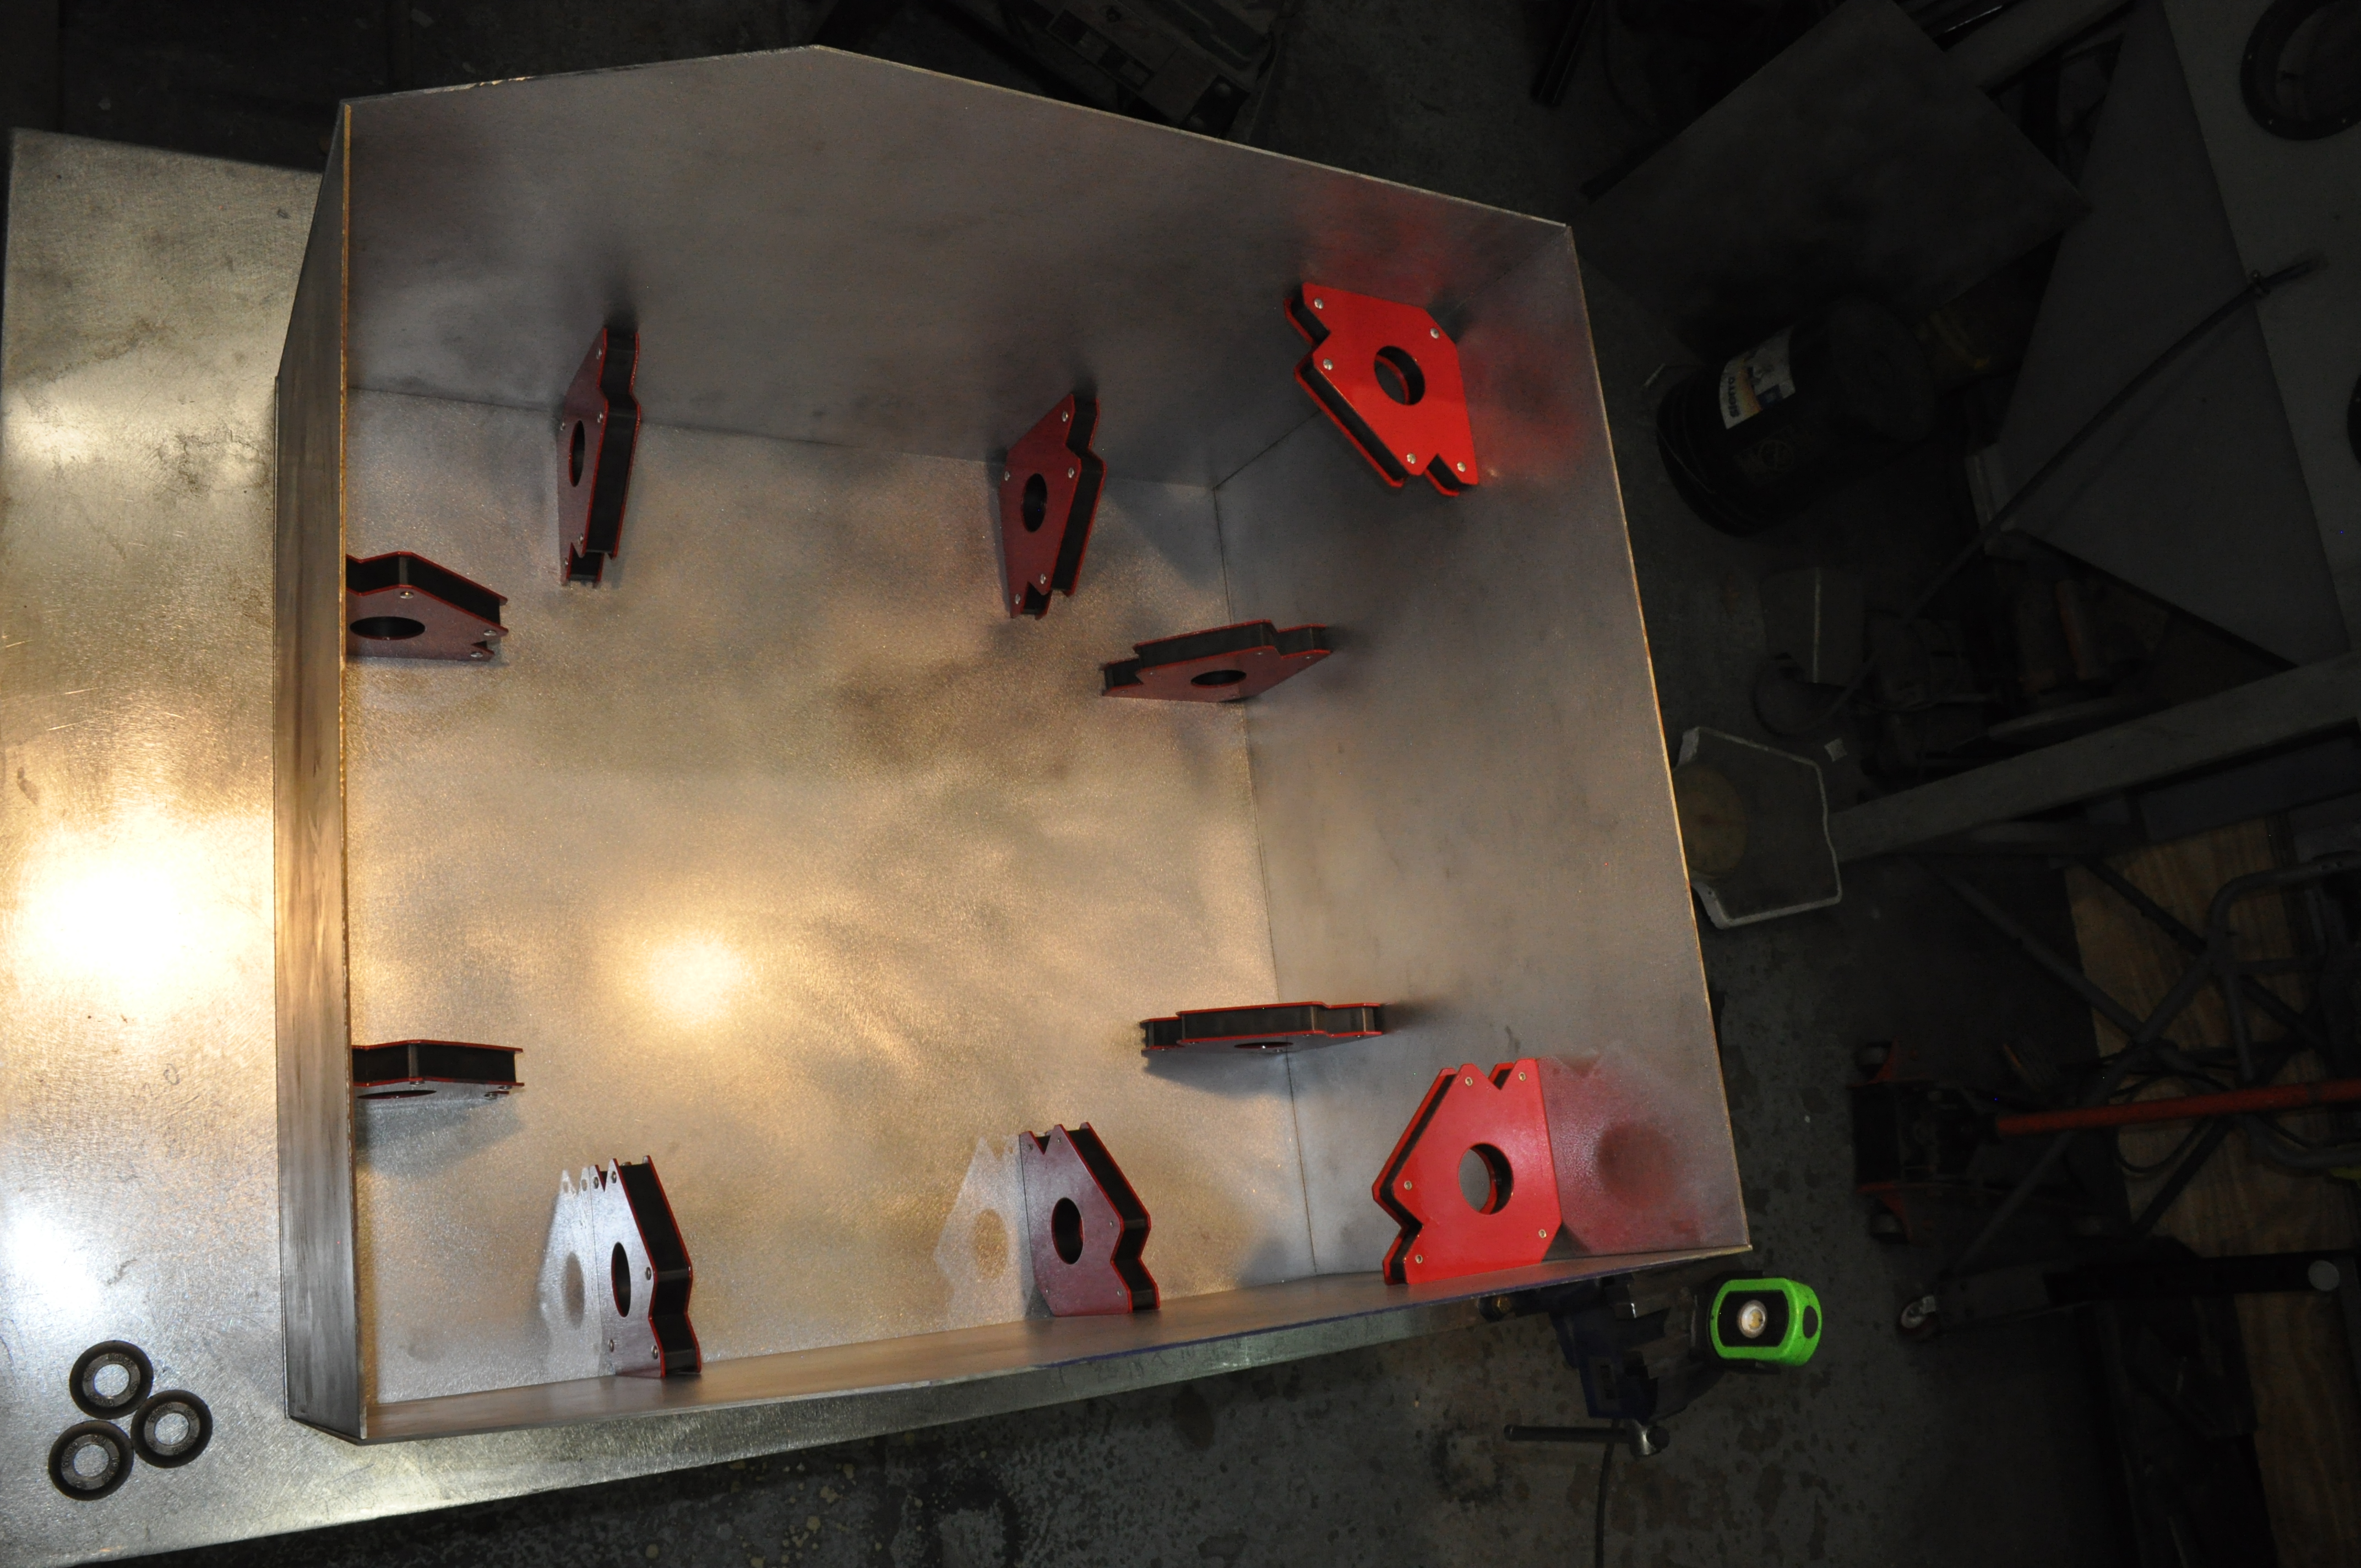
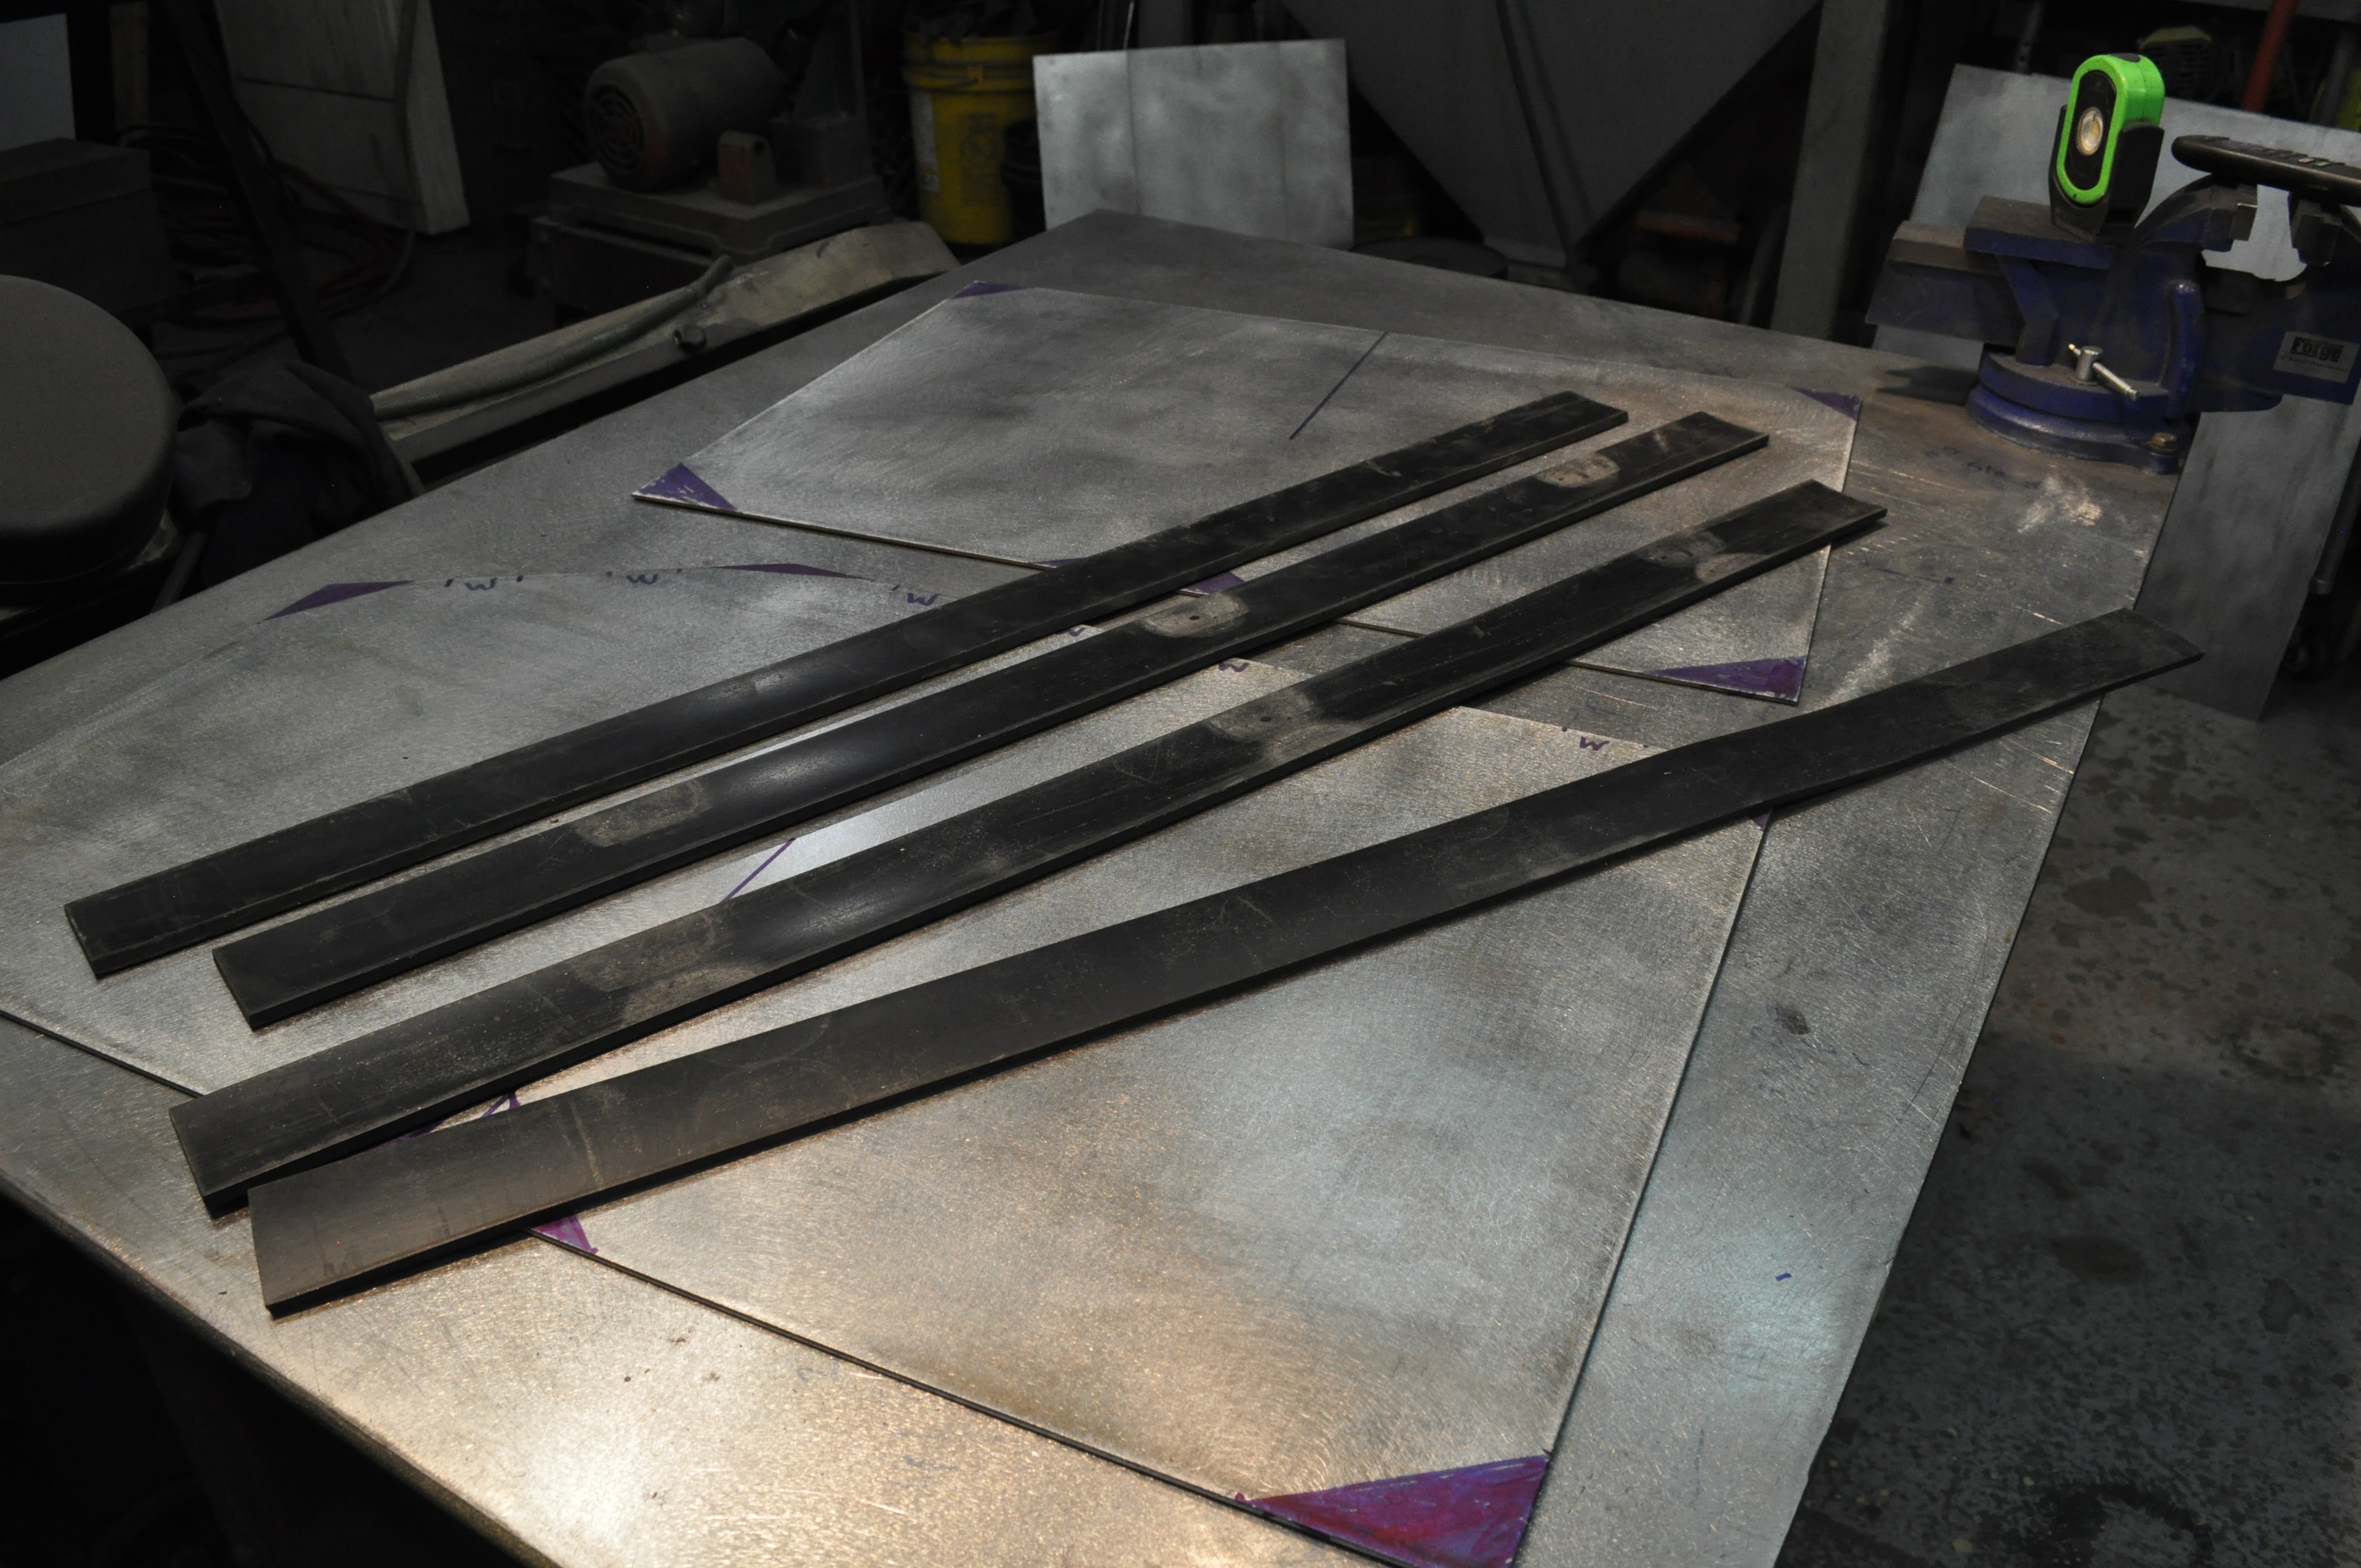
tho a bit more work, definitely think I'm going to do them in 4 piece..


full


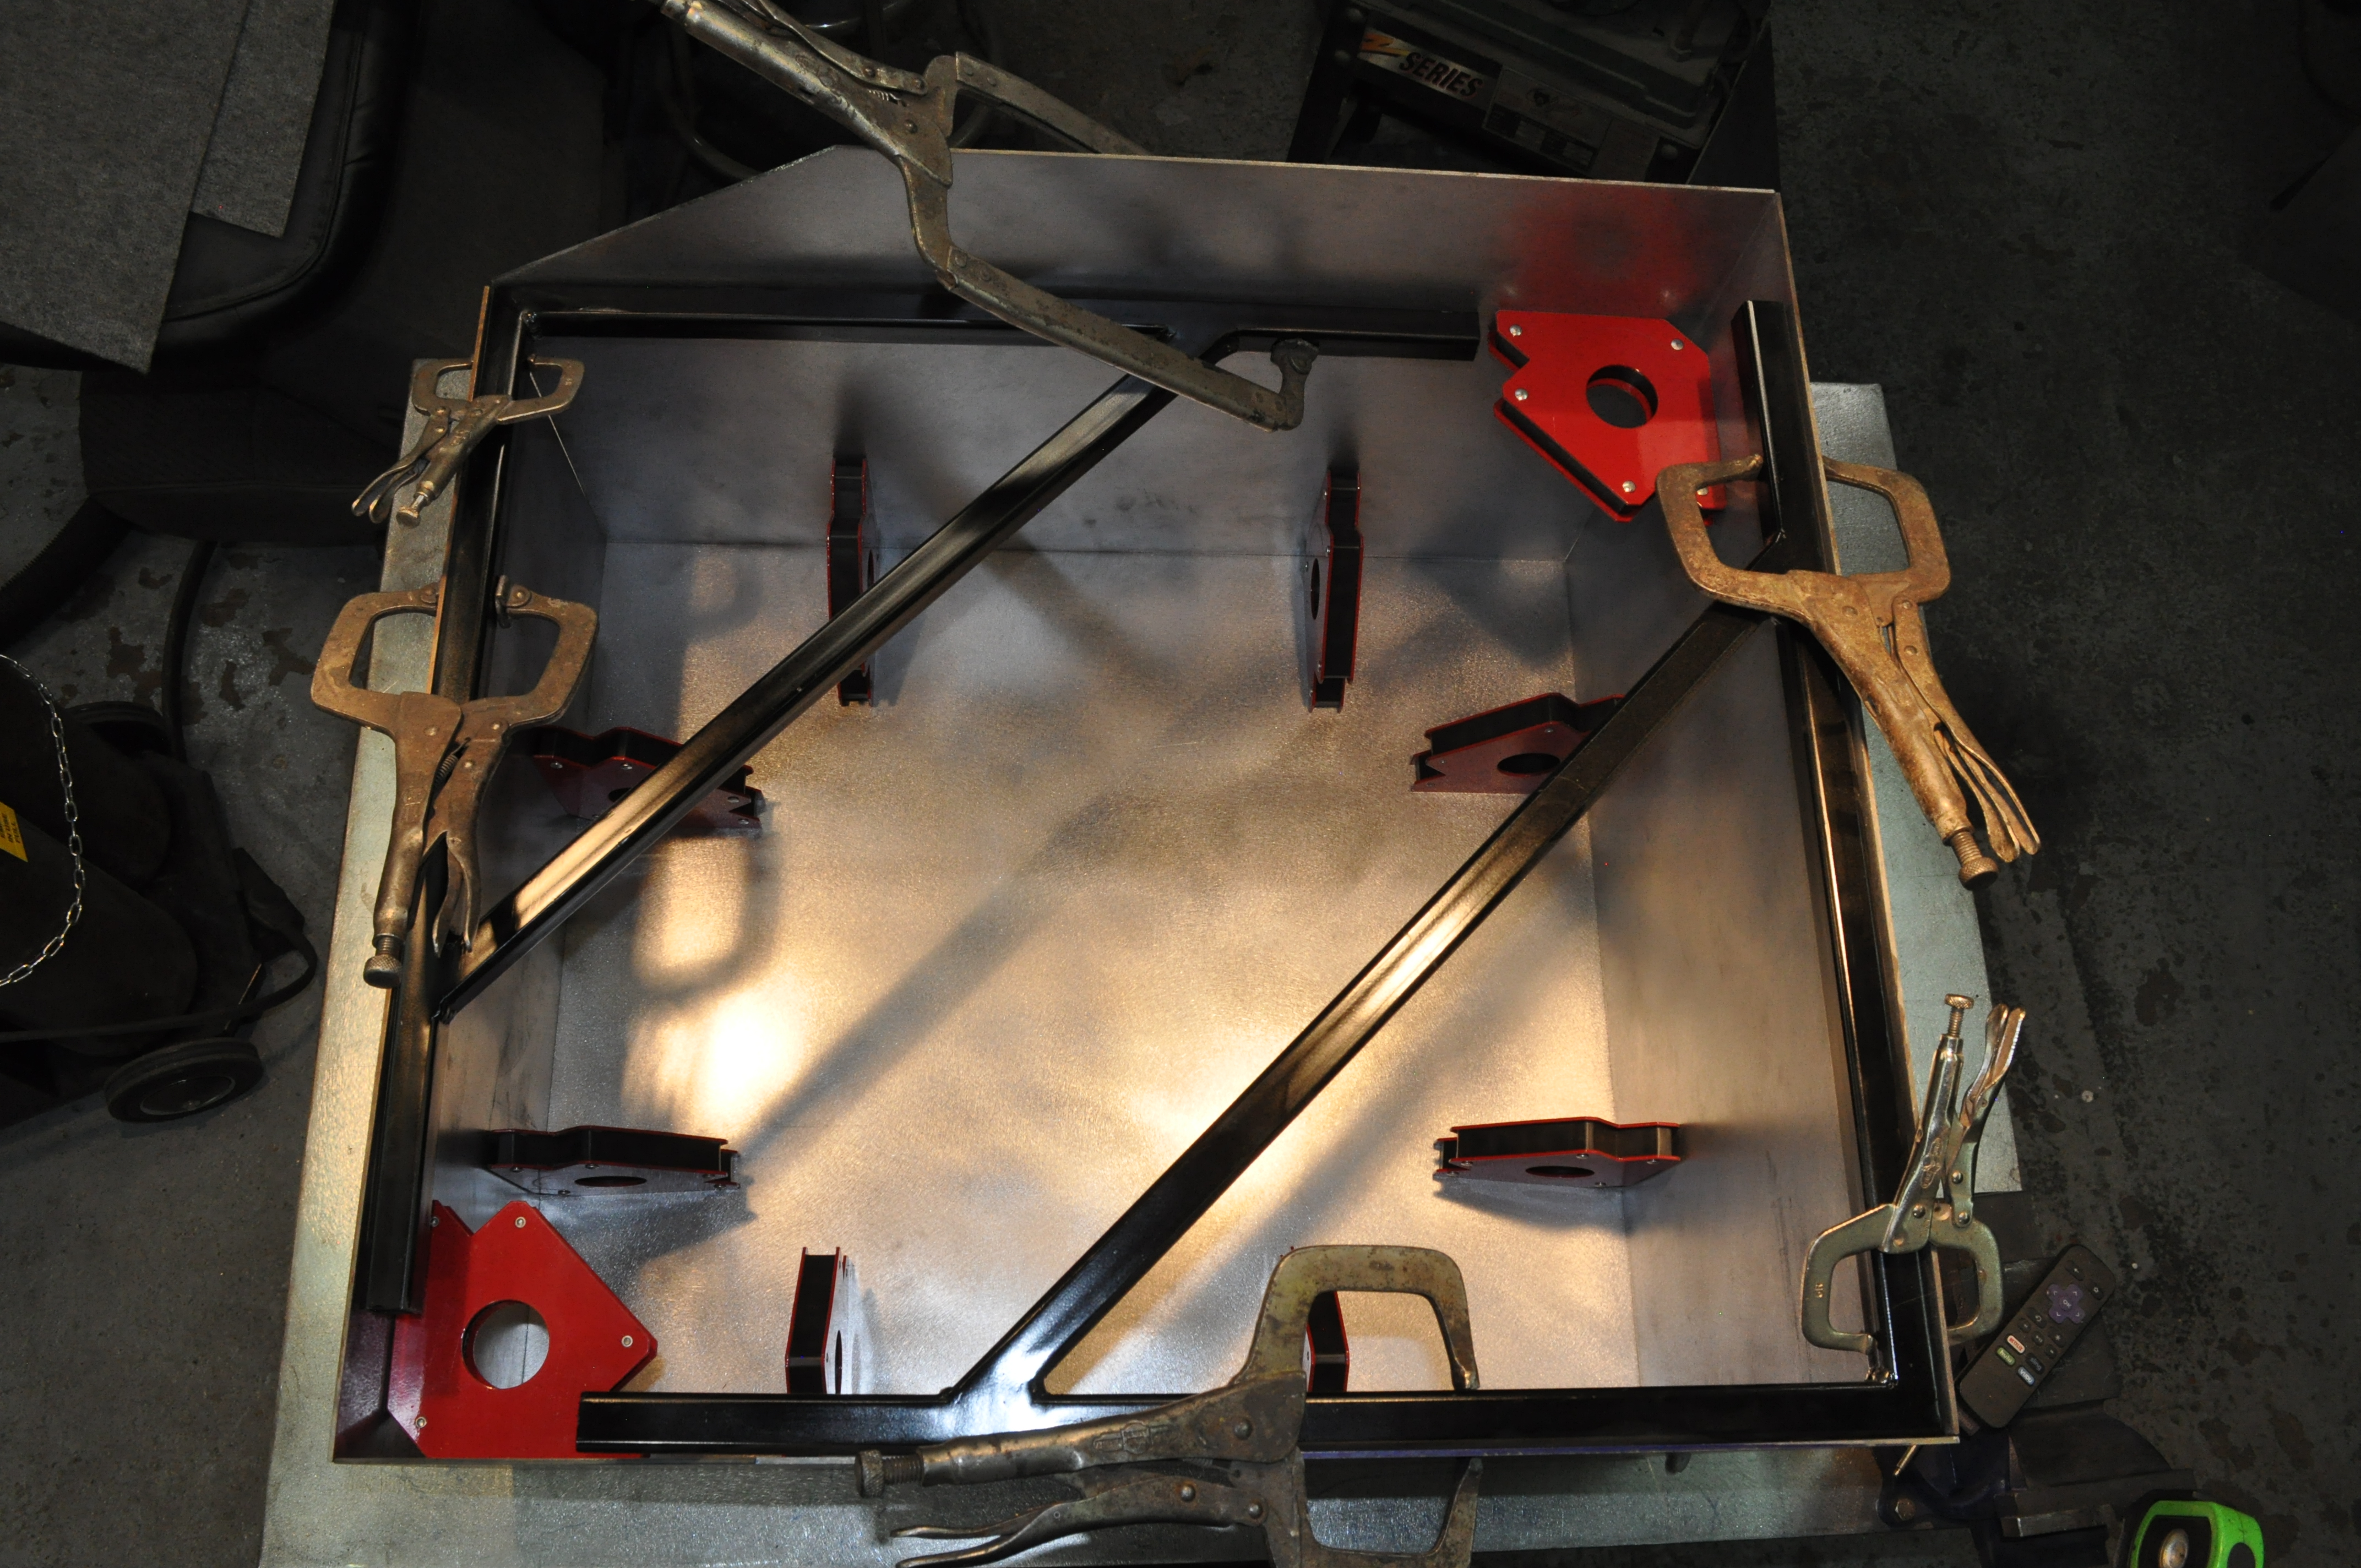
ignore the extra length ends.. but that is the right angle, about 80*, or 100, however you want to look at it....... set the bandsaw up at about 13*....


as opposed to a 3 piece design..... at 20*.....


full


full


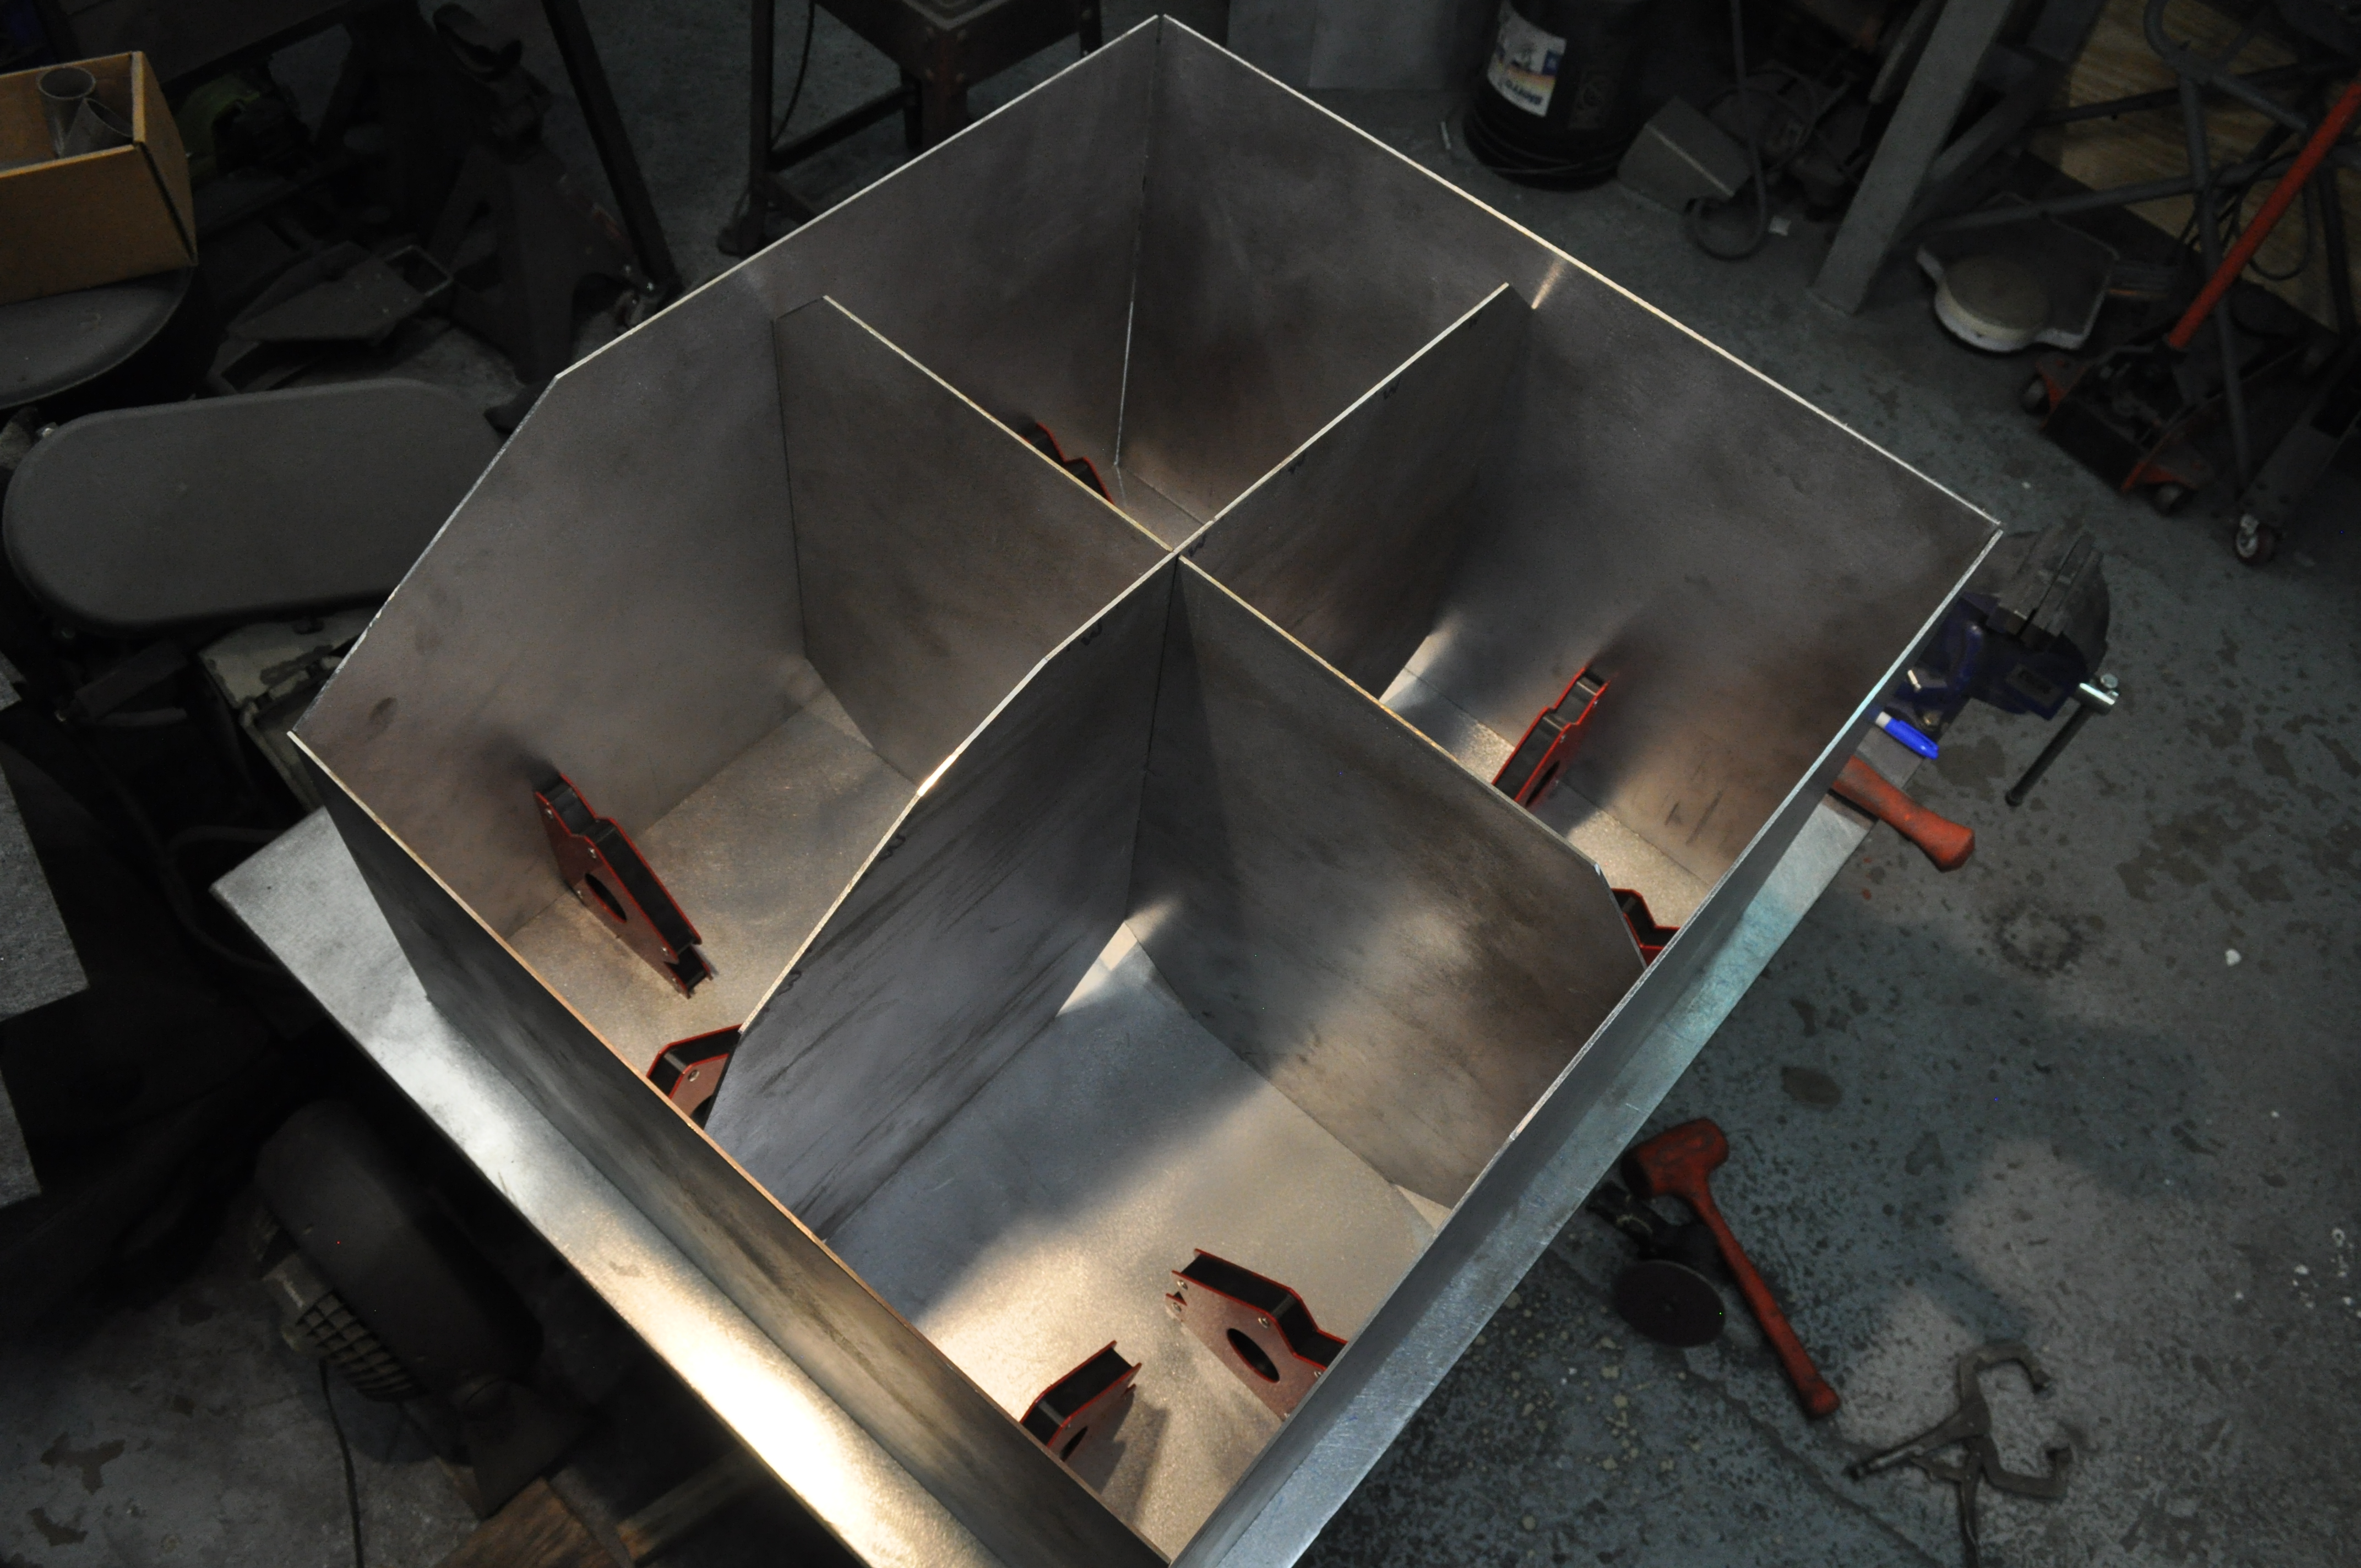
I just like the internal transition a bit better.. bit more "roundy" ;)


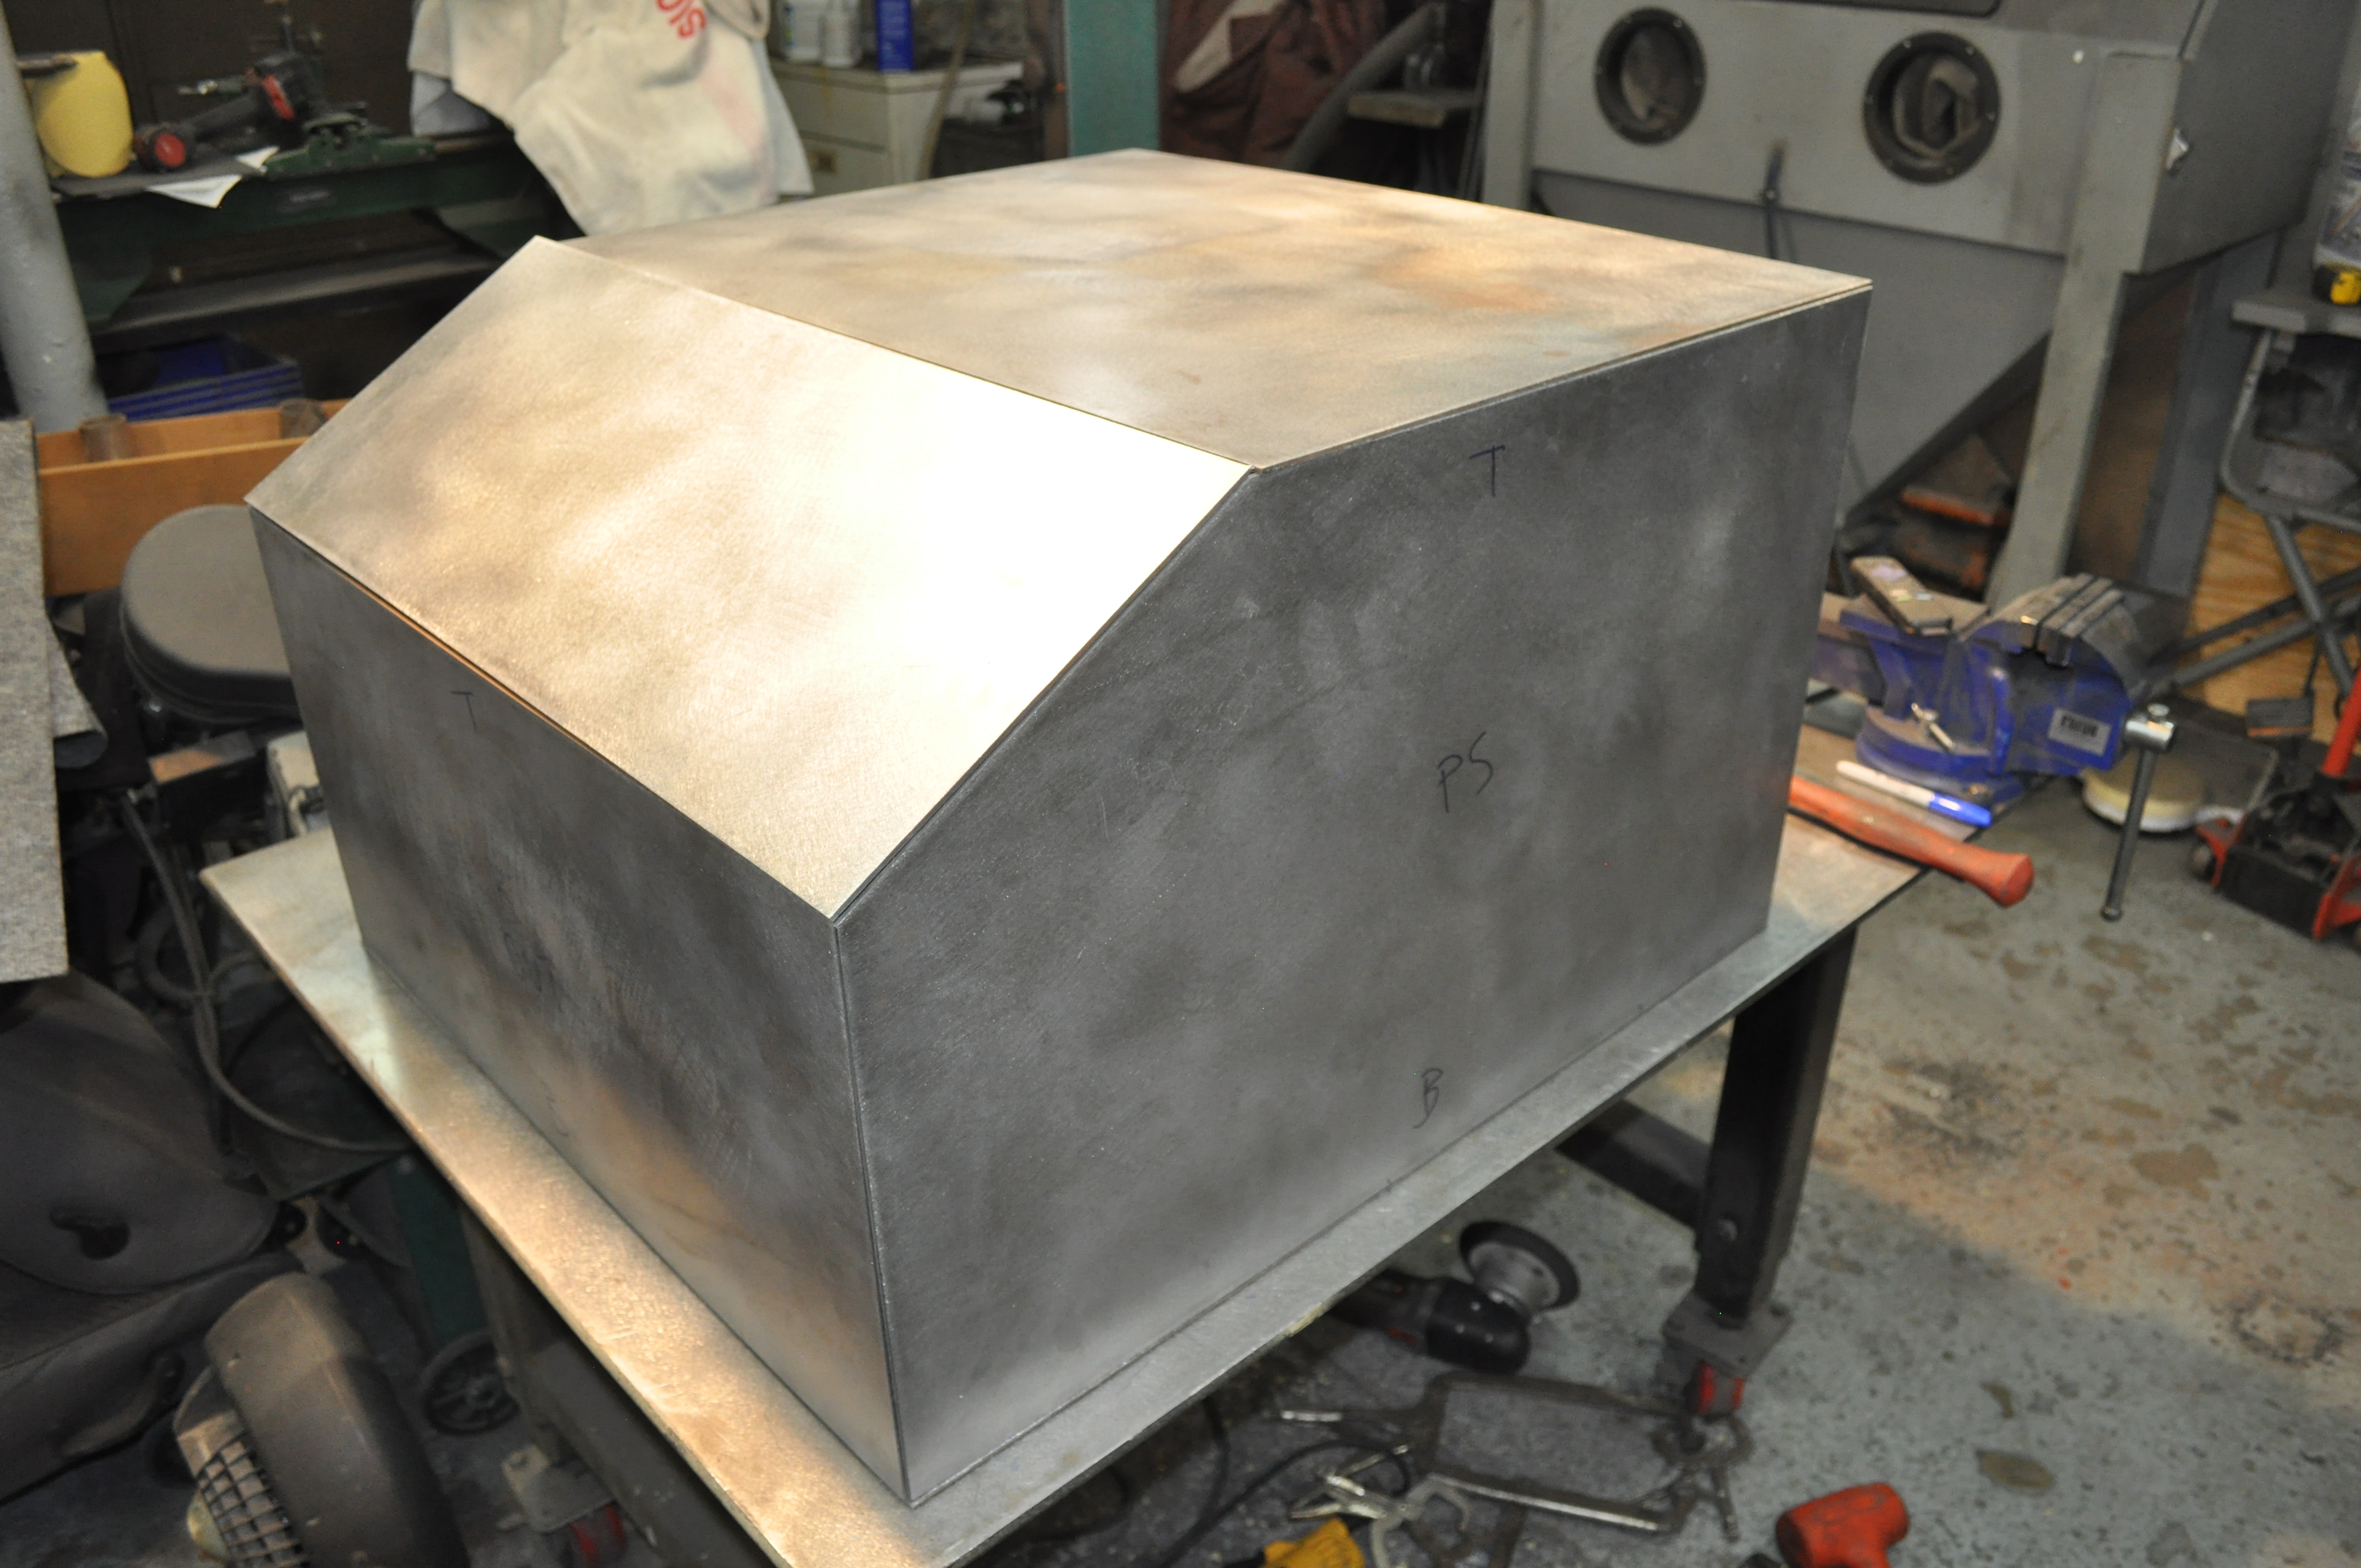
hopefully my paper shows tomorrow and I can get back to panel fit-up... also taking a ride to Fazio maybe tomorrow or fri...
 
Last edited:
Will the lid/neck be tank mounted, and the door be doghouse mounted?

Overkill never hurts, but I’d think the 3 piece is fine. Remember, you aren’t welding/ smoothing the insides. Whatever creates the least turbulence going in will be your friend.
 
and just to follow that up a bit... the intention/plan at this point is that I will fully build the top, flat panel of the tank before actually welding it to the tank.. both fills, feed, return and vent bungs, and hole for sender with tapped mounting holes...... that way I can fully weld the fills, and bungs, outside, and in, before attaching the plate to the top...

I'm also still undetermined on whether to do that first, or the angle front one first. cuz technically i should be able to get in there and do some inside welding before the last piece goes in...

the top is probably the smarter.. but it is the larger panel.. and has all the "stuff" on it.. the angled one is smaller, less weld.. but it is consistently "lower" in the fuel level...

:ears:
 
Last edited:
and, just some minutia clarification.. the reason I'm going to Fazio's is.....


I'm an idjit! :haha:


while I built some cool clamp-on angle brackets, which will be great for the sidewall to sidewall alignment.... the 2 BIG angle magnets I picked up at Fazio when getting the plate, on a whim, are friggin awesome... I want more.. :haha: on the left..


full


they are big 75 lb stout mofos that run about $9 a piece... I'm going to buy 4 more minimum.. maybe 6 if I'm feeling Randy.. :haha:


I've decided the smart way to do this deal is to actually have the lower 5 in perfect position when tacking.. I'm sure I could flex things around individually, but...

the big ones I made are good for the sidewall to sidewall clamping kind of at the top, but to get the sides to the floor, etc, these things will be killa... worth $50 or so...

compared to the big HF $5 ones, it's no contest.. the 75's are stooopid powerful at aligning.. all the smaller ones i already own are pretty much useless with such large panels...
 
If you have that many, just be sure to do the same thing they do in operating rooms with the sponges and equipment.
Count before closing.
Its too late after you weld the last panel to realize you are one magnet short..........

J.
 
If you have that many, just be sure to do the same thing they do in operating rooms with the sponges and equipment.
Count before closing.
Its too late after you weld the last panel to realize you are one magnet short..........

J.


troof... :haha: i didn't even think of that..

shouldn't be an issue tho, as I wont be using them to install the top 2 pieces......


on that note... had 2, "eh I'll get 4 more, maybe 6"...... bought 8 :haha:


figured, screw it, an hr each way, get everything, just walked in the door. so between 10 of those and the 2 big ones, I'll be in good shape...
 
probably should have bought a couple more ;)


full


I'll be fine... :haha:


the bigger issue at this point is I really need to take my time right now and properly tune/fit these... They are very good, but not perfect... couple could be shortened a hair to make perfect joints to weld in the corners..... not even the kind of thing I'd use the belt sander for, just a DA at 1/2 speed, "creep up on it" deal...


the other thing is that all 4 sidewalls have just the "ever so slightest" bow running on the lengths, literally an 1/8" or less.. a little simple "over the knee" persuasion will take care of it....


than you can also factor in wanting/needing to bring all that inside surface up thru 320, etc.... friggin Benchmark, I swear, I like what they are about, but the whole flatrat USPS deal brings the suck... it's always a minimum of 7 to 10 days for me... think that stuff shows tomorrow..


and again, I'm an idjit.... ;) like the 1/2" bungs I got... only prob is, *insert brainfart* , I need 4..... :doah: :haha:


full
 
For future reference, Home Depot carries a “green” muriatic acid that’s about 1/2 strength of regular. That might be closer to a soak and forget kind of deal.
 
For future reference, Home Depot carries a “green” muriatic acid that’s about 1/2 strength of regular. That might be closer to a soak and forget kind of deal.


good to know, most projects I would prefer a less aggressive approach....

I have decent size trays i buy to make Kai's food.. i can upgrade a couple to new at some point.. They aren't big enough for these, but prolly 18" x 28"....

i seem to remember my ACE having a lesser one a while back too.. but I think this is all they carry now...


here's kind of how the initial tack set up will be... marked out the couple edges i want to touch up tomorrow... should get a good couple days in here...


full
 
oh, and I'm running down the street to the tank guys in the morn to get the rubber strips i need...


I'm going to actually put that whole assembly into the frame and on the rubber strips when i tack it up to guarantee good clearances, etc..... I'll pull it out to fully weld obviously...
 
stripped the baffles thru 40 and final marked.....

*kook level 11 for marking out ceiling stitch locations..*


full


the observant will notice it is set up for the side to side baffle to go in first, and front/back to slip on top...


anyway, final tuned all the walls today, put a chamfer at the bottom to the floor and am ready to tack that whole structure up... I will say, while my dull sharpies gave me concern, I'm so glad I really took my time laying out and cutting the panels... i had one wall like 1/16 high and just took a bit off a couple other ends... used my new 45* belt sander attachment for the accurate bevel... :saweet:


also picked up the neoprene from my tank guy... 1/4" x 2".. 3' strips.... stuff ain't cheap... $60 right there...

he said his alum costs right now are insane.... we talked poo on bidumb..


full


I'm REALLY luvin working in The LAB™ with some actual room to move.... still waiting on 2 4' LED's to come in...


#Kaibomb


full


hopefully tomorrow will be the last circ saw work and I can put the vac away.. I get paranoid with Kai... it's like 10 minutes to set up, 5 mins to cut.. and a 1/2 hr to clean up... :doah: :haha:

the rest of the day will be 180 work on the DA.. for hrs... and hrs... :deal:


oh, wait, :pimp1:, there's more....

320, 320, 320.... :grind:


sigh... :doah: :haha:
 
Last edited:
thanks bud... :)


nice rain day in The LAB™ with Kai.....

so.. in all my yrs, can't say I've ever brought raw steel thru polish.... :thinking: :haha:

here's about an hr and a 1/2 on the bottom.. from 40g.. bunch of 180 and 320... and super quick white compound hit with a wheel... would have used orange if I had some...


full


it's funny how blotchy the steel is...... could have worked it a bit more...... bit more 180 and 320.. was fighting a few trace 40's at the end.... a grit inbetween would have helped.. i do have some 600 DA at work I could hit it with a bit too.... decided to wipe off compound residue with thinner, than denatured alcohol.. damp/dry.... being that anything H2O related is no bueno...


biggest thing will be it's reaction to moisture/humidity as I move forward..... I have noticed the heavy etch of the 40g sanding on the other panels was getting a bit of flash rust here and there... think I may just try putting a super light WD40 coat on em with a rag.. than wipe em down with a thinner rag right before welding... maybe re-oil it a bit before welding the last piece on the top...

I'd like to plow right thru the install and fill the fugger right away.. get that steel soaking.. even if the mill isn't in yet... we'll see..


oh, and here's the neoprenes cut to fit... when everything's painted and doing assembly, I'll put a quick spritz of contact cement under them..


full
 
Amazing how fast stuff rusts out there. Brings back so many memories of rusted out piles I drove .


what's kind of funny is, I'm pretty good in the shop anymore after incidents years ago venting the dryer into the garage causing mucho rusting... I honestly think that the fresh cut, open grain 40 was making it rust WAY WAY fast.. compared to other metal I have kicking around...


i'm just trying to be diligent in how i go about this... not screw myself.. there's no excuse to not take my time and try to be thorough.. other than me getting gacked over my projects... ;) it could take me 6 months to finish this and really wouldn't be a big deal...
 
just a weird shop material use thought....

when i was saying a couple weeks ago that i was gonna try to protect this clean metal on a big % of it when welding, etc...

well, the obvious thing I thought of was the 3M welding paper.. never used it, but had seen it used many times... well, that ain't happening, it's like $125 a roll minimum.. :eek1: I'm sure it's awesome, but....

anyway, my cheap, immediate thought is to just tape some cardboard in place... maybe keep a spray bottle of agua around to put out any embers burning thru.... :ears:
 
Last edited:
just a weird shop material use thought....

when i was saying a couple weeks ago that i was gonna try to protect this clean metal on a big % of it when welding, etc...

well, the obvious thing I thought of was the 3M welding paper.. never used it, but had seen it used many times... well, that ain't happening, it's like $125 a roll minimum.. :eek1: I'm sure it's awesome, but....

anyway, my cheap, immediate thought is to just tape some cardboard in place... maybe keep a spray bottle of agua around to put out any embers burning thru.... :ears:

Cardboard and good painters tape make awesome paint protection.
Do a couple strips width of tape then the cardboard.

The 3m stuff is worth it if you're covering glass. But otherwise, tape for the win.
 
The bigrolls of cardboard they have at home depot make decent protection and even sheetmetal template material. It’s the stuff the lay down on floors to protect them. 1/16” thick or so.
 

Latest Posts

Top Bottom