CK5
Register an account today to become a member! Once signed in, you'll be able to participate on this site by adding your own topics and posts, as well as connect with other members.

87 K5 "Cashbag"

wheels87k5

24 Karat
 Premium
GMOTM Winner
Joined
May 1, 2007
Posts
2,029
Reaction score
2,223
Location
Goddard, Ks
wheels87k5 submitted a new Build:

87 k5 "Cashbag"

In the beginning...just a standard 87 K5.....long story short? OK...it was supposed to be a DD but turned out to be a screw over...that's what I get for not having somebody take a look at it for me....and since the seller and myself are in different states....more like 1000 miles apart.....I decided to keep it and make it my own.
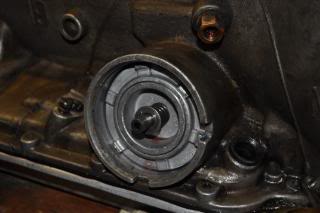
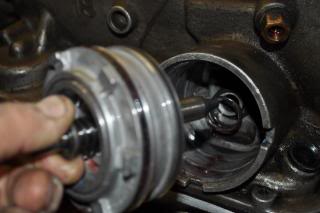
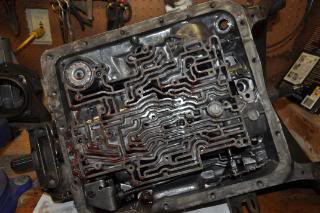
Since I have owned it, I have replaced the engine (350 TBI), the transmission (700r4), all new brakes, headers, dual exhaust, 4" TC all spring lift, regeared the rear 10b to 4.10 w/power trax no slip locker, all new sensors and EGR valve, 2 new rims to match the front, 32x11.5 BFG A/T, fuel pump, transfer case (NP241).

View attachment 112396

View attachment 112398

View attachment 230331

Read more about this build here...
 
Last edited by a moderator:
My plans are to put in the 14bff w/detroit and disc, dana 60 w/trak lock, geared to 5.13, 36-37" tires, 16x8 steel rims, 6" total lift, steel bumper w/winch, hi-performance chip w/cam, sye the 241 w/new cv driveshafts, all 1350's.

Here's the dana 60. Came from a 1986 M1031 5/4 ton contact truck. I drove about 2 hours south to pick it up for $750 and some gas.


DSC_0001.jpg

DSC_0003.jpg

DSC_0007.jpg
 
Last edited:
nice truck.......least now you know what's what.

out of curiosity.....with those gears why did you stay with that size tire?
 
I'll ramble on as I go.....enjoy the ride....I know I have enjoyed watching some of these builds since I have joined CK5....I don't post much...well...not since the first year (from 5/07 to around sometime in 08) That's when all hell broke loose and I was first running the new 350. I yelled for help and got it from all directions.
If I recall, someone even told me to quit starting a new thread about the same subject I was getting answers for in the first thread I started. It was about an overheating issue I wasn't having.

So to all the newbies, please join up, search and read, read, and read some more. This place is loaded with information, and great people to help you with any problem you can throw at them.

Yeah yeah yeah, blah blah blah.........

My collection of manuals to help me along....especially the wiring.

DSC_0011.JPG
 
nice truck.......least now you know what's what.

out of curiosity.....with those gears why did you stay with that size tire?

If you mean the 4.10 w/ 32".....It had 3.42 gears and would keep hunting between D and OD every time a bug hit the windshield. The tires are really only 31.5" tall.

If you mean the 5.13 w/36-37".....same reason....I think it might hunt gears if I go bigger.
It really depends on the tranny....I'm going to rebuild it and add a little "umph" to it and if it allows a bigger tire, I might go a little bigger but I'm not looking to put anything on it that would take it out of the power range and lower rpm.
I bought this rebuilt 700r4 from a tranny shop w/12 month, 12,000 mile warranty. It started going kaput at around 13,000 miles and one year after the warranty.
 
As stated earlier, the 14bff with detroit.......I've installed the disc conversion....it helps with the re-gearing when you need to put a good load on the ring gear to get good, solid readings. The spring perches and shock mounts have been removed. Also a pic of a 2WD steering box and one of the new spring plates and perches.
When doing the steering box change I'm going to put in both the weld in and bolt in frame braces.

DSC_0028.JPG

DSC_0030.JPG

DSC_0029.JPG

DSC_0033.JPG
 
Last edited:
Not sure if anyone has used this set-up before but it works great.....There is a flathead screwdriver wedged in between the caliper bracket and back of brake pad...basically filling in the gap....and a C-clamp that's on the edge of the brake pad base and outside of caliper bracket....Just tighten a little at a time until you reach 40-50 ft per lbs at the pinion nut.

Pic of my other project/toy........1978 Trans Am.....It's nickname is not Dusty......just looks that way. :whistle:

DSC_0031.JPG

DSC_0032.JPG
 
Got a good deal for parts and labor to heighten my garage door and opening. It went from 7'x18' to 8'9"x18. For those of us without calculators, that's 17" of wasted space!!! :yikes:
You can see the difference between the two doors.....kind of a before and after pic. And then there's the power to open up that monster. I think the installer said the door now weighs 340#.
I also got some parts in the mail......a 700r4 rebuild kit w/HD torque convertor, corvette servo, and .500 boost valve. And the rebuild kit w/chain for the np241. Hopefully I can start on the transmission in about 3 weeks or less. When I do, I'll take pics of the whole process and post up any that you want to see. The TC will follow and same thing on the pics.

Copy of DSC_0036.JPG

Copy of DSC_0035.JPG

Copy of DSC_0040.JPG
 
i quickly looked at the other garage door and said thats the shortest garage door ive ever seen!.. then i realized i was over looking the blazer which i thought was the trans am.
 
700r4 rebuild

Pulled the transfer case and transmission yesterday......And started on the 700r4 first.
I bought the Video with Paul Zank rebuilding the 700r4 and so far it's pretty much right on the money. But I have run into a small problem.
When I removed the 1-2 accumulator housing(pic), the piston is the first thing you see, then you pull that out and there's the spring, inside the housing.
According to the Video, it's the opposite...the piston is suppose to be flipped over, inside the housing and the spring sitting on it. Did this transmission get rebuilt wrong(from tranny shop), or does it matter how the spring and piston are set up?


The set up on the other side of the gasket (case side) is also different in the Video. The vidoe shows the piston should be flipped over, in the case, then the spring sits on it.

full


full


Any 700r4 fans that know if the tranny shop put these in wrong? I want to get a verification before putting them back in.
 
Last edited:
After further review.....and reading the ATSG manual.....that set up was done correctly....I will continue with the rebuild and upgrades.
Any and all input is appreciated.
 
Looking pretty good. For some reason the thought of rebuilding a transmission has always scarred me. Maybe the video would make it easy for me.
 
700r4 tear down

Just a few pics of the fun....
This is my first rebuild of any transmission, and so far it doesn't seem too difficult if you follow the video and/or manuals and do exactly what is says. Will it operate correctly after installed? I'll find out soon enough and hope for the best. I have the help of a transmission shop in Wichita if I run into trouble. You can bring in part of your tranny and they will help you assemble it correctly.
You do not need a bunch of specialty tools....I have a hydraulic press that I use for compressing the spring assembly. I guess if you don't have the funds it could be considered a specialty tool....sorry. I seen an article that shows how you can use a 2x4 with a notch cut in it to compress the spring assembly. I didn't like the idea of wood splinters getting in or on any parts....but it does work. And I bought the lip seal tool from the tranny shop for $23. I cut a piece of metal to fit the pump shaft and a gear puller to remove the pump.

Removing o-ring for servo cover

full


full


full


full


Spot the checkballs ?

full


I've got the reverse input housing done....all new clutches and steels...and all new o-rings. It's sitting in confinement keeping clean.

I'll try to have this done and installed by Sunday....and since the fireplace rock has been delivered.....someone (the Queen), will want that project completed before I can do the NP241. :sign26:
 
Last edited:
Small updates.

I finished rebuilding the 700r4 about a month ago.....and I regeared the Dana 60 to 5:13s Monday and Tuesday.

Today I got the 10bolt out and am in the process of welding the braces to the frame. I hope to find time tomorrow to fininsh welding and try to get the Dana 60 installed. Slow but moving. I will get pics up later.

A BIG THANKS to Chris at ORD. All the parts came in as schedueled....and the SYE kit that was on back order for 2 weeks came in a week early. That was a nice surprise. Again....Thank You Chris and ORD. :bow:
 
Top Bottom