Hawse fair leadOkay, so I'm trying to narrow down my Blazer Bash prep list from things I think I need to thing I really do need.
- Re-route trans cooler lines away from exhaust and into new cooler
- Wire fan for new cooler
- Weld part of exhaust
- Fuel tank plates at least between brackets to keep sending unit area safe
- Try replacing passenger tank return line between tank selector valve and tank to see if that brings pressure down to match other tank
- new CB antenna
would be nice list
- in-cab fuel pressure gauge
- new rear shocks with better mounting
CK5

You are using an out of date browser. It may not display this or other websites correctly.
You should upgrade or use an alternative browser.
You should upgrade or use an alternative browser.
'89 R3500 Crew Cab 2wd to 4wd conversion & beyond
- Thread starter mrk5
- Start date
Started out with 2wd TBI350 with SM465 to current 4wd with 454, 700r4, NP241

It's now in the crew cab so it can't be forgotten.Hawse fair lead
I been forgetting to post about the stirrup type steps I made.
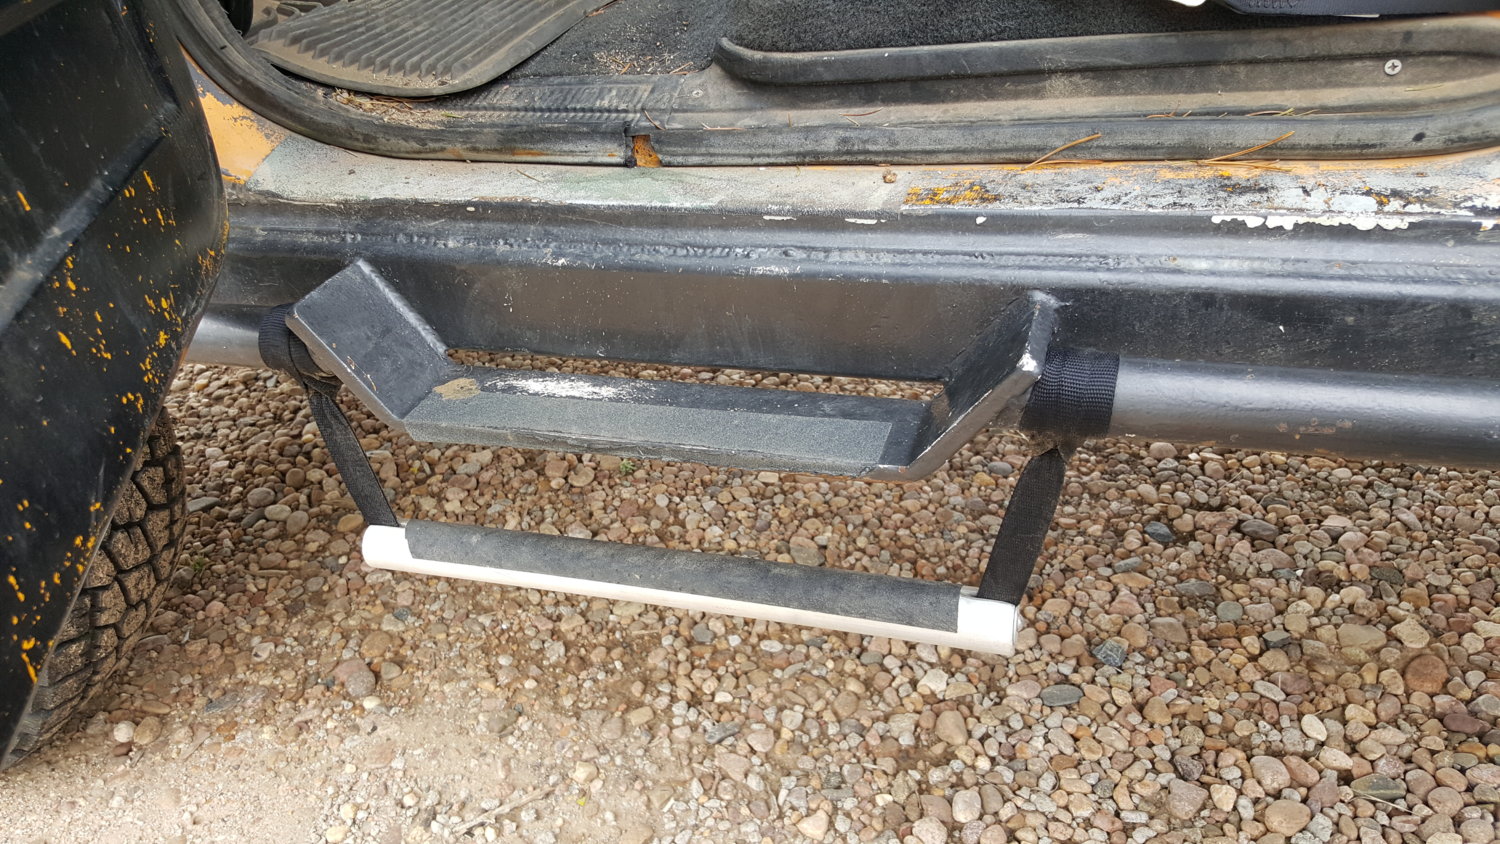
I had to do this because of a fabrication error. The flat steel step doesn't allow my foot to pivot so on a long day getting in and out my knee gets pissed.
I've seen people use actual stirrups too. I would have done that if I hadn't had the fabricated steps there already.
There's a gynaecologist joke in there.
TwiceThere's a gynaecologist joke in there.
Put it in the console so I can't forget.Hawse fair lead
Blazer Bash prep continues. Had a pretty fruitful weekend but not without some stumbling blocks.
Finished up the install of the little cooler with the fan by adding the transmission side. Unfortunately younger Scott did not do me any favors 8 years ago. I thing I had put AN fittings on the 700r4 but it turns out I used the barbed twist-loc fittings Summit sells. My forearms are sore today from trying to push the lines on IN the truck. If I had known ahead of time I would have bought new adapters. I still may because I couldn't push the hose on as far as I would have liked. I added hose clamps for security. I think they'll hold tho. Damn those things are a bitch. All my new stuff uses the typical AN hose ends.
Another item I tackled was the high fuel pressuring on the left tank, not the first time this happened. After eliminating the tank selector valve and the hard line between tanks, I decided it had to be a kinked return line again. Sure enough, as soon as I lowered the tank enough to see the lines, I could see where the return had been kinked.
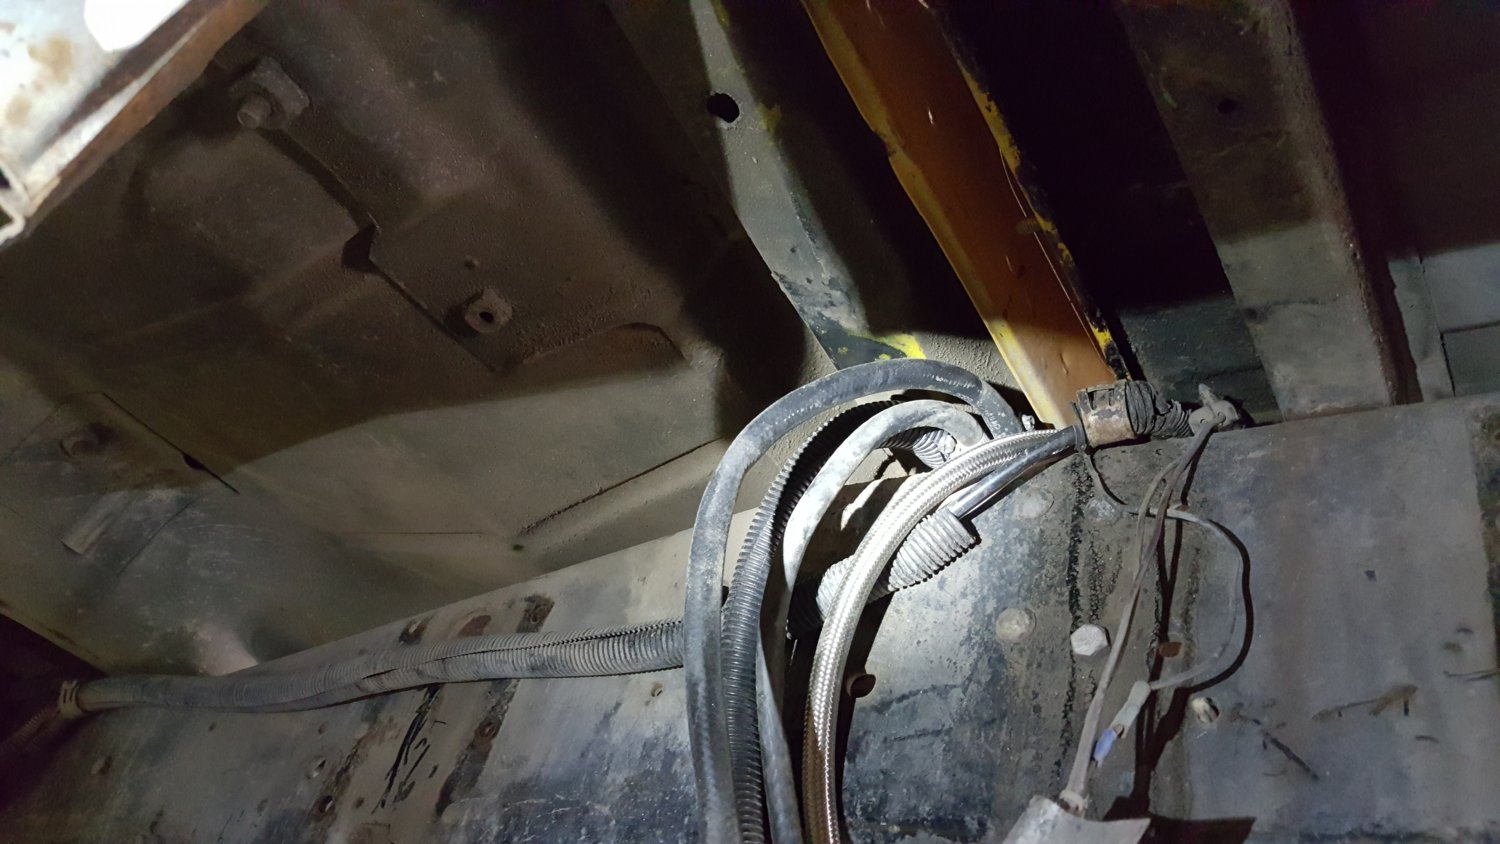
If you look at the far left hose, you can see where it is kinda flat from kinking. It turns out I had some 5/16" stainless steel braided hose. I've had it for as long as I can remember and I don't remember what I bought it for. I had always thought it was 3/8" until I tried to use for the transmission cooler earlier in the weekend.
So I ran the braided line from the tank, all the way across to the tank selector valve which is on the right frame rail.
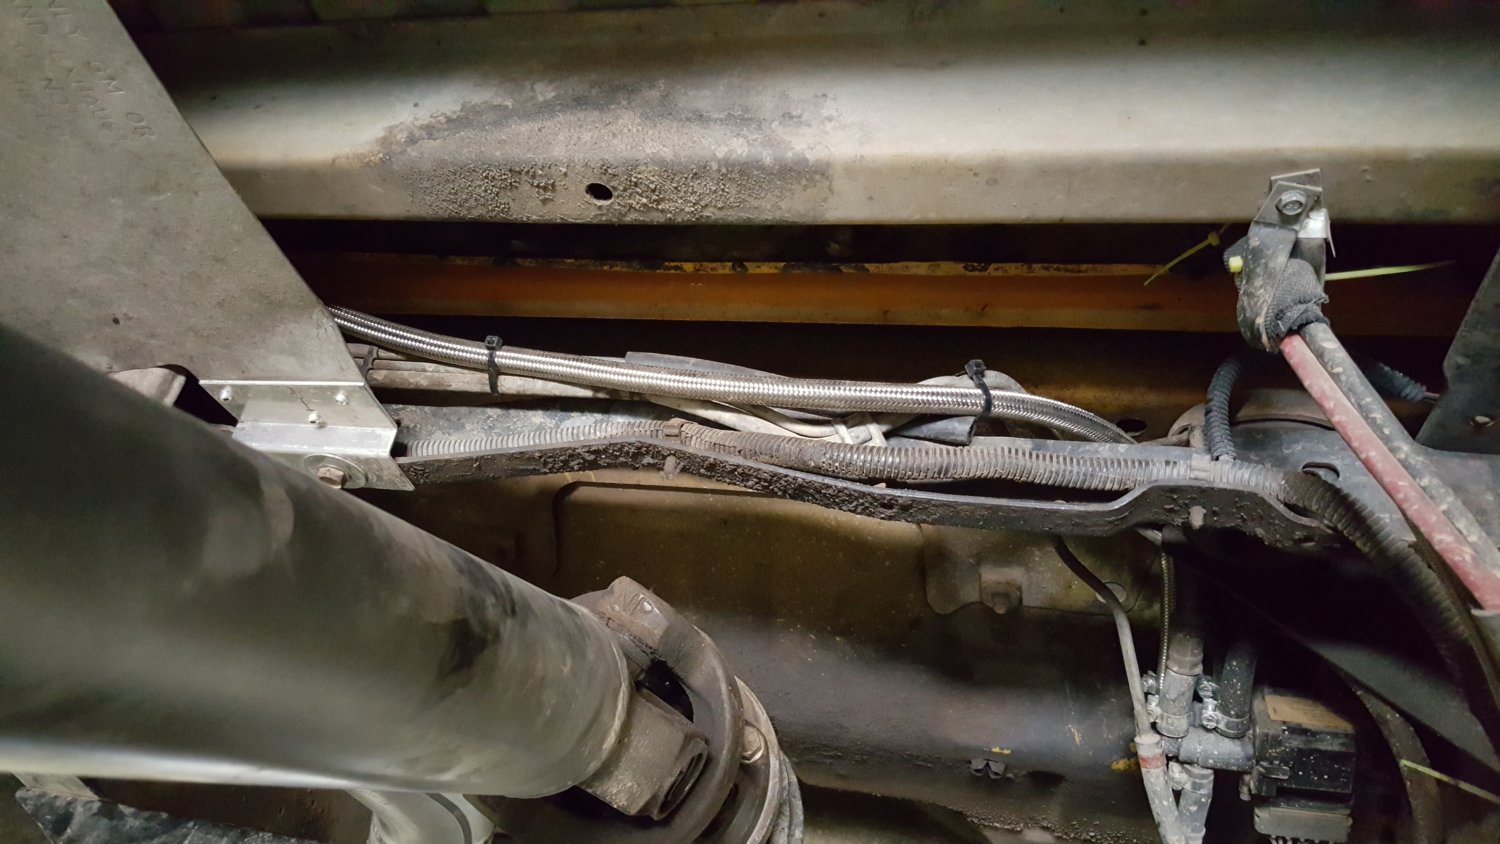
It would be pretty damn hard to kink a steel braided line and I'm tired of dropping this tank because it requires removing the exhaust.
Speaking of the exhaust, I added a flex piece to the straight section.

My thinking is this will help with some of the areas where I really have to force the exhaust into place. I didn't want to crack the headers when the truck is twisted up on the trail. Down side is now the tail pipe doesn't quite line up. So I may need to redo that flange. Although while looking through the photos I realized I didn't tighten up one of the hangers, so that might have some effect as it comes after the flex piece.
The other step back was the power steering. I still have the leak at the pump connection for the reservoir. It occurred to me to look at the fitting I removed and I found this;

There is something on the fitting that is causing it to get scored. I'm very upset with myself for not looking at this BEFORE I installed the new fitting.
Does anyone know of a way I can resurface the fitting on the pump. I don't need to worry as much about the hose fitting because it can be replaced. The fitting on the pump can is welded on.
Finished up the install of the little cooler with the fan by adding the transmission side. Unfortunately younger Scott did not do me any favors 8 years ago. I thing I had put AN fittings on the 700r4 but it turns out I used the barbed twist-loc fittings Summit sells. My forearms are sore today from trying to push the lines on IN the truck. If I had known ahead of time I would have bought new adapters. I still may because I couldn't push the hose on as far as I would have liked. I added hose clamps for security. I think they'll hold tho. Damn those things are a bitch. All my new stuff uses the typical AN hose ends.
Another item I tackled was the high fuel pressuring on the left tank, not the first time this happened. After eliminating the tank selector valve and the hard line between tanks, I decided it had to be a kinked return line again. Sure enough, as soon as I lowered the tank enough to see the lines, I could see where the return had been kinked.
If you look at the far left hose, you can see where it is kinda flat from kinking. It turns out I had some 5/16" stainless steel braided hose. I've had it for as long as I can remember and I don't remember what I bought it for. I had always thought it was 3/8" until I tried to use for the transmission cooler earlier in the weekend.
So I ran the braided line from the tank, all the way across to the tank selector valve which is on the right frame rail.
It would be pretty damn hard to kink a steel braided line and I'm tired of dropping this tank because it requires removing the exhaust.
Speaking of the exhaust, I added a flex piece to the straight section.
My thinking is this will help with some of the areas where I really have to force the exhaust into place. I didn't want to crack the headers when the truck is twisted up on the trail. Down side is now the tail pipe doesn't quite line up. So I may need to redo that flange. Although while looking through the photos I realized I didn't tighten up one of the hangers, so that might have some effect as it comes after the flex piece.
The other step back was the power steering. I still have the leak at the pump connection for the reservoir. It occurred to me to look at the fitting I removed and I found this;
There is something on the fitting that is causing it to get scored. I'm very upset with myself for not looking at this BEFORE I installed the new fitting.
Does anyone know of a way I can resurface the fitting on the pump. I don't need to worry as much about the hose fitting because it can be replaced. The fitting on the pump can is welded on.
Haha! Look what I found after finally stumbled across the right search term "AN flare savers"
https://m.summitracing.com/parts/ear-169212erl
https://m.summitracing.com/parts/ear-169212erl
Picture of the pump fitting? I would think some fine sandpaper would remove the burr (assuming that's all it is).
It looks to me like the black coating is just scuffed off of the flare seat. That part doesn't move when tightening so nothing has turned against it causing any scoring, probably just scratched the coating off as it compressed. I agree, sand the coating off in case the scratch is allowing a leak but I can't see the fitting being damaged.
Yeah, I'm not sure if it's just the coating or if there's a burr. I can't feel anything on the fitting pictured with my finger, but my fingernail does catch on it. I'm thinking there may be a bur on the male fitting on the pump can. Seems like it has to be some foreign material to cause 2 different fittings to leak.
I was reading about leaking AN fittings and people mentioned lubricating the flare faces. People talked about direct experience with getting leaks when they didn't because the 2 faces would essentially grind together and cause scratching. I haven't had trouble with my fittings leaking like this one is, but if it is leaking because of the coating scratching off, that might be an indication lubing the faces would help.
I'm going to pull the reservoir line off and inspect both sides. If there's a bur, I'll gently sand it down. I'm also going to run the "AN flare saver" to be safe. And make sure there's a light coating of oil or grease on the flare faces as well. One nice thing with AN fittings is I can remove the reservoir without losing much fluid.
I understand your concerns and there is a valid argument for lubricating the surfaces during assembly but that circular mark couldn't have been created by a burr on the male fitting unless the nipple, not the nut, was allowed to spin 360° during assembly. The nipple should remain stationary as the nut is tightened.
That does make some sense because I didn't look carefully at the fitting on the pump can, but I would have thought I would have noticed something like a bur. So maybe I need to be more careful not to move the fitting once it's tight. I need to hold it where I want it and tighten the fitting.
Oh, yeah anti seize is a good idea.Scott in all the years we used those fittings I always put a dab of anti sieze on the threads and the seat face
Well I know that some of you won't like this, but 30+ years ago, a couple of experienced guys showed me a trick. If you have a leak on a flared fitting and there aren't obvious mating surface problems, then loosen the nut very slightly and rock the hose, then retighten.
Some leaks were cured with just loosening and retighten.
Think of it as lapping valves in the head.
I know some will say that it can put debris out of the fitting from any "grinding " that occurs. But I am just telling you what has worked for me multiple times in my experience.
Some leaks were cured with just loosening and retighten.
Think of it as lapping valves in the head.
I know some will say that it can put debris out of the fitting from any "grinding " that occurs. But I am just telling you what has worked for me multiple times in my experience.
So you're claiming seniority?Well I know that some of you won't like this, but 30+ years ago, a couple of experienced guys showed me a trick. If you have a leak on a flared fitting and there aren't obvious mating surface problems, then loosen the nut very slightly and rock the hose, then retighten.
Some leaks were cured with just loosening and retighten.
Think of it as lapping valves in the head.
I know some will say that it can put debris out of the fitting from any "grinding " that occurs. But I am just telling you what has worked for me multiple times in my experience.
Some of the stuff I read mentioned tighten, loosen, tighten.... a few times to seat flare fittings. My issue is this is the 2nd fitting, different brand but same result. I did try loosening, then letting it flow a little, then retighten with the previous fitting. But no luck.Well I know that some of you won't like this, but 30+ years ago, a couple of experienced guys showed me a trick. If you have a leak on a flared fitting and there aren't obvious mating surface problems, then loosen the nut very slightly and rock the hose, then retighten.
Some leaks were cured with just loosening and retighten.
Think of it as lapping valves in the head.
I know some will say that it can put debris out of the fitting from any "grinding " that occurs. But I am just telling you what has worked for me multiple times in my experience.

