My truck is quiet and respectful. Quite the opposite of Roseanne Barr.
CK5

You are using an out of date browser. It may not display this or other websites correctly.
You should upgrade or use an alternative browser.
You should upgrade or use an alternative browser.
'89 R3500 Crew Cab 2wd to 4wd conversion & beyond
- Thread starter mrk5
- Start date
Started out with 2wd TBI350 with SM465 to current 4wd with 454, 700r4, NP241
So here's the basic idea for the shift position indicator.

Obviously the end product will have some nicer printed stickers, not sharpy marks. I plan to keep the one on the right like it is for the 2 NP205 shifters since they are the same. The one on the left has both the NP205 and the Magnum. The Magnum marks are the 2 furthest apart and the NP205 pattern fits in between. I think the final product will only have the Magnum marks to avoid confusion.
The pattern on the knobs are nice but they really don't tell you what gear you're in. I have trouble with my current cable shifter figuring out what gear I'm in, you have to try and count/feel the detent clicks.
Ultimately these will have a color coding. Mostly because my wife drives this truck from time to time so she will need help remembering which position each lever needs to be in. For example 2Hi needs the front output in neutral, rear output in Hi, and Magnum in Hi.
It would be really cool if there were a corresponding led to each position
I was thinking about that actually.
Those are cool kid parts for certain. That controller is amazing with many things it lets you change with your trans. It definitely takes away some of the negatives an auto trans has and accentuates its better virtues. Pretty awesome upgrade.
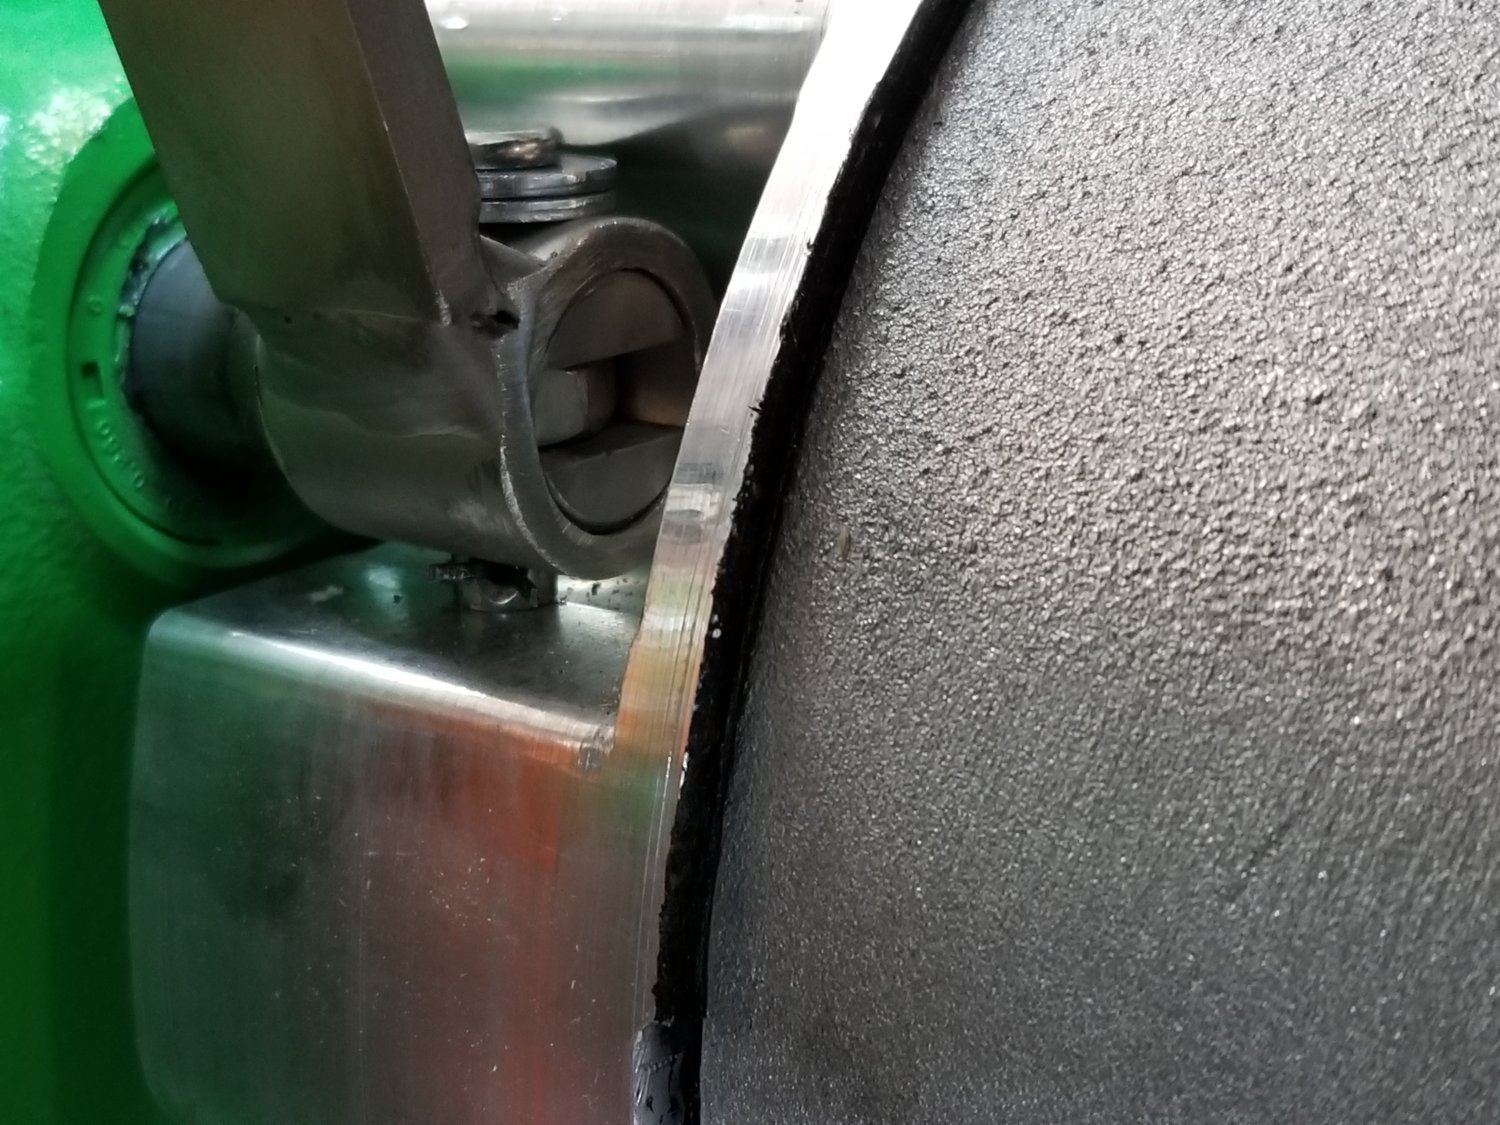
So the rear output shift rail that nests into the Magnum. You may recall earlier I had to grind the cable shifter bracket to get it on the rail. The bolt that came with it is too long so I finally got a shorter bolt along with a jam nut. Well the jam nut won't fit either.
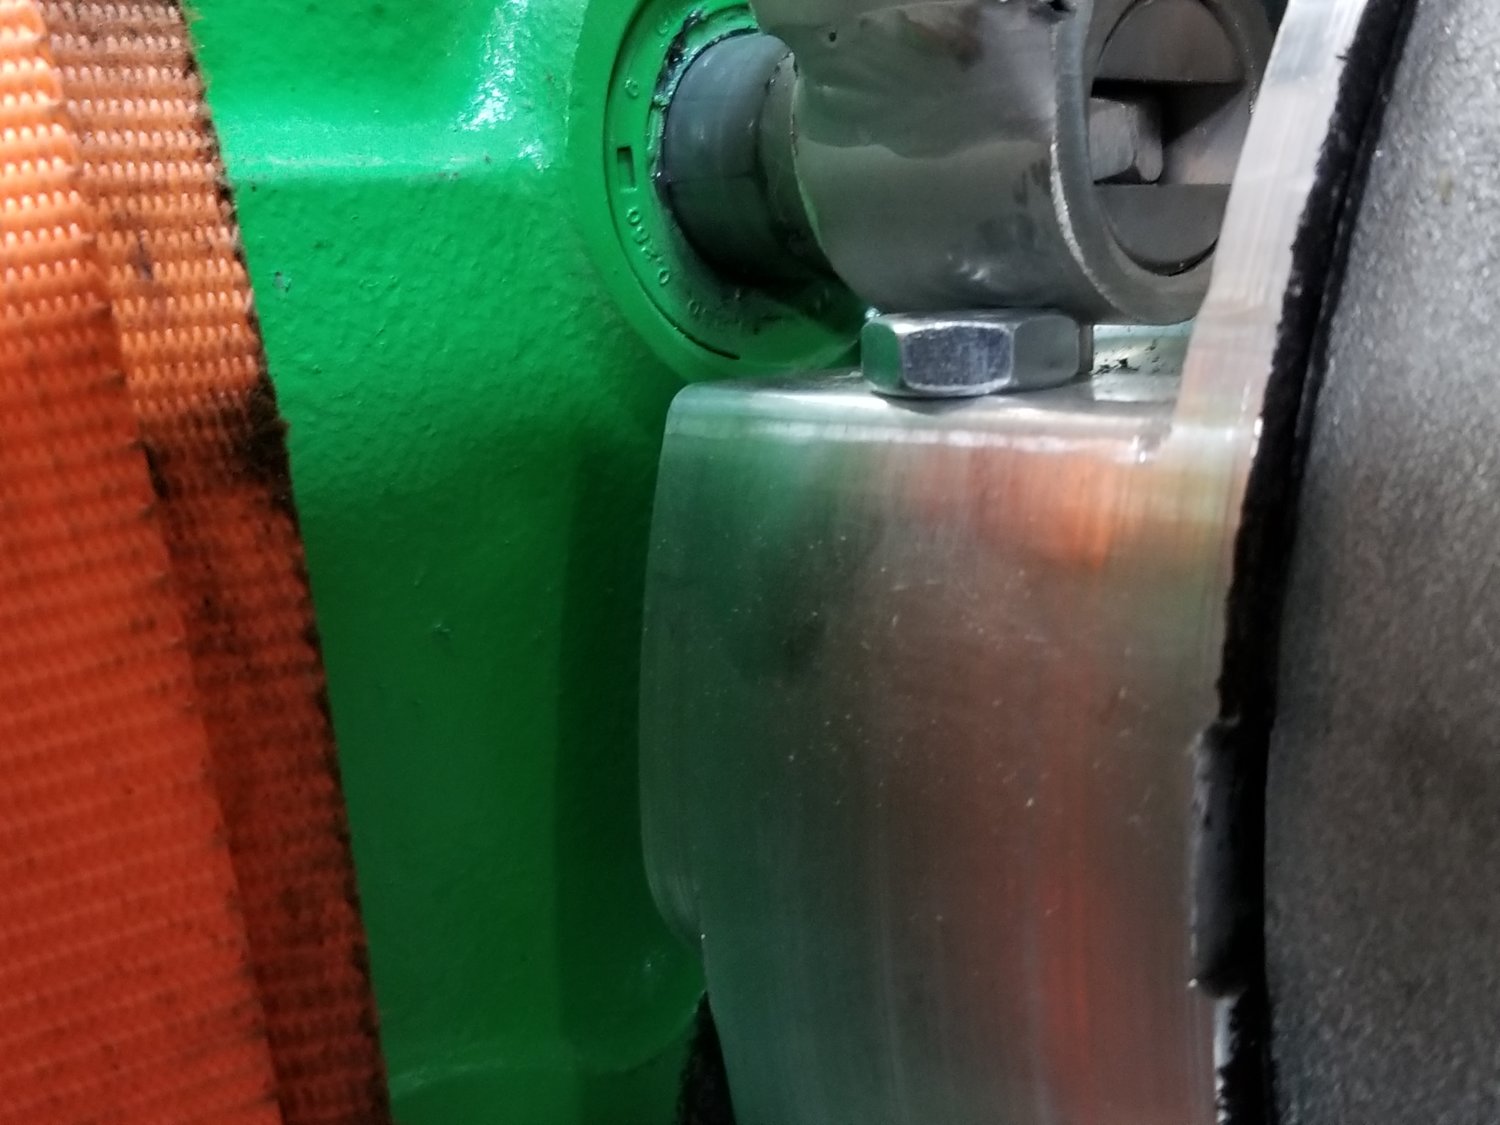
I bought a keeper pin and used a small cotter pin to keep it in place. I also put a couple washers under the head of the pin so it wasn't riding too hard on the Magnum.
The JB Custom Fab instructions do warn that the bolt or nut might need grinding to clear. I wonder if I had put the bolt in before the Magnum if it would have jammed up the shift rail. I'm glad I did it after. I don't know if I'll ever need to remove that bracket, but I feel better knowing I can anyway.
Maybe ORD should start machining that area with more clearance if possible. That or the bracket needs a threaded boss in place of where that nut should go and then use a button head bolt that has that nice little bit of Loctite on it already maybe. What does the ORD twin stick setup use on that shift rail?
I'm not sure what ORD does.
Threading the bottom hole of the bracket would probably work but they'd have to do it from the beginning.
Threading the bottom hole of the bracket would probably work but they'd have to do it from the beginning.
I say you leave the shift base blank, doubles as anti theft when all the levers are every-which-way and the dude doesn't know.
See... doubler anti theft AND T-case
See... doubler
anti theft AND T-caseScott, aren't you concerned with slop not using a nut and bolt pulling it together? I'd be grinding that box so I could use a nut.
We use a plate in the slot of the rail rather than a tube around it

There's a million ways to skin this cat. Machine down the tube a bit and machine .050 off the nut.
What you have would probably work too except you have no space underneath that pin. So after use when things open up a bit the pin is going to cant and dig into the case, which could make it a bitch to shift.
What you have would probably work too except you have no space underneath that pin. So after use when things open up a bit the pin is going to cant and dig into the case, which could make it a bitch to shift.
Like the ORD version.
I can make the pattern plate removeable like a stereo face plate and lock it in the console.I say you leave the shift base blank, doubles as anti theft when all the levers are every-which-way and the dude doesn't know.
See... doubler

A little but at least on the stand there's more slop in the cables than the bracket.Scott, aren't you concerned with slop not using a nut and bolt pulling it together? I'd be grinding that box so I could use a nut.
I'm thinking I could make a hybrid of the ORD style. Basically and L bracket. Then it should work fine with a 1" bolt.Like the ORD version.
That would be my vote
An “L” type design would need to fit really tight in the rail otherwise it will be sloppy. There is a reason why Jon uses tube over that rail.
ORD’s design works quite differently with that bracket running across to a pivot point.

ORD’s design works quite differently with that bracket running across to a pivot point.
What about doing some machine work to the JB shift rail collar? Make a countersunk hole for the nut to sit in and then weld the nut so you don’t have to hold it.
bp71k5
3/4 ton status
What about doing some machine work to the JB shift rail collar? Make a countersunk hole for the nut to sit in and then weld the nut so you don’t have to hold it.
That's kinda what I was thinking. Just thread the tube for the bolt and don't use a nut.
That said, I used the same type of pin thing on mine and it works just fine, but I have the ORD linkage. I'd guess the tube style bracket would work similar.
Yeah, I was thinking if I made an L bracket I will need to get the hole just right so it's tight against the back of the slot. I may also try grinding down the bottom of the JB Fab bracket and see if I can get a nut in there. Or leave like I've got it.
I'm not going to pull the Magnum off, so any other ideas will have to be for the benefit of the "next guy". But that's why I like posting this stuff. Hopefully it will help someone else in the future.
My controller arrives today so I can start work fabbing the mounting for it. It's going to go on the bottom half of the dash. I'll make an angled piece so it is orientated in a direction that I can read it. It has to be in the passenger cabin, but I have seen some people mount it out of sight. I want it visible because I need access to the knob to change Low Range modes and it will also display useful info. My plan is to have it display the current gear the transmission is in. I frequently find myself wondering what gear the transmission is in when I'm on the trail and climbing mountain passes on the highway.

