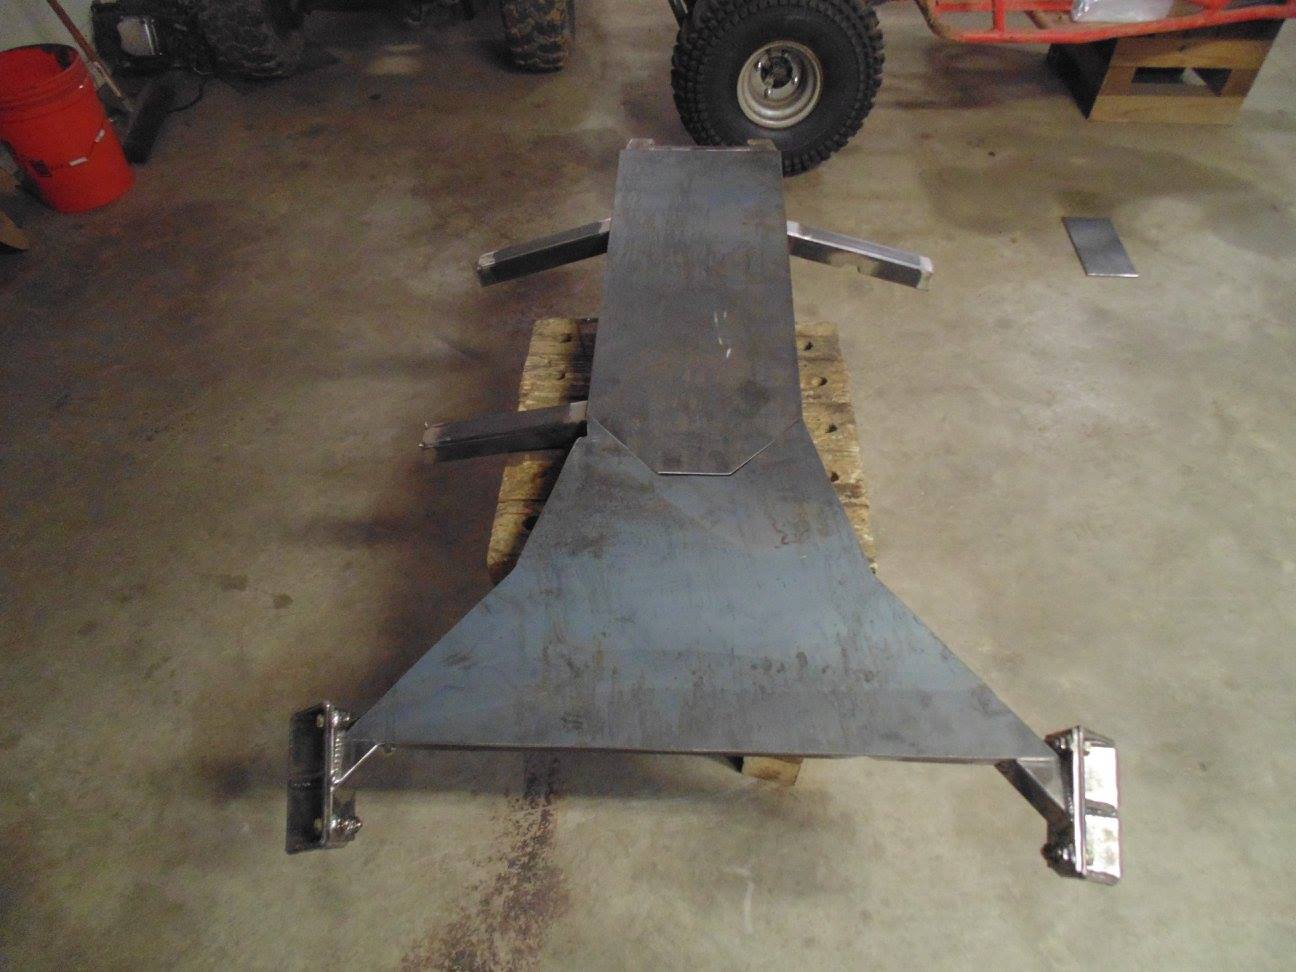
That "rib cage" is looking pretty awesome.
CK5

You are using an out of date browser. It may not display this or other websites correctly.
You should upgrade or use an alternative browser.
You should upgrade or use an alternative browser.
DO NOT OPEN IN PUBLIC, YOU WILL BECOME INSTANTLY ERECT!!!
- Thread starter truck-oholic
- Start date
That "rib cage" is looking pretty awesome.
Thanks, it's definitely been a process and obviously very labor intensive to make it such a tight fit. I like that name by the way, might have to start using it too since this is a little more than just a belly skid at this point.
I am hoping to get some pics tomorrow of a more finished looking version.
Yah I'm digging it. Have built a couple for other trucks. Need to build one for mine.
It's amazing the time it actually takes
It's amazing the time it actually takes
I like that name by the way, might have to start using it too since this is a little more than just a belly skid at this point.
Go for it! I was going to call it a skeleton, then a belly skeleton, then I thought oh wait they already have a name for that lol.
Go for it! I was going to call it a skeleton, then a belly skeleton, then I thought oh wait they already have a name for that lol.
This gave me a good chuckle
I've eaten too many crayons today.
Got sidetracked this afternoon with homeowners insurance stuff so didn't get much done but have a little to report.
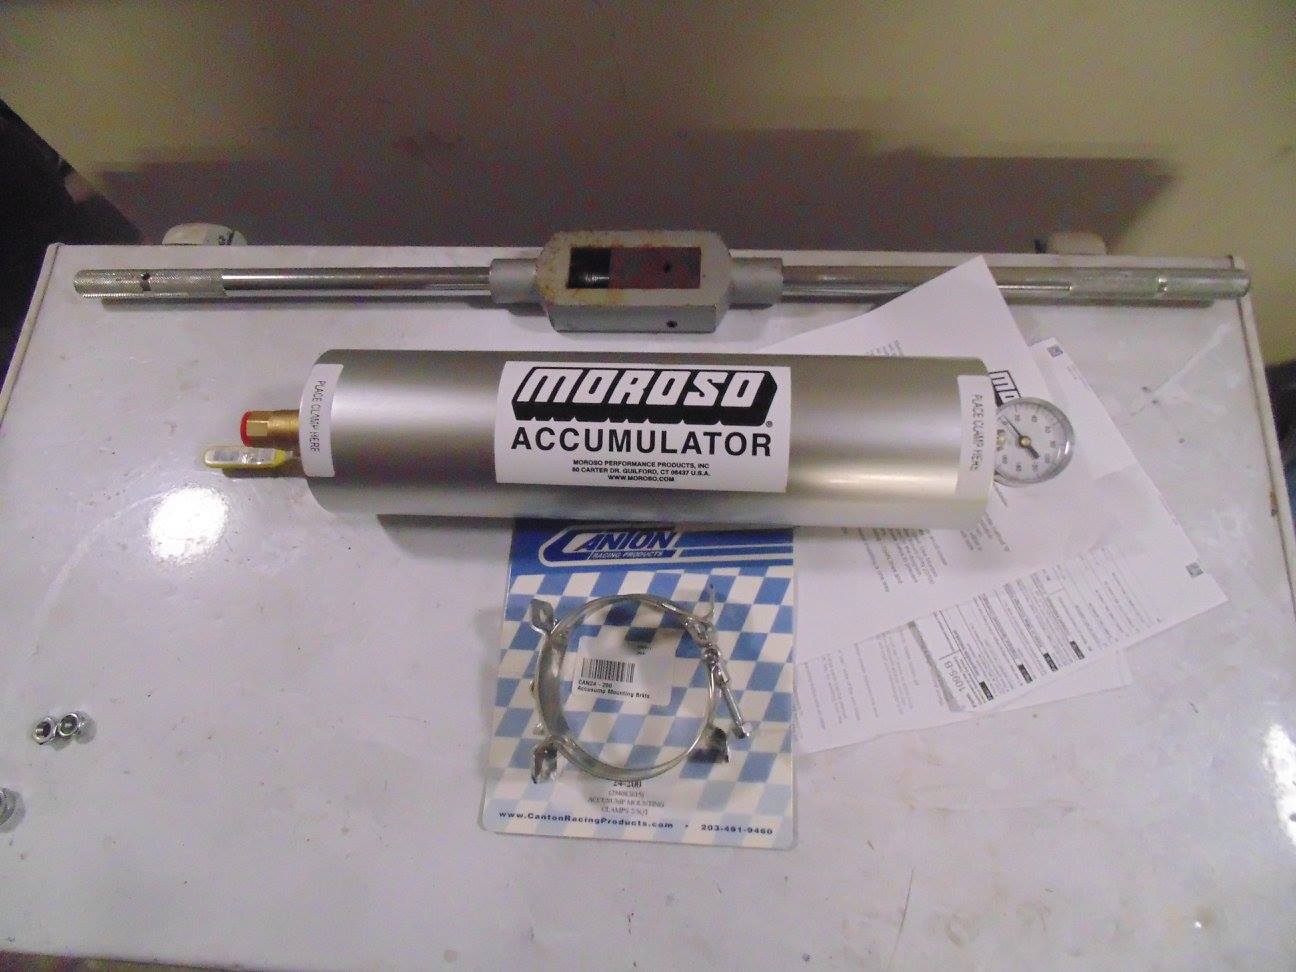
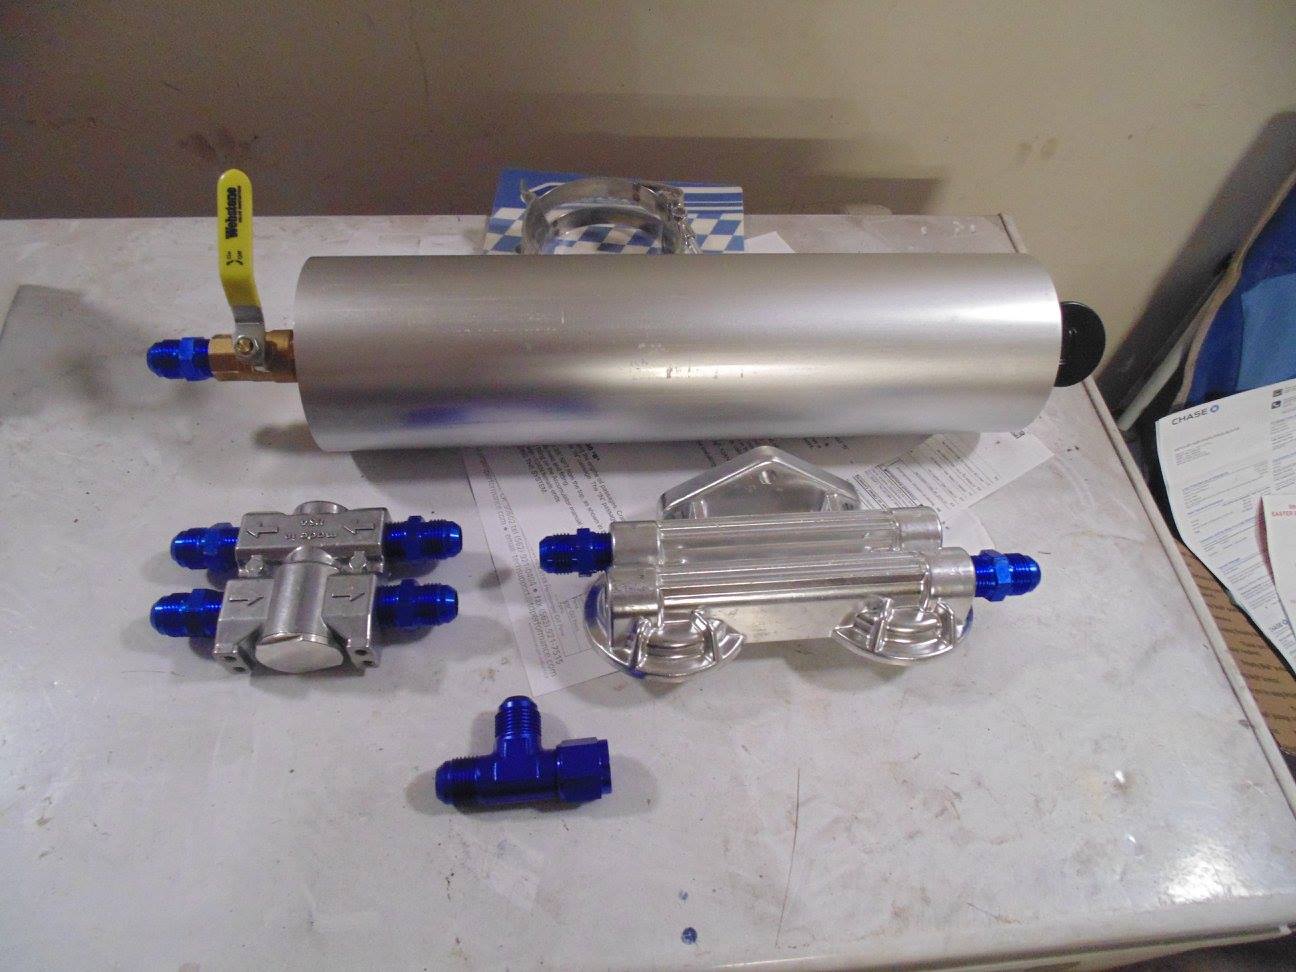
Got my 3 qt oil accumulator and mounting clamps in today. This thing is pretty massive. Almost as long as my tap handle.
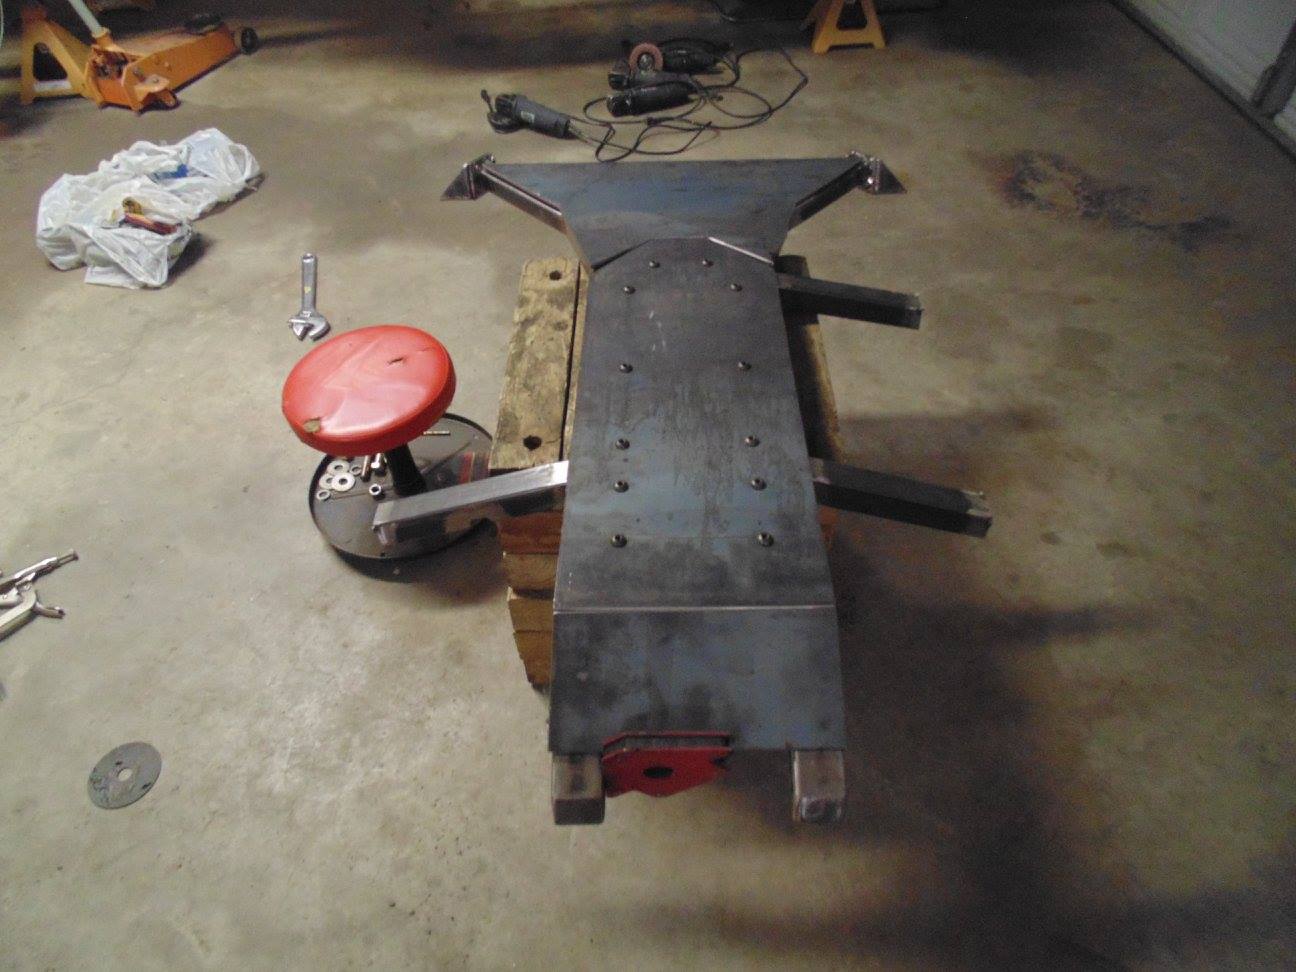
Got some 1/4" plate cut for the start of the actual skid plate
The front section is going to be a bit more involved. Have to lay that out and get that cut tomorrow. Still have to add small pieces of plate and welded flange nuts up front to attach the plate to. May also start drilling holes in the main plate if time allows.
Got my 3 qt oil accumulator and mounting clamps in today. This thing is pretty massive. Almost as long as my tap handle.
Got some 1/4" plate cut for the start of the actual skid plate
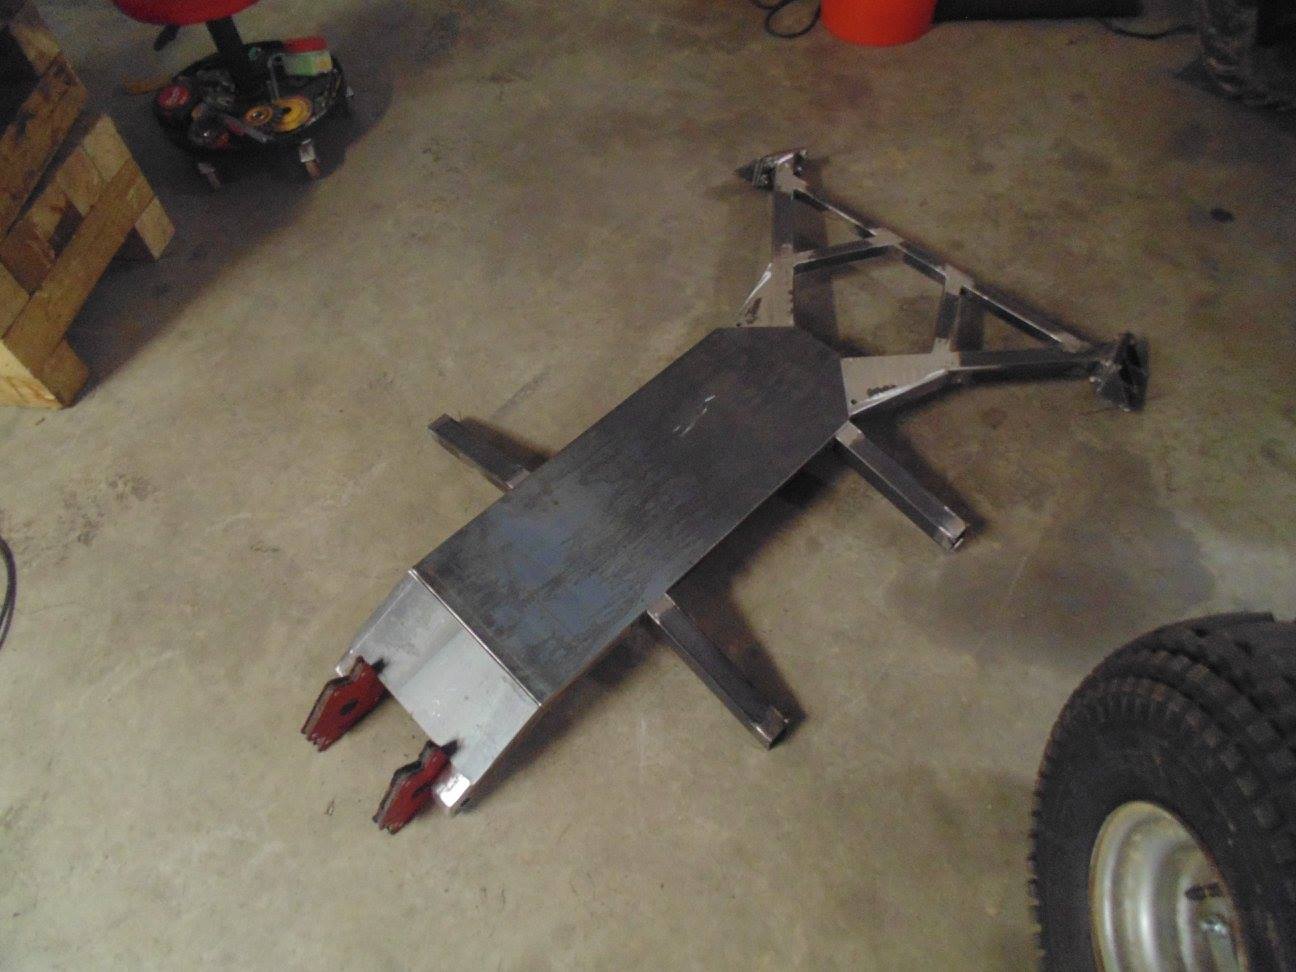
The front section is going to be a bit more involved. Have to lay that out and get that cut tomorrow. Still have to add small pieces of plate and welded flange nuts up front to attach the plate to. May also start drilling holes in the main plate if time allows.
Last edited:
are you planning on laying any plate between the frame and the existing center plate pictured?
are you planning on laying any plate between the frame and the existing center plate pictured?
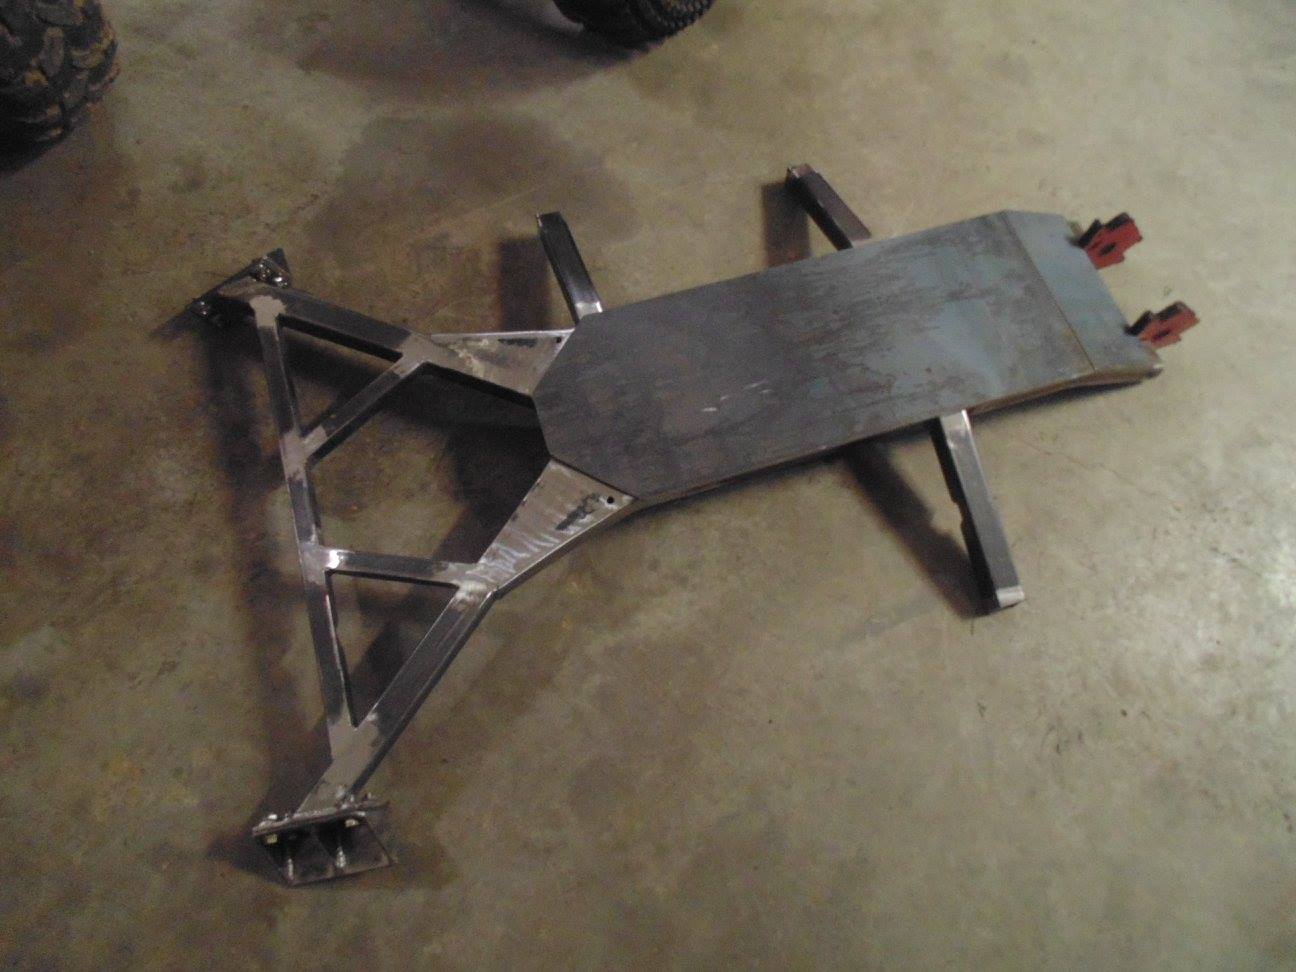
Not really. Those two legs on the driver side are at different angles due to the "rib cage" being angled with the drivetrain and keeping the same location at the frame rail for exhaust clearance. Would make it harder to plate with 1/4" unless I did some kind of spacer. 1/8" would probably be flexible enough to do it but it wouldn't have much support. Way I see it, the passenger side can't get any side plate due to the drive shaft so what difference would it really make on the driver's side anyway. That being said, I may still try to figure out a way to do it just because. Could I get hung up between the legs right now on the right shaped rock, maybe . . .
Only reason I ask is because it kinda looks like those two arms may become something that could hang you up if your dragging the rib cage
Only reason I ask is because it kinda looks like those two arms may become something that could hang you up if your dragging the rib cage
Yeah, I get what your saying. Those arms go up and hit a tie plate above the bottom of the frame rail so you have the rig cage as a low point and then the frame rails are another low point fairly close to the rib cage so it is a pretty small window the rock would have to hit. The side plating is not completely out of the question, just not top priority right now.
Last edited:
Hard to judge some of this stuff over the interwebs, look forward to seeing it mounted under the rig.
Hard to judge some of this stuff over the interwebs, look forward to seeing it mounted under the rig.
Yeah, as soon as I get this done and installed then it's time to tear the whole drivetrain out and finish body repairs, do the cage, box the frame more, etc etc. Next time the drivetrain goes back in will be final install.
All the wife is going to let me do tonight
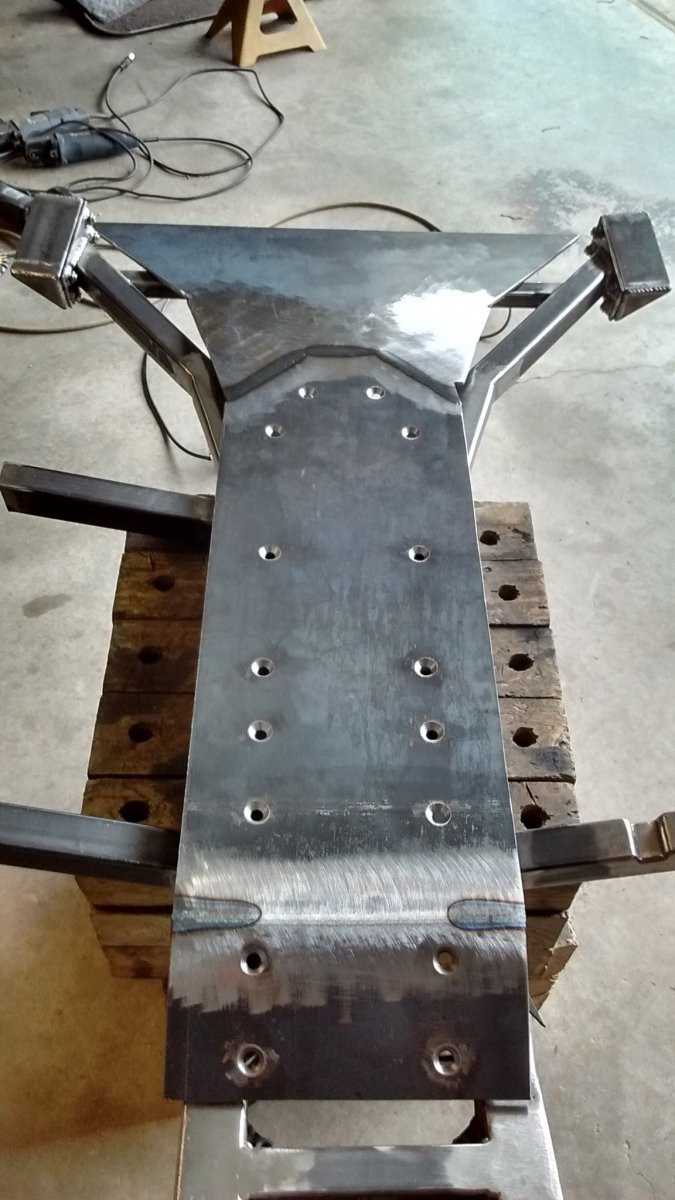
Got the front plate piece cut out
Fit is OK, but not 100% yet. I should have just enough plate left over to do that side piece like @skunked suggested. I might make that side piece a permanently welded non removable deal for simplicity sake.
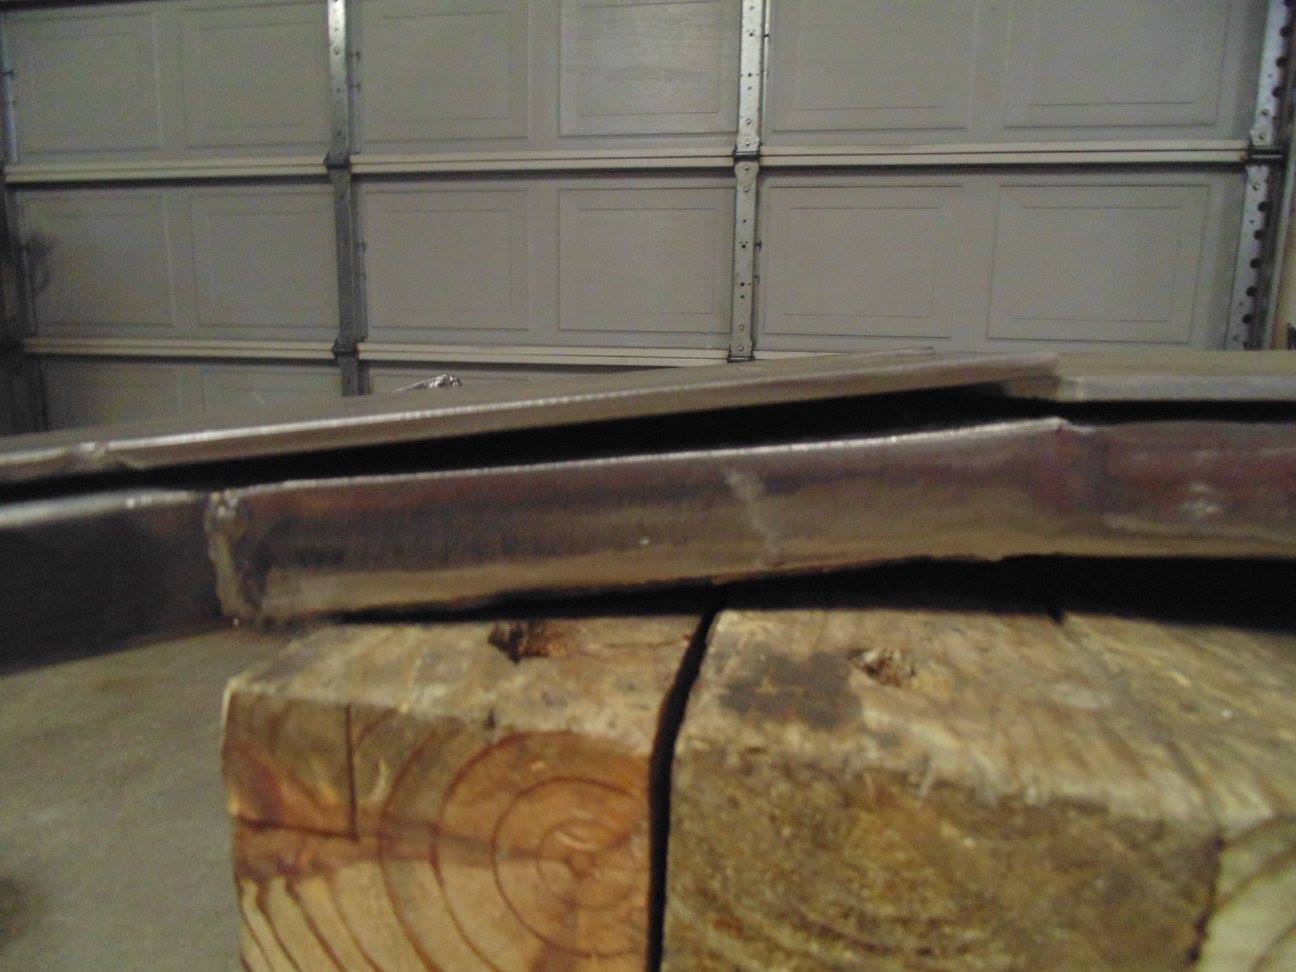
Here is where I need to relief cut on both sides to let these corners drop and follow the rib cage structure
Got the front plate piece cut out
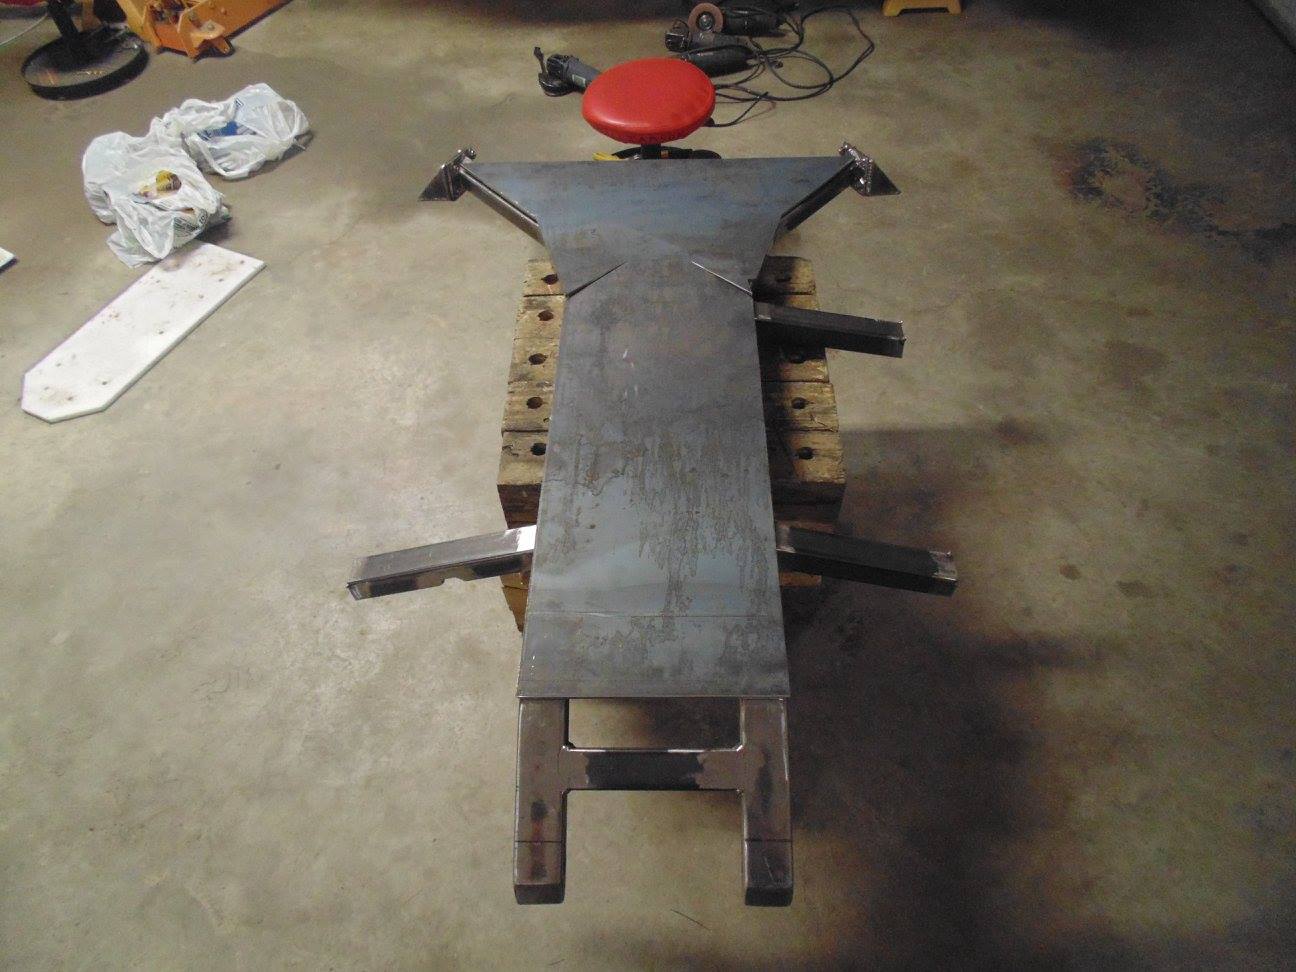
Fit is OK, but not 100% yet. I should have just enough plate left over to do that side piece like @skunked suggested. I might make that side piece a permanently welded non removable deal for simplicity sake.
Here is where I need to relief cut on both sides to let these corners drop and follow the rib cage structure
Last edited:
In other news . . .
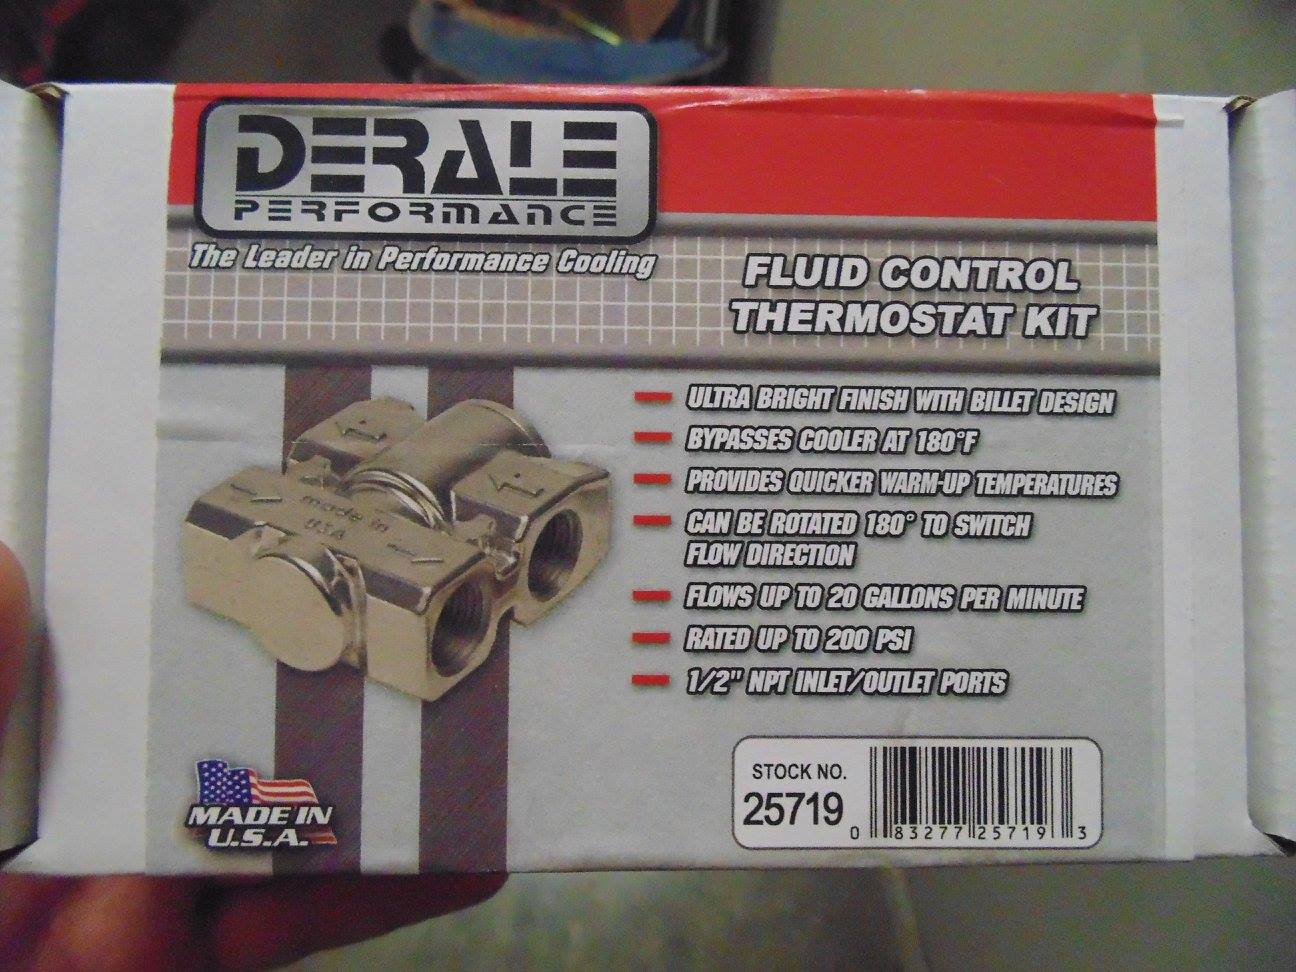
Got the oil cooler bypass valve in today. Have a lot more components showing up over the next week or two.
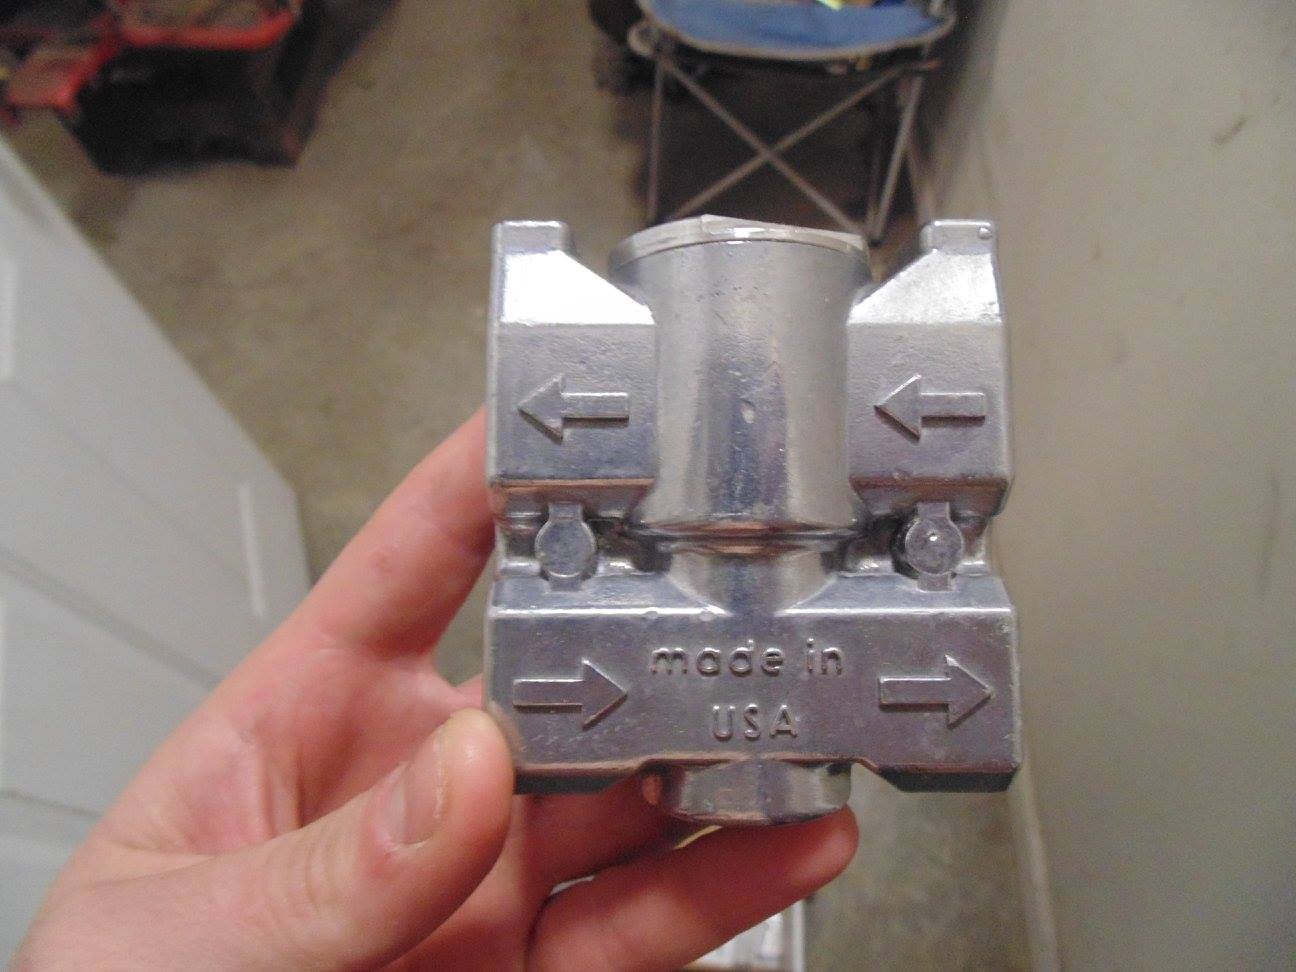
There are fancier units out there but this one seemed like the better value. In the above pic, "before cooler" is bottom left to right and "after cooler" is top right to left
Straight from the product literature:
When the oil is cool the valve is in the open position, allowing oil to be applied equally to both the inlet and outlet of the cooler, preventing oil flow through the cooler. As the oil temperature approaches 180F the valve begins to close, forcing all of the oil to flow through the cooler and return through the valve to the source. This fail-safe design insures full oil flow to the source regardless of whether the valve is open or closed. The cooler remains full of oil at all times, eliminating pressure variations, aeration and foaming of the oil.
If you have trouble understanding that, here it is broken down. Under 180F oil comes in the bottom left and is allowed to push on all 3 other openings. Since the bottom and top right side openings have the same pressure applied, there is no flow through the cooler and the oil just exits out of the top left port. At 180F the valve closes, forcing the oil to flow left to right through the bottom channel, through the cooler, and back through the top side of the valve right to left exiting again out of the top left port. Pretty cool.
Got the oil cooler bypass valve in today. Have a lot more components showing up over the next week or two.
There are fancier units out there but this one seemed like the better value. In the above pic, "before cooler" is bottom left to right and "after cooler" is top right to left
Straight from the product literature:
When the oil is cool the valve is in the open position, allowing oil to be applied equally to both the inlet and outlet of the cooler, preventing oil flow through the cooler. As the oil temperature approaches 180F the valve begins to close, forcing all of the oil to flow through the cooler and return through the valve to the source. This fail-safe design insures full oil flow to the source regardless of whether the valve is open or closed. The cooler remains full of oil at all times, eliminating pressure variations, aeration and foaming of the oil.
If you have trouble understanding that, here it is broken down. Under 180F oil comes in the bottom left and is allowed to push on all 3 other openings. Since the bottom and top right side openings have the same pressure applied, there is no flow through the cooler and the oil just exits out of the top left port. At 180F the valve closes, forcing the oil to flow left to right through the bottom channel, through the cooler, and back through the top side of the valve right to left exiting again out of the top left port. Pretty cool.
Last edited:
Got the remote dual filter setup in and some 1/2 NPT to -10AN fittings. Went ahead and installed what I could using blue locktite as recommended
Got all my holes laid out and drilled in the main skid plate piece. Got to teach my 6 yr old boy how to use the drill press so that was pretty cool. He liked it too!
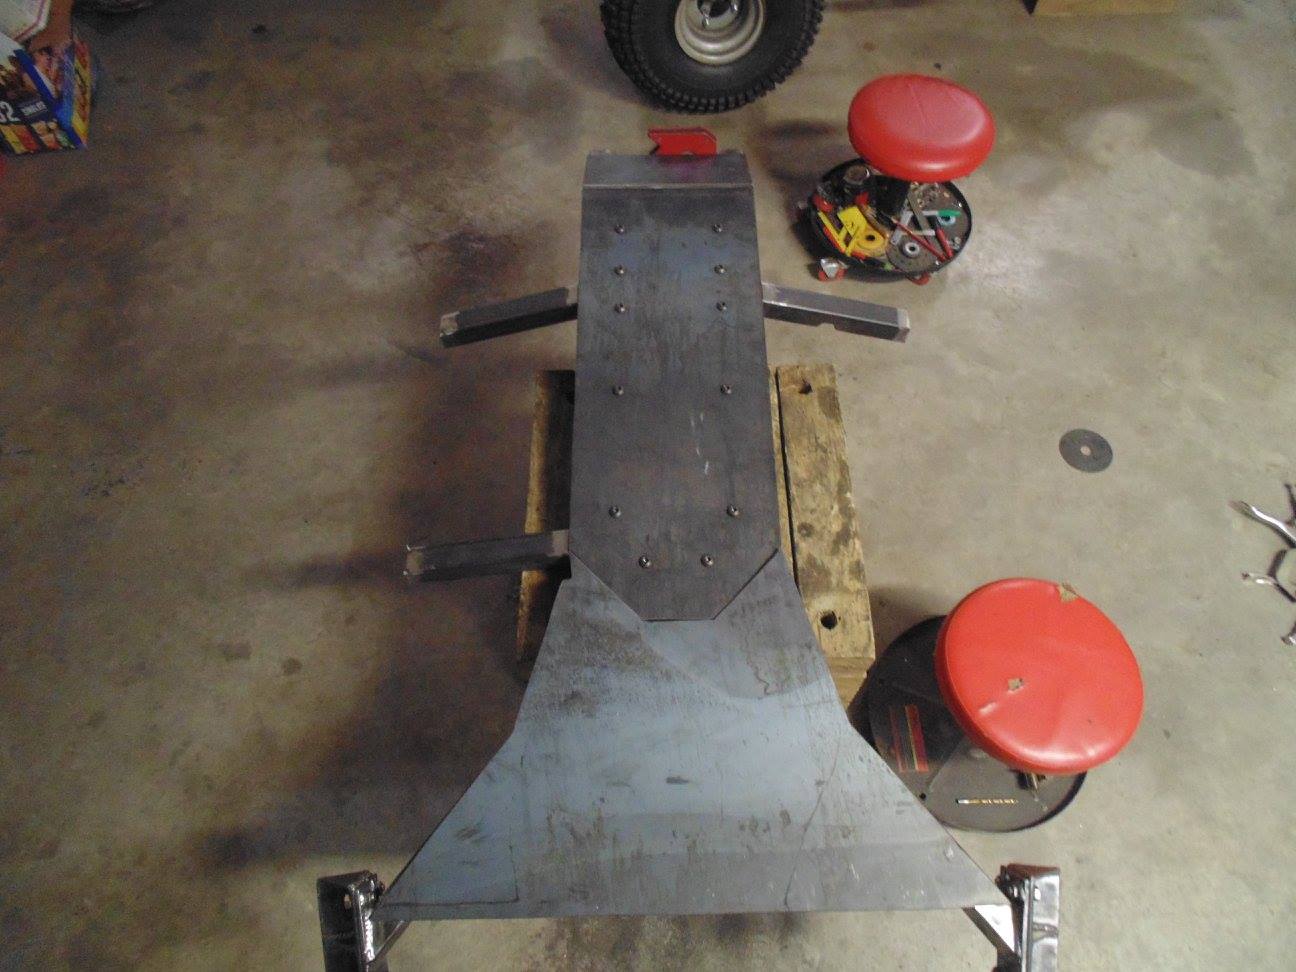
Bolted it up with some temporary button heads to make fitting the front piece easier
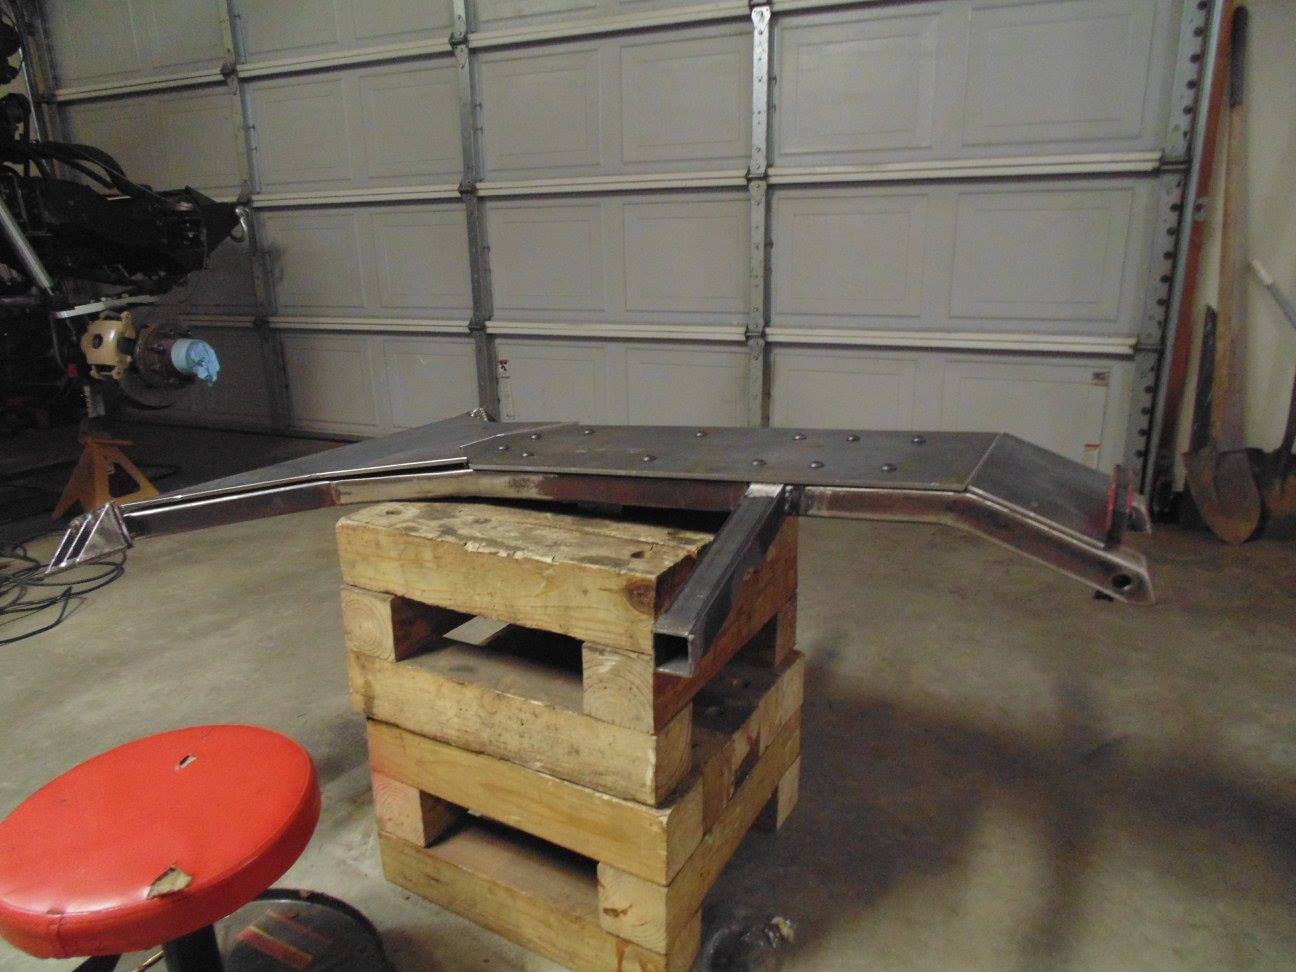
Eventually I will be able to bolt everything into place so there is no movement and then weld it all together to make one big, continuous skid plate
Got all my holes laid out and drilled in the main skid plate piece. Got to teach my 6 yr old boy how to use the drill press so that was pretty cool. He liked it too!
Bolted it up with some temporary button heads to make fitting the front piece easier
Eventually I will be able to bolt everything into place so there is no movement and then weld it all together to make one big, continuous skid plate
Last edited:
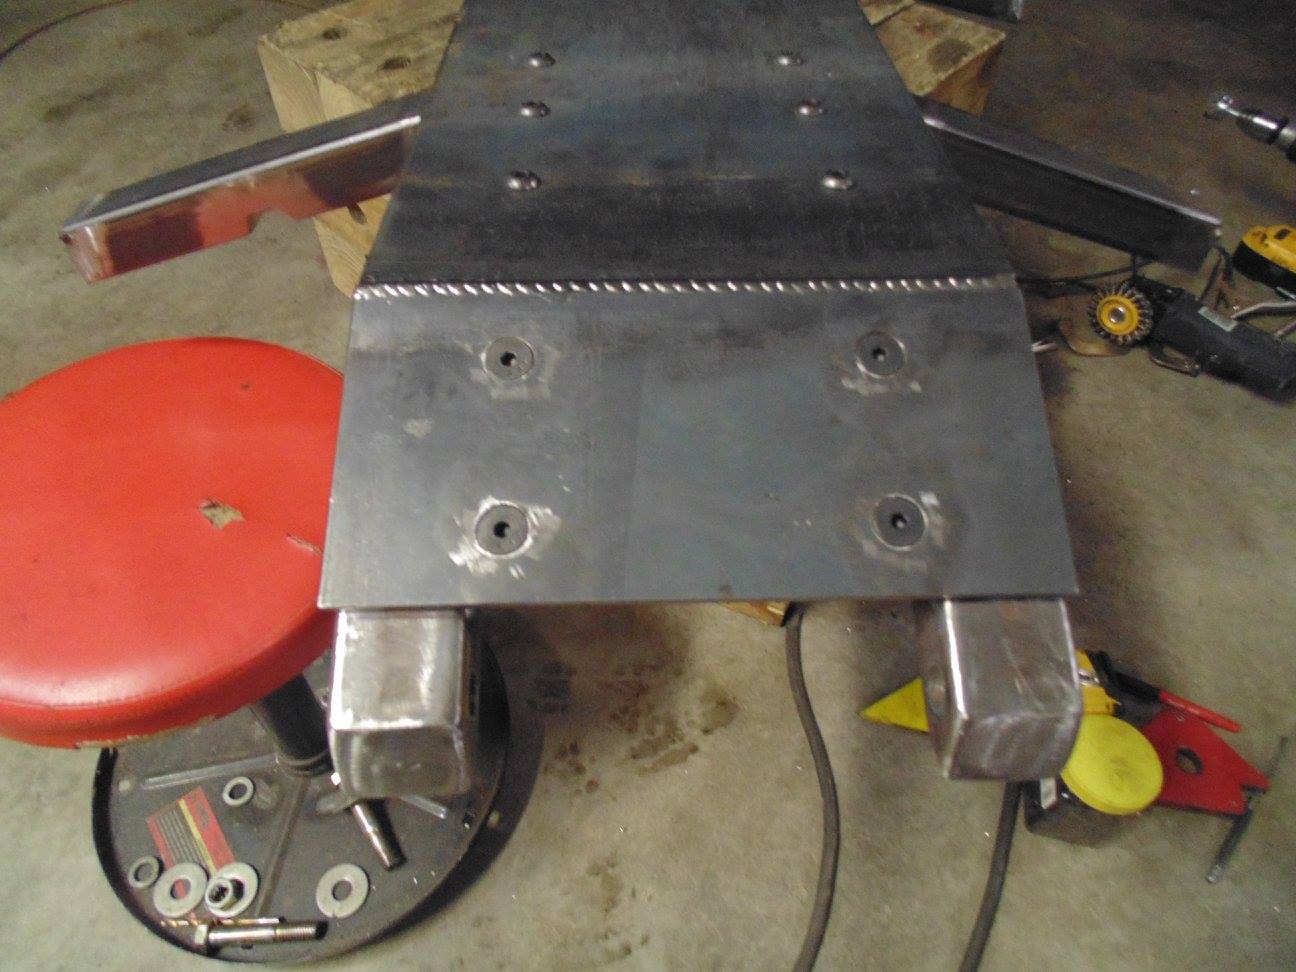
Got home from the studio and made a little more progress on the skid plating. Got the gusseting with welded flange nuts welded on the top side of the rib cage. Drilled, countersunk, and welded the plate on the outside. I will grind this weld down to make it seamless. I have to do the same process on the front plate and also countersink all the holes in the main plate. Lots of drill press work in my future.
Last edited:
Little more progress this morning. Hoping to have this thing licked by the end of the day
Last edited:
the joys of countersinking....
so glad my recent endeavors have been with alum!
so glad my recent endeavors have been with alum!
the joys of countersinking....
so glad my recent endeavors have been with alum!
Yeah, I have been surprised how easy it's actually been so far. I started out with a harbor freight bit that i had on hand and that didnt last too long but i also had to play with the drill press rpm settings before i hit the sweet spot. At 220, my normal drill setting, it was horrible. At 480 it was night and day difference but the bit was already shot so i got a ryobi brand 3/4 counter sink from home depot and it has been smooth sailing since

