Really fun build! I will be following this. We had a little 5hp, no suspension kart when I was a kid. Wish we had something this cool and neat trail to take it on. We just have an empty field next to our house. Those gussets will be a great place for your son to put some stickers on or better yet, you guys could come up with a name for the cart and paint that on
CK5

You are using an out of date browser. It may not display this or other websites correctly.
You should upgrade or use an alternative browser.
You should upgrade or use an alternative browser.
Offroad Go Cart Build - Too Many Builds
- Thread starter truck-oholic
- Start date
Lots to update on this today. Ordered a bunch of parts. Got all new suspension pieces front and rear, new front wheels/tires/hubs, and a new tighter radius steering rack coming. Once funds allow, still have to order 175cc crate engine, seat harnesses, transmission braces, and new rear tires.
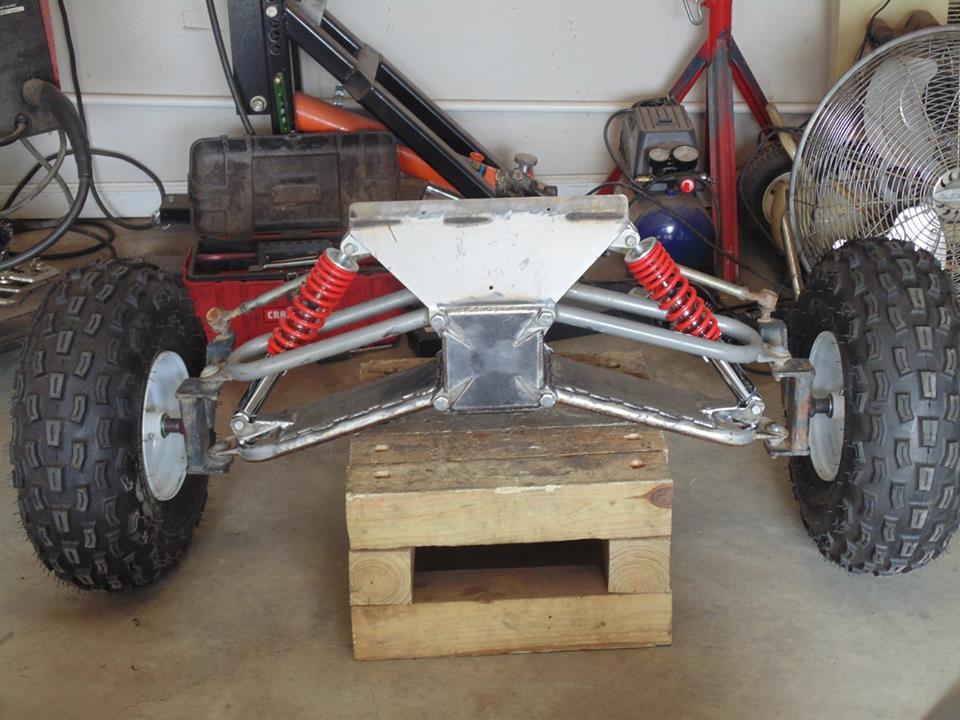
Got these all welded on this afternoon
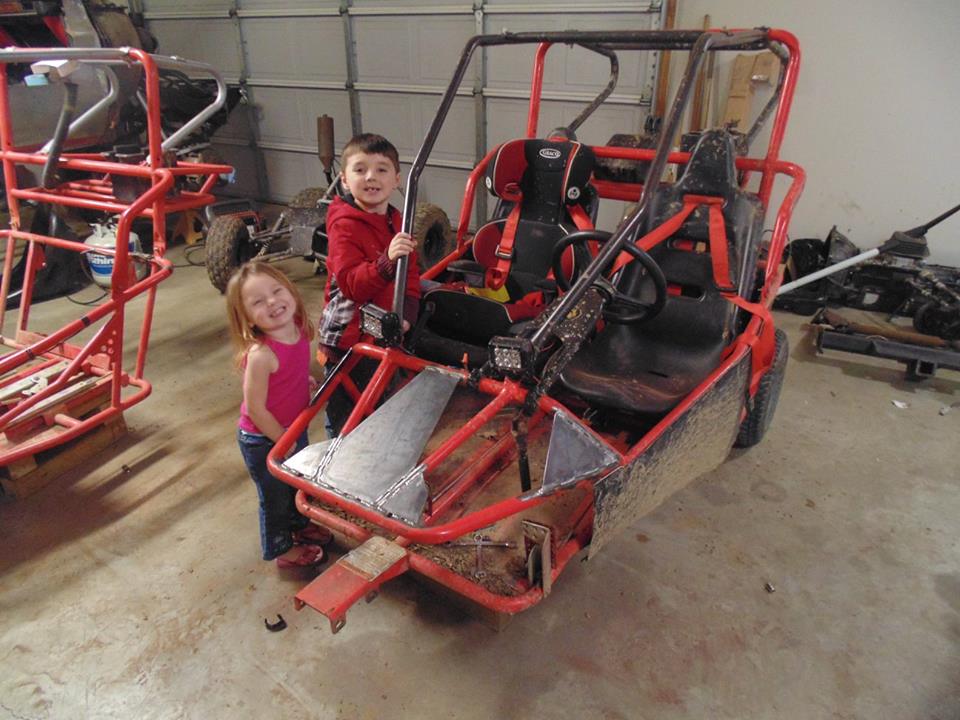
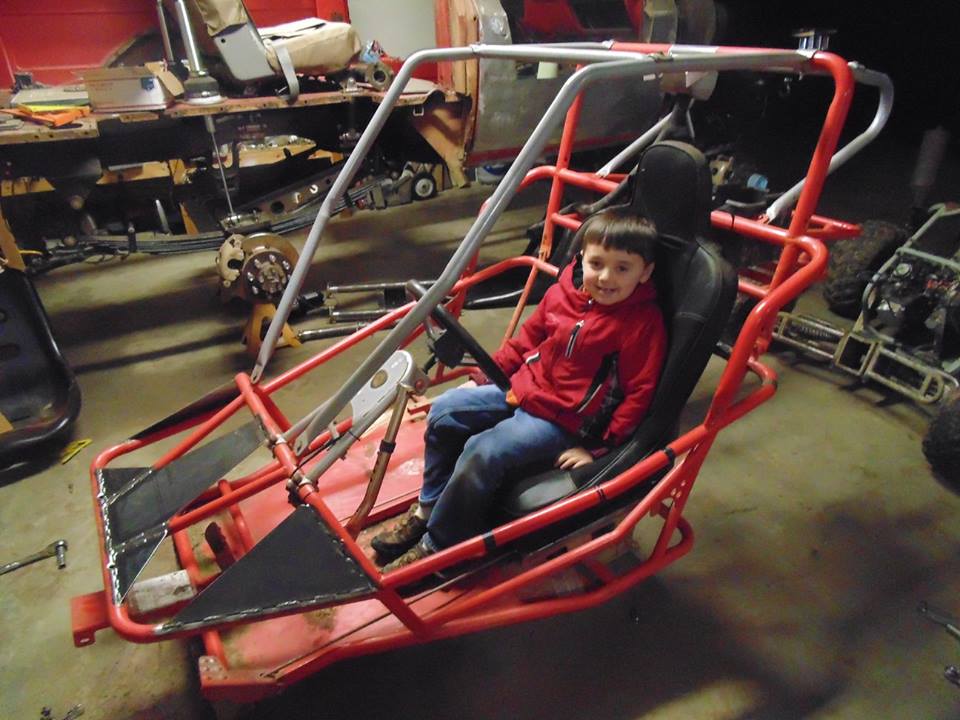
Jacob agrees that this cart is cooler so we are going to make this one the super badass version instead of the other one like originally planned
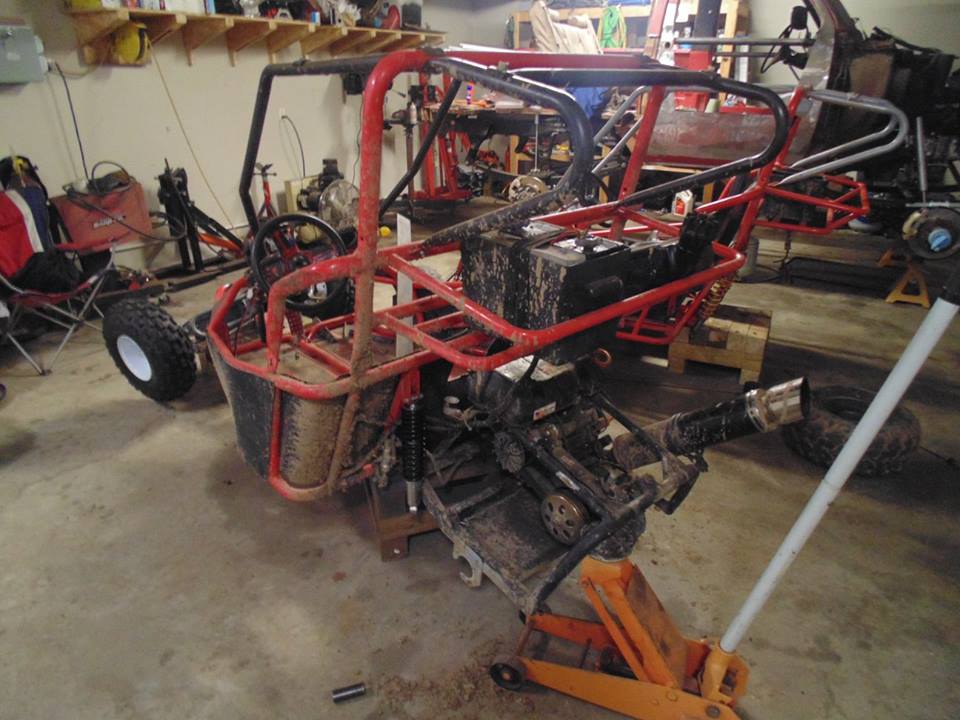
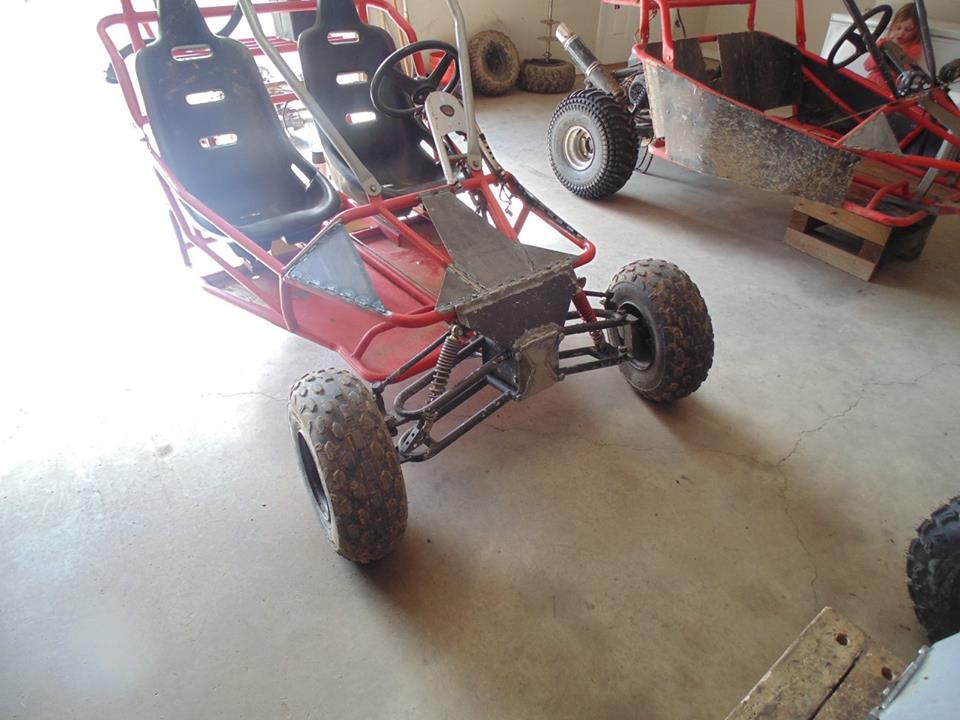
Went ahead and took the front end off of both carts since I am now going to build this cart instead of the other one. I have some gusseting and boxing that I want to do to that bracket sticking out. I think it has already bent a little so I will straighten that out and give it some beef.
This will be going under the front of the red and silver cart.
Now that I switched builds I can go ahead and put the original swing arm and motor back into this cart. Oh well, not too involved anyway.
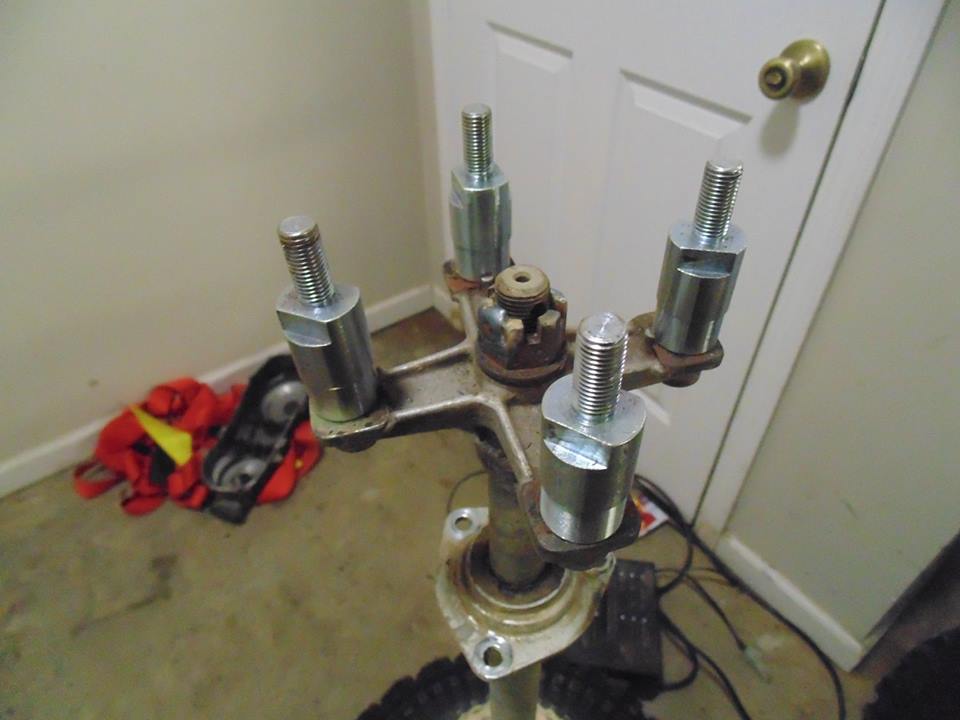
"Good" front end waiting to be bolted up and then welded solid to the frame. I guess I will be painting it and all the new gussets black after welding.
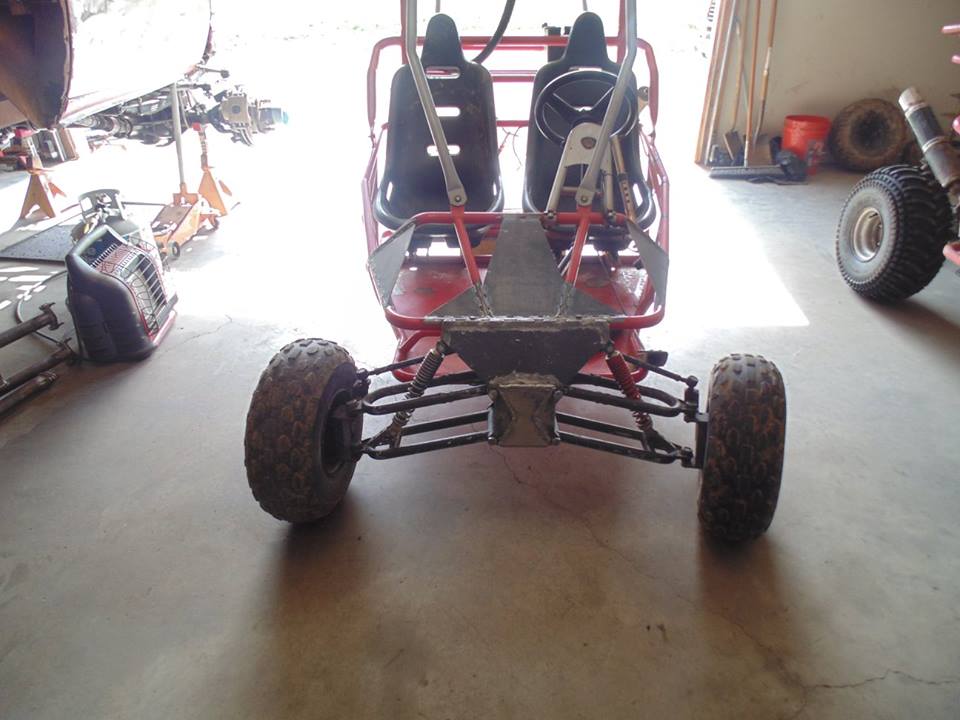
Also picked up some suspension seats for the black and red cart since it will be donating it's seats to the red and silver cart. Cool thing is that these both have slider brackets. Since the original driver's side seat of the red and black cart has a slider bracket and so did the red and silver cart it means that the red and silver cart will have dual sliding seats too.
Just threw this in the red and silver cart to take a pic even though it will actually be going in the red and black cart
Got these all welded on this afternoon
Jacob agrees that this cart is cooler so we are going to make this one the super badass version instead of the other one like originally planned
Went ahead and took the front end off of both carts since I am now going to build this cart instead of the other one. I have some gusseting and boxing that I want to do to that bracket sticking out. I think it has already bent a little so I will straighten that out and give it some beef.
This will be going under the front of the red and silver cart.
Now that I switched builds I can go ahead and put the original swing arm and motor back into this cart. Oh well, not too involved anyway.
"Good" front end waiting to be bolted up and then welded solid to the frame. I guess I will be painting it and all the new gussets black after welding.
Also picked up some suspension seats for the black and red cart since it will be donating it's seats to the red and silver cart. Cool thing is that these both have slider brackets. Since the original driver's side seat of the red and black cart has a slider bracket and so did the red and silver cart it means that the red and silver cart will have dual sliding seats too.

Just threw this in the red and silver cart to take a pic even though it will actually be going in the red and black cart
Last edited:
Time to start beefing up this front end suspension
Plated the top of the lower A arms. I will probably plate the upper A arm too, leaving a hole for the shock to go through but I need to get that in first and cycle the suspension to see how much room to leave.
Don't think this arm will have any trouble holding up to some abuse now.
Mocking up the suspension seats, may have to make some compromises.
These are a pretty tight fit, not sure if I will be able to keep them both in one cart, may have to have one normal seat and one suspension seat in each cart. We will see . . .
Last edited:
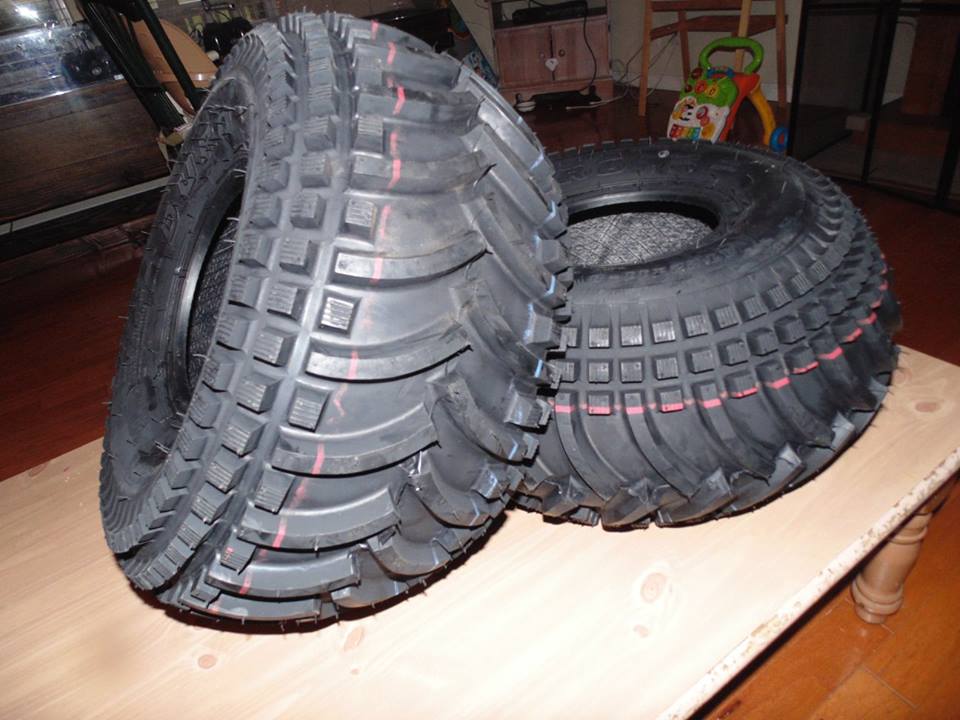
New rear go cart tires came in today
22x11x8 Duro HF243s
Can't wait to get these mounted

22x11x8 Duro HF243s
Can't wait to get these mounted

Last edited:
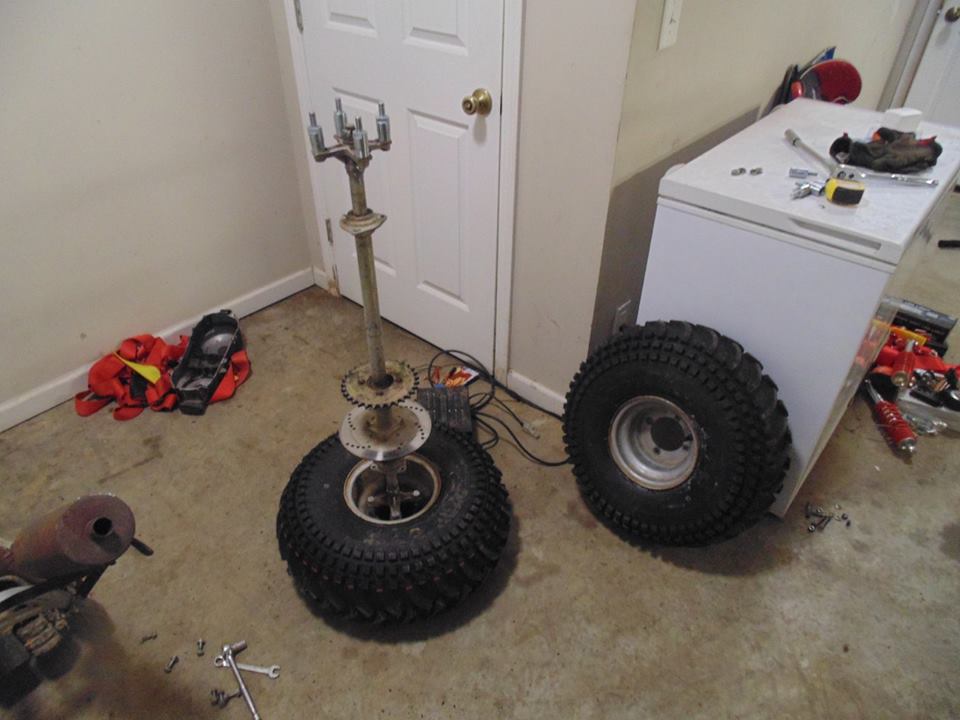
New front wheels, tires, & hubs. Had to chase the UPS truck driver down to get these. Said he couldn't find my street. I think he just wanted to keep them for himself, hahaha.
20x7x8 tires came already mounted on the wheels and aired up from the supplier
I threw the hubs into the wheels. They are some nice looking units and are greasable!
20x7x8 tires came already mounted on the wheels and aired up from the supplier
I threw the hubs into the wheels. They are some nice looking units and are greasable!

Last edited:
Welded the underside of the plate to the lower A arm
Don't think that is going anywhere
Front end is now ready to be bolted on to the front of the go cart and welded. Just have to do some more gusseting to the front end of the cart where this attaches first
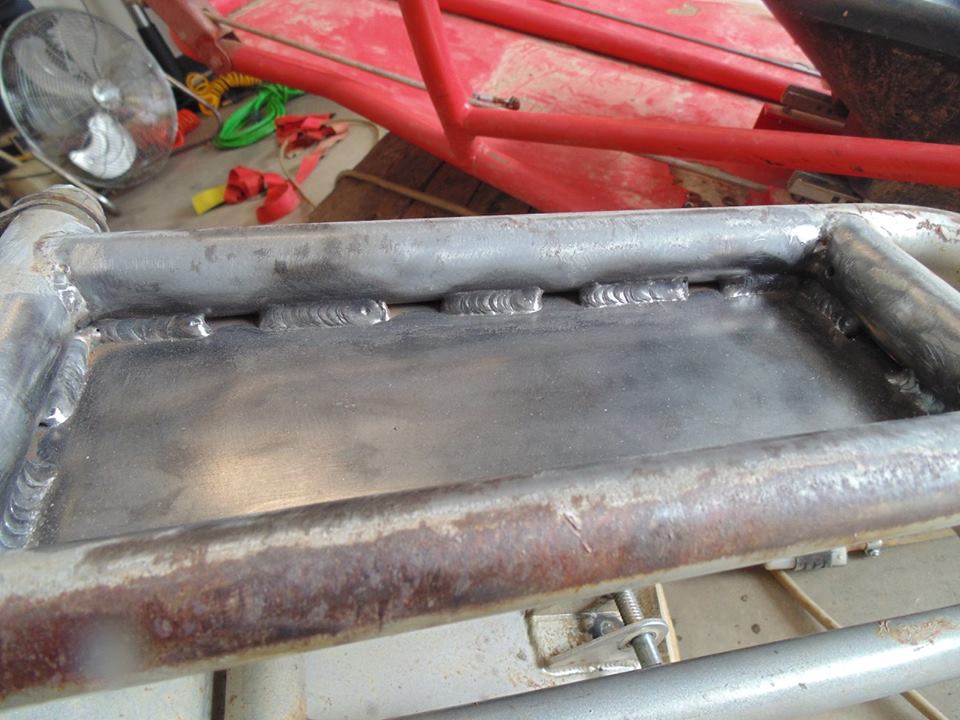
Plated in the bottom of the front suspension box
Used 1/4" here since it will be acting as a bit of a skid and will get the brunt of any impacts
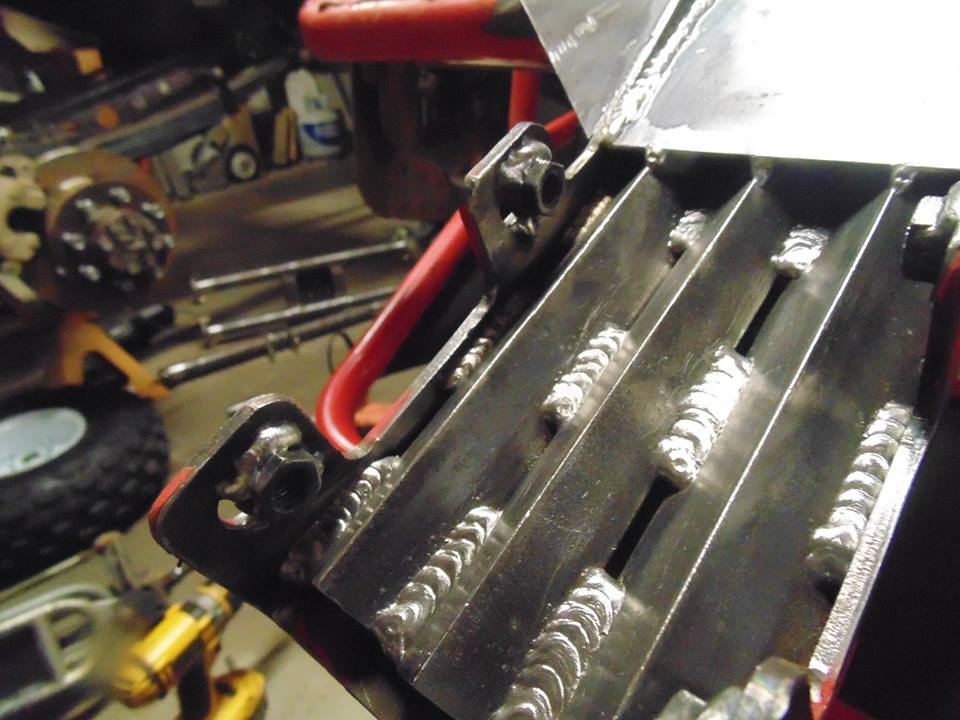
Flipped the red and silver cart over to weld the underside of the hood gussets to the frame
Should have all this welding done today and a bunch of other stuff too.
Don't think that is going anywhere
Front end is now ready to be bolted on to the front of the go cart and welded. Just have to do some more gusseting to the front end of the cart where this attaches first
Plated in the bottom of the front suspension box
Used 1/4" here since it will be acting as a bit of a skid and will get the brunt of any impacts
Flipped the red and silver cart over to weld the underside of the hood gussets to the frame
Should have all this welding done today and a bunch of other stuff too.
Last edited:
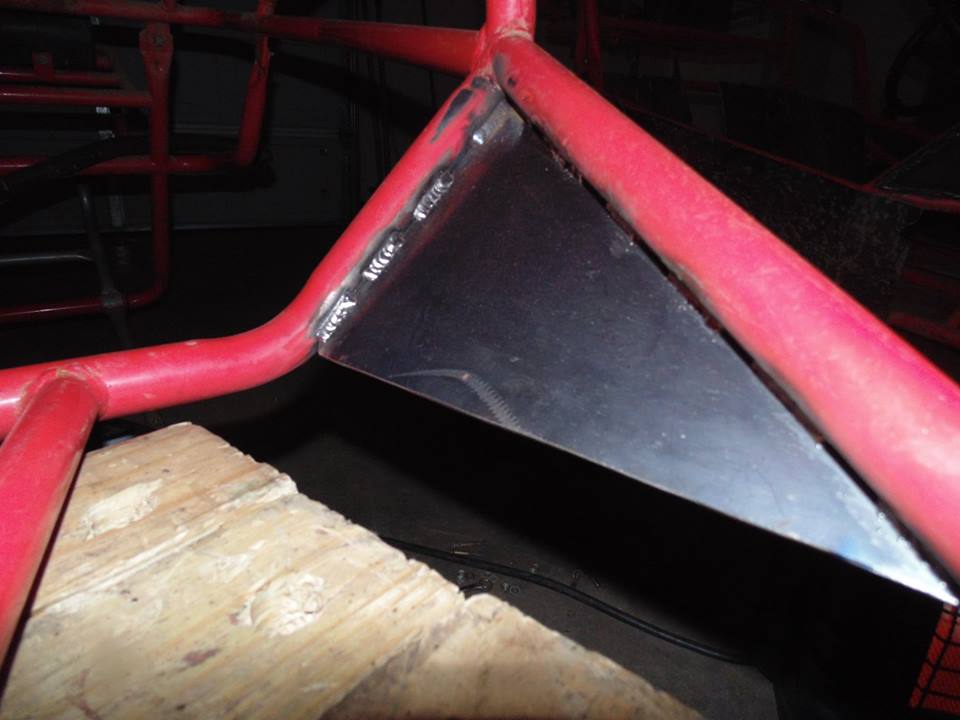
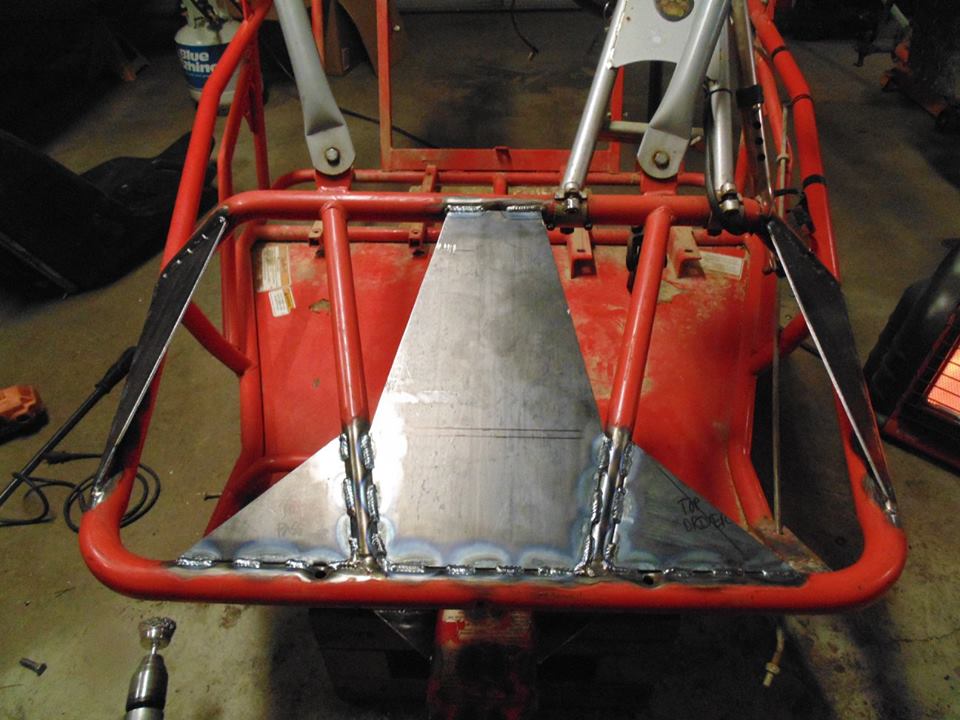
Welded the underside of the hood gussets
Put the front end on to see what kind of gusseting I was going to do
That red arm sticking out is what I wanted to beef up
Started by welding some gussets in the corners and putting some 1" angle in to stiffen things up
Added a piece of 3/4" angle in the middle and welded that in
Boxed in the arm up to where the front end stops
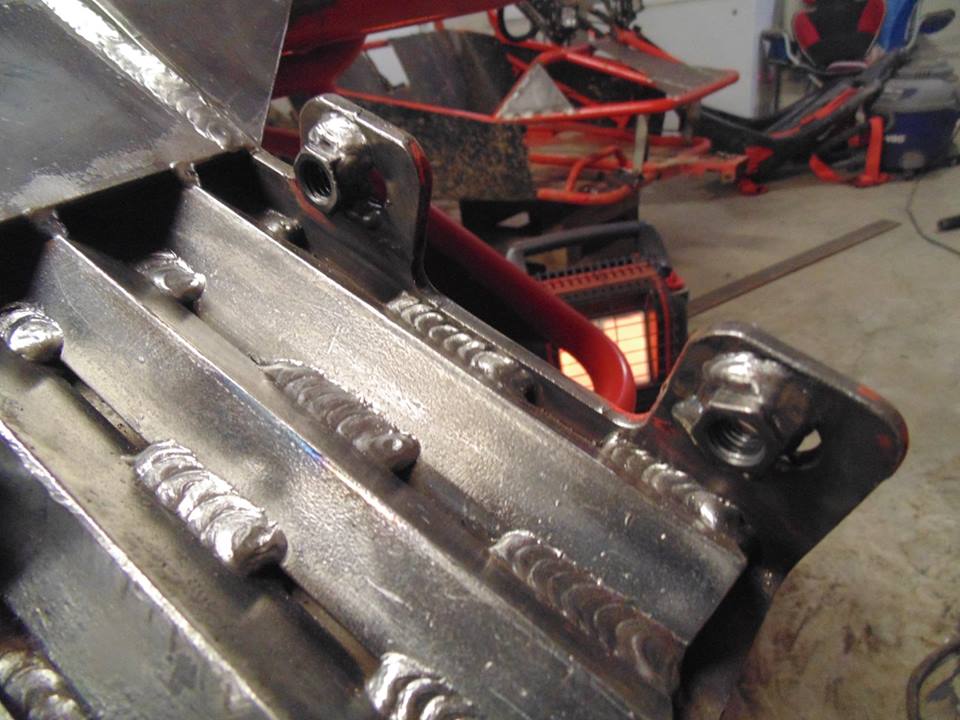
Welded some nuts on since this area will now be inaccessible with the bottom of the front end plated in as shown a couple pics ago
Put the front end on to see what kind of gusseting I was going to do
That red arm sticking out is what I wanted to beef up
Started by welding some gussets in the corners and putting some 1" angle in to stiffen things up
Added a piece of 3/4" angle in the middle and welded that in
Boxed in the arm up to where the front end stops
Welded some nuts on since this area will now be inaccessible with the bottom of the front end plated in as shown a couple pics ago
Last edited:
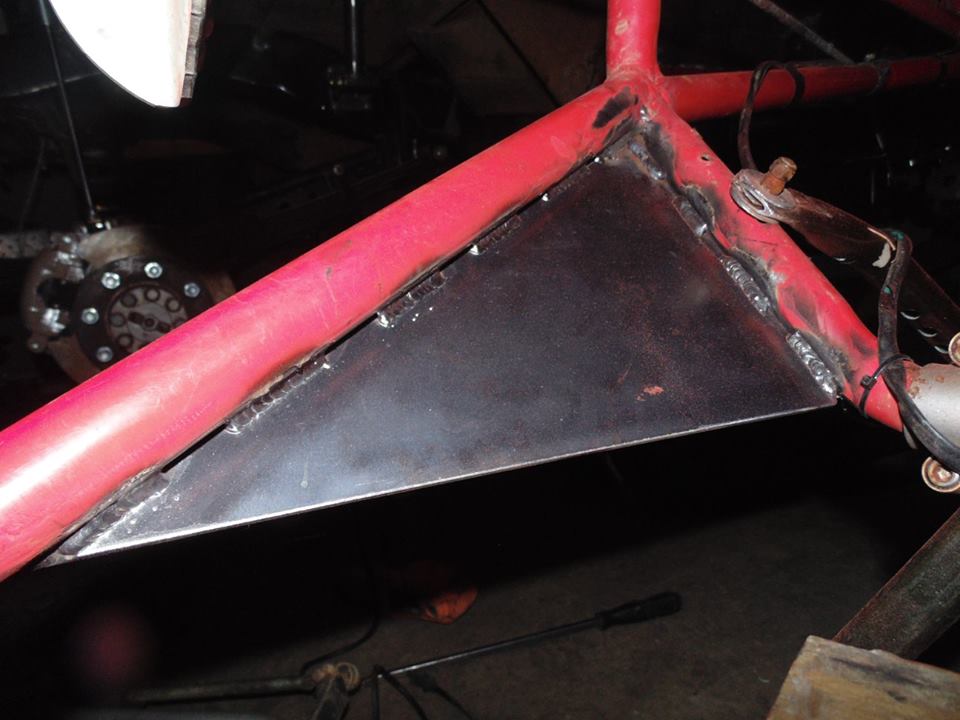
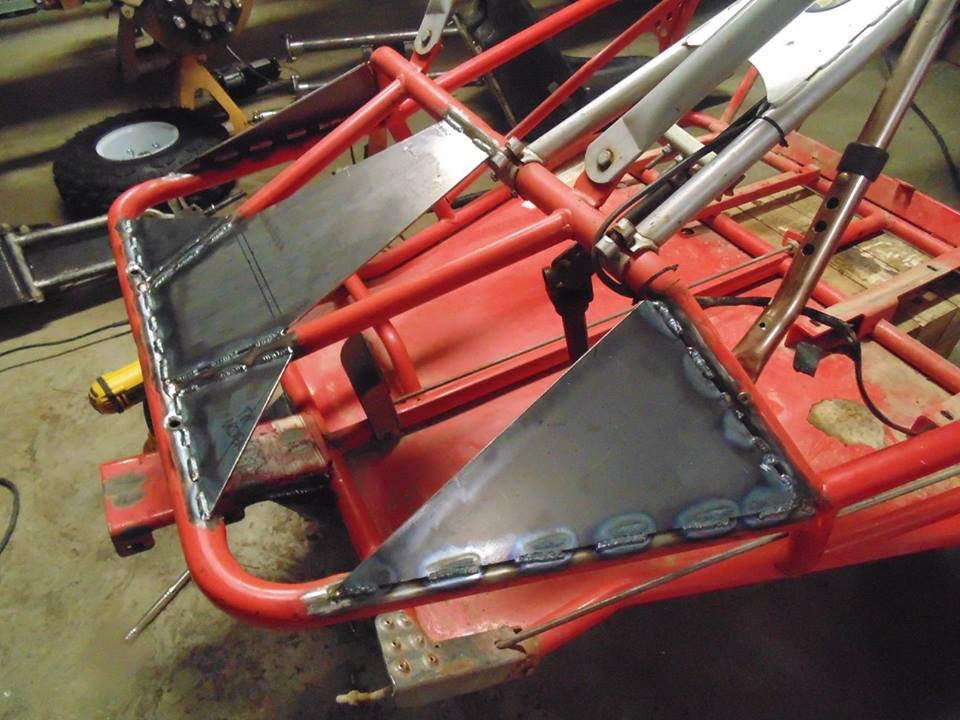
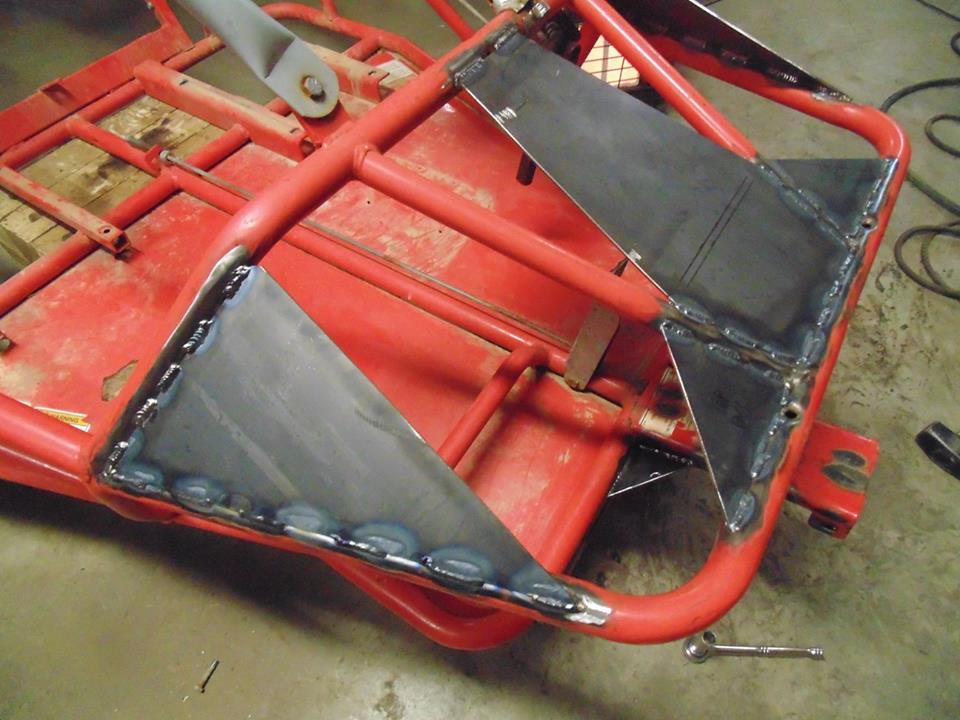
With all the welding done underneath I was ready to flip the cart back over
Last bit of welding that had to be done to the front suspension arm
May still do a little more vertical gusseting here yet on the triangle gussets or completely box in the triangle gussets
Last bit of welding that had to be done to the front suspension arm
May still do a little more vertical gusseting here yet on the triangle gussets or completely box in the triangle gussets
Last edited:
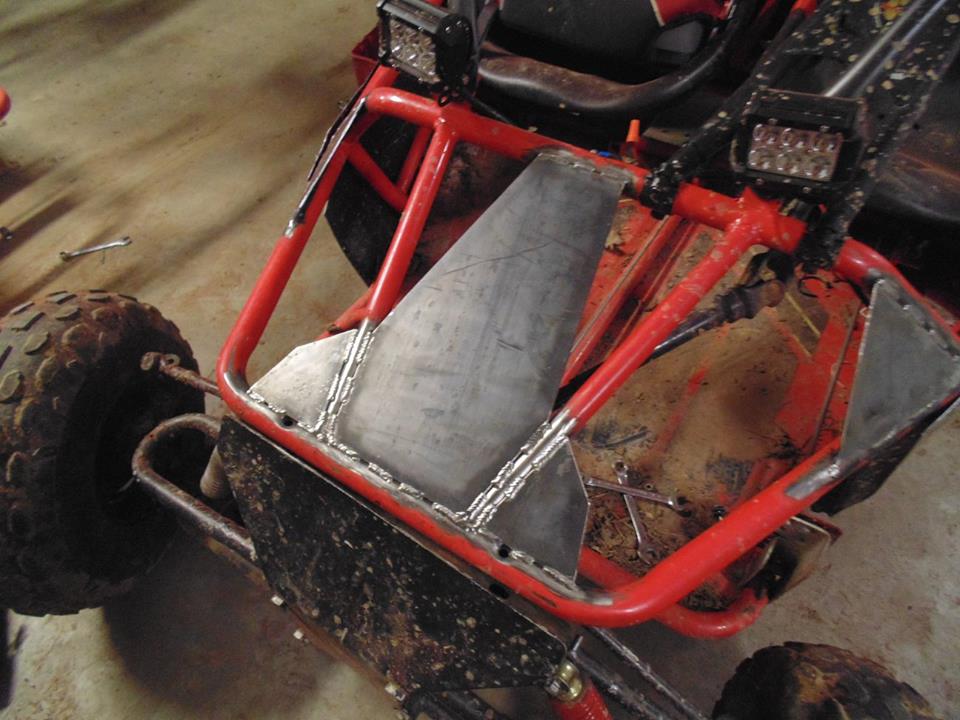
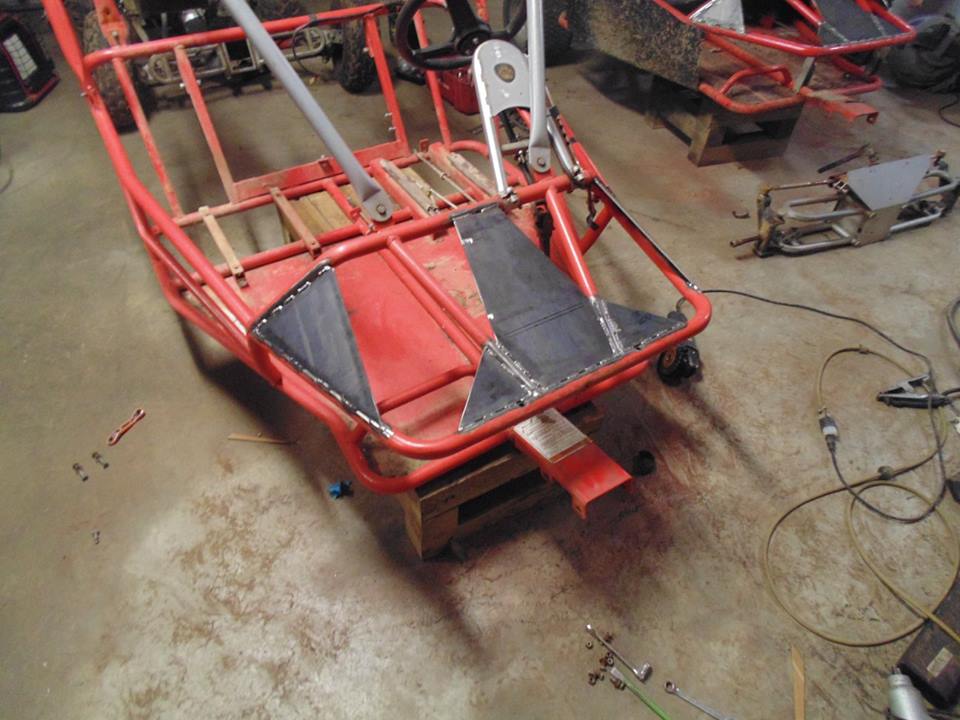
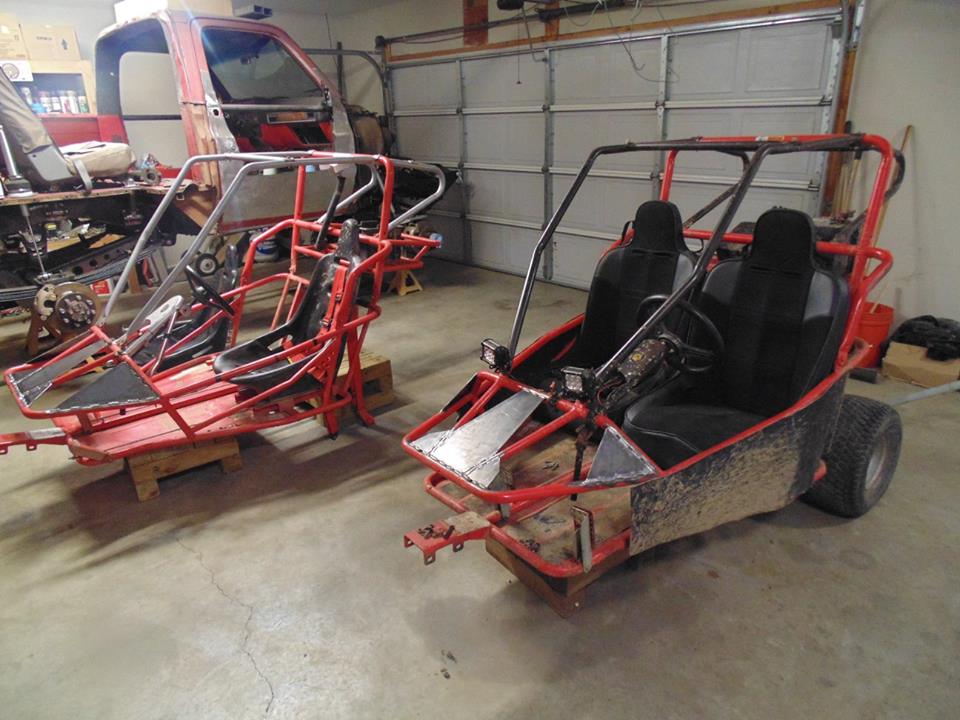
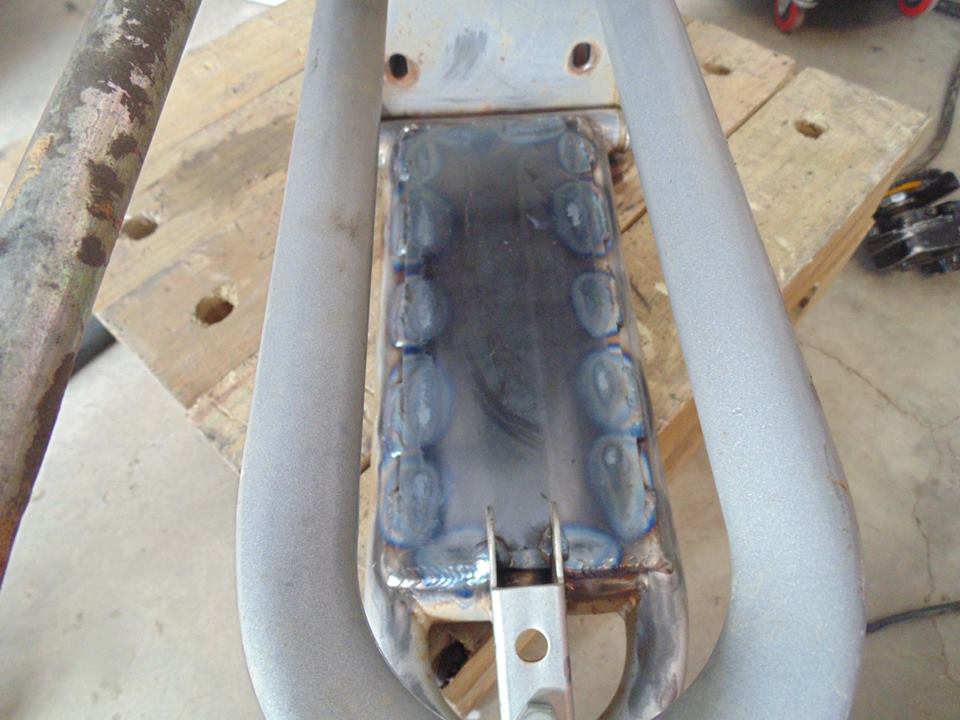
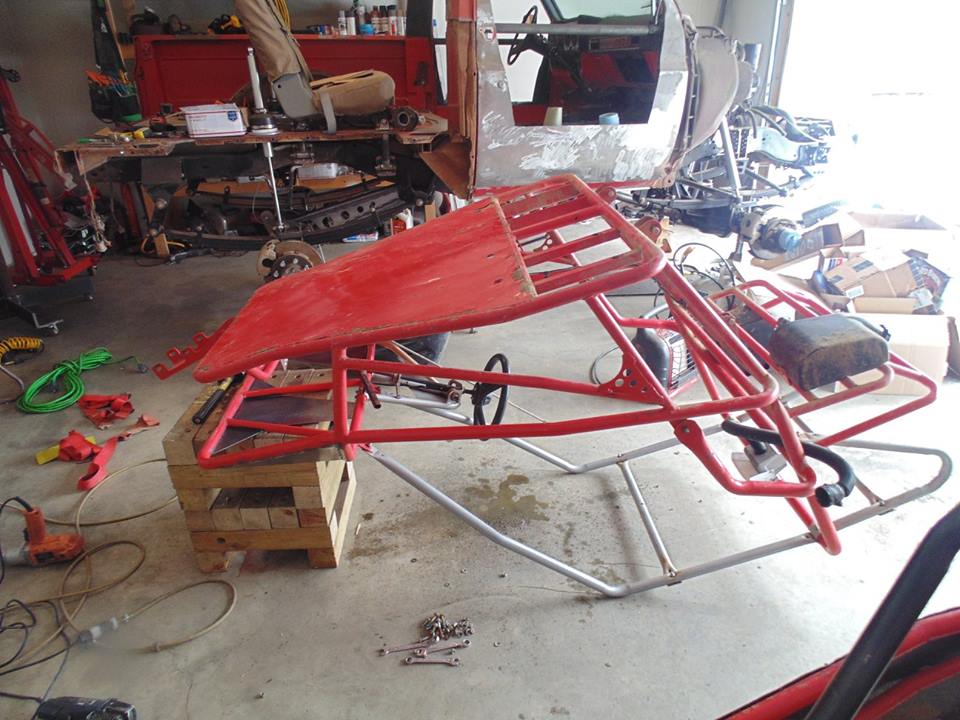
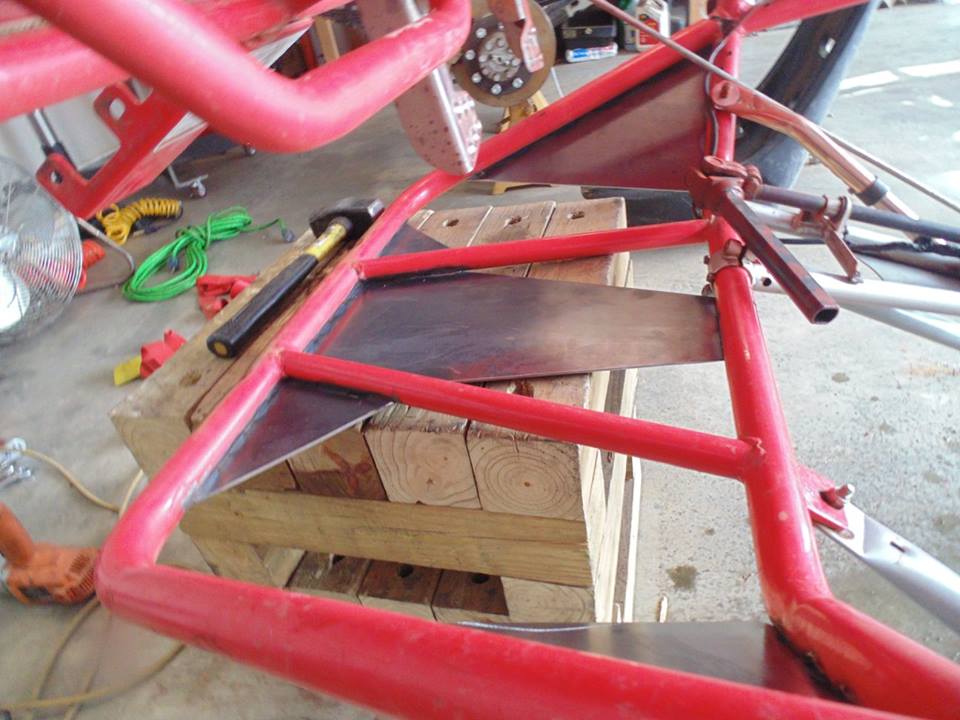
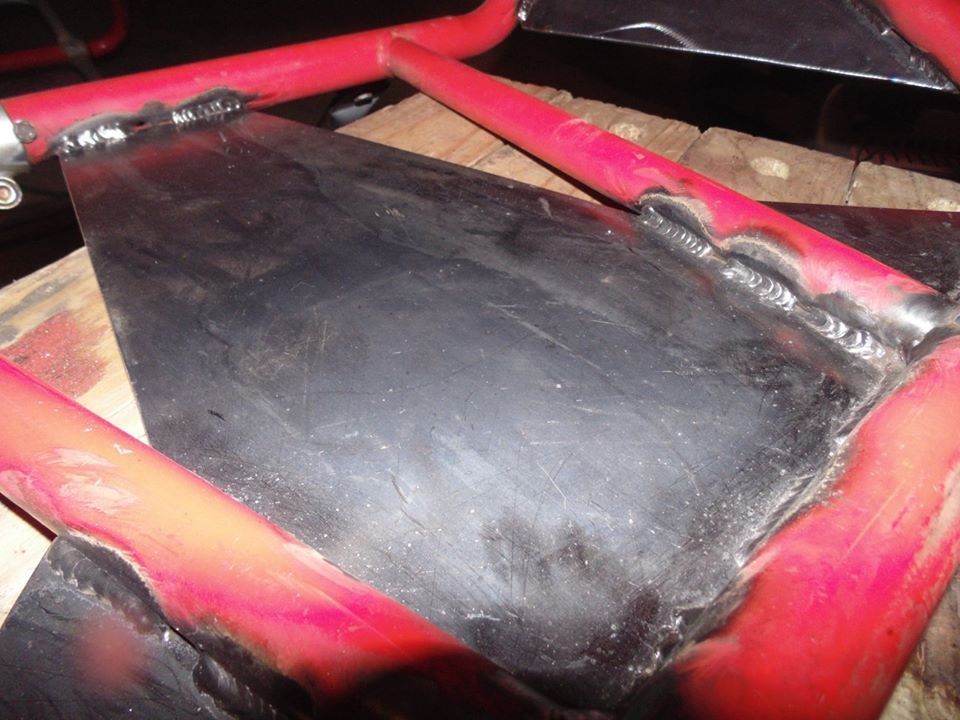
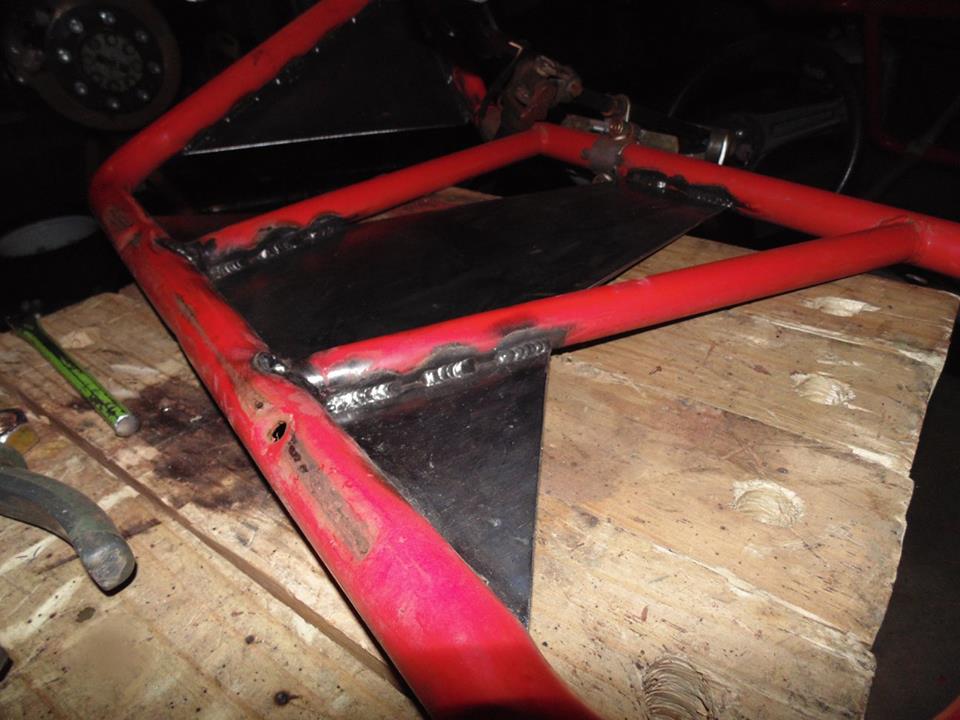
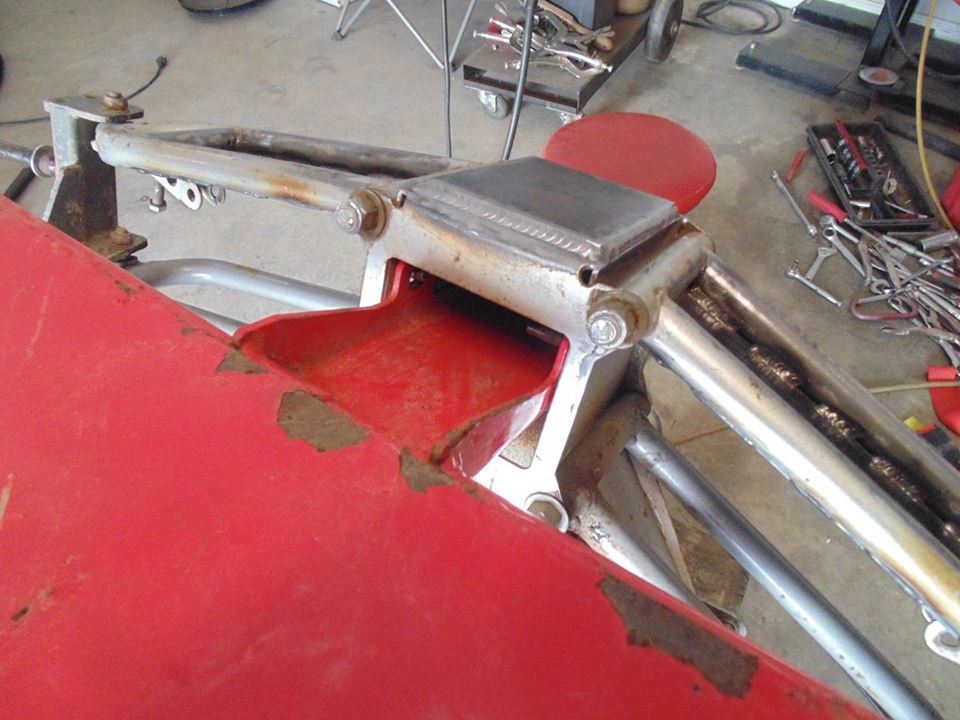
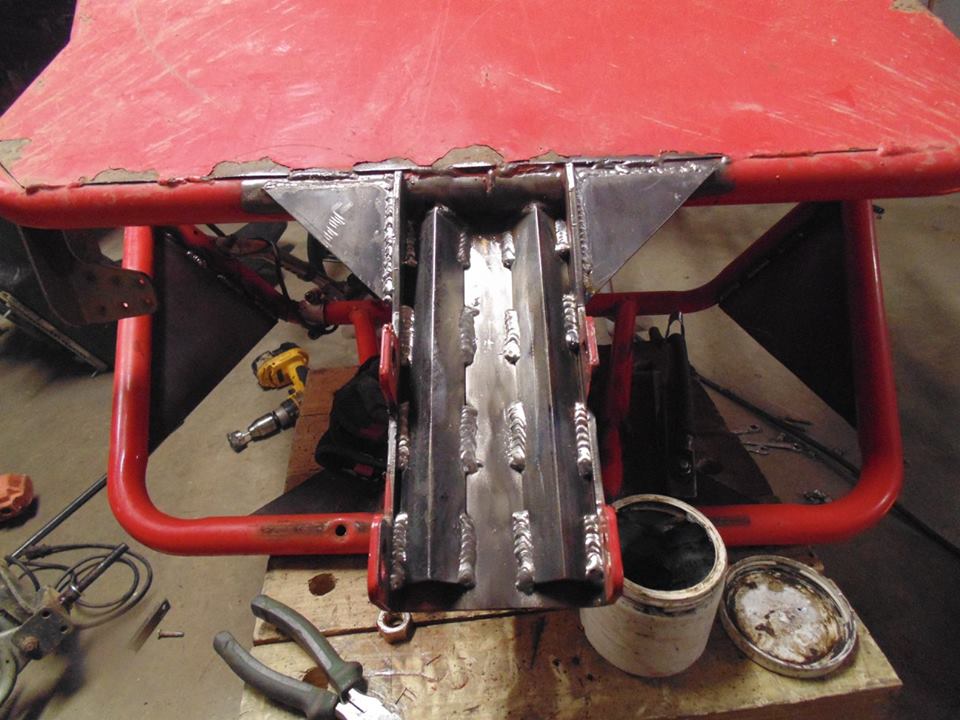
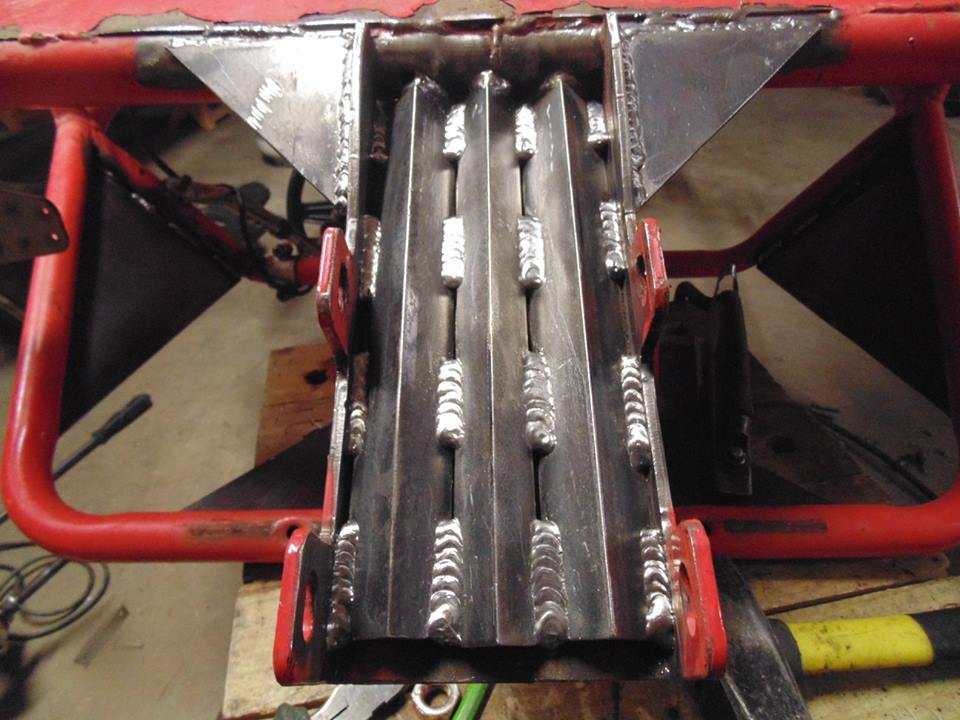
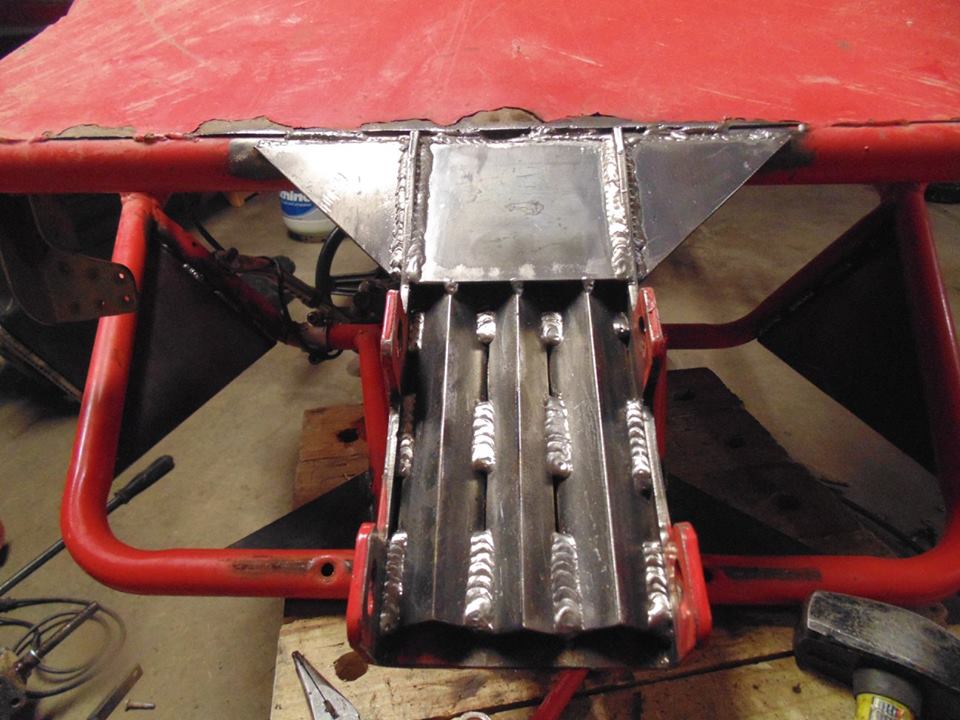
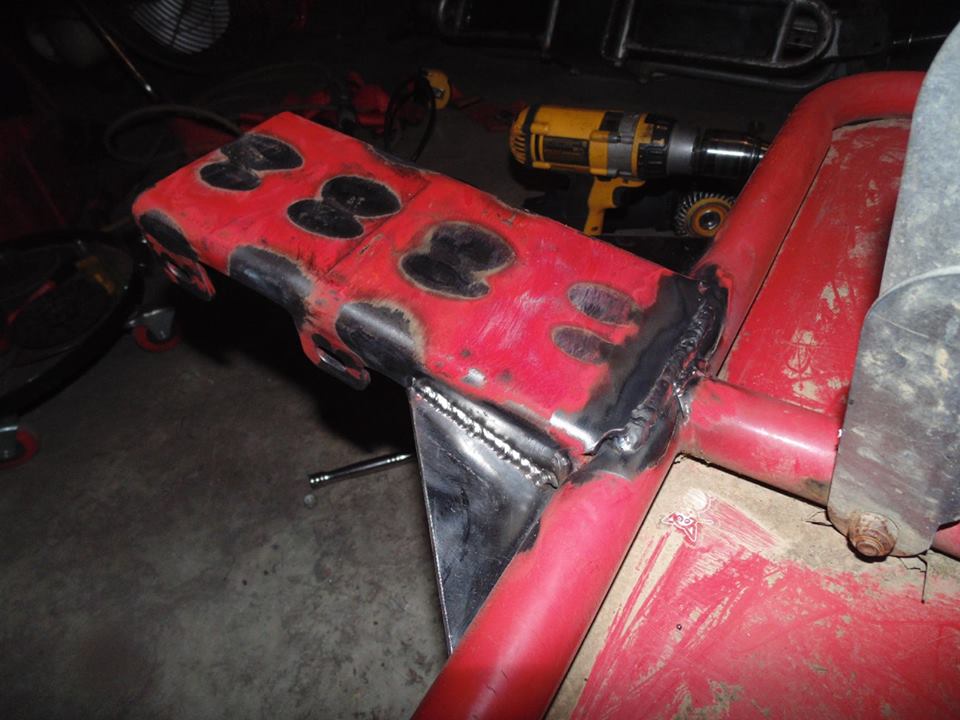
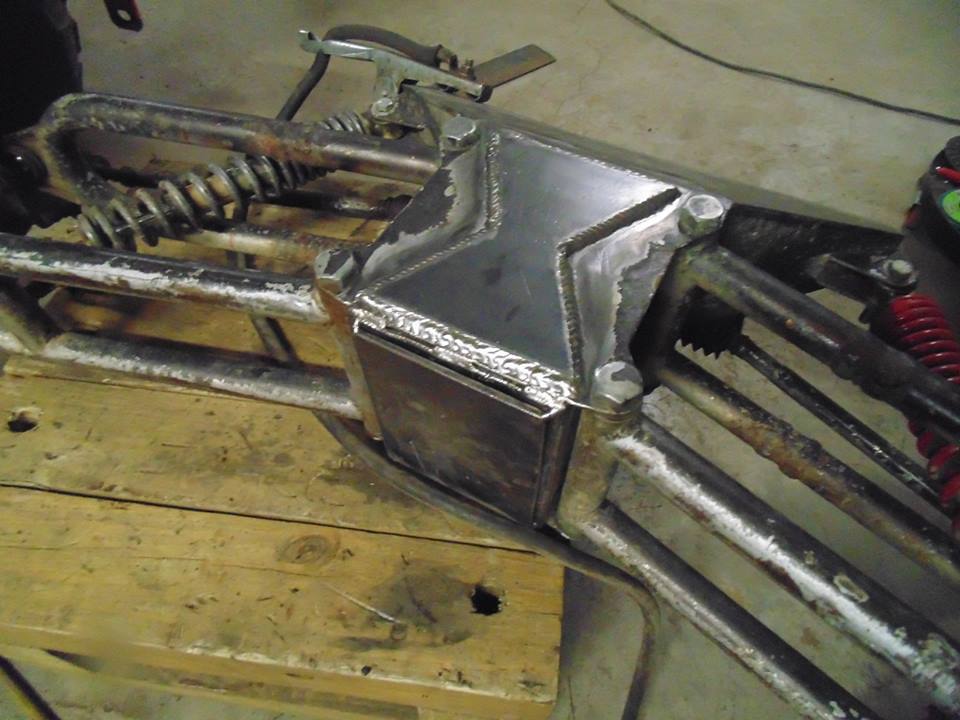
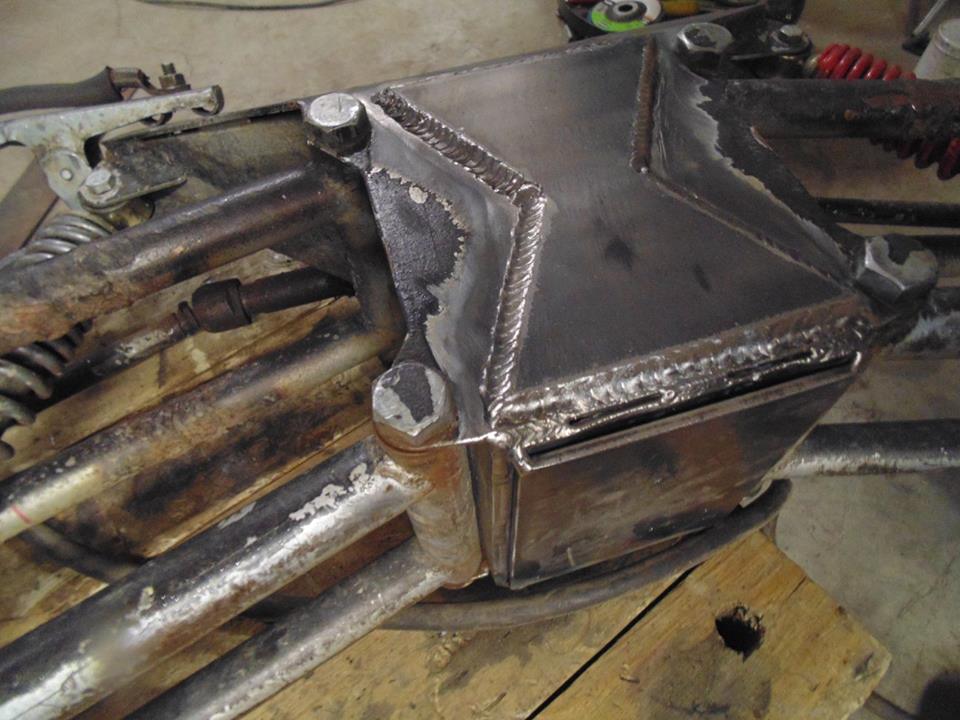
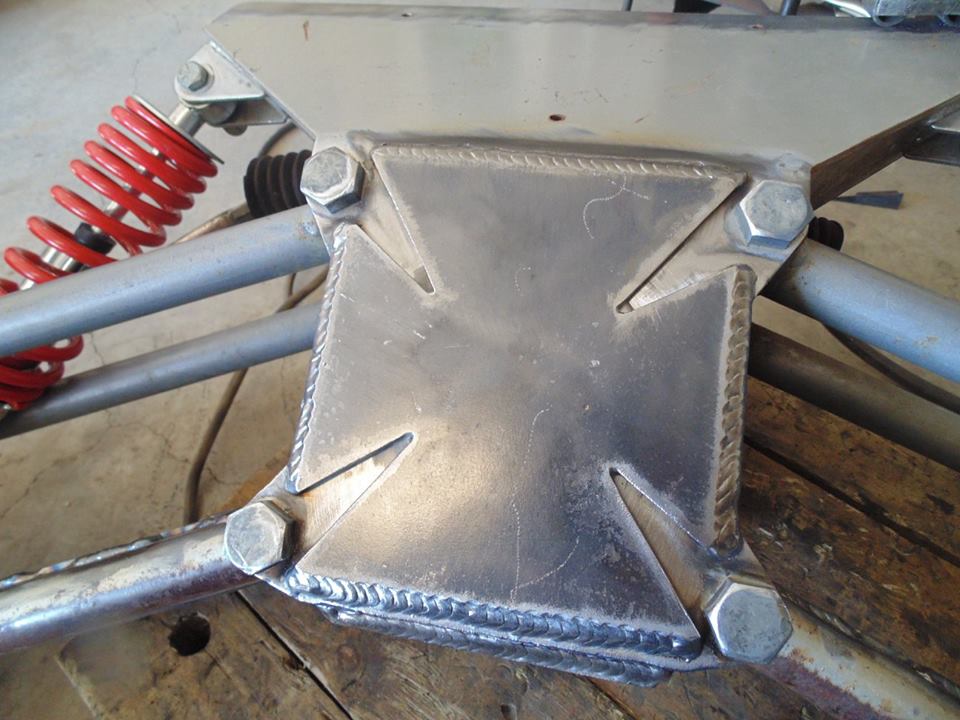
This front end is actually going on the black and red buggy. I just wanted to see how things were eventually going to look. That iron cross is a reinforcement plate that will be welded on soon. The bulk head and all the hood gussets on the black and red cart will be painted black and the iron cross will be painted either red to make it pop or black for the stealth look. Either way, the black and red cart shall henceforth be called the "Iron Cross Buggy"
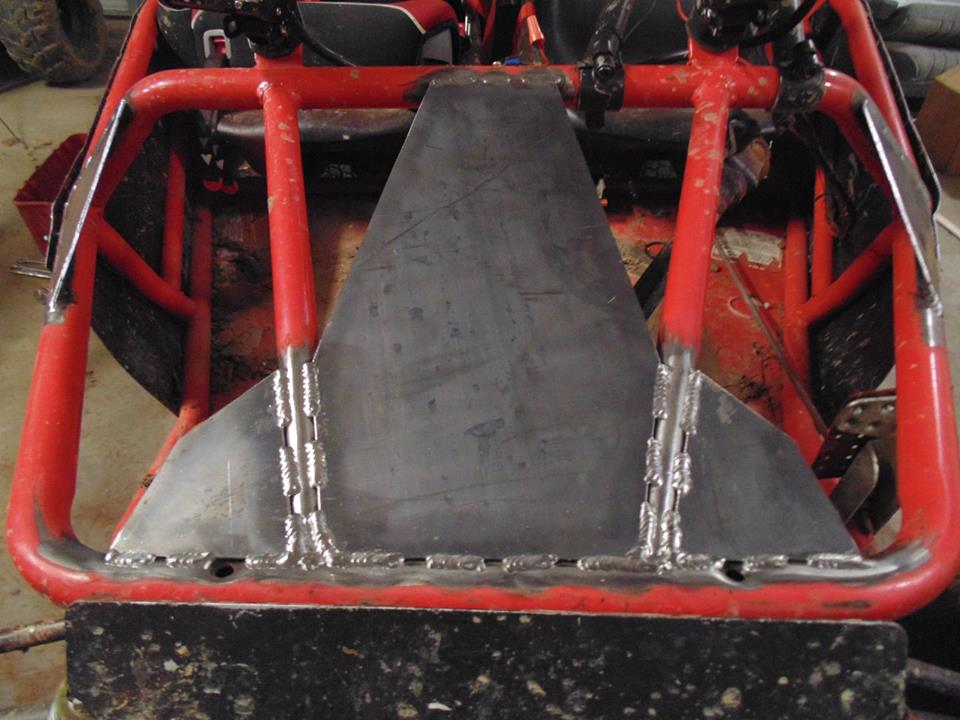
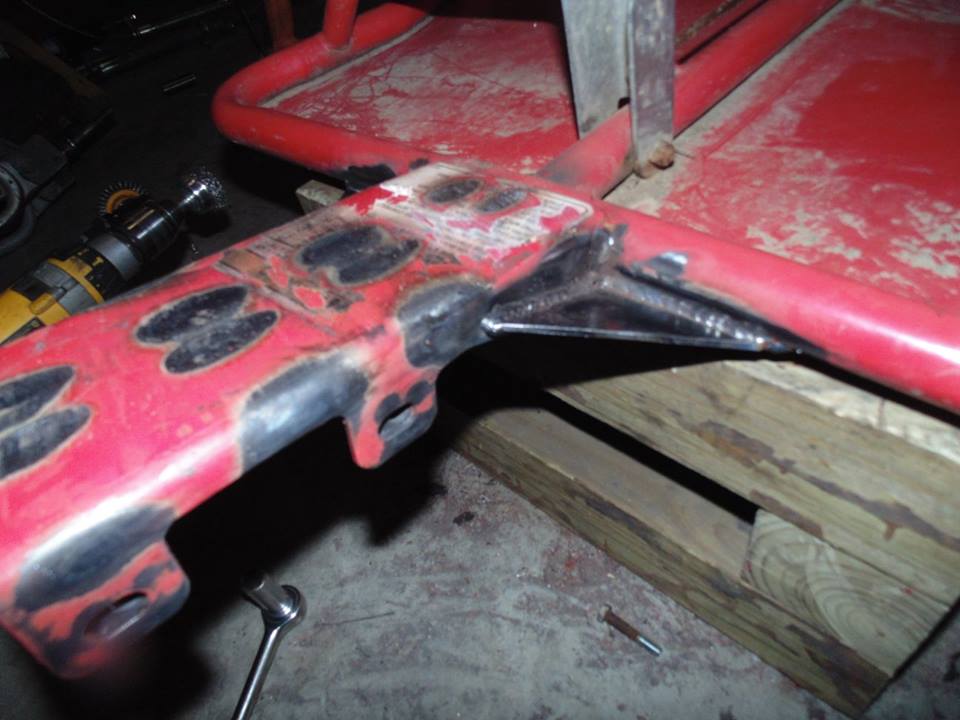
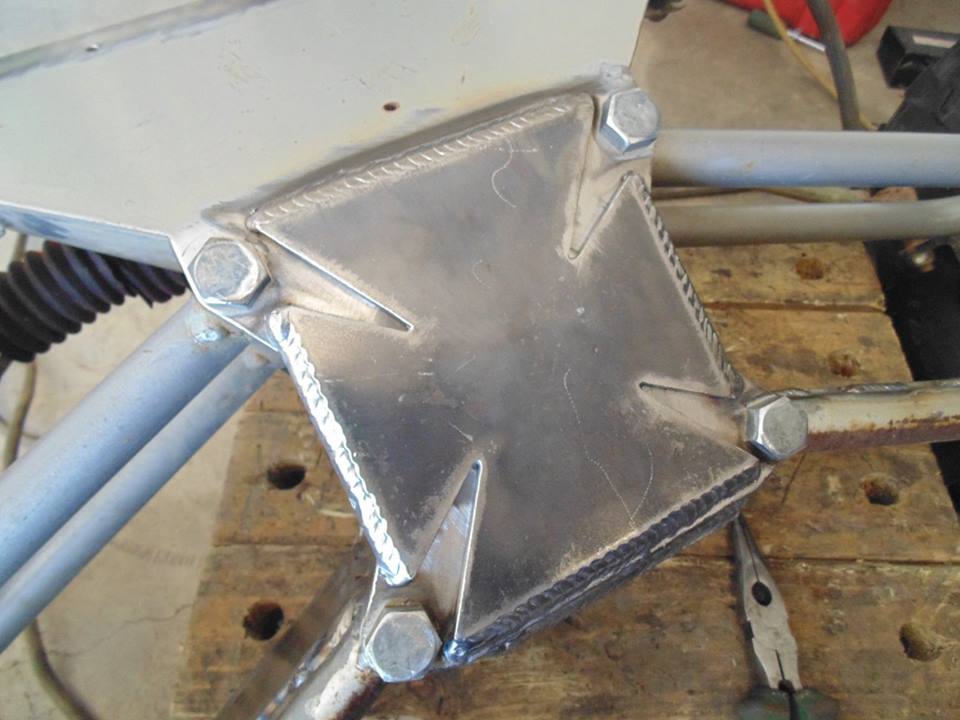
Started working on the old front end that will actually go on the red and silver cart. I decided that I will not be plating the A arms on this front end but will still plate in the bottom of the bulk head using 3/16" and doing a bulk head reinforcment plate as shown here.
To keep things a little different I went with an hour glass shaped bulk head plate. The bulk head and all the hood gussets on the silver and red cart will be painted black and the hour glass will be painted red. This cart shall henceforth be called the "Black Widow Buggy"
I ran out of welding gas on the tail end of the last bead on the hour glass (upper left) so I had to call it a night. Need to get more gas and more steel plate and tube from the welding supplier tomorrow after work.
Last edited:
Lookin pretty burly now! I like your choices so far, and the welding looks pretty good too!
I'm wondering if you're going to keep the upper part of the roll cage a bolt on, or if you're going to beef that up too? It seems the flattened tube with a single bolt isn't ideal and if you're going with more power it might not be a bad idea to strengthen that area...
I'm wondering if you're going to keep the upper part of the roll cage a bolt on, or if you're going to beef that up too? It seems the flattened tube with a single bolt isn't ideal and if you're going with more power it might not be a bad idea to strengthen that area...
looks great, nice projects
needs a D60 though, that IFS will never work
needs a D60 though, that IFS will never work
Lookin pretty burly now! I like your choices so far, and the welding looks pretty good too!
I'm wondering if you're going to keep the upper part of the roll cage a bolt on, or if you're going to beef that up too? It seems the flattened tube with a single bolt isn't ideal and if you're going with more power it might not be a bad idea to strengthen that area...
I have seen some guys weld those flattened ends to the tube instead of having the bolt. I am not opposed to doing that. On the Iron Cross Buggy those connections are made with 3/8" grade 8 bolts. The Black Widow Buggy probably currently has grade 5 bolts. I don't see any reason to keep those bars removable so I will probably heed your suggestion and weld them but still leave the bolts in place
looks great, nice projects
needs a D60 though, that IFS will never work
I do have another set of tons coming off the Burb that are available . . . don't tempt me, hahahaha
It's hard to know where to stop, and feel free to take this with a grain of salt...but what about removing the stamped flat (aka weak) part of the tube, then run a short coped sleeve over it and have a true roll cage connection? I don't know what tube size you have, but it might not be too hard to find a size that will slip over the existing stuff.
It's hard to know where to stop, and feel free to take this with a grain of salt...but what about removing the stamped flat (aka weak) part of the tube, then run a short coped sleeve over it and have a true roll cage connection? I don't know what tube size you have, but it might not be too hard to find a size that will slip over the existing stuff.
Yeah, I don't care enough about it to do all that. This thing will get the occasional low speed flop more than anything. Worst case scenario I do a little barrel roll but I have learned pretty quickly what the limits are and won't go there again. Don't think the tubing used will survive much of a crash no matter how it is attached anyway. The material thickness and type is the biggest weak point.
All good points! Still enjoying watching what you do with them. Good job so far!
If you plate the lower arms again, what about plating the bottom instead of the top? Seems like they'd slide better over stuff.
Looking good!
Looking good!
All good points! Still enjoying watching what you do with them. Good job so far!
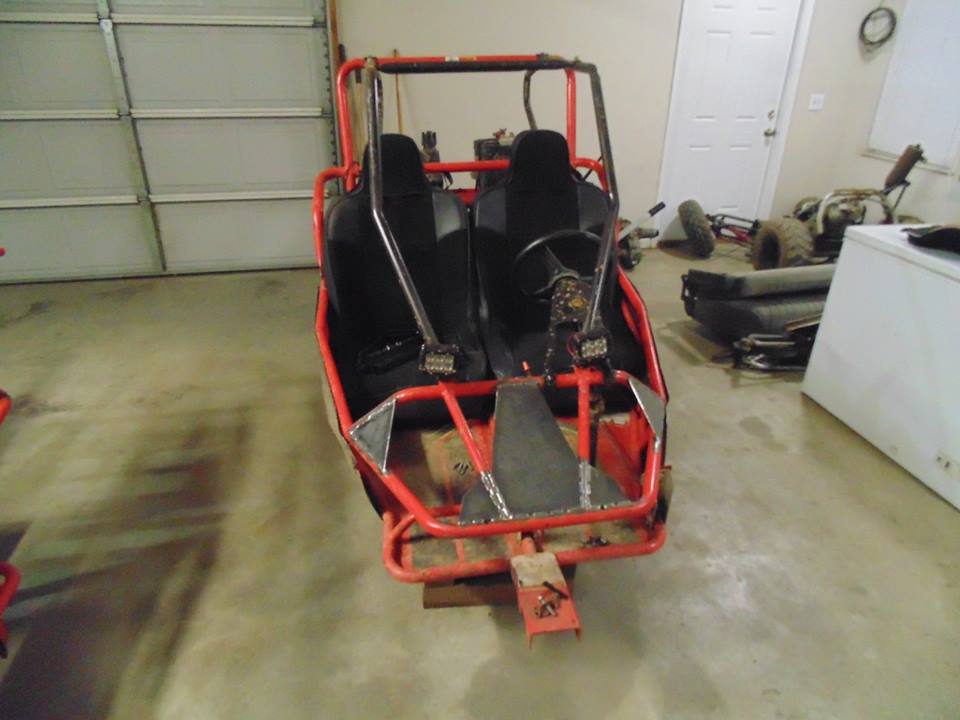
Thanks, it's something different and that is pretty cool. Also neat because not many people put this kind of work into a go cart so it stands out a bit more.
If you plate the lower arms again, what about plating the bottom instead of the top? Seems like they'd slide better over stuff.
Looking good!
I thought about doing that but I didn't want to create a tray for dirt, mud, water, rocks, etc to collect in and I didn't want to fully box the A arms to prevent that either. Going on top was the best compromise.
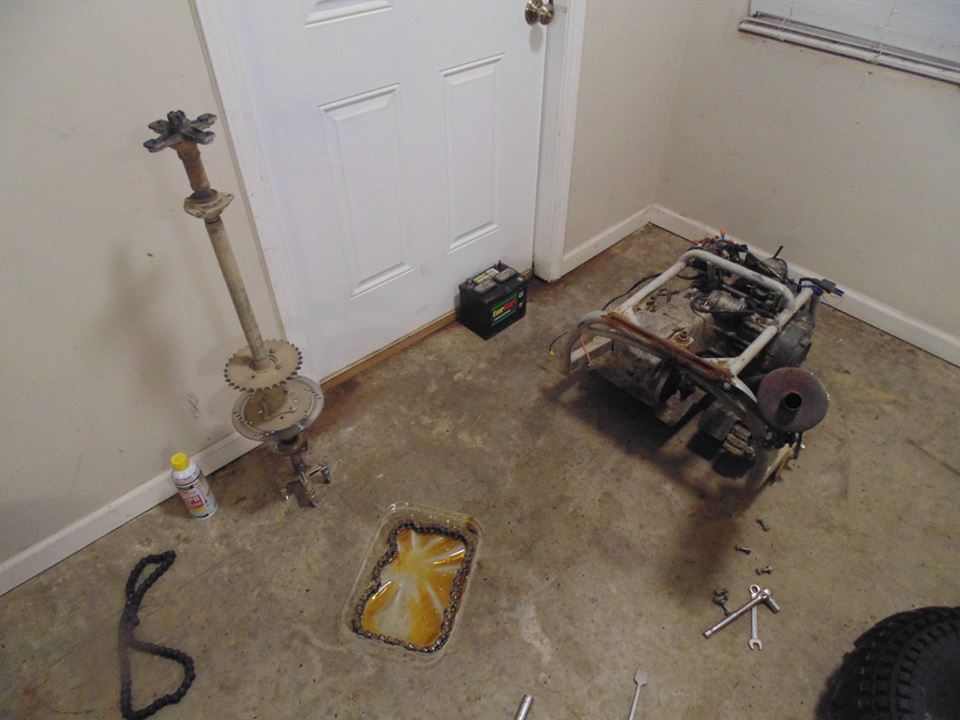
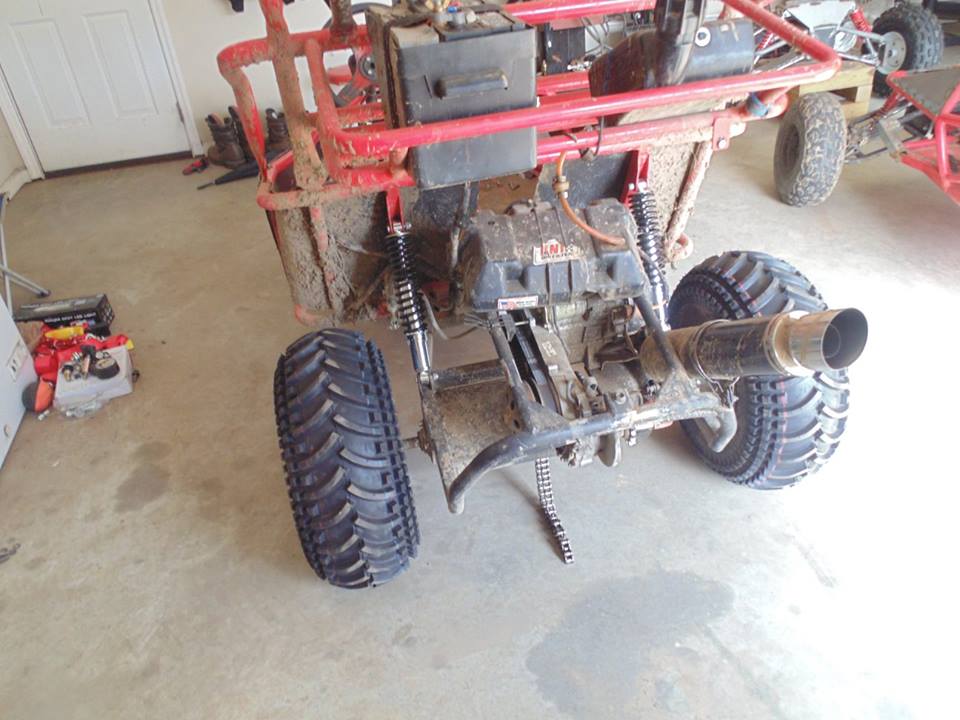
Was turning some wrenches out in the garage this afternoon.
Swapping some axle shafts and chains around
This is the axle shaft assembly that is going in the Iron Cross Buggy
Also installed some 1.5" wheel spacers to the rear axles. This makes the rear wheel track 3" wider than stock to match the front end a little better.
Old shocks are pulled from the Iron Cross Buggy and new shocks are waiting patiently in position
Last edited:
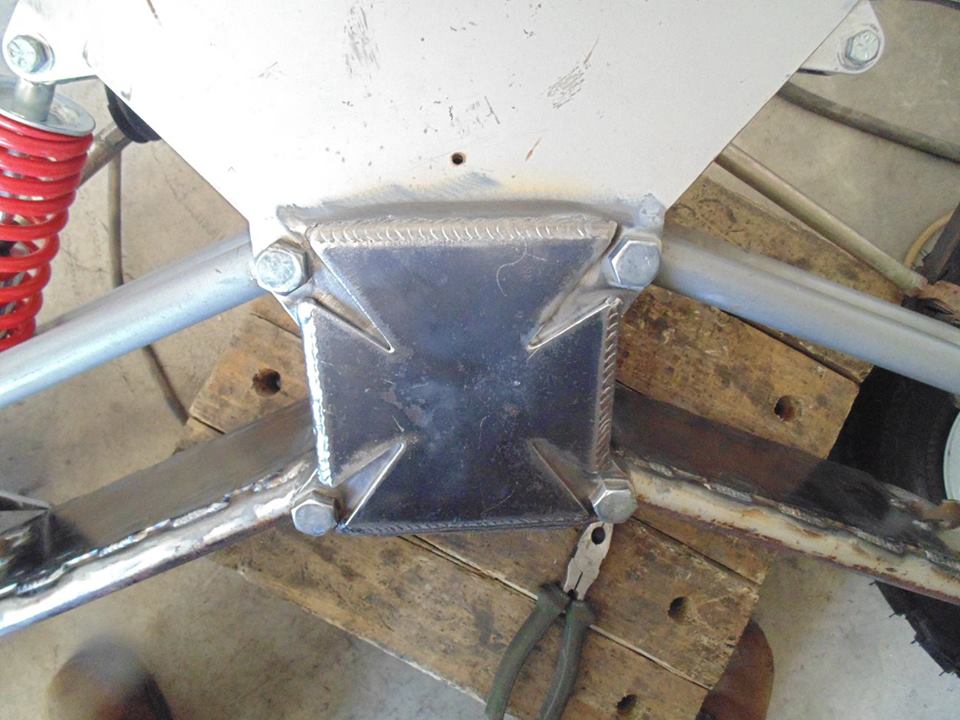
Burned in the Iron Cross gusset for the Iron Cross Buggy
Not sure if I should lay some beads on the cut ins or leave it as is. Thoughts?
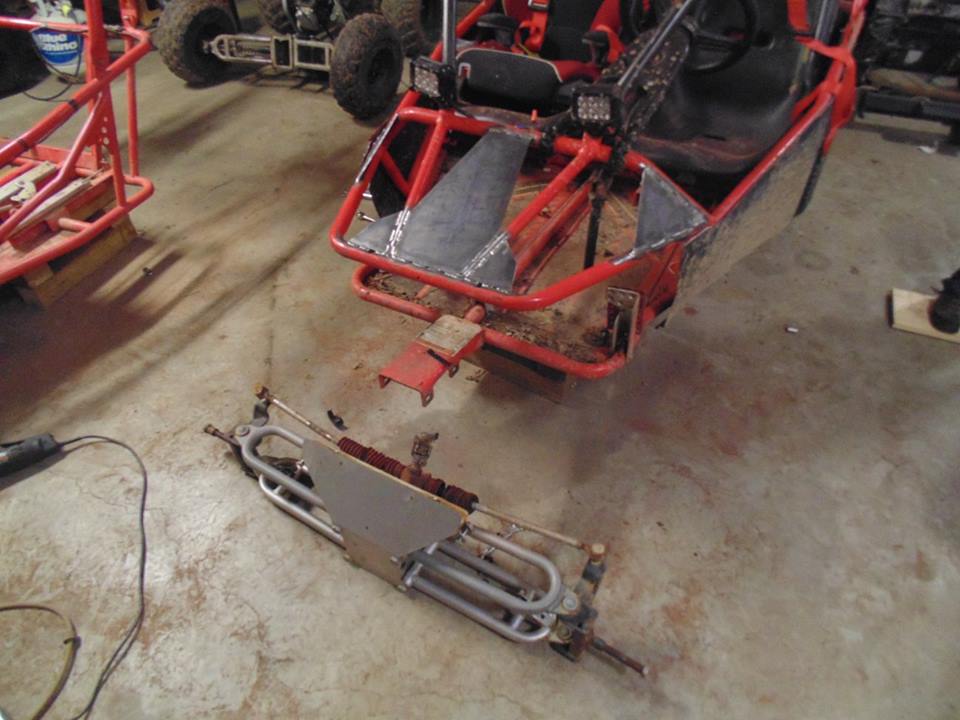
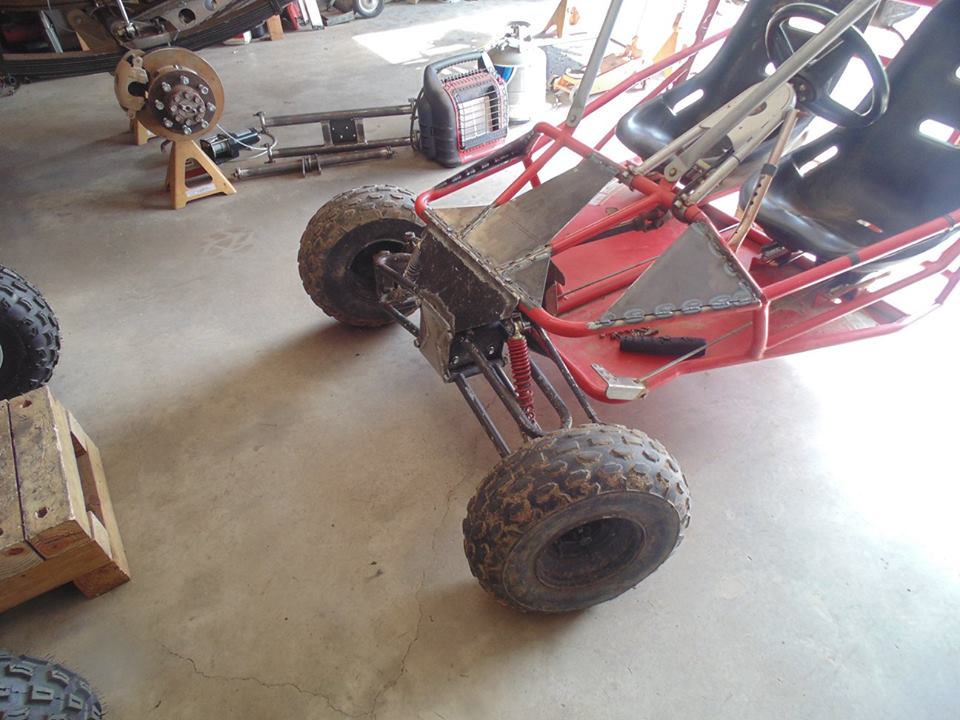
Modified the lower shock mounts and welded that all together
This shock eye relocation is necessary to accomodate the longer shocks going up front
Here is a pic with the new shocks installed
Steering upgrades still need to go on and the new heavy duty ball joints installed. Not sure if I am going to partially plate the upper A arms like the bottom or leave them open as is. Thoughts?
New chain for the Iron Cross Buggy came in so the axle shaft could go back in the swing arm.
The 175cc crate engine will be installed in this swing arm in a couple weeks
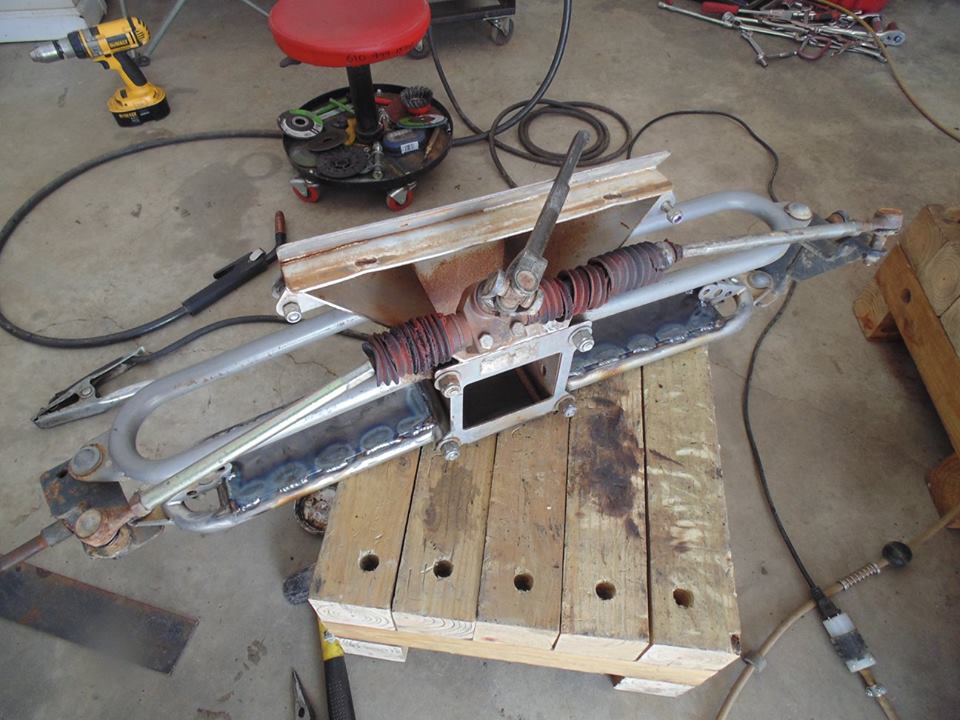
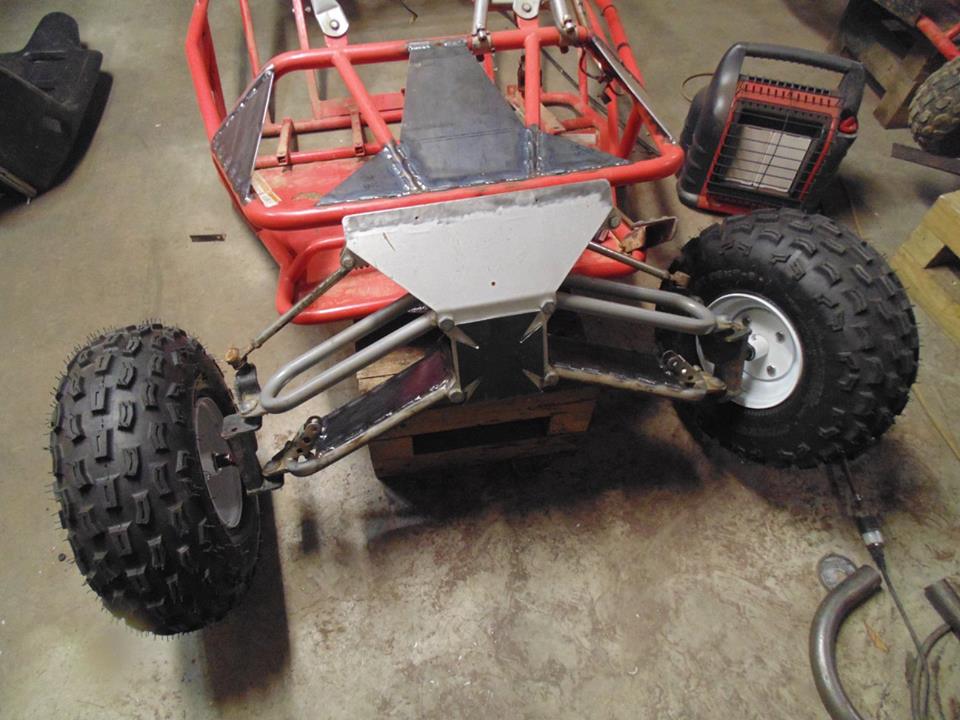
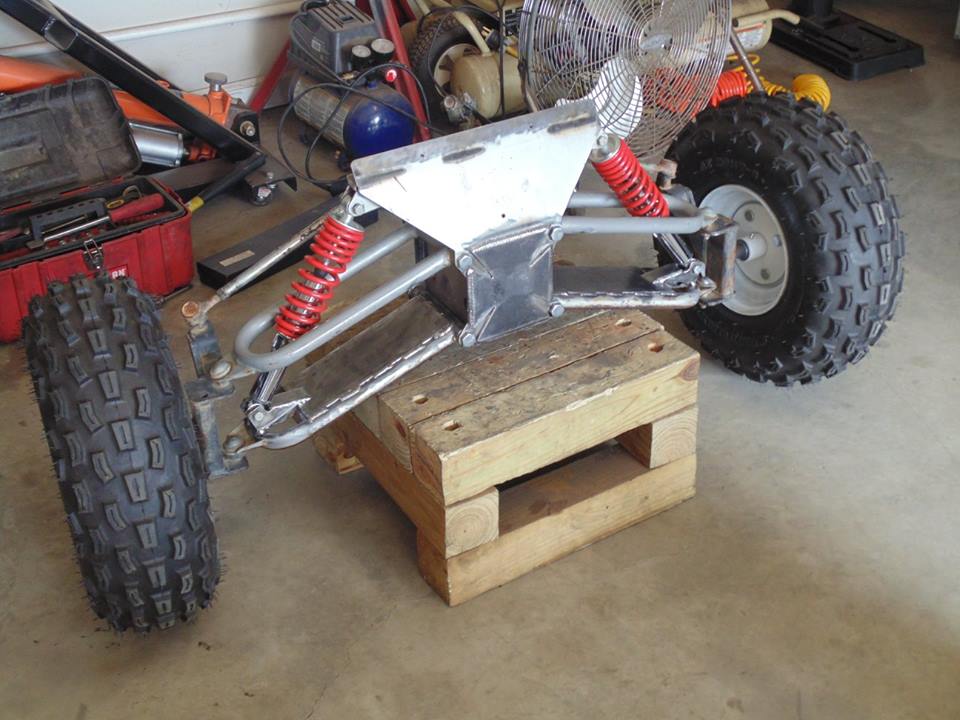
Black Widow Buggy front end is fully installed and welded in
Going to be working a bunch on the Black Widow Buggy to get it back to a complete roller and ready for a rebuilt 150cc engine
Love how this front end has turned out. The Iron Cross Buggy is going to be even cooler so I am super excited
Not sure if I should lay some beads on the cut ins or leave it as is. Thoughts?
Modified the lower shock mounts and welded that all together
This shock eye relocation is necessary to accomodate the longer shocks going up front
Here is a pic with the new shocks installed
Steering upgrades still need to go on and the new heavy duty ball joints installed. Not sure if I am going to partially plate the upper A arms like the bottom or leave them open as is. Thoughts?
New chain for the Iron Cross Buggy came in so the axle shaft could go back in the swing arm.
The 175cc crate engine will be installed in this swing arm in a couple weeks
Black Widow Buggy front end is fully installed and welded in
Going to be working a bunch on the Black Widow Buggy to get it back to a complete roller and ready for a rebuilt 150cc engine
Love how this front end has turned out. The Iron Cross Buggy is going to be even cooler so I am super excited
Last edited:
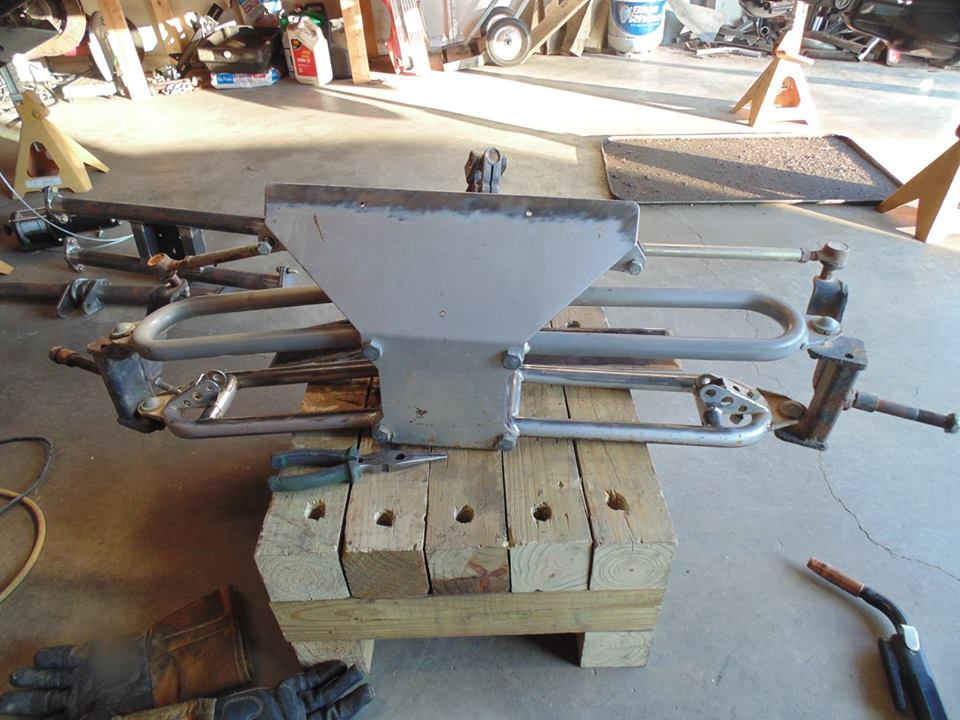
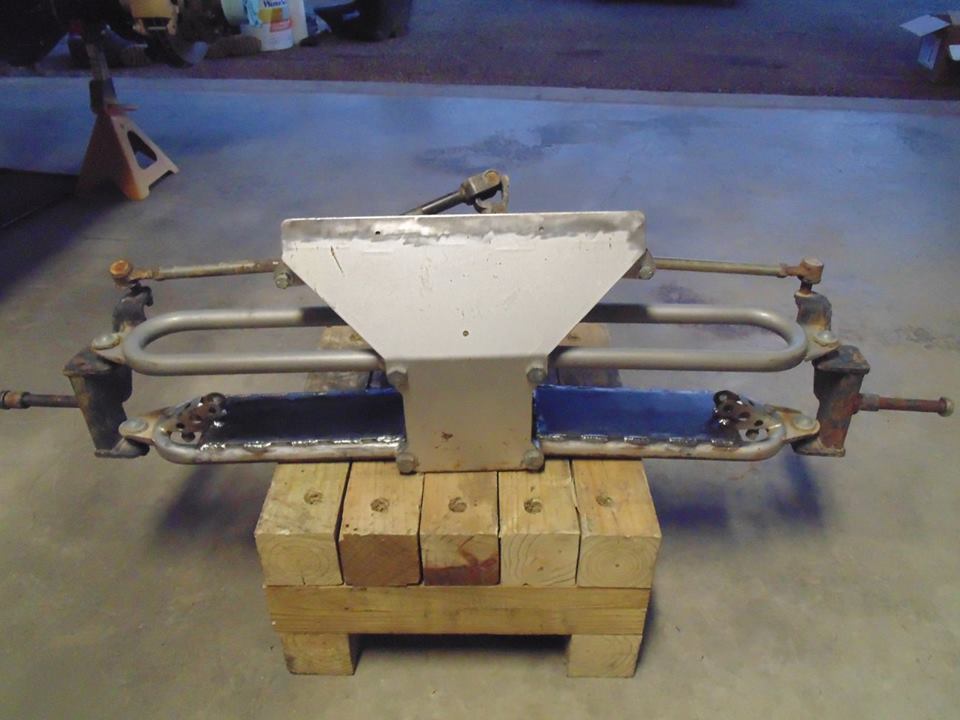
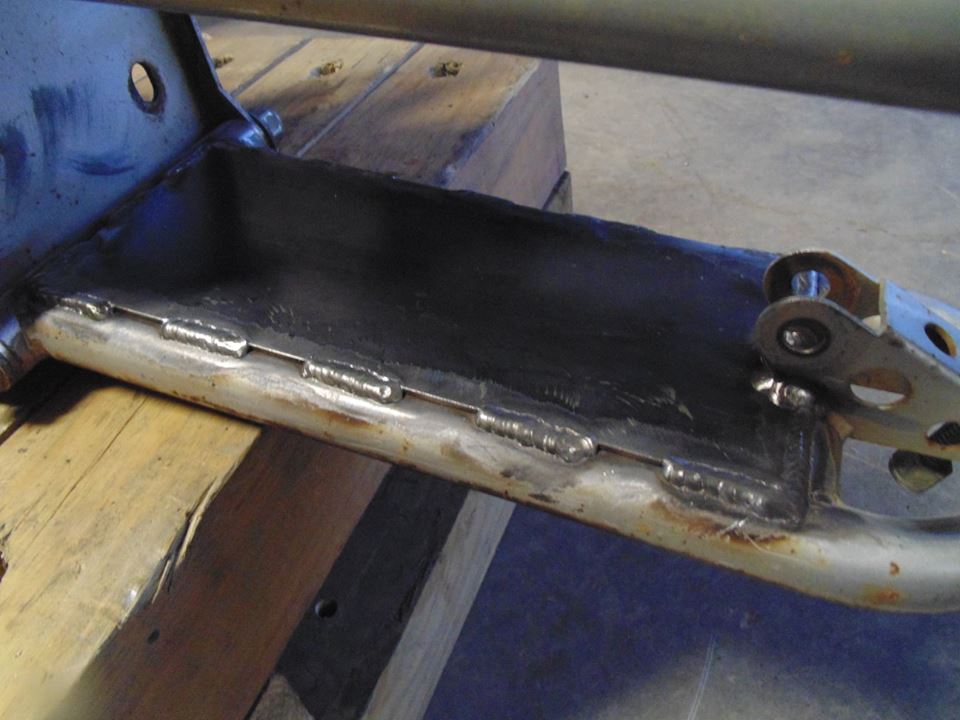
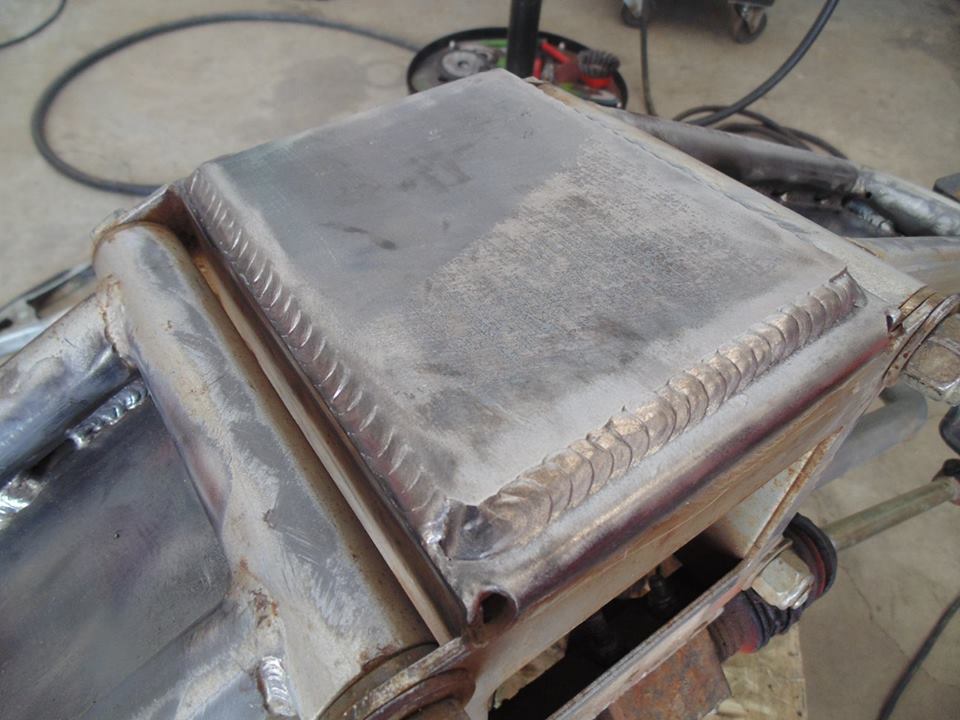
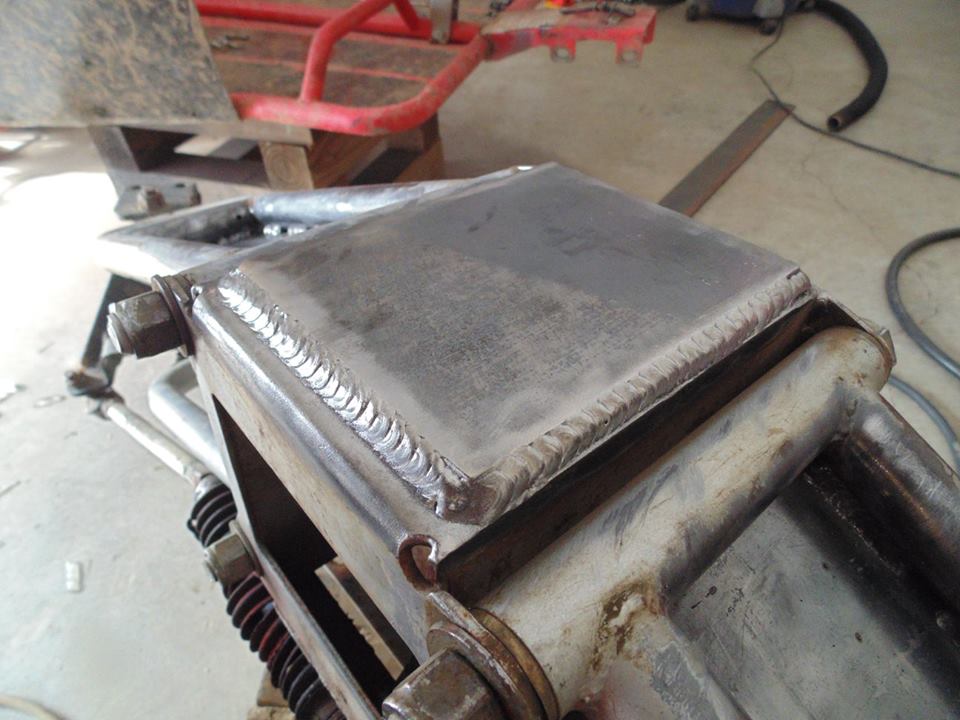
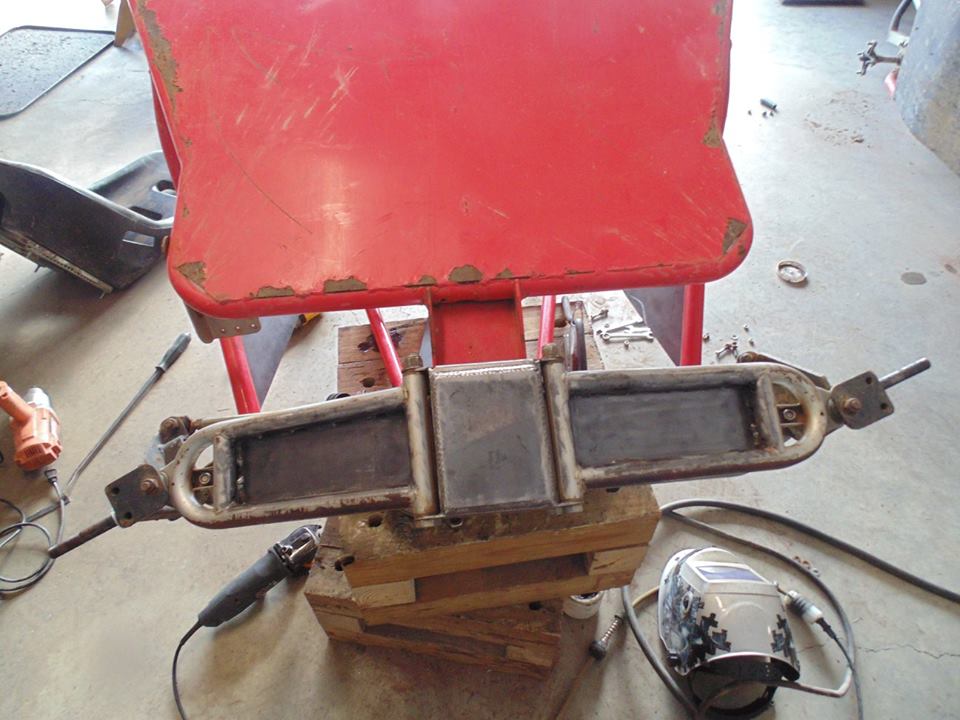
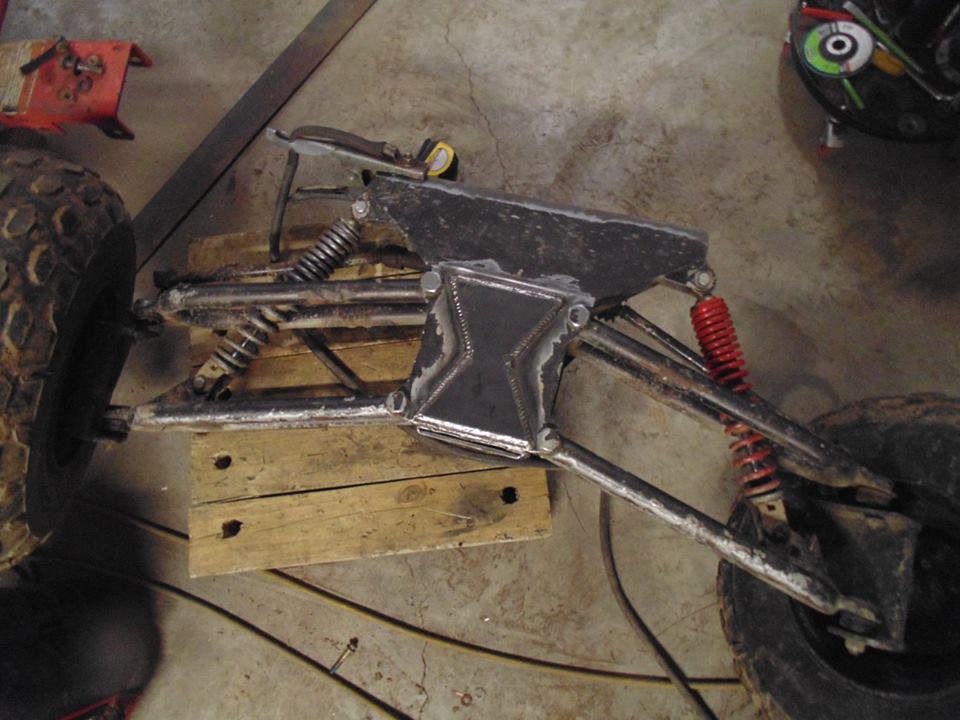
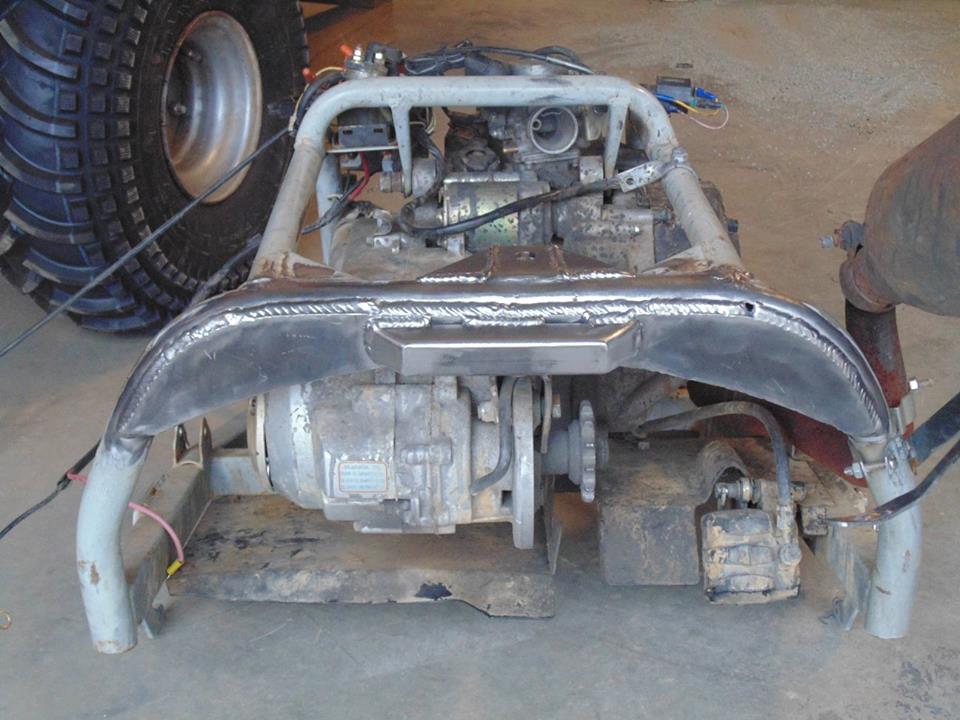
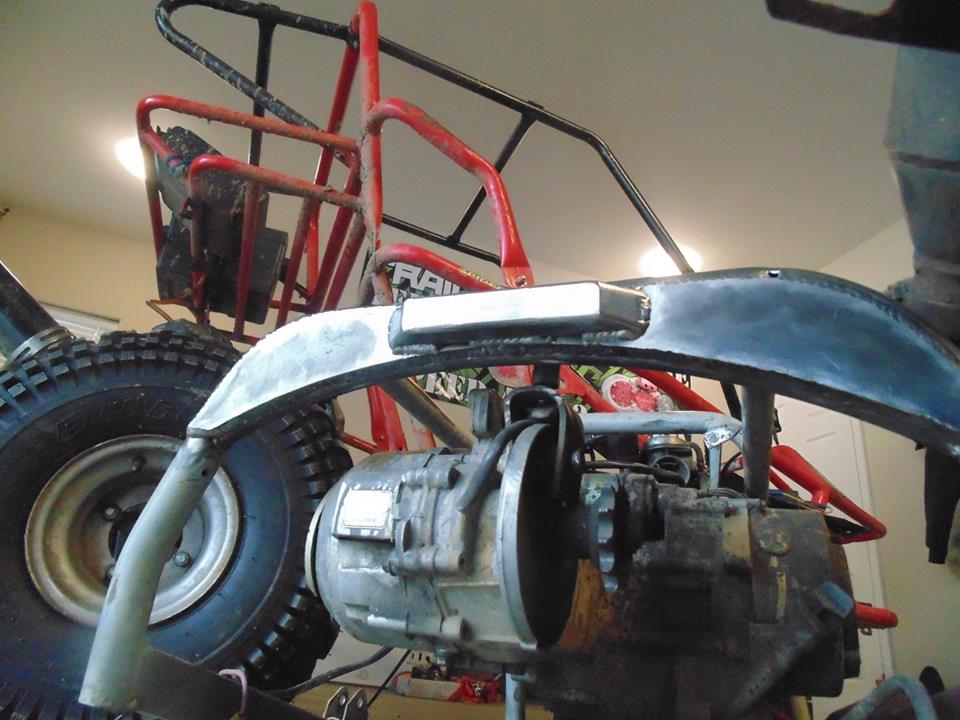
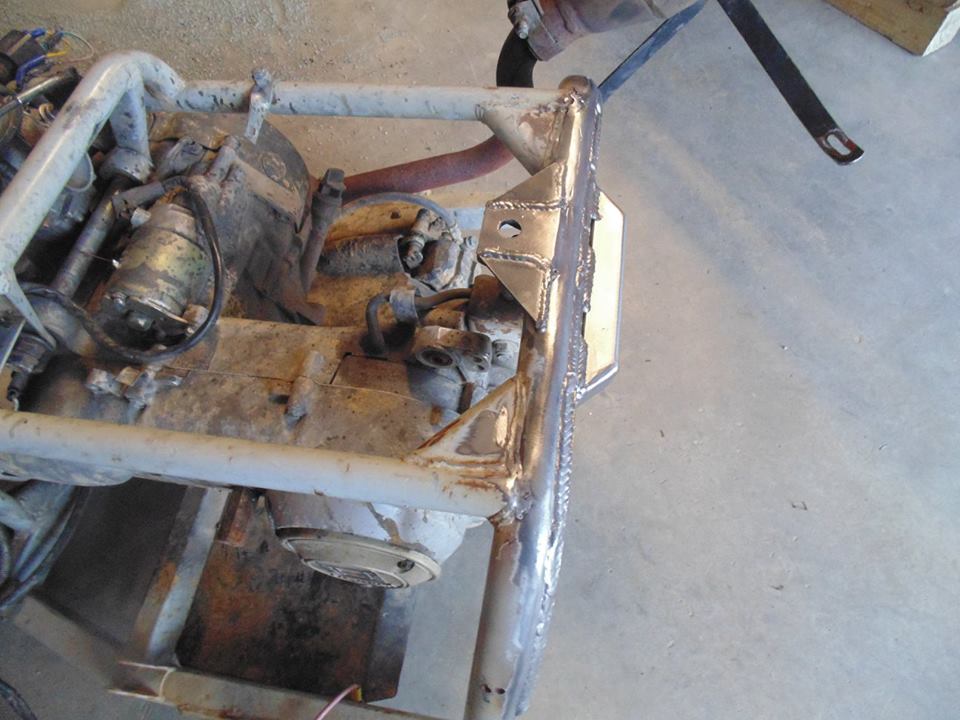
Got the swing arm all beefed up. Ordered a new stock 150cc crate engine so now I am ready to pull the old engine, paint, and intall the swing arm into the Black Widow Buggy.
The big "back" plate is 3/16 and ties the two existing tubes together. I used the box tube to add some extra reinforcement at the center and lend some dimensionality.
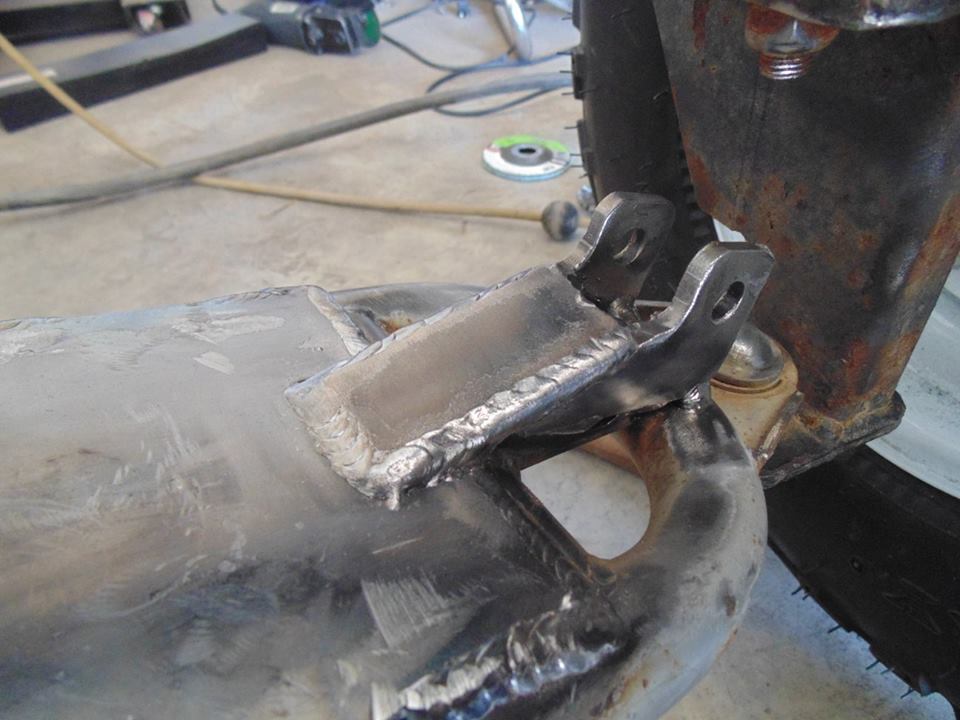
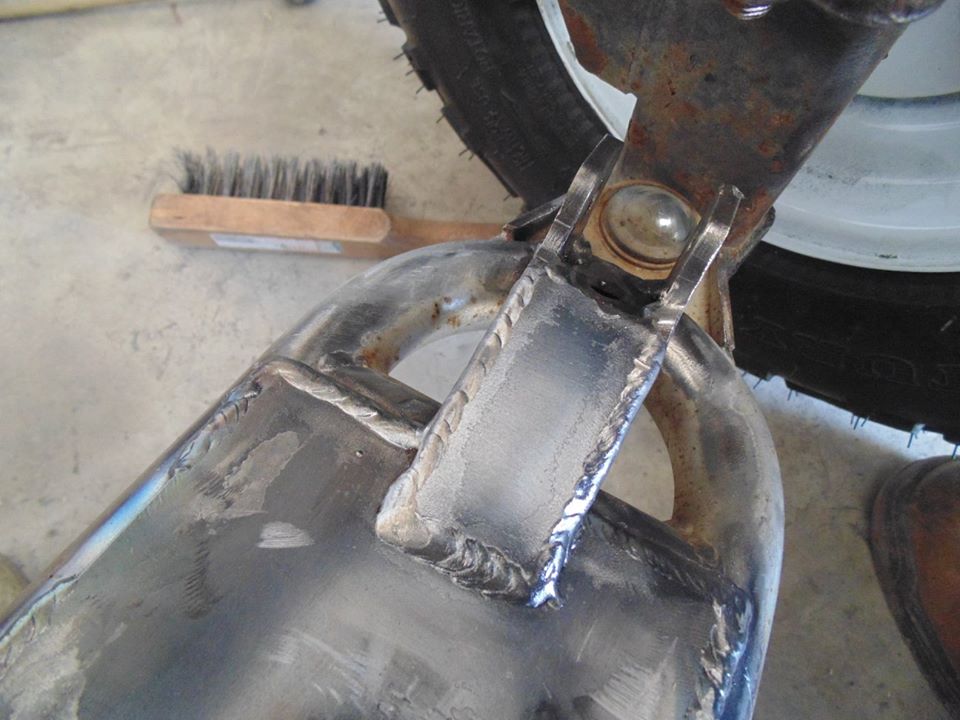
I added two small triangle gussets to the OEM transmission case hanger where tube failure seems to be common (both go carts had cracks here)
The big "back" plate is 3/16 and ties the two existing tubes together. I used the box tube to add some extra reinforcement at the center and lend some dimensionality.
I added two small triangle gussets to the OEM transmission case hanger where tube failure seems to be common (both go carts had cracks here)
Last edited:

