CK5

You are using an out of date browser. It may not display this or other websites correctly.
You should upgrade or use an alternative browser.
You should upgrade or use an alternative browser.
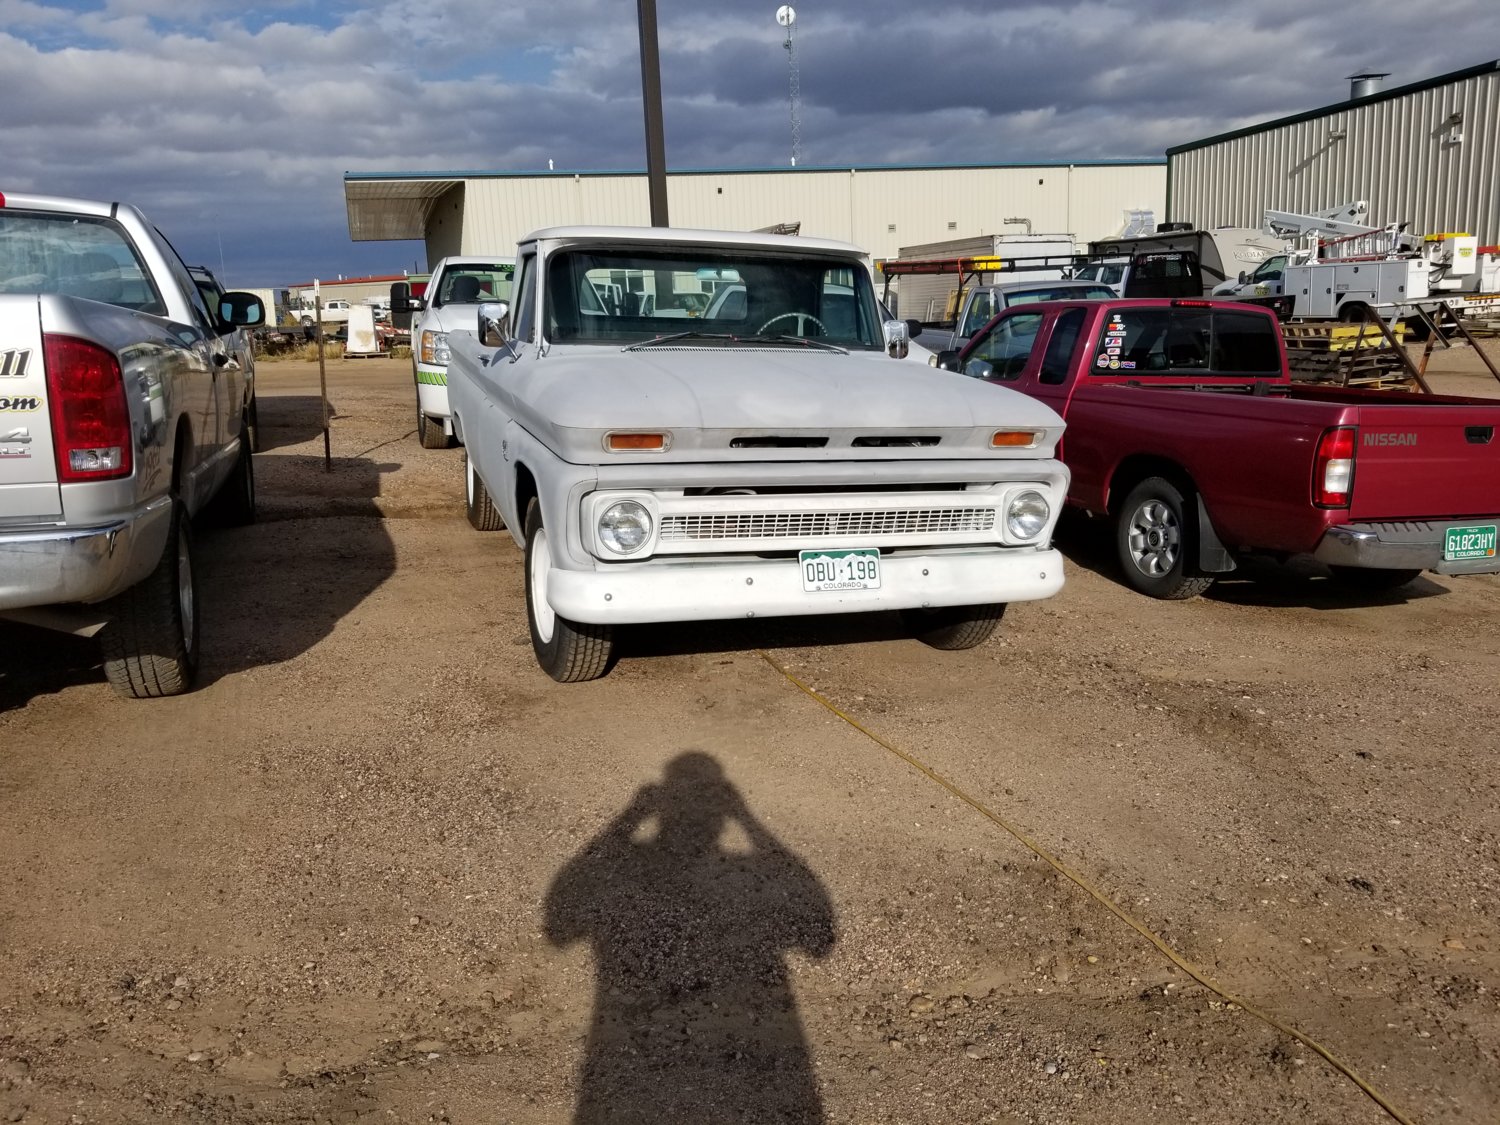
1966 Chevy C20
- Thread starter mrk5
- Start date
I'll have to research a good, quality throwout bearing for this thing. I'm lazy and don't like to do work twice. 
That's funny, I'm cheap and apparently LOVE doing things twice.I'll have to research a good, quality throwout bearing for this thing. I'm lazy and don't like to do work twice.
Probably shoddy part. Looks like I'm pulling mine for a new throw out bearing
Not trying to hijack but when I was gathering parts for my 77 I just used one of the throw out bearings that I had laying around. Spun nice, quiet...still working good.
Max, you're a farmer...
It's kinda mandatory that you use things that you have laying around
Lol! Truth!
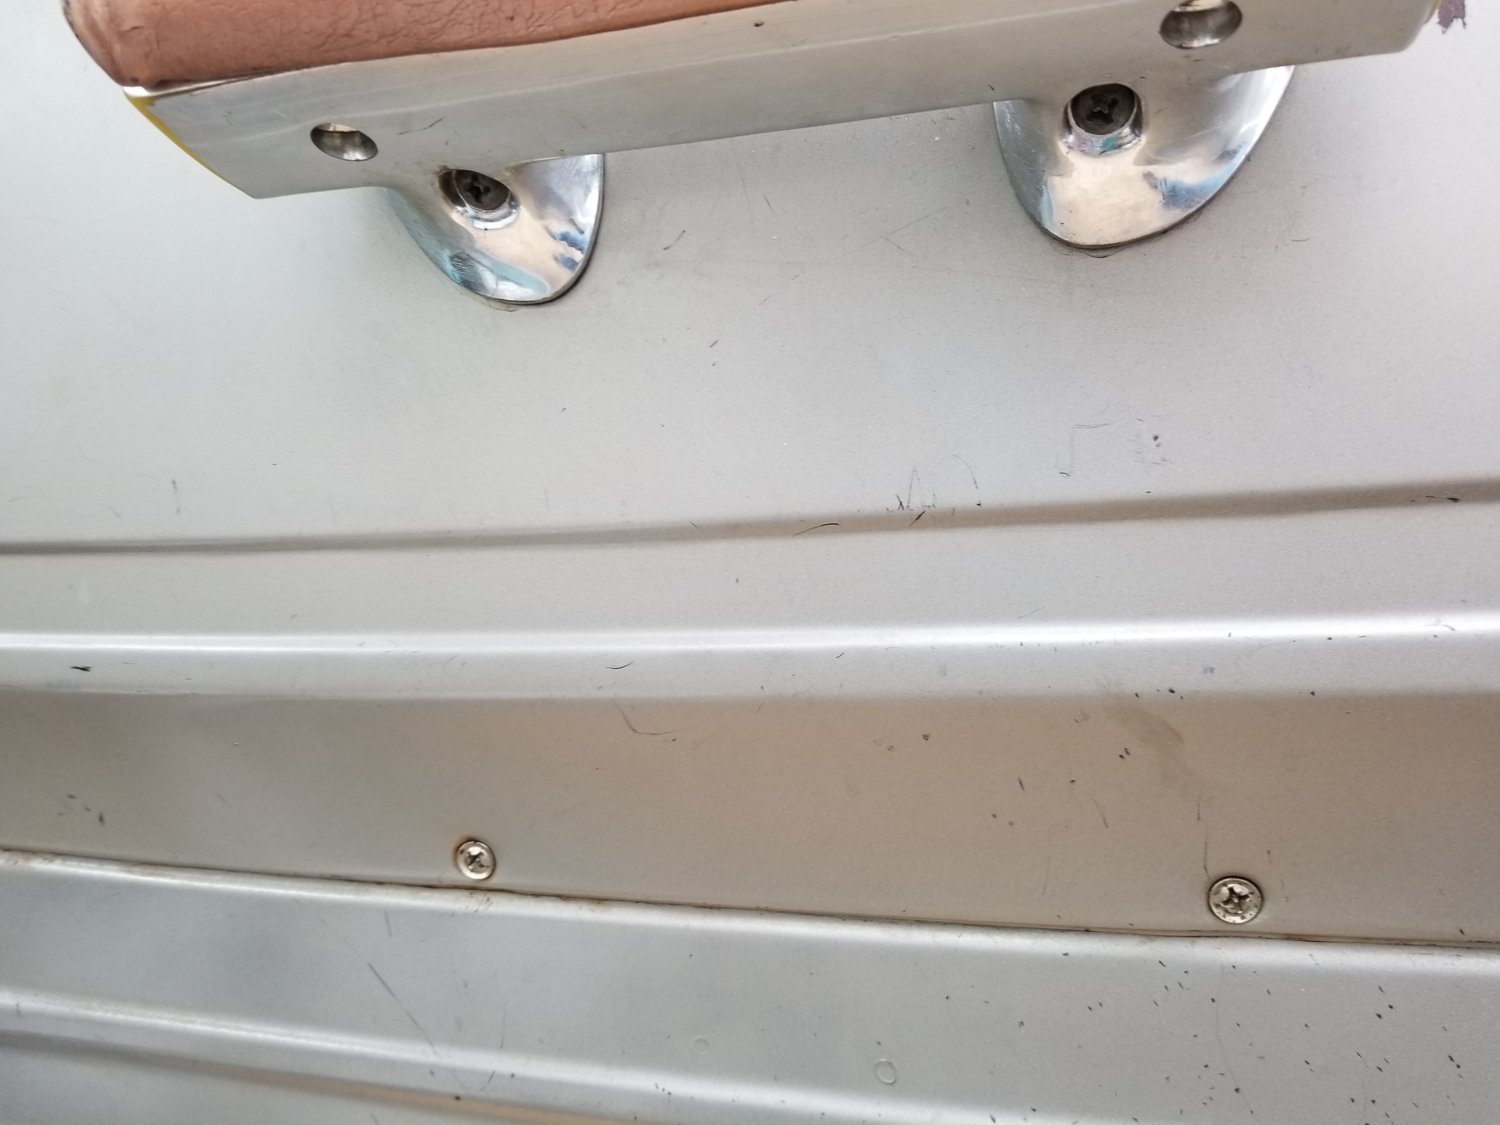
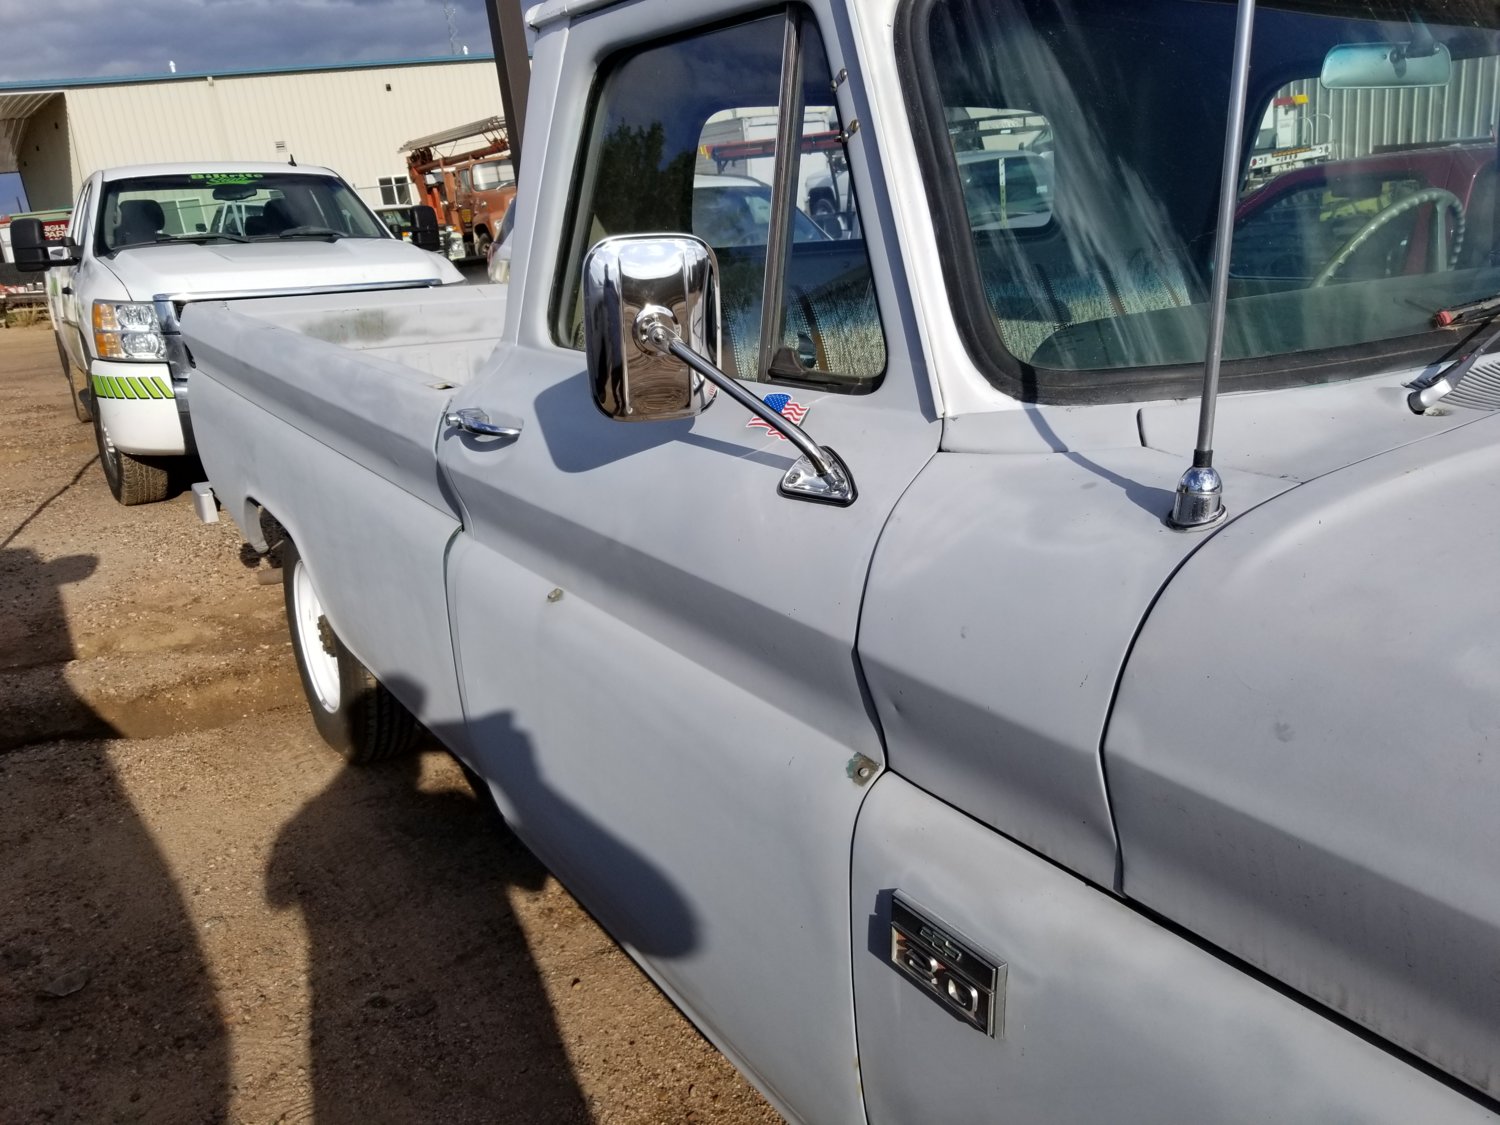
Installed new mirrors from LMC. Driver side was simple bolt on. Passenger side needed mounting provisions.
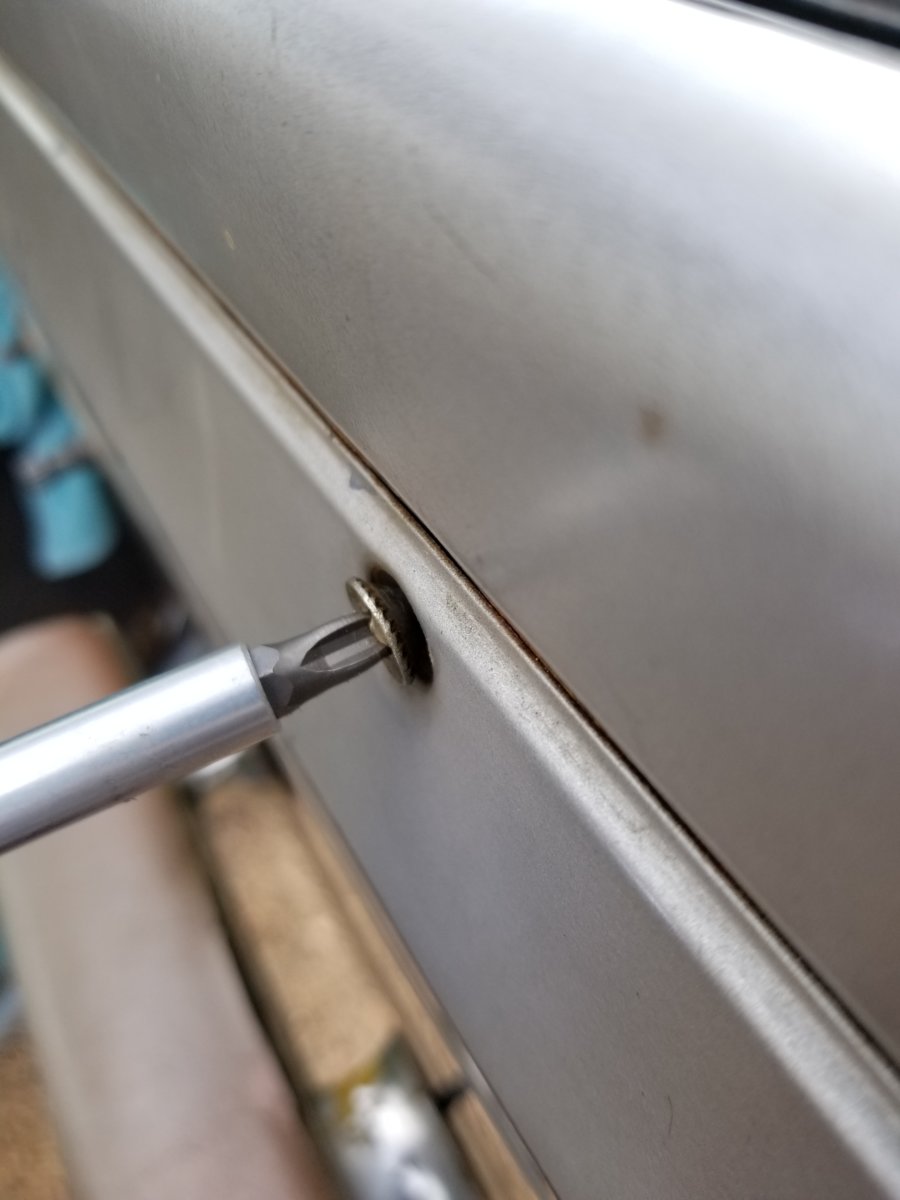
First thing is to remove the door panel. The handles use set screws.


The screws are offset so it's easier to get a screw driver on them.
The panel is screwed to the door around its perimeter.

Don't forget the screws under the armrest.
The screws are interesting, a serrated countersunk deal.
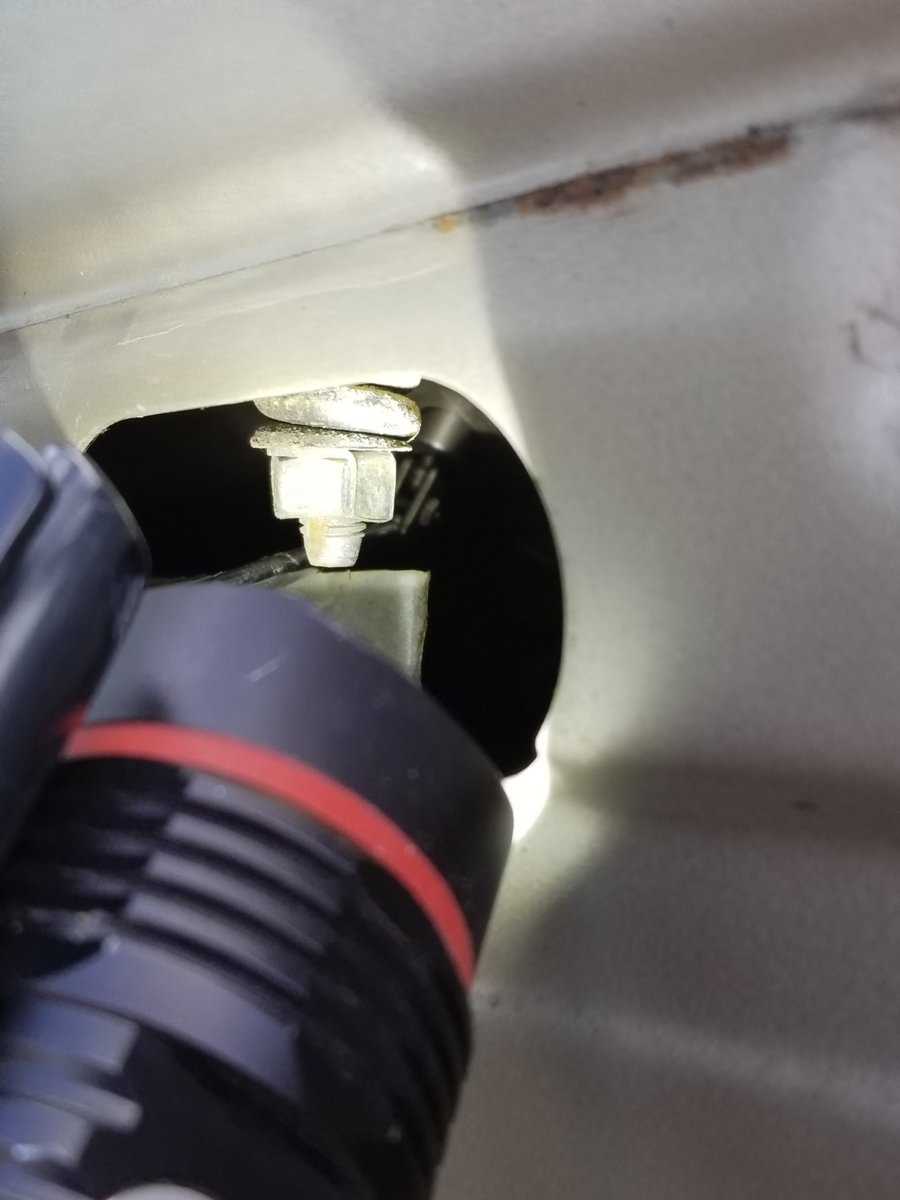
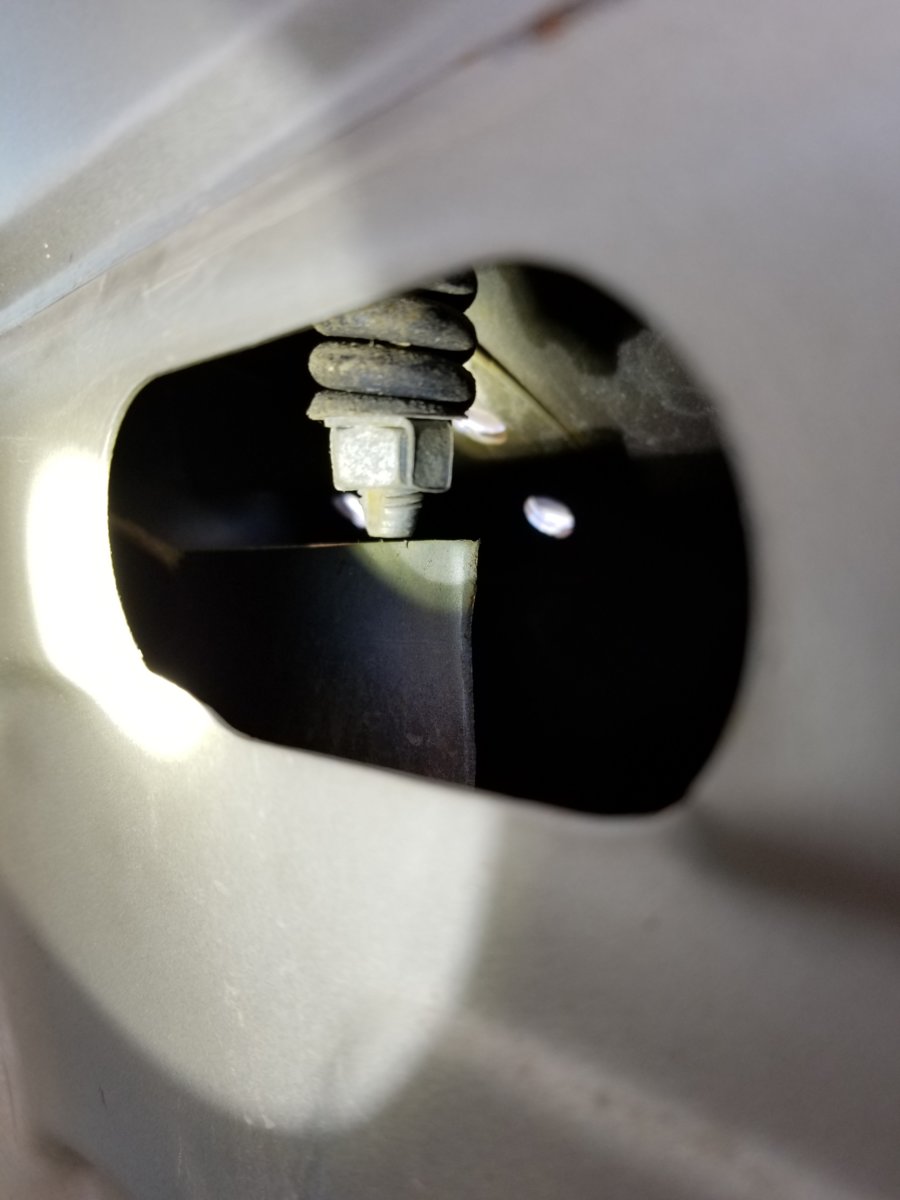
Once the panel is off there's not a lot of access.

There are existing holes for a mirror on a backing panel on the inside of the door. I was thinking this makes a good template for drilling holes in the correct place.

Problem is they are nearly impossible to reach.
I put a magnet in the holes and then used a screw on the other side to mark the spot.

It worked out pretty good.
I used rivet nuts for the my ting.
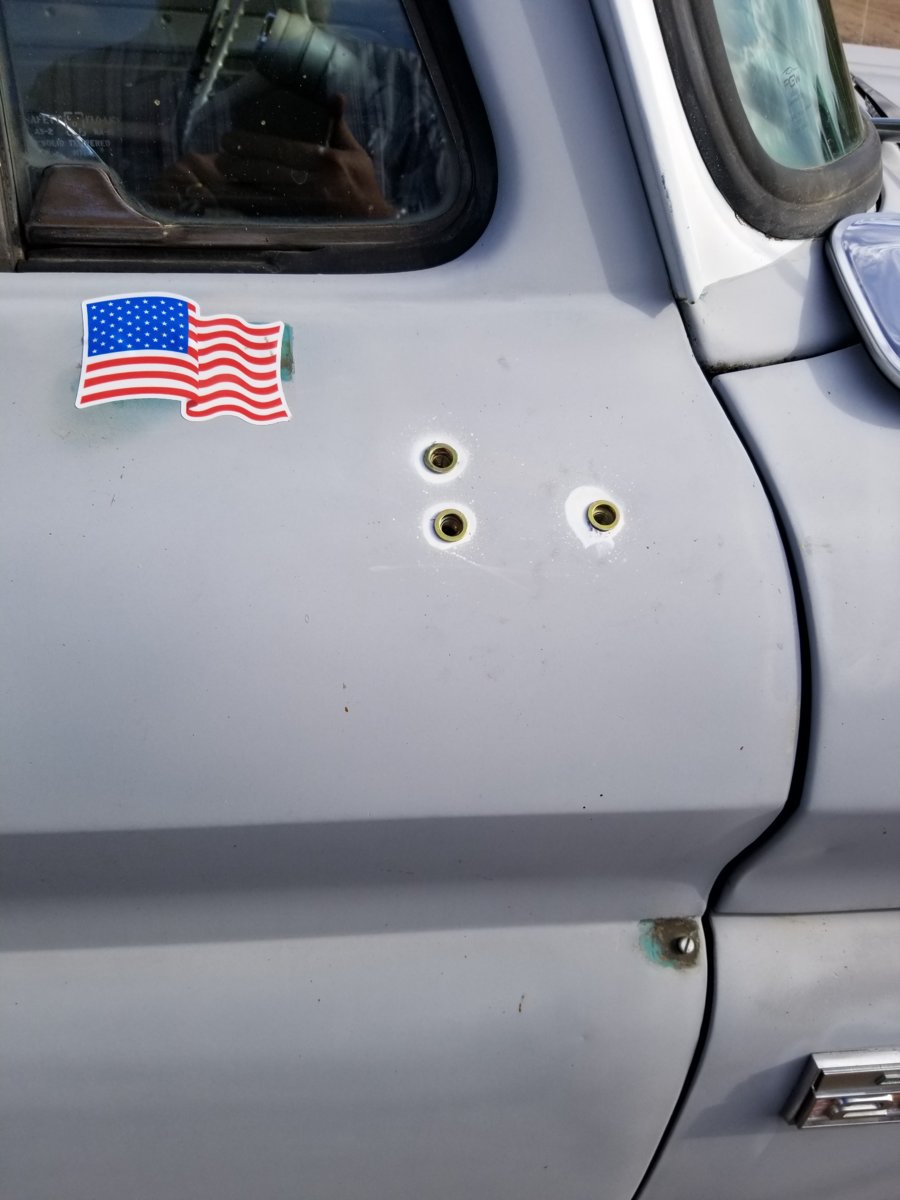
The white paint I sprayed to coat the fresh exposed edges of the holes.
Here are the new mirrors.
First thing is to remove the door panel. The handles use set screws.
The screws are offset so it's easier to get a screw driver on them.
The panel is screwed to the door around its perimeter.
Don't forget the screws under the armrest.
The screws are interesting, a serrated countersunk deal.
Once the panel is off there's not a lot of access.
There are existing holes for a mirror on a backing panel on the inside of the door. I was thinking this makes a good template for drilling holes in the correct place.
Problem is they are nearly impossible to reach.
I put a magnet in the holes and then used a screw on the other side to mark the spot.
It worked out pretty good.
I used rivet nuts for the my ting.
The white paint I sprayed to coat the fresh exposed edges of the holes.
Here are the new mirrors.
Nice job on the magnet idea. great idea!
Thanks, the mirrors vibrate a little but not horrible.Looks good Scott, how is the vibration?
Thanks! I forgot to add that I used the gasket to fine tune the hole locations before drilling.Nice job on the magnet idea. great idea!
I like the seat cover. I think the color goes well with the truck. I also like that you used the alpine green engine color. I think it's a neat color.Love this thing. I picked up a 66 C10 last winter and got it back on the road with a quick v8 swap.


And the best bolt on

TreeFarm
Internet fabricator.
I like the seat cover. I think the color goes well with the truck. I also like that you used the alpine green engine color. I think it's a neat color.
Alpine green/Detroit diesel green has to be the best OEM engine color of all time, It was actually the correct color for the truck too.
Noticed a puddle under the front; thought it was the radiator leaking. Found it was the rubber line jumper between pump and hardline from the tank.

Looking inside the "good" end of this piece, I can see the whole thing needs replaced.

I have a feeling that hose has been on there a while.
Just like replacing the filter, I got a gasoline shower. With the tank in the cab, there's really good gravity feed. I need to put in a cutoff valve in the line just before the filter.
Looking inside the "good" end of this piece, I can see the whole thing needs replaced.
I have a feeling that hose has been on there a while.
Just like replacing the filter, I got a gasoline shower. With the tank in the cab, there's really good gravity feed. I need to put in a cutoff valve in the line just before the filter.
It would appear I fixed the possible throw out bearing noise. I realized the pedal had a good deal of play and it was quite a bit higher than the brake pedal. I theorized the clutch may be releasing too far.
I was going to adjust the clutch linkage but I realized that would not change how high up the pedal is. So I just added a 1/4" spacer to the pedal arm where it hits the stop.

Now the pedals are even.

And there's still the proper stroke for the clutch to engage/disengage. And no more noise.
Funny how your muscle memory gets used to the pedal travel. I like where the pedal is now as far as comfort but I find myself pulling my leg up higher than I need to now.
I also improved the hood alignment that's been bugging me.
Before

After

I was going to adjust the clutch linkage but I realized that would not change how high up the pedal is. So I just added a 1/4" spacer to the pedal arm where it hits the stop.
Now the pedals are even.
And there's still the proper stroke for the clutch to engage/disengage. And no more noise.
Funny how your muscle memory gets used to the pedal travel. I like where the pedal is now as far as comfort but I find myself pulling my leg up higher than I need to now.
I also improved the hood alignment that's been bugging me.
Before
After
Better
See what you started?

I’ll say I was never a fan of the big nose 60s trucks but this thread is bringing me around pretty bad
Nice! I like the 64 fender badges best.

