CK5

You are using an out of date browser. It may not display this or other websites correctly.
You should upgrade or use an alternative browser.
You should upgrade or use an alternative browser.
1991 Chevy Crew Cab "R" / "V" Conversion
- Thread starter mckustomfab
- Start date
 thanks man.
mckustomfab
1/2 ton status
I'm starting to feel like the name of this build should be "Snowball" because that is exactly what is happening....
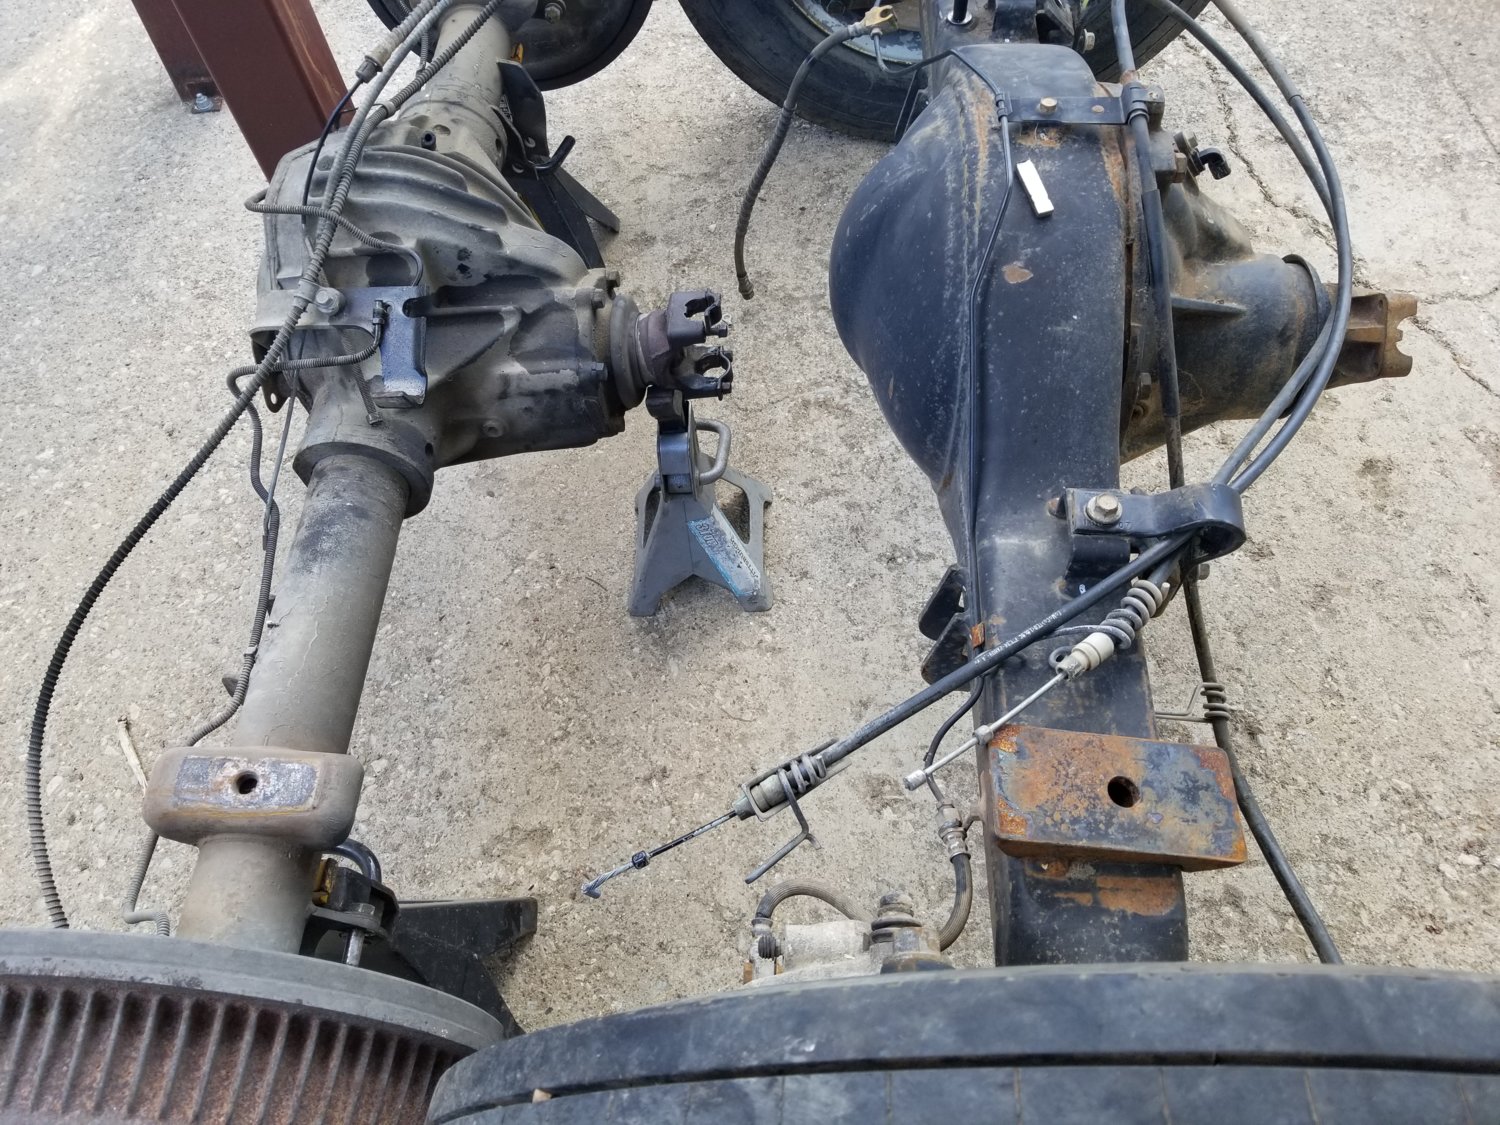
A guy I found was parting out a 2008 F550 and I scored the front and rear axles for a good deal! The front is the big version of the Dana 60 super, and a Spicer 110 for the rear. While both axles are BIG, the Spicer 110 is flat out huge... I will get some photos of it next to a 14bolt. They both have a odd 10x225 lug patter and I will probably end up running MRAP wheels with adapter plates. Here are a few pics, I have some stuff to figure out but I hope to have the rear ready before too long.


A guy I found was parting out a 2008 F550 and I scored the front and rear axles for a good deal! The front is the big version of the Dana 60 super, and a Spicer 110 for the rear. While both axles are BIG, the Spicer 110 is flat out huge... I will get some photos of it next to a 14bolt. They both have a odd 10x225 lug patter and I will probably end up running MRAP wheels with adapter plates. Here are a few pics, I have some stuff to figure out but I hope to have the rear ready before too long.
Fricking cooool. I've seen alot of the s110 up close and personal. Let's hope you never have to take the chunk out on the ground after you install it. Gotta keep those pinion bearings lubricated. Make sure oil level is good.
mckustomfab
1/2 ton status
Fricking cooool. I've seen alot of the s110 up close and personal. Let's hope you never have to take the chunk out on the ground after you install it. Gotta keep those pinion bearings lubricated. Make sure oil level is good.
Thanks man! I think if I ever need to drop the chunk I will pull the axle and use a engine hoist. I am probably going to over fill the axle by a little and add some Lucas oil stabilizer. I wish this axle has the Detroit TruTrac but at some point I can add one I guess.
Last edited:
Thanks man! I think if I ever need to drop the chunk I will pull the axle and use a engine hoist. I am probably going to. Over fill the axle by a little and add some Lucas oil stabilizer. I wish this axle has the Detroit TruTrac but at some point I can add one I guess.
drill a hole in that goofy cast iron tab on the top of the dropout and use it for a lifting point up to the frame or bottom of the bed. Easy in, easy out. ish.
mckustomfab
1/2 ton status
drill a hole in that goofy cast iron tab on the top of the dropout and use it for a lifting point up to the frame or bottom of the bed. Easy in, easy out. ish.
LOL. easy ish! That would beat having to pull the axle to drop it out! I have a old spare engine stand that I could steal the base from and mount one of these little "in bed hoists" onto it. Should be able to roll it under there and using Stephens idea, lift it out pretty easy! Maybe...

I have done a ton of drop out style diffs like that in semis and stuff lots bigger than that. The best method if you have a trans jack is to build a plate to bolt flat to it with a 90 degree edge coming up. Usually I just weld a piece of angle to the front edge of the plate. Cut a pattern in the angle and drill some holes so it will bolt to the lower two holes on the diff. Then make some long studs out of some bolts like 6" long and screw one in at the ten and two positions in place of the diff bolts. Then you can just unbolt the diff and slide it out a few inches on the studs and bolt it to the trans jack adapter and remove it. Same thing when you go in. Hang on studs, squirt in silicone and unbolt from adapter and slid it home. These baby F550 diffs are gravy. FYI I haven't priced one in a few yrs but last time I priced a reman dropout with a locker for the older version of this axle it was several thousand and the company I worked for auctioned the truck off instead of fixing it so try not to blow yours up too bad ever. Lol. The quick method for removal involves a pallet or something like that for cushion and just dropping it out on the ground.
https://1stattack.com/super-single-wheels-2/
These would work for you also but the price is a wee bit steep.
These would work for you also but the price is a wee bit steep.
https://1stattack.com/super-single-wheels-2/
These would work for you also but the price is a wee bit steep.
I have some of there wheels for a project I am doing with some 5500 dodge axles . Very nice pieces.
mckustomfab
1/2 ton status
I have done a ton of drop out style diffs like that in semis and stuff lots bigger than that. The best method if you have a trans jack is to build a plate to bolt flat to it with a 90 degree edge coming up. Usually I just weld a piece of angle to the front edge of the plate. Cut a pattern in the angle and drill some holes so it will bolt to the lower two holes on the diff. Then make some long studs out of some bolts like 6" long and screw one in at the ten and two positions in place of the diff bolts. Then you can just unbolt the diff and slide it out a few inches on the studs and bolt it to the trans jack adapter and remove it. Same thing when you go in. Hang on studs, squirt in silicone and unbolt from adapter and slid it home. These baby F550 diffs are gravy. FYI I haven't priced one in a few yrs but last time I priced a reman dropout with a locker for the older version of this axle it was several thousand and the company I worked for auctioned the truck off instead of fixing it so try not to blow yours up too bad ever. Lol. The quick method for removal involves a pallet or something like that for cushion and just dropping it out on the ground.
That's a good idea on the transmission jack, I will keep it in mind but hopefully never have to use it!...
https://1stattack.com/super-single-wheels-2/
These would work for you also but the price is a wee bit steep.
I priced out several super single wheels and everything I have found are super expensive. I recently ran across a set of 5 mraps wheels with inserts and adapter plates for the F550 lug pattern for a decent price so I picked them up. May have to do a little spacer in the rear but won't know till I mount the wheels up on the axle and measure.
Sweet! Sounds like it's gonna turn out pretty nice.That's a good idea on the transmission jack, I will keep it in mind but hopefully never have to use it!...
I priced out several super single wheels and everything I have found are super expensive. I recently ran across a set of 5 mraps wheels with inserts and adapter plates for the F550 lug pattern for a decent price so I picked them up. May have to do a little spacer in the rear but won't know till I mount the wheels up on the axle and measure.
mckustomfab
1/2 ton status
I got started mocking up the rear Spicer 110 today, one thing I can say is that the Spicer is considerably bigger than the 14bolt...
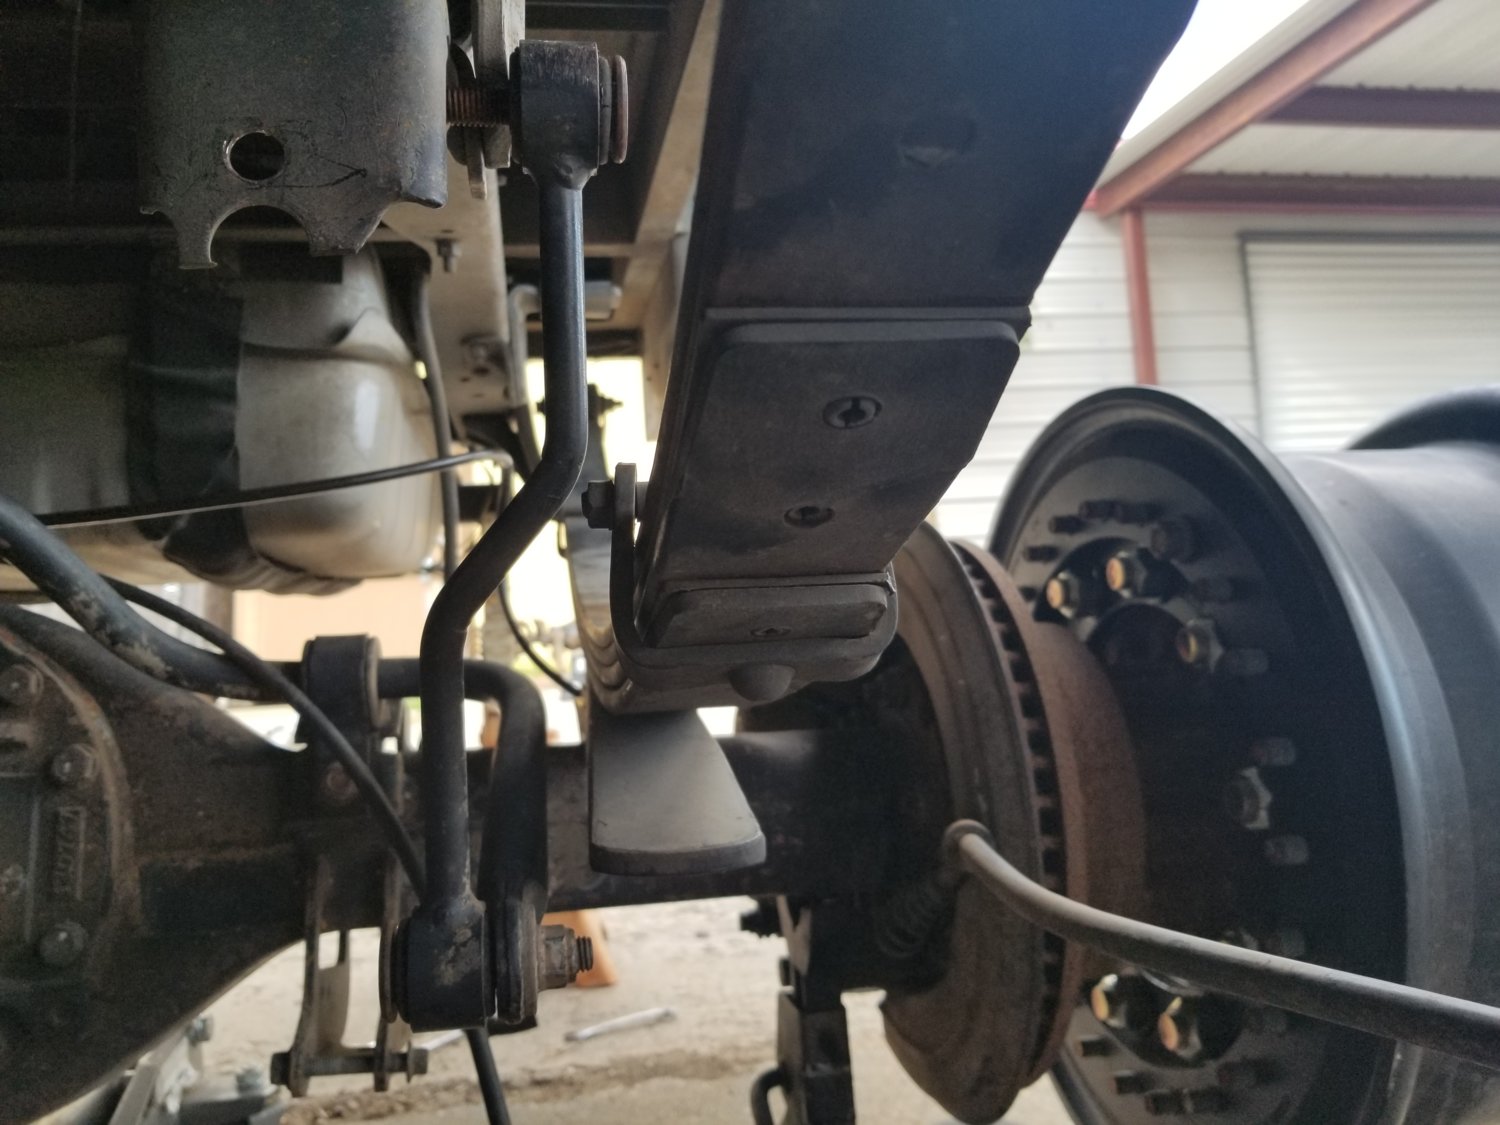
The spring perches are about 1" too wide so I am going to have to move them in some, also looks like the passenger shock and the exhaust will occupy the same space. I am probably going to move the rear axle forward about 3" to center up the wheel in the wheel well. Here are a few pics, I hope to get some more done tomorrow.


This is how far the MRAP wheels will stick out, I can flip them around but then they will suck in to far. I may have to break down and order some spacers to get the track width right. Also the swaybar, if I decide to run it, will work great, I will just have to extend the links a little.

The spring perches are about 1" too wide so I am going to have to move them in some, also looks like the passenger shock and the exhaust will occupy the same space. I am probably going to move the rear axle forward about 3" to center up the wheel in the wheel well. Here are a few pics, I hope to get some more done tomorrow.
This is how far the MRAP wheels will stick out, I can flip them around but then they will suck in to far. I may have to break down and order some spacers to get the track width right. Also the swaybar, if I decide to run it, will work great, I will just have to extend the links a little.
Awesome
mckustomfab
1/2 ton status
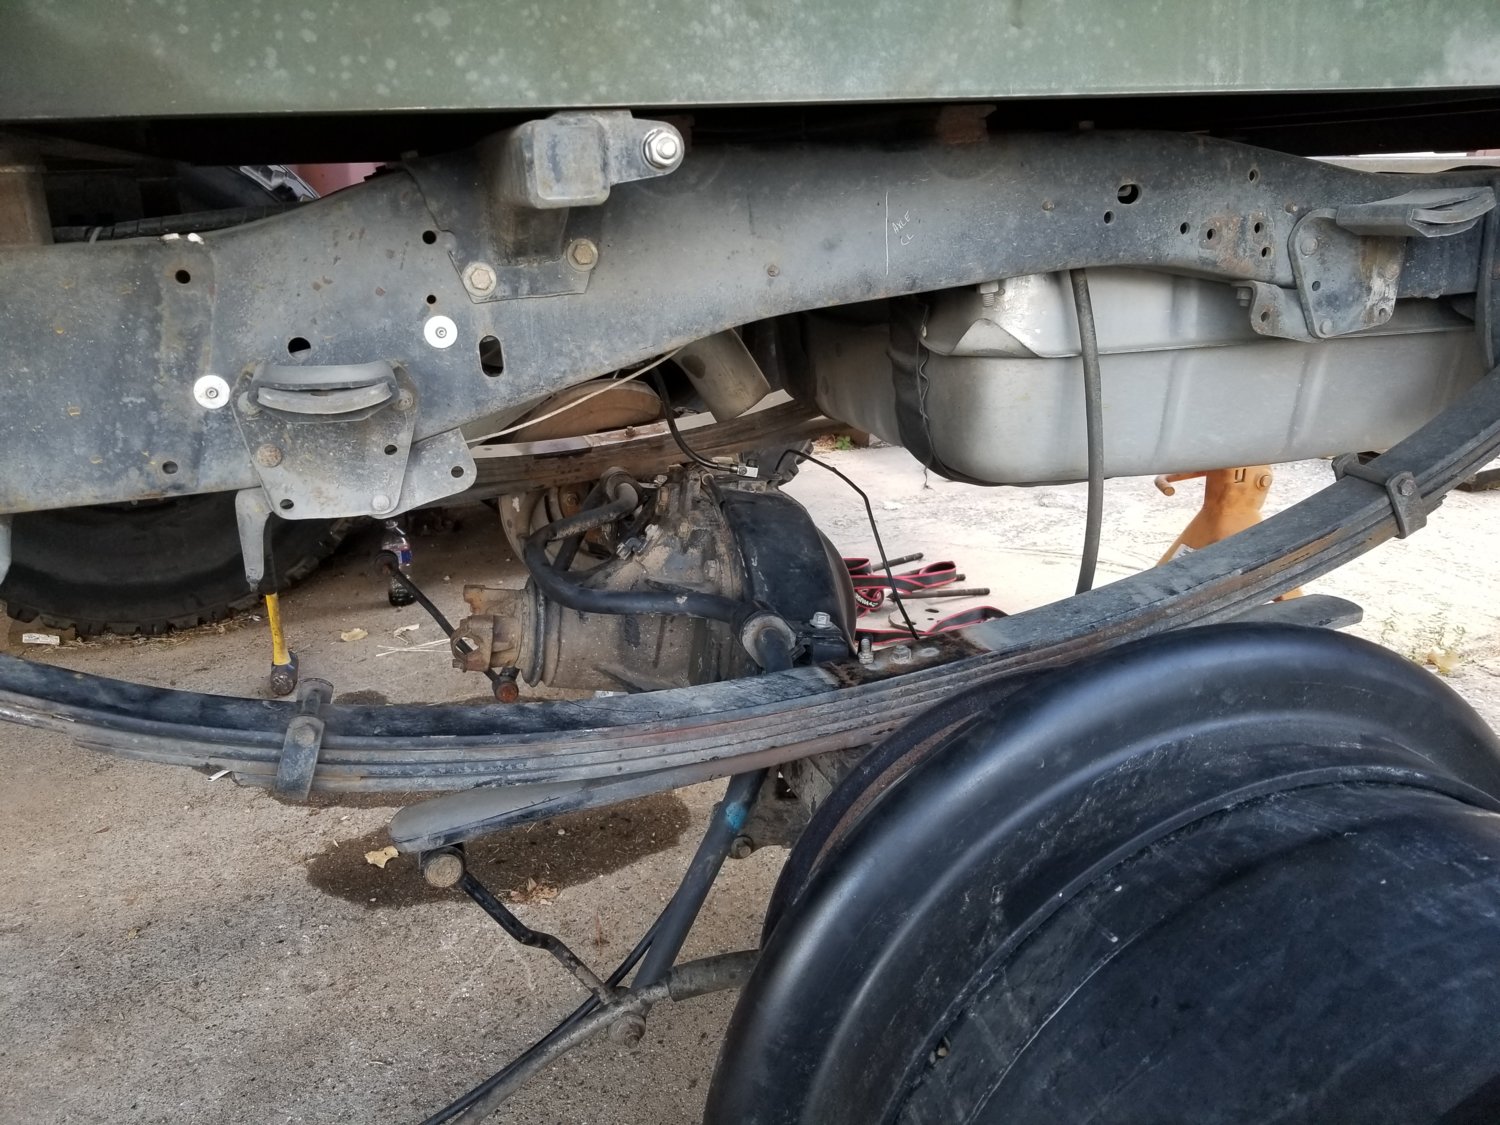
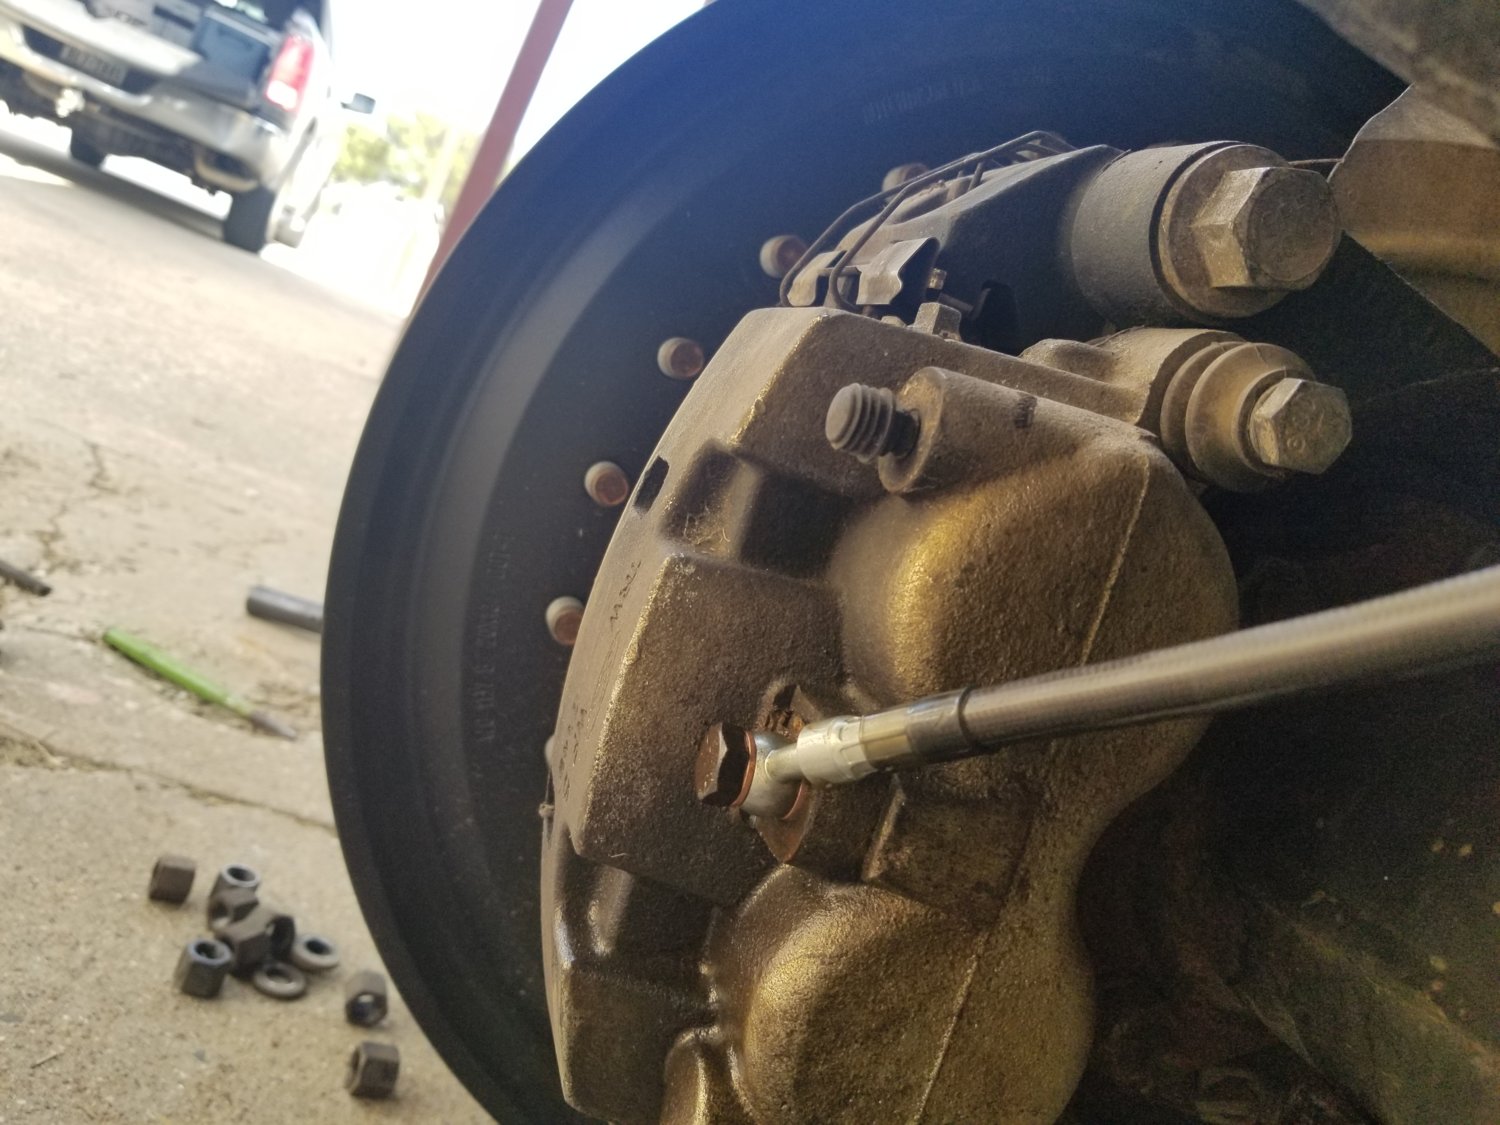
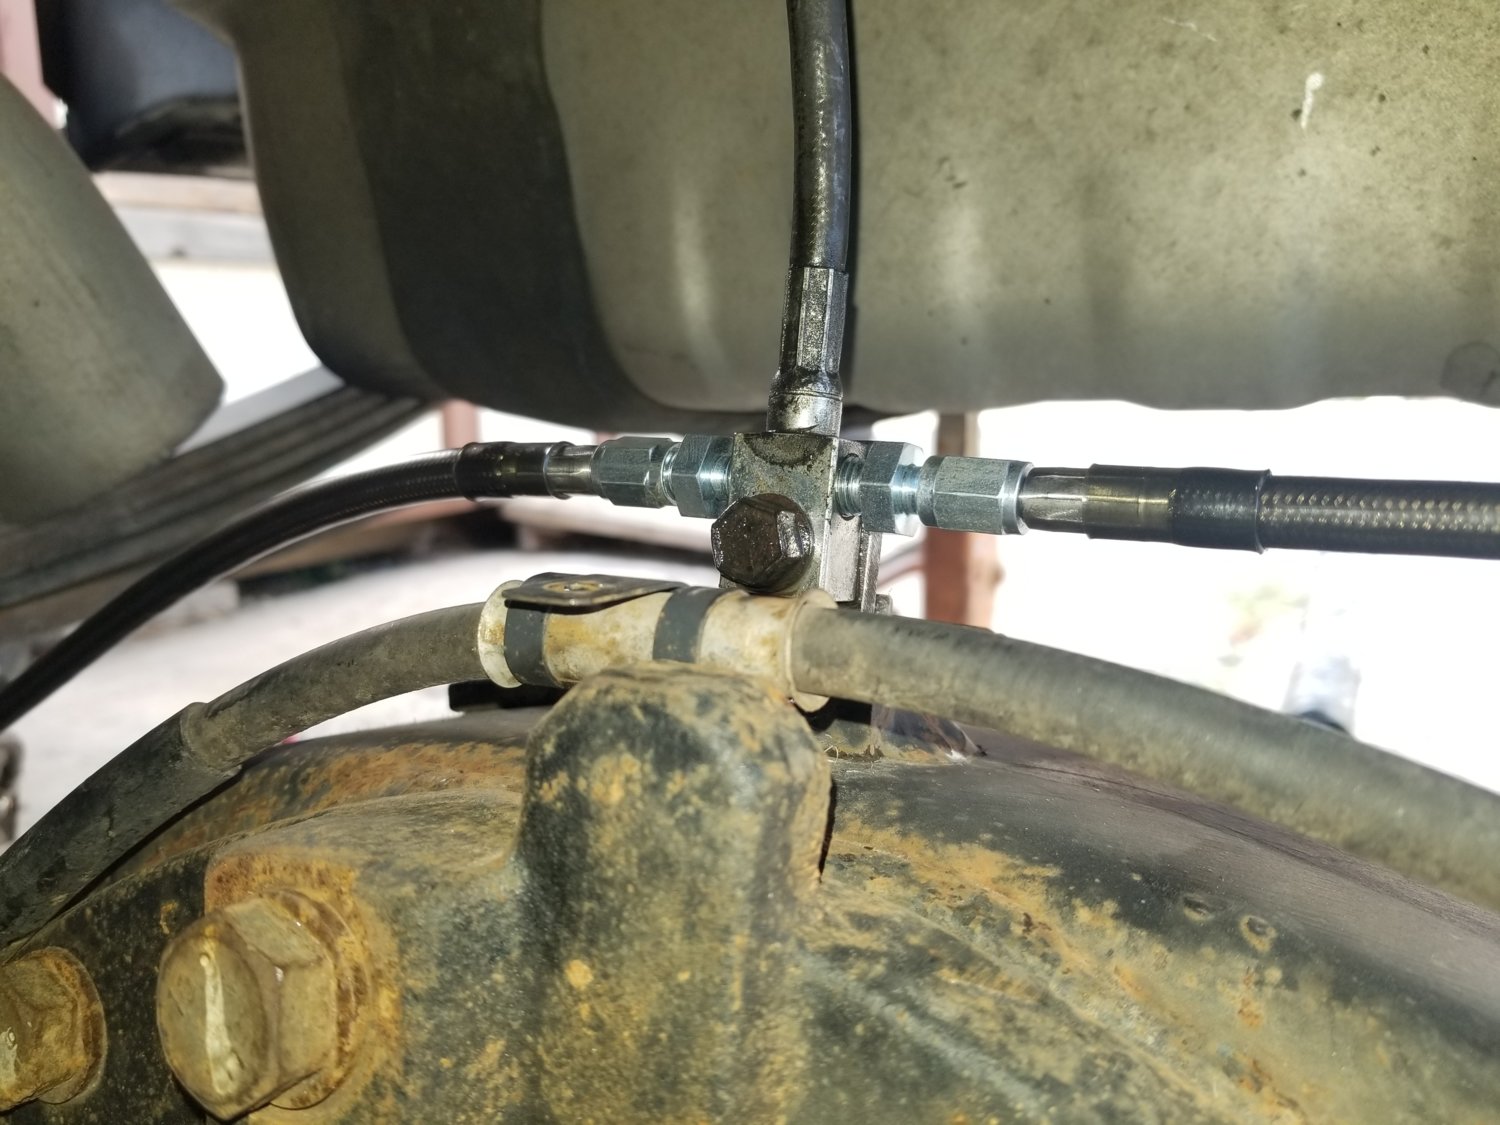
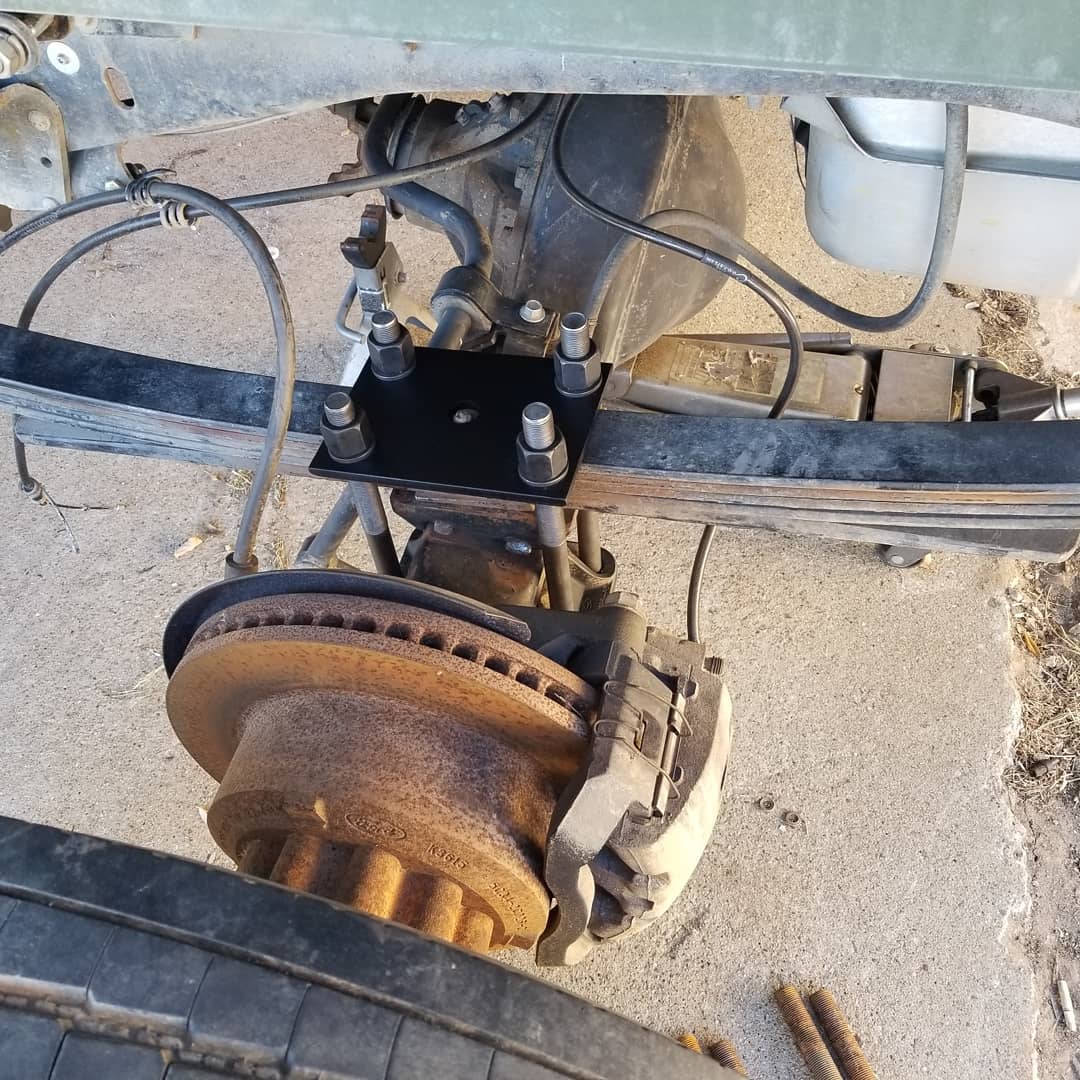
Little more done today, got the perches moved which was pretty straight forward, moved them each about 5/8" inward. The spicer axle has a small threaded boss on the top of the pumpkin for the factory brake line and parking brake cable. I drilled a simple angle bracket to bolt into the boss and the ORD extended brake line bolts into it. Then I routed the new ORD braided lines to the calipers and used the factory Ford banjo bolt. Just for fun I tossed the swaybar in to see how it lined up and it will work well if I go that way.
mckustomfab
1/2 ton status
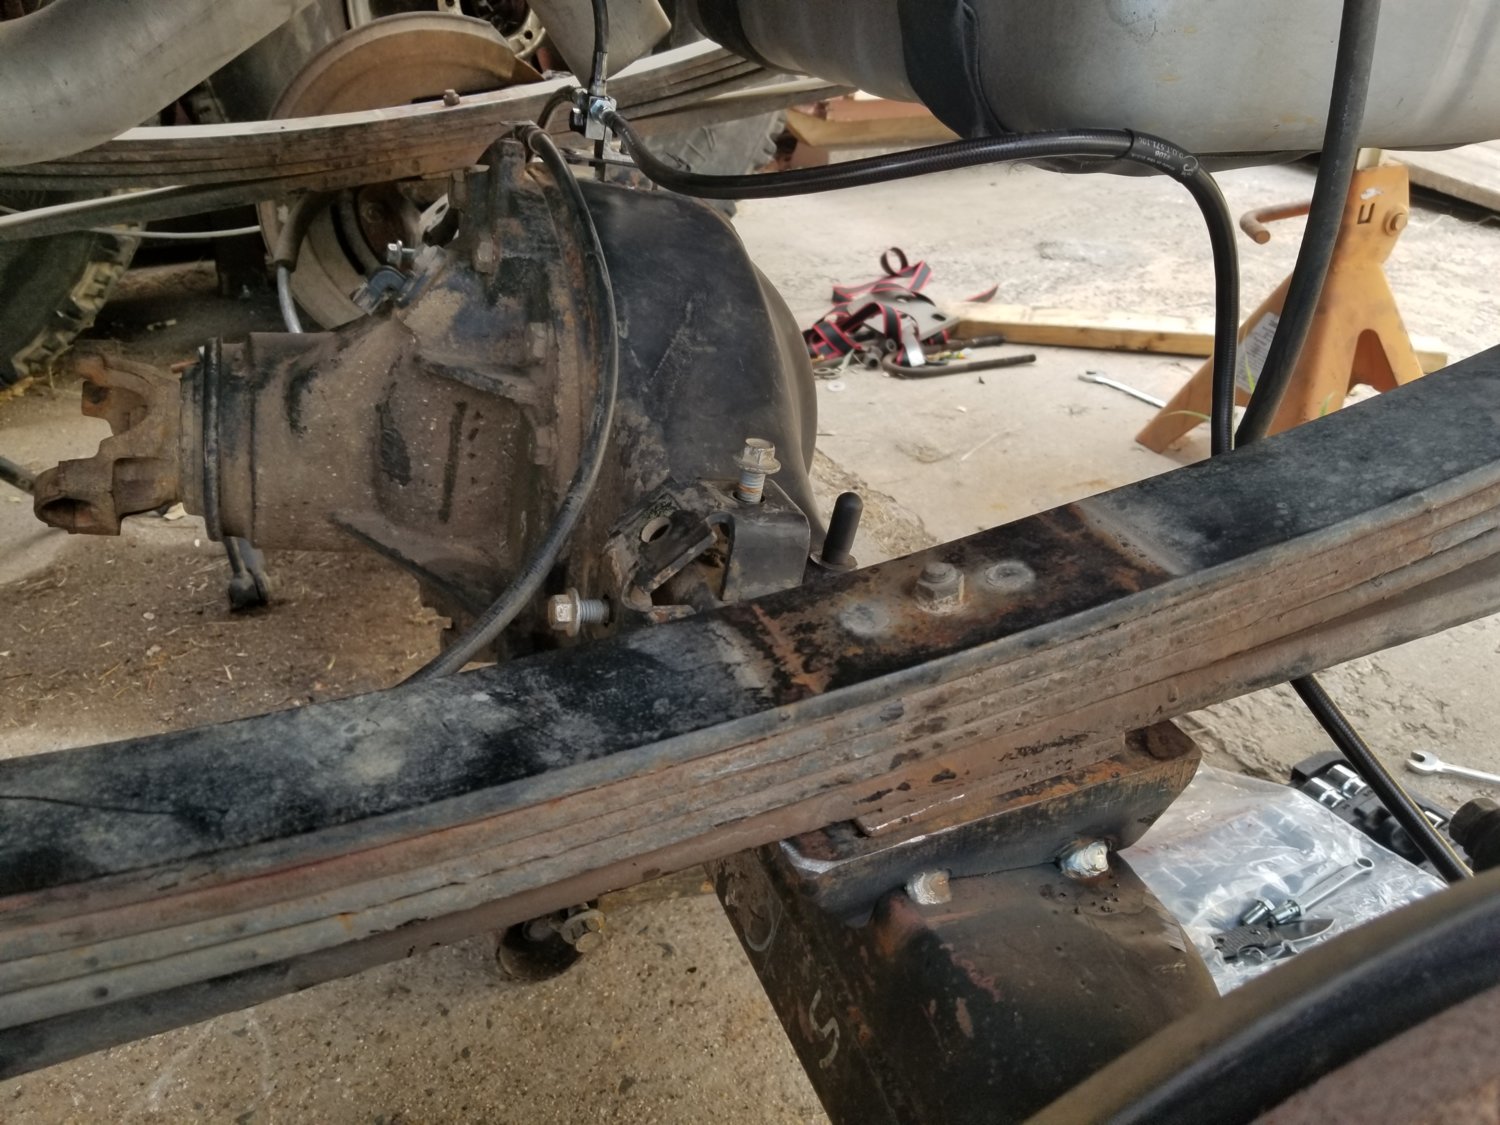
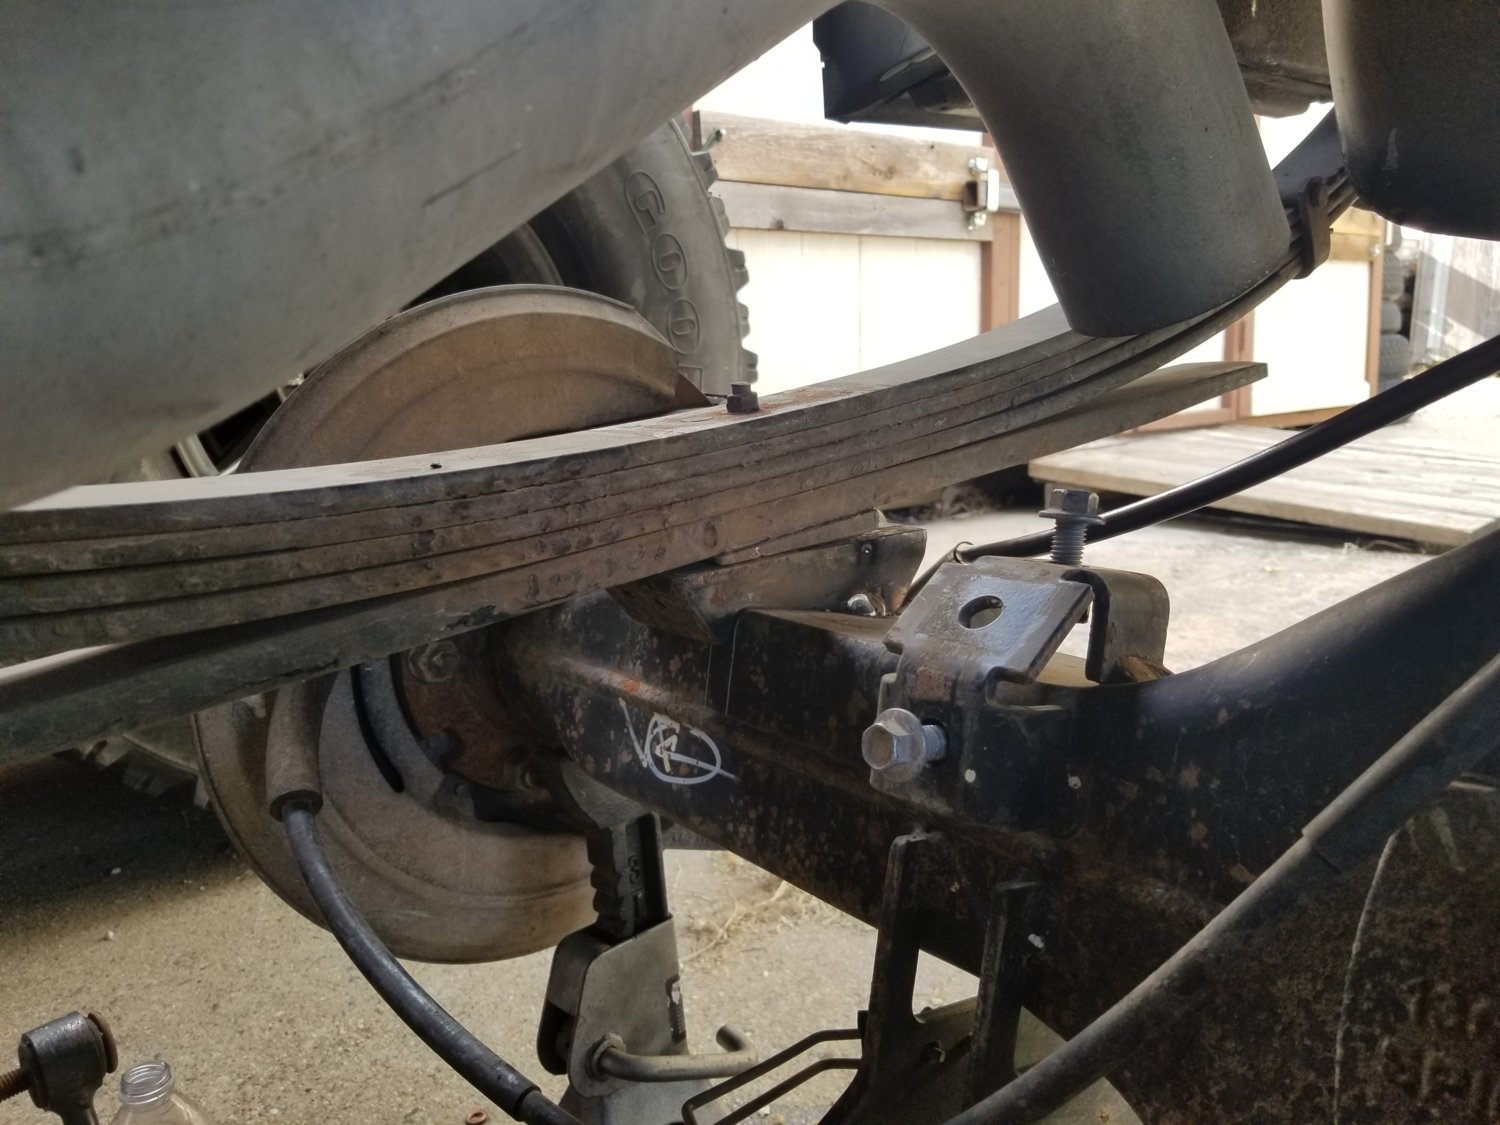
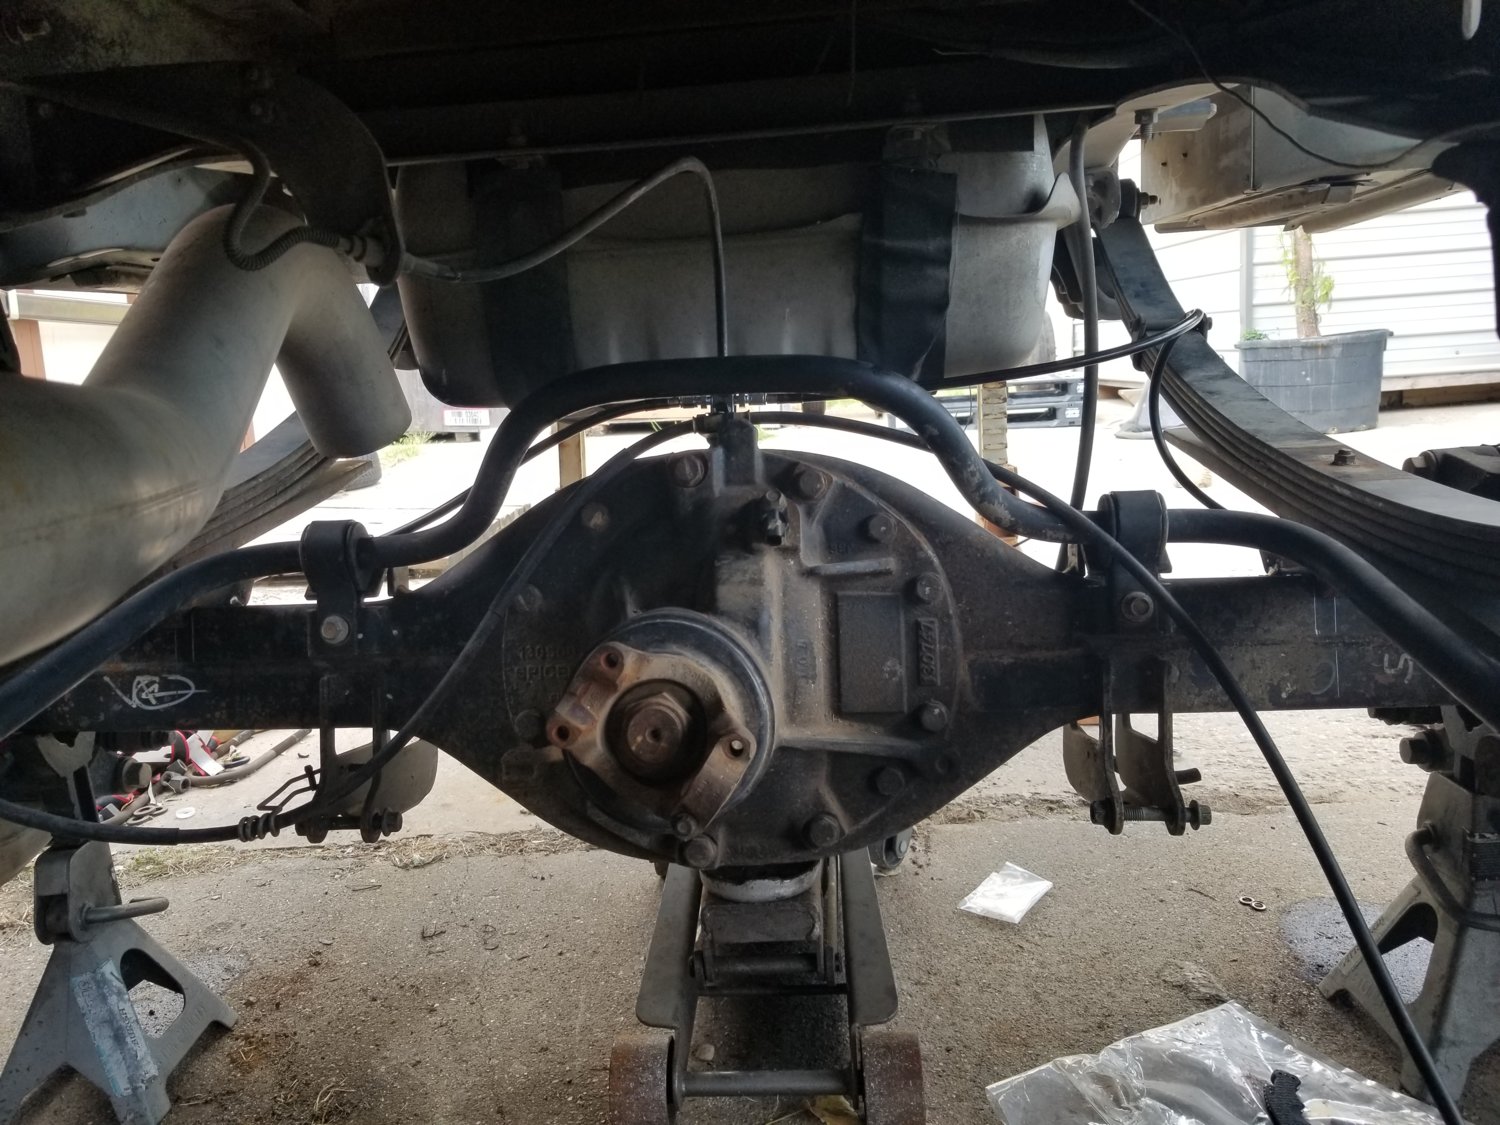
Today I got around to buttoning up the rear axle (except for bleeding the brakes). I ordered new "square" 7/8" u-bolts and I made some top spring plates so that I could run the u-bolts with the threads above the axle. The factory setup had the threads and nuts hanging below the axle and I wanted to avoid that if possible. I also moved the axle forward about 3" to help center up the wheel in the wheel well, it also had the benefit of fixing my shackle angle. Previously the shackle leaned back more than I would have liked, I was just waiting to move the axle until I swapped a different axle in. Here are a few pics of the rear as it sits, I still need to connect the sway bar and sort the shock mounts out. Then its time to start on the front...


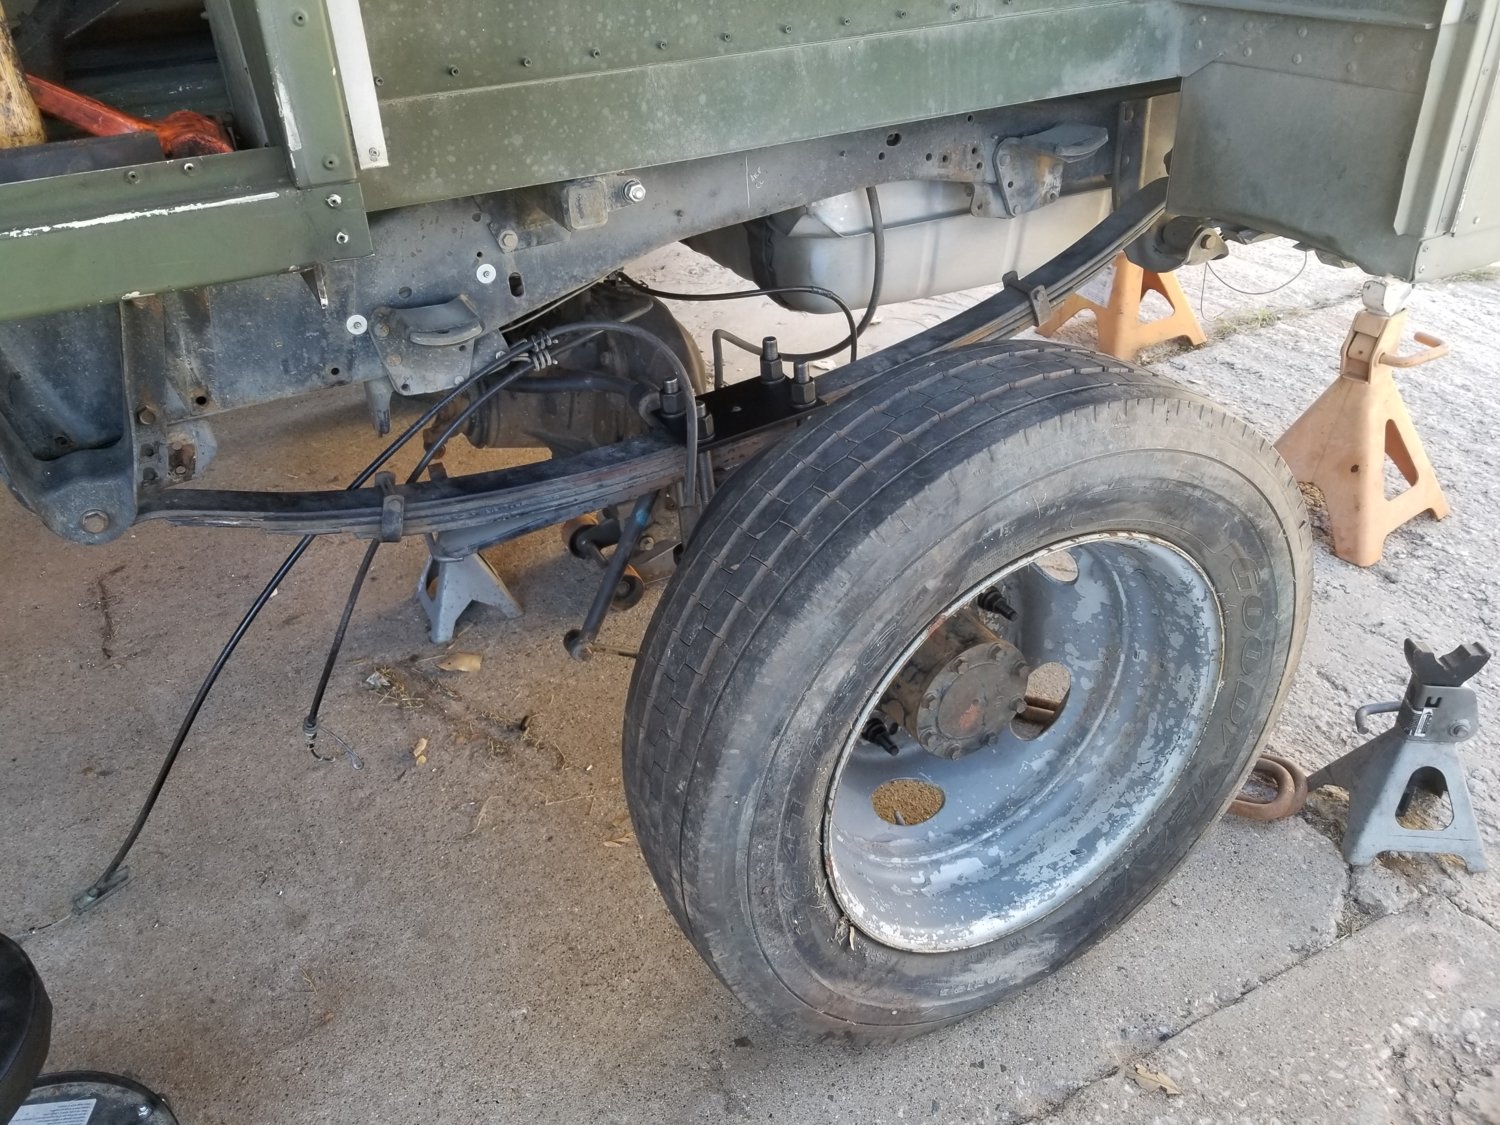
I am not ground clearance guru but with the 10 lug donuts that are about 32" tall, there is about 7" from the ground to the bottom of the diff. Seems ok considering the intended use of the truck and the tires it will have on it.
I am not ground clearance guru but with the 10 lug donuts that are about 32" tall, there is about 7" from the ground to the bottom of the diff. Seems ok considering the intended use of the truck and the tires it will have on it.
the axle spring perches are solid ? not open voids were the leaf pack sits ? if so the 3" perch with 2.5" width will eat away at the cast perch over time .
and you should NOT be running square bend u-bolts the way you are . you have created a massive stress point at the square bend going in to the lower saddle the way you did . square bend u-bolts break a lot more right in this area under normal design and application use . there is around 6-10 different shapes to square bend u-bolts to let the full contact patch hit and seat on the saddle / top or bottom plate and be supported correctly . if you can se light in ANY point of the full square bend area then it is NOT correct .
maybe swap to a better setup like this one here SQUARE TUBE AXLE SWAP or go grd 8 bolts from the bottom up to keep the ground clearance you are after .good to see the upgrade to 7/8" for this combo to get more strength for the setup tho .
my info comes from working in a spring shop years ago and also working on trucks with square bend u-bolts over the years .
otherwise looks good . . . . just dont want to see a guy drop a axle .
Last edited:
mckustomfab
1/2 ton status
the axle spring perches are solid ? not open voids were the leaf pack sits ? if so the 3" perch with 2.5" width will eat away at the cast perch over time.
I have never heard that before an I didn't think of that... The webbing under the perch is super thick but I will definitely keep a eye on it. Any suggestion on a remedy other than going to 3" wide springs?
and you should NOT be running square bend u-bolts the way you are . you have created a massive stress point at the square bend going in to the lower saddle the way you did . square bend u-bolts break a lot more right in this area under normal design and application use . there is around 6-10 different shapes to square bend u-bolts to let the full contact patch hit and seat on the saddle / top or bottom plate and be supported correctly . if you can se light in ANY point of the full square bend area then it is NOT correct .
I ground a relief on the bottom plate so the bolt sits flat because I was concerned about that. Do you think with the relief it will still be a concern? (asking honesty)
maybe swap to a better setup like this one here SQUARE TUBE AXLE SWAP or go grd 8 bolts from the bottom up to keep the ground clearance you are after .good to see the upgrade to 7/8" for this combo to get more strength for the setup tho .
I had given this some thought but couldn't find grade 8 bolts in the length I needed for cheaper than u-bolts... I also looked at that kit the only issue I had was that the factory mounts have some angle built into it and I wanted to try too keep.
my info comes from working in a spring shop years ago and also working on trucks with square bend u-bolts over the years .
otherwise looks good . . . . just dont want to see a guy drop a axle .
Thanks for the info! That's why I love this site!
I'm gonna second the ubolts being upside down.
Since you already ground out the lower spring plates, I'd go to a more traditional rockwell-esque style like what ruffstuff sells.
Those ubolts need to be tight as hell so your top plate needs an additional piece welded to the ends to prevent deformation when torqued.
As for the narrow spring or a wide pad. You could weld on a top plate to the cast perch to give a solid footing to spread the load and prevent the spring wearing into the cast perch.
mckustomfab
1/2 ton status
So after getting some input from sweetk30 and obijuank5 I revised my u-bolt setup, I swapped back to u-bolts pointing down and I also added a plate under the leaf pack that is the same width as the spring pad. I also got the sway bar hooked up to see how it looks, I may make a disconnect for it but for the time being it looks pretty good. I removed one of the rivets on the overload pad bracket and drilled it out for the sway-bar hardware.


