CK5
Register an account today to become a member! Once signed in, you'll be able to participate on this site by adding your own topics and posts, as well as connect with other members.
No kidding, Mr. "I'm gonna be in the shop all day doing cool stuff you only dream about". Where's the pics? As far as we know you coulda just spent the day holding your wife's purse in the ladies dept at JC Penney.
 
Holding purses at JCPenny's??? :yikes:

Them's fighting words, ol' pushrod Pete! :haha:


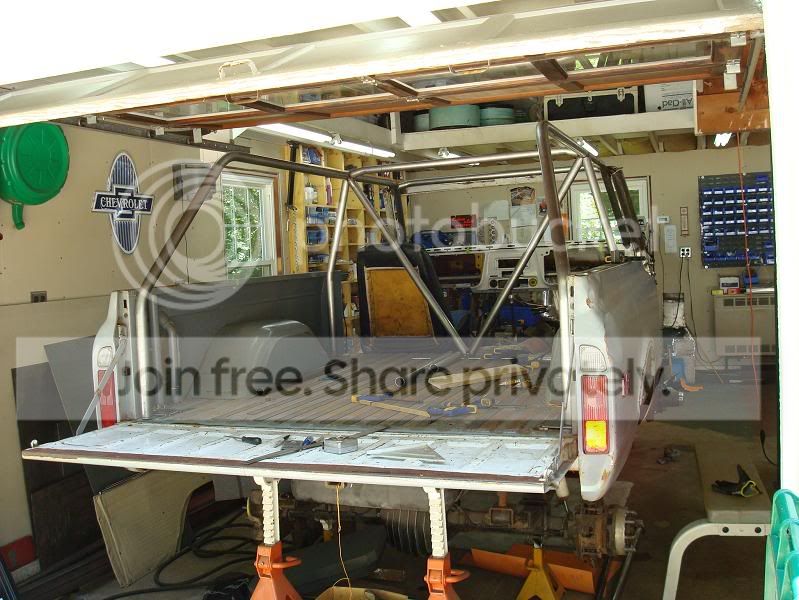
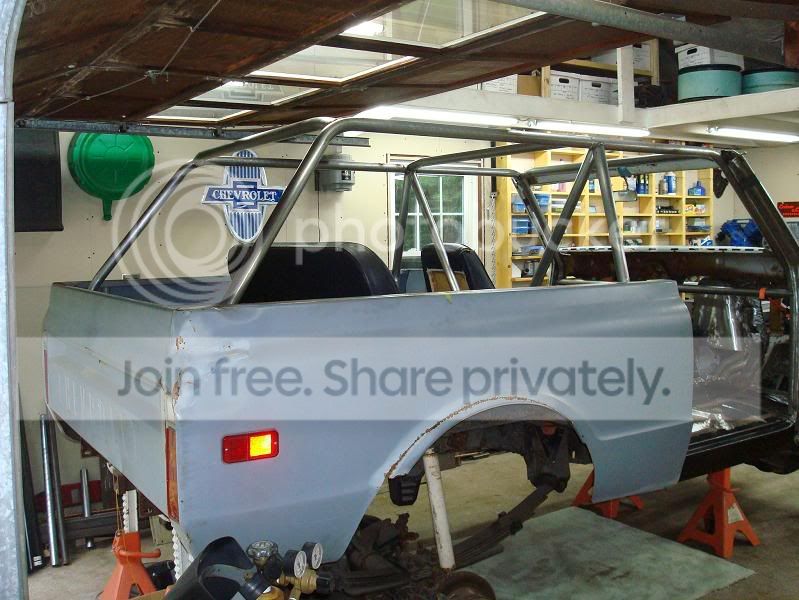
OK, here are a couple of photos to calm down the mob... Rear cage bars are now designed and bent (again courtesy of Bend-Tech Pro)....oh how I'm learning to love that software and what it can do. :bow:

DSC01766.jpg


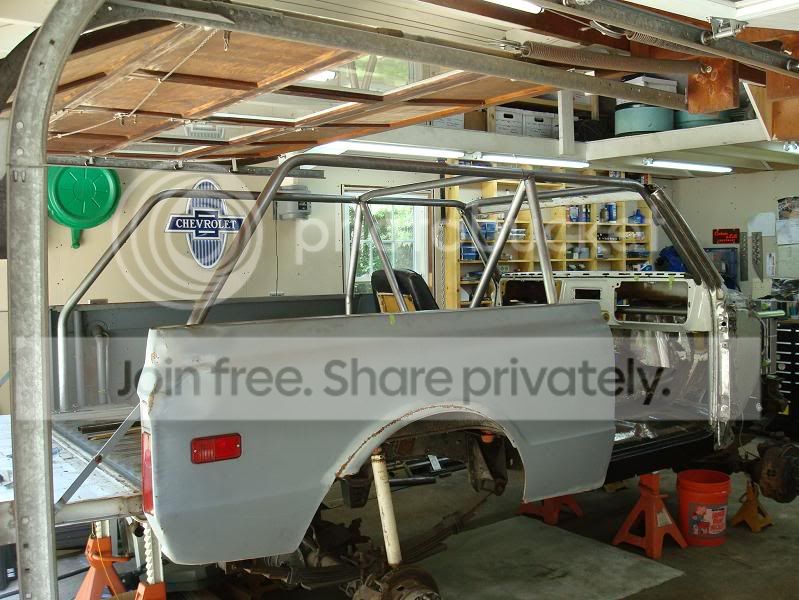
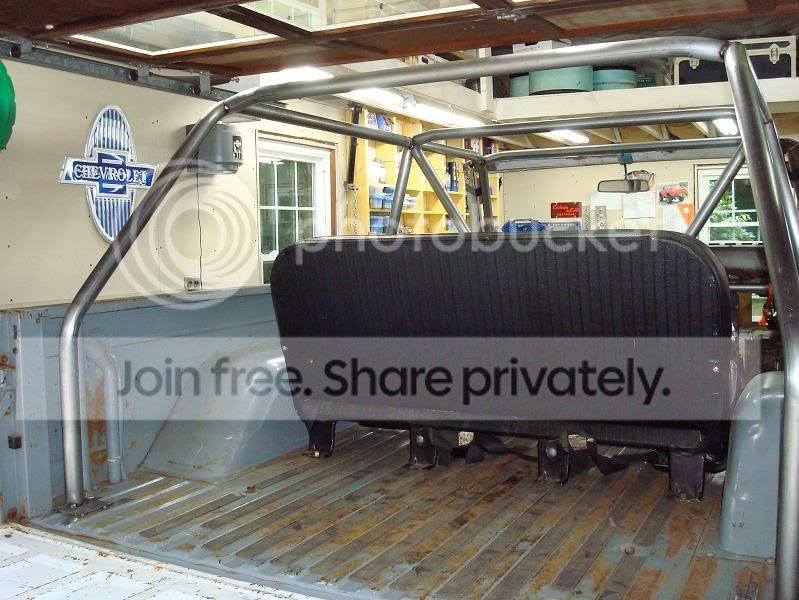
A slightly different angle...

DSC01770.jpg


I was making screaming progress, but then got slightly delayed when I had to adjust some dimensions that were slightly off on the cage. I don't know to what tolerances other guys try to hold their cagework, but I'm trying to keep everything to within 1/8" from side to side and top to bottom. It takes a LOT of checking to make sure that things aren't shifting around as the assembly gets more and more tubing attached to it....

Don't worry, I'm going to finish off a large cup of coffee and get through the rest of my email quickly, then I'm back out to the shop again today. More photos and a more complete story later tonight. :deal:


:usaflag:
 
Last edited:
Looks great, Did the software come with your bender and is it meant for that brand of bender or is a seperate thing that can be set up for any bender?
 
Looks great, Did the software come with your bender and is it meant for that brand of bender or is a seperate thing that can be set up for any bender?

The software is not bender specific. You do have to calibrate the software though by "wasting" a bunch of tube (hopefully most of it can be salvaged for later use).
 
2009.09.09 - UPDATE! - A VIEW OF DE-SPARE...

As mentioned earlier, I got sidetracked a little bit over the weekend with some "tweaking" of the existing cagework to get all the dimensions to within my personal tolerance limit of 1/8"...some areas were creeping further away and it was time to cut a few spot welds, remove a few bars and make the adjustments now while it was still fairly simple.

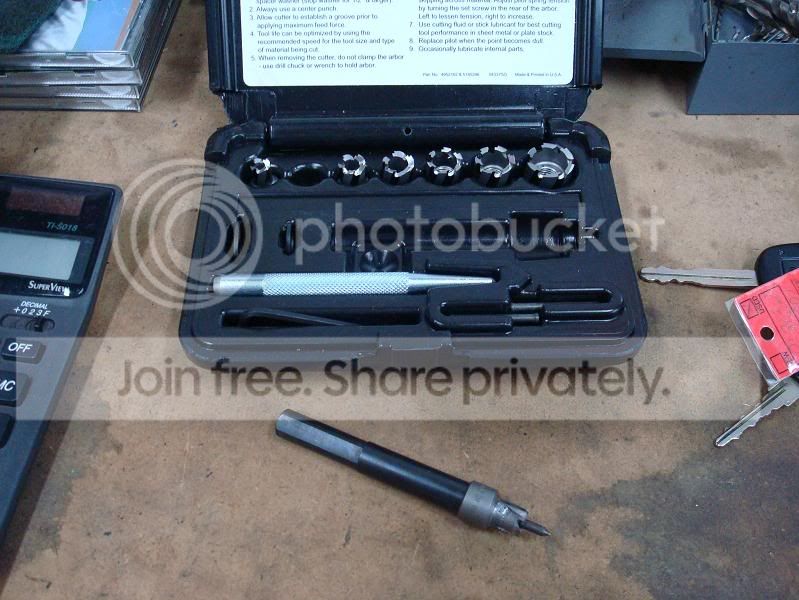
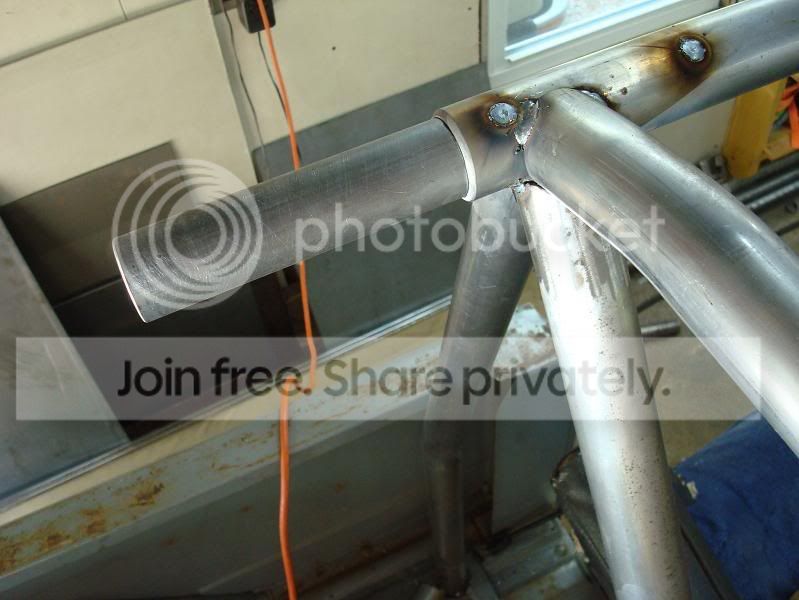
Once I was back on track, it was time to cut off the "pinwheel tubes" coming off the back of the cage, and set them up correctly near the b-pillar area with some .120" wall DOM sleeves (12" long per side). This gave me a chance to play with a new set of holesaws from SnapOn...

DSC01822.jpg


These babies are cool! They are like minature hole saw bits (very sharp) with a spring loaded centering pin. All you do is centerpunch the hole you want to drill and go directly to the size you want (in this case 3/8") without going through the normal progression of smaller bits to larger ones to get a clean hole. I used this bit to cut a few rosette holes on each side of the sleeve to anchor it in place permanently.... then I cranked up the welder and puddled up the holes..

DSC01804.jpg


I put a bevel on each side of the outer tube also, so that when I go to do that butt-weld of the two tubes, I'll have a good deep, and strong weld there also. Basically, the cage is 1/4" thick through that section now, so strength is not going to be an issue.

Once that was done, it was time to put the rear bars in for the last fitment and lock them down also...

DSC01825.jpg


As you can see, I also bent another spreader like the first two for a consistent look across the top of the cage. Those 15-degree bends at each end are a subtle design touch, and give the cage just a bit more headroom over the seats too.

Another shot from a slightly different angle with the tailgate down to show the repeated shape of those upper cage spreader bars and the landing spots for the rearmost c-pillar bars....

DSC01829.jpg


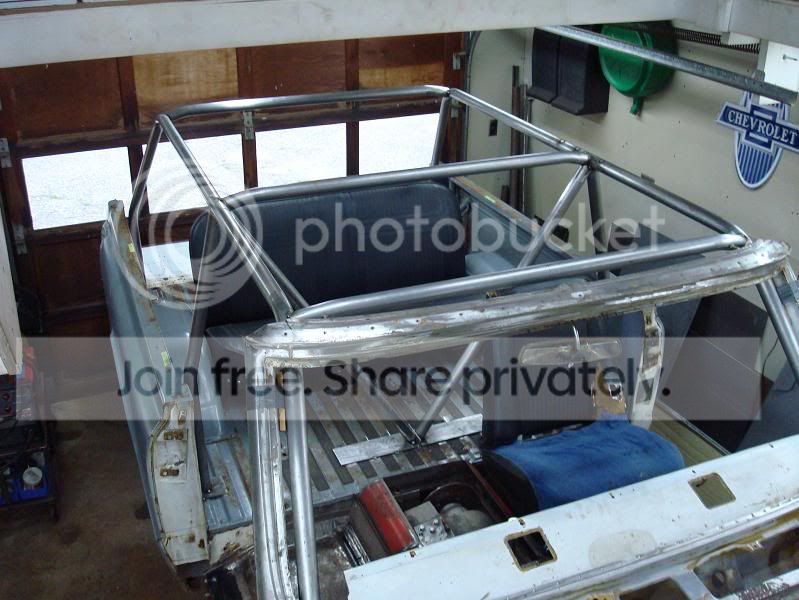
Here's the "attic view" of the cage, in an attempt to show the rear seat legroom (HA!) with the seat in it's stock location. Actually, the legroom isn't terrible and would probably be fine for almost anyone that needed to ride back there for anything other than a long highway trip.

DSC01832.jpg


Here's where I got stymied today....and the reason for today's tagline pun:

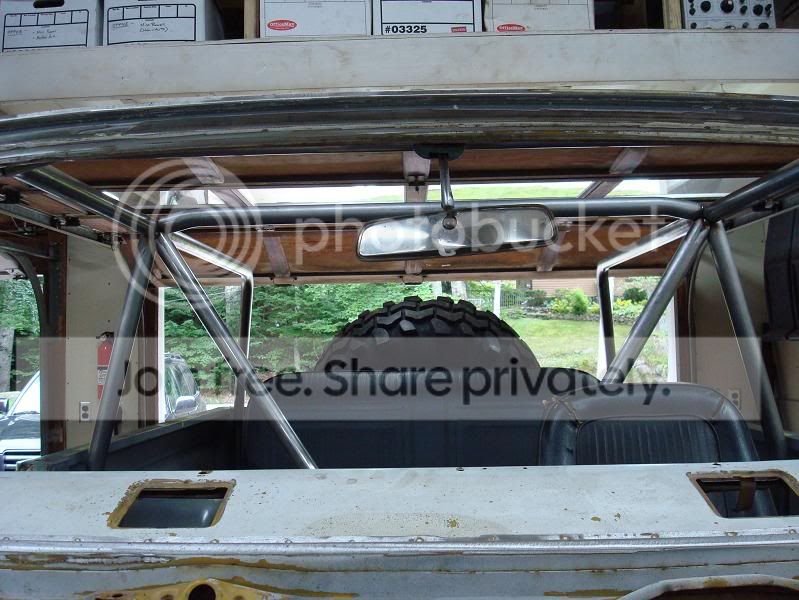
DSC01820.jpg


I need to come up with a way to carry a spare for long trips and for wheeling too. This shot is with the 39" tire loaded tight against the tailgate and laid-back against the rear seat. Basically it blocks the entire view out the rearview mirror.... it's bad.

The original hope was that the angle would be enough to drop it down further out of sight, but unless I carve out about an 8" deep trough in the rear floor, there's no way to get the tire down low enough to clear my rearward vision. The only other option is to lay the tire flat in the bed, but even then I'd have to push the seat forward another 3" or more to get the tailgate to close....and the legroom back there is already pretty limited.

More head scratching to do... but overall the weekend's progress was very satisfying to say the least. :wink1:


:usaflag:
 
Last edited:
I've been trying to figure out where to put my spare for several years now.
I don't want it on a swing out off the bumper because of it blocking the view there. Don't want it standing up like yours either. I tried to put it in the origional spare tire area on the passenger side, but it's too tall.

I have laid mine in the bed area flat on the floor. But I don't have a rear seat either. There is a toolbox where the seat was. I still don't like it there, but it works for now.

Cage looks awesome by the way.:bow:
 
Greg, since you aren't planning on running a top why not make a mount of some sort to throw that spare on top of the cage?
 
Greg, since you aren't planning on running a top why not make a mount of some sort to throw that spare on top of the cage?

I was wondering this myself. I don't have a cage yet. But this is probably the route I'll take once I build one.
 
Greg, since you aren't planning on running a top why not make a mount of some sort to throw that spare on top of the cage?


Scotty,

Well a few reasons actually.... It puts a lot of weight really far away from the CG of the truck, it would be REALLY hard to lift up there by myself if I ever needed to. Since I'm planning to run a softtop (I'm not in CA anymore, so unexpected thunderstorms are a real possibility) there's no real practical way to do it and still have a collapsable softtop like I want.

I have been thinking about an external swing-out style mount that would put the tire lower than it is on the rear bedfloor... might be enough to get the line-of-sight out back again.

There's got to be a way, I just need to spend some more time mulling it over... :thinking:


:usaflag:
 
I had a similar problem, and I was able get a bit more visibility by flipping it over so the front of the tire wedges down behind the seat. I guess 39's wouldn't have much difference though. It also sticks out over the tailgate a bit as well so a softtop might have problems there too.

Perhaps two thinner bucket seats with the tire wedged up against one of the bedsides?

I'm considering one of those hitch mounted carriers for long trips, but that doesn't help as a trail spare.
 
Angle it off the rear bumper so that the bottom of the tire is closer to the bumper and the top of the tire is further from the tailgate. This way it shouldn't screw up the departure angle either
 
One other option is to move the back seat forward a few inches. I just had a buddy who is 6'7" tall and had him sit back there to determine how much I can move it forward. I can now fit a 35" tire flat in the back by moving the seat about 5" and he can still fit back there comfortably.

Angling the tire along with moving the seat might get you there.
 
Greg, An idea for your spare tire problem may be a net-tailgate that would have some extra stretching room at the bottom. You could lay the spare flat and come up with some sort of a support bar across the upper part of the tailgate to maintain stability. Maybe one of those Semi packing bars used to keep loads from shifting would give the upper support needed. I haven't done any measurements to see if this is possible but maybe.
 
Why not french the inside panel of the tailgate to gain a bit more room, and move the seat 2" of so forward? Then lay the tire flat...

Rene
 
Why not french the inside panel of the tailgate to gain a bit more room, and move the seat 2" of so forward? Then lay the tire flat...

Rene

Maybe french the back of the rear seat too? :thinking:

I might be able to steal a few inches out of the rear center of the seat and not affect the two seating areas at all. Re-upholstering it could be a challenge though...

I have been thinking about some sort of tubular tailgate to replace the stock "CHEVROLET" one too, something with a set of bends to bring it out further....maybe with a side-swingout design, instead of a drop down style? Drop down tailgates tend to be a real pain on a tall truck because it's almost impossible to reach in and get to things you need.....or maybe I'm just too short! :D

There was some kind of production truck (Nissan?) that had a tiny 4' bed on it, and they sold an tubular accessory tailgate that made the area longer for hauling a motorcycle or lumber or whatever.

No matter what I do, the problem remains that the spare tire eats up almost ALL of the rear space, and there doesn't seem to even be enough room for a cooler back there. Stuff like tools or sleeping bags can be packed in whatever small spaces are left, but ending up with a big square rectangular spot for the cooler is still going to be important.

More thinking, I suppose. This stuff has a habit of working itself out if I just let it sit in the back of my mind for a few days....by the time the weekend comes, I usually have an idea that will work. :deal:


:usaflag:
 
The exploder sport-trac had a do-hicky like that IIRC, but I've seen them for others as well.

I am partial to the fold down tailgate - there seems to always be something in the way when you try to open a swing out tailgate.

If you can get the spare flat, you could put the cooler on top of it.

Here is another option - desert race style (sorry bout the ugly pic)

tacotiremountreariso.jpg


I have seen them with the tire angled the other way as well. It doesn't work well with tops though.
 
Tiregate

It would give you a pretty good start to modify it to work like you want it to, and possibly seal up as well as stock. They have a pretty good set of installation instructions as well. - install

I've been thinking about this on my 90, but I then have to contend with the rear window being gone as well. I could fix that with a softopper probably though.

Later,
Buddy
 
Last edited:
Thanks Buddy,

That's awfully close to what I've been designing in my head over the last few days. I think mine will be like the angled style shown there, but with the cagework on the outside so that I can put some sheetmetal over it for weather protection.

:waytogo:


:usaflag:
 

Latest Posts

Top Bottom