CK5
Register an account today to become a member! Once signed in, you'll be able to participate on this site by adding your own topics and posts, as well as connect with other members.

DO NOT OPEN IN PUBLIC, YOU WILL BECOME INSTANTLY ERECT!!!

That will give lots of clearance!

I'm digging on that pan.

Yeah, it took a lot of searching to find that. I looked at Kevko hard but all theirs were too long and/or too wide in the sump. This thing should be pretty much exactly what I was looking for. Only downside is I have to remote mount my oil filter now but that just gives me an excuse to run an accumulator now.
 
Man you do amazing fab work.

No reason to farm out the exhaust. Get some 2" bends maybe j bends and go to town.
 
Man you do amazing fab work.

No reason to farm out the exhaust. Get some 2" bends maybe j bends and go to town.

Thanks for the vote of confidence. We'll see what happens. I have to have this thing ride ready by August for a couple events so the next few months are going to be busy
 
Did a little bit out in the garage tonight. Cut all the suck down winch crossmembers out, drilled all my holes, and welded up the rear crossmember tabs.

I welded the two tab pairs together all the way around and then ground the backside down for aesthetics

I am probably going to do a bead on the inside of the inner tabs where I can get to it just for good measure
 
Last edited:
Got the belly skid pulled out for finish welding and skid plate layout

Worked on the front belly skid mounts for under the frame. Nothing too fancy, just some basic fab 101 stuff

Still need to do the hole layout and drill for bolts to the belly skid tie plates
 
Last edited:
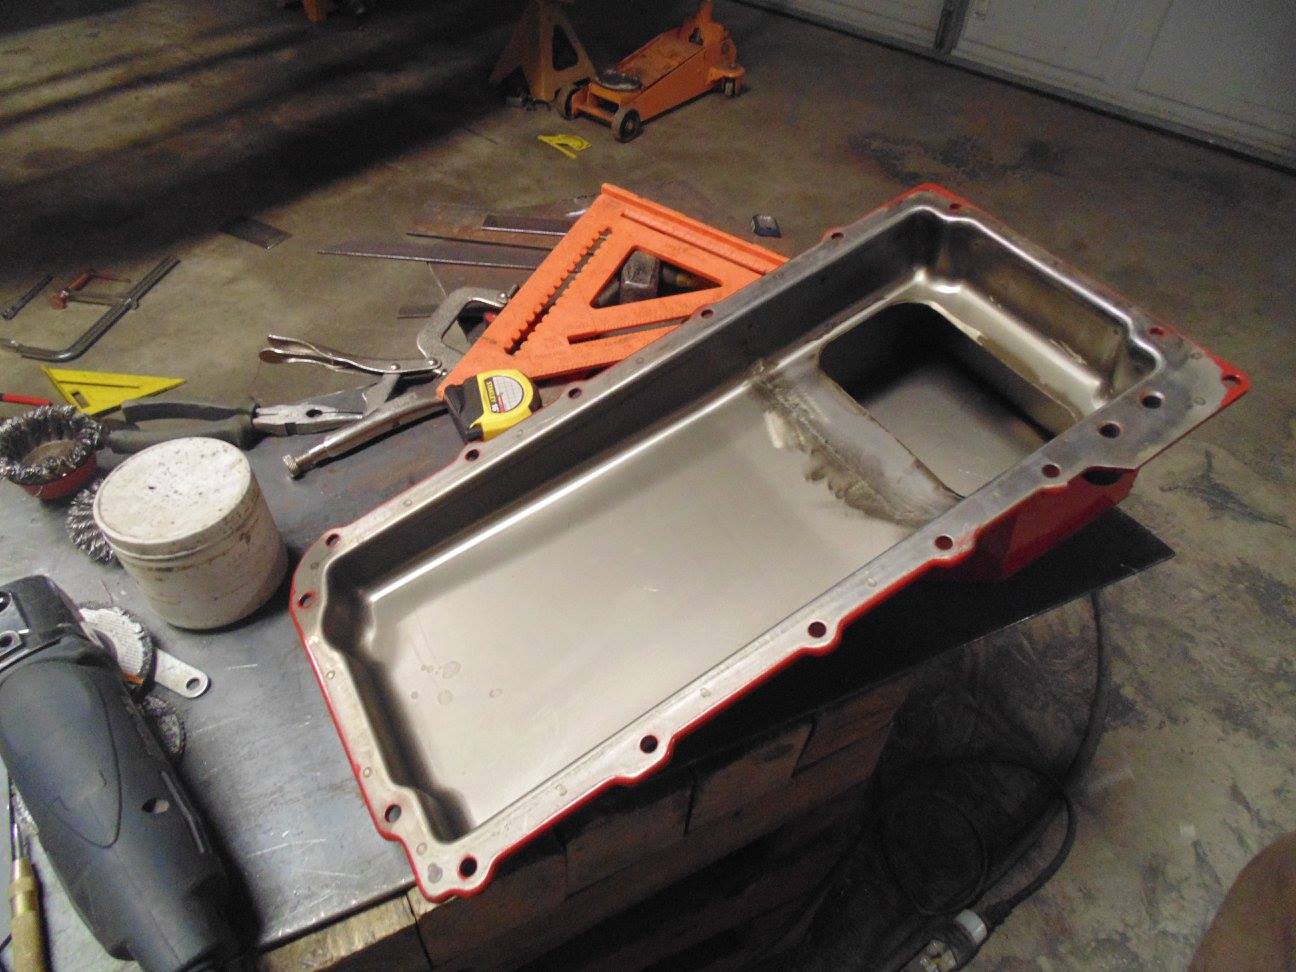
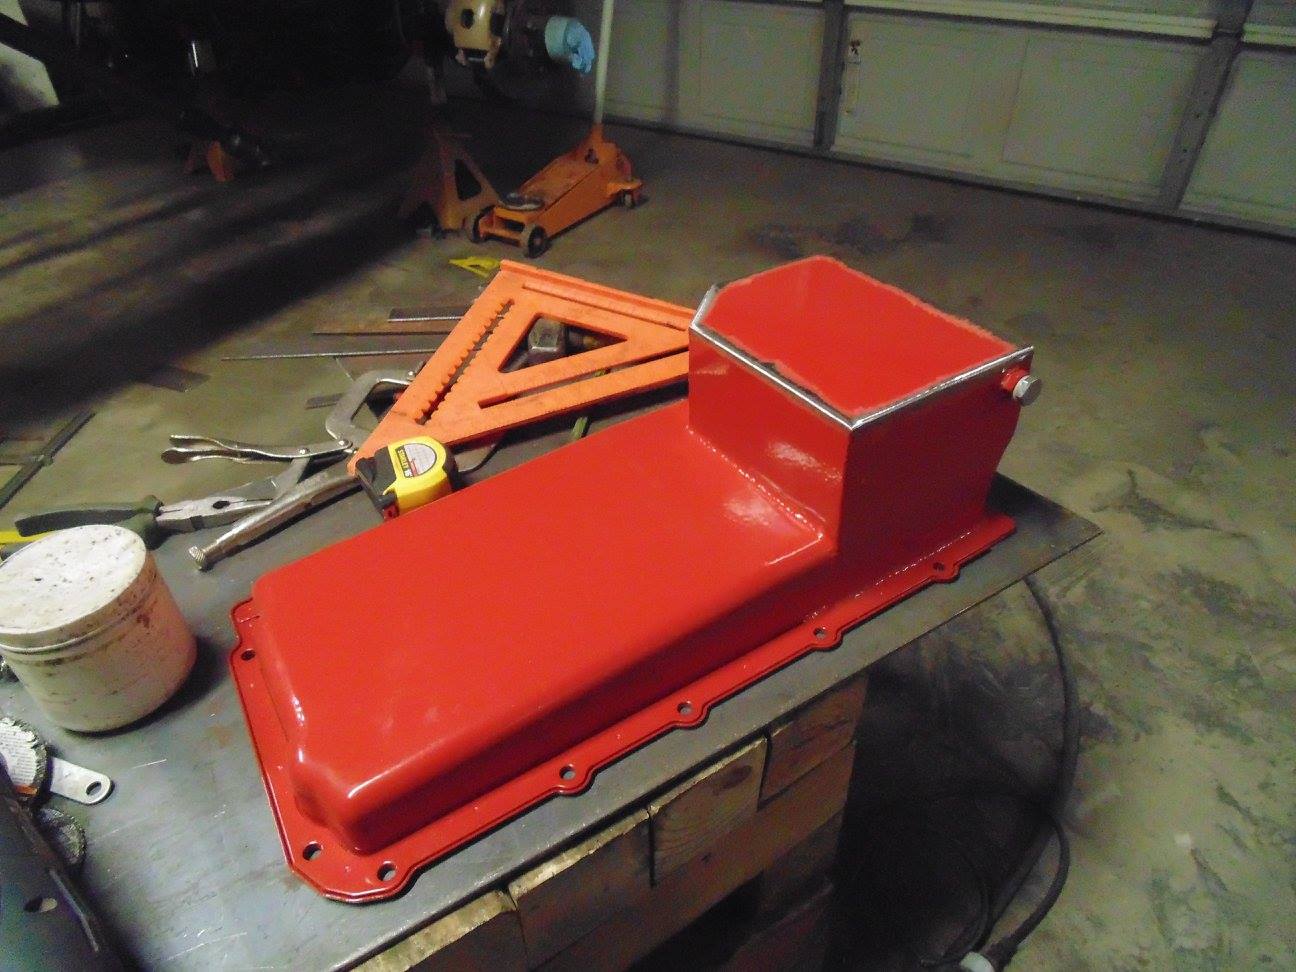
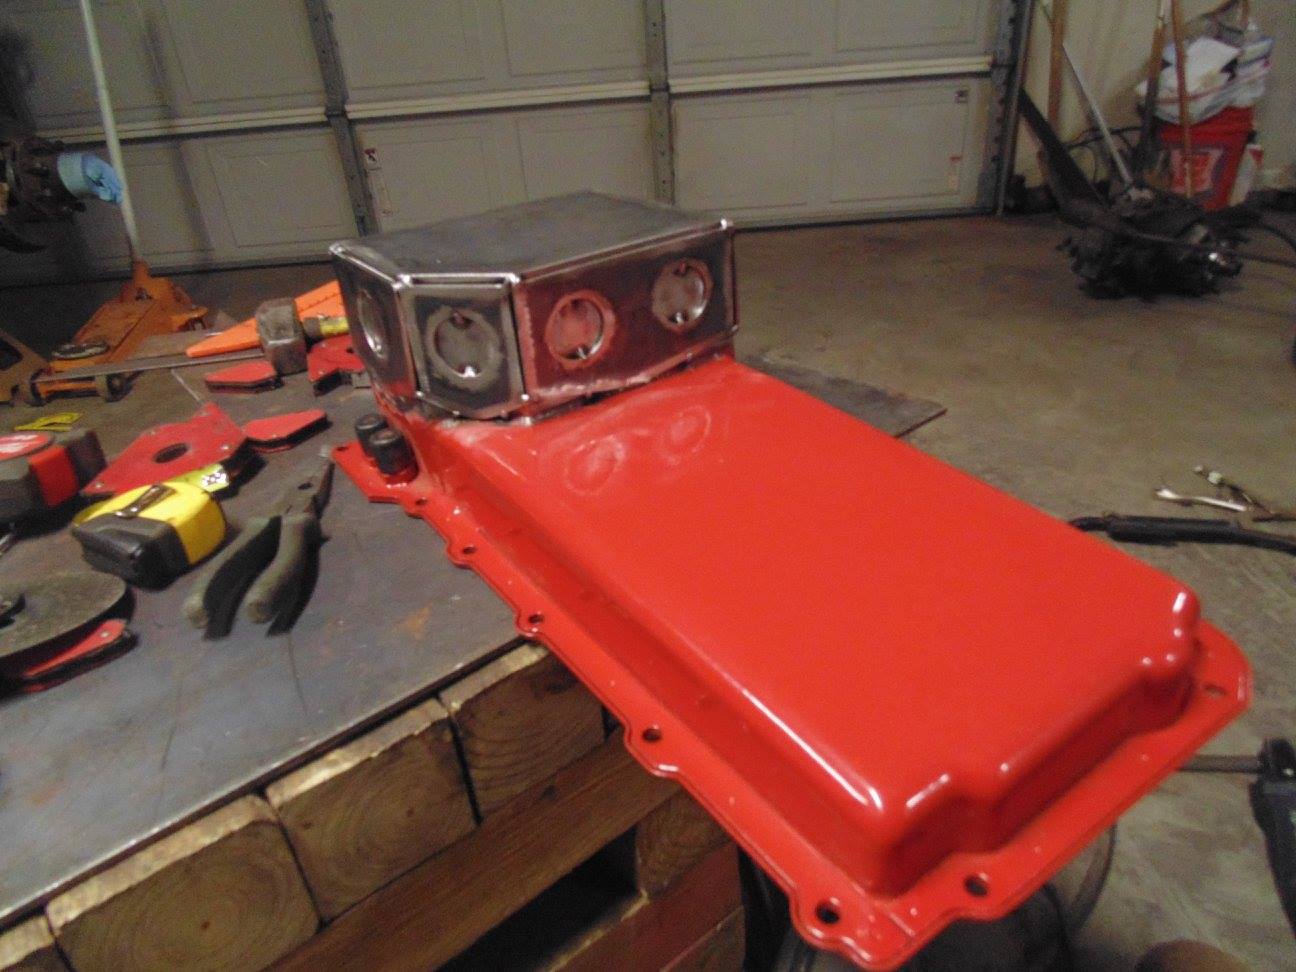
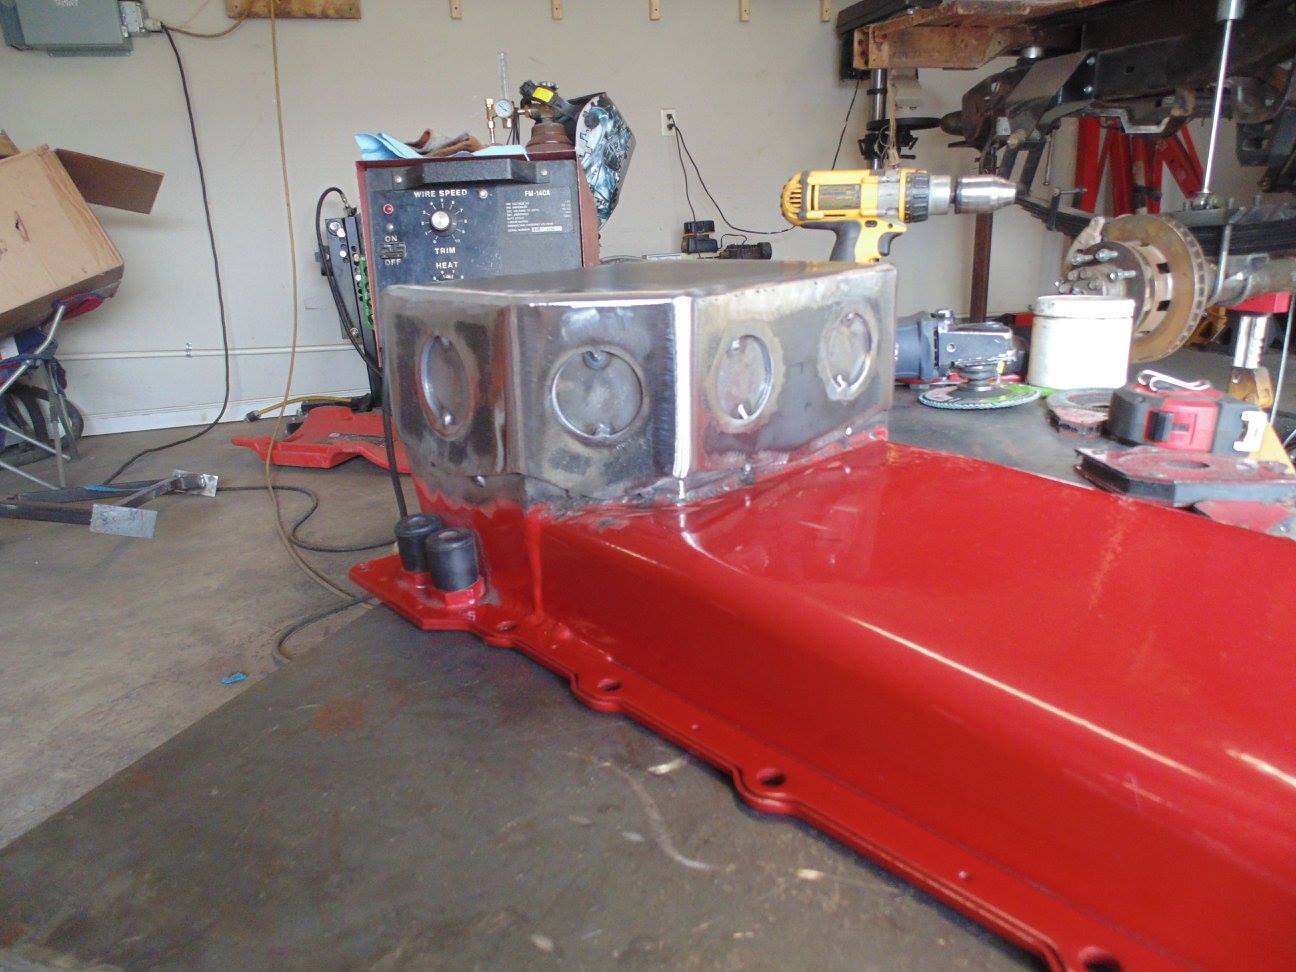
Got the new oil pan in today. Not quite as advertised but still pretty nice. The specs said it would have trap door baffles and come with a gasket, but that's not the case evidently

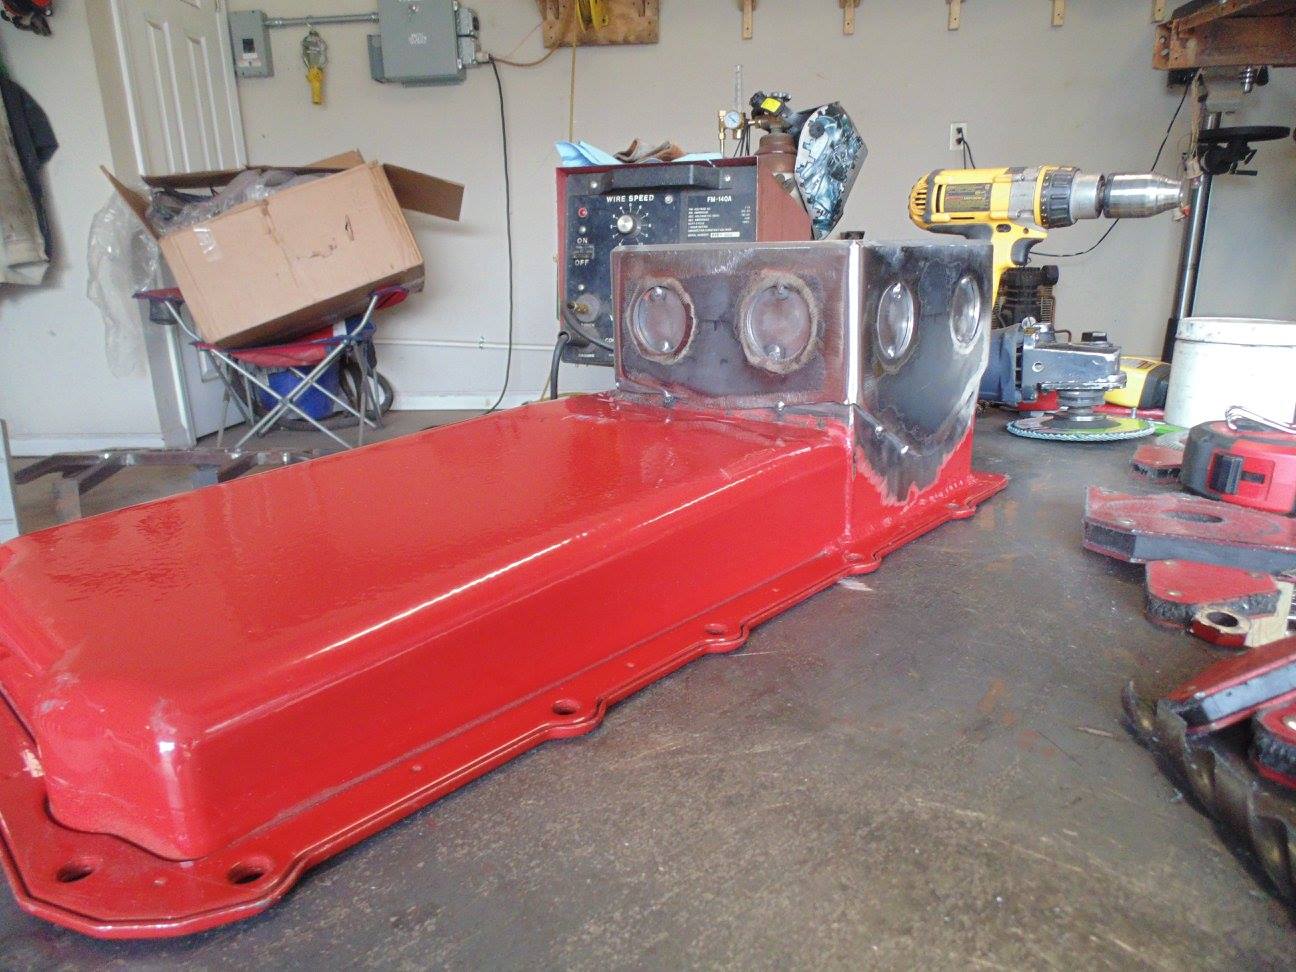
Seriously, who takes a brand new $250 oil pan and immediately starts taking the paint off?

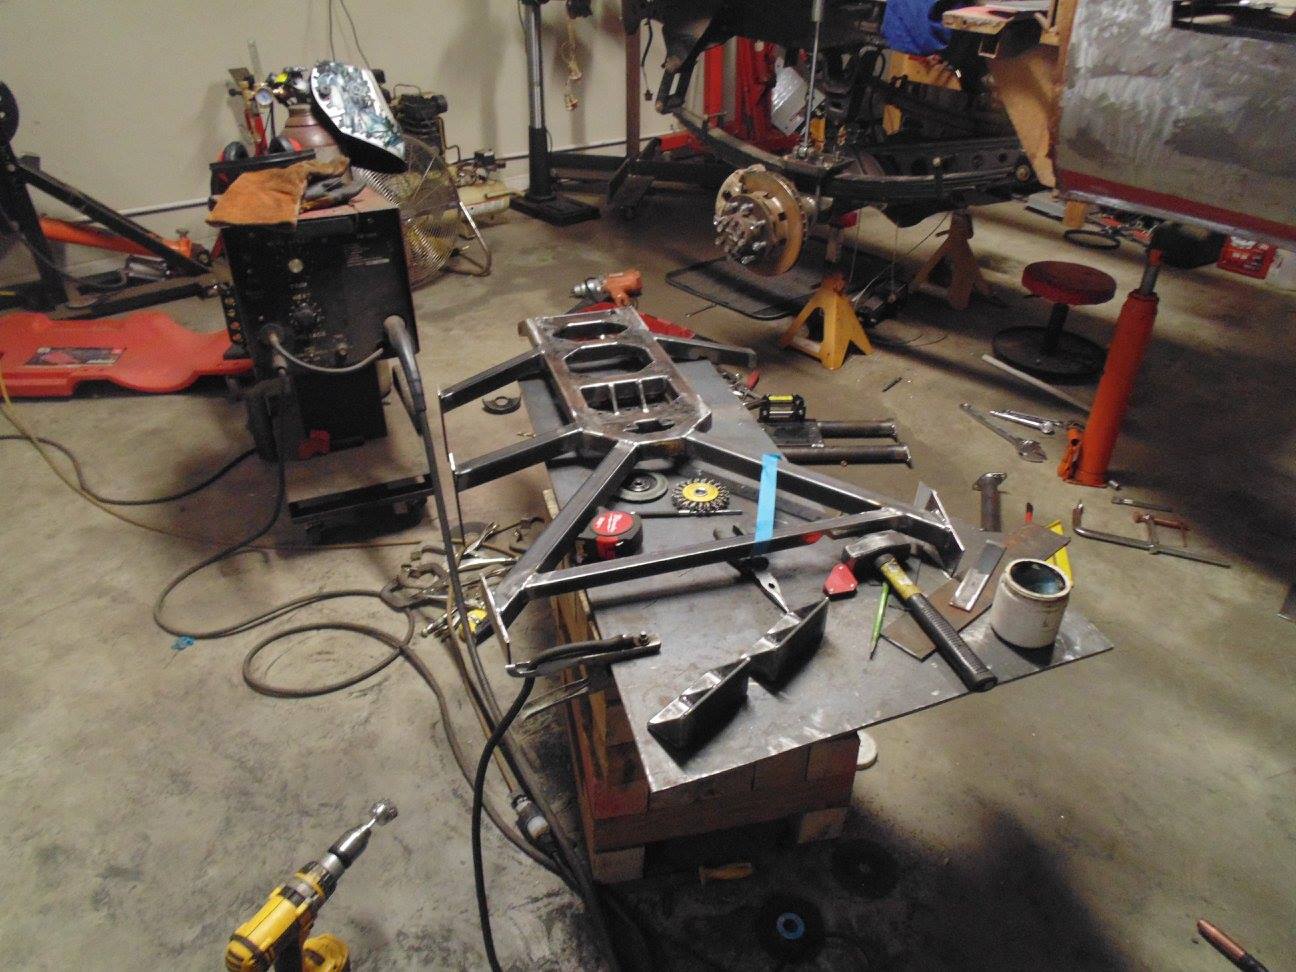
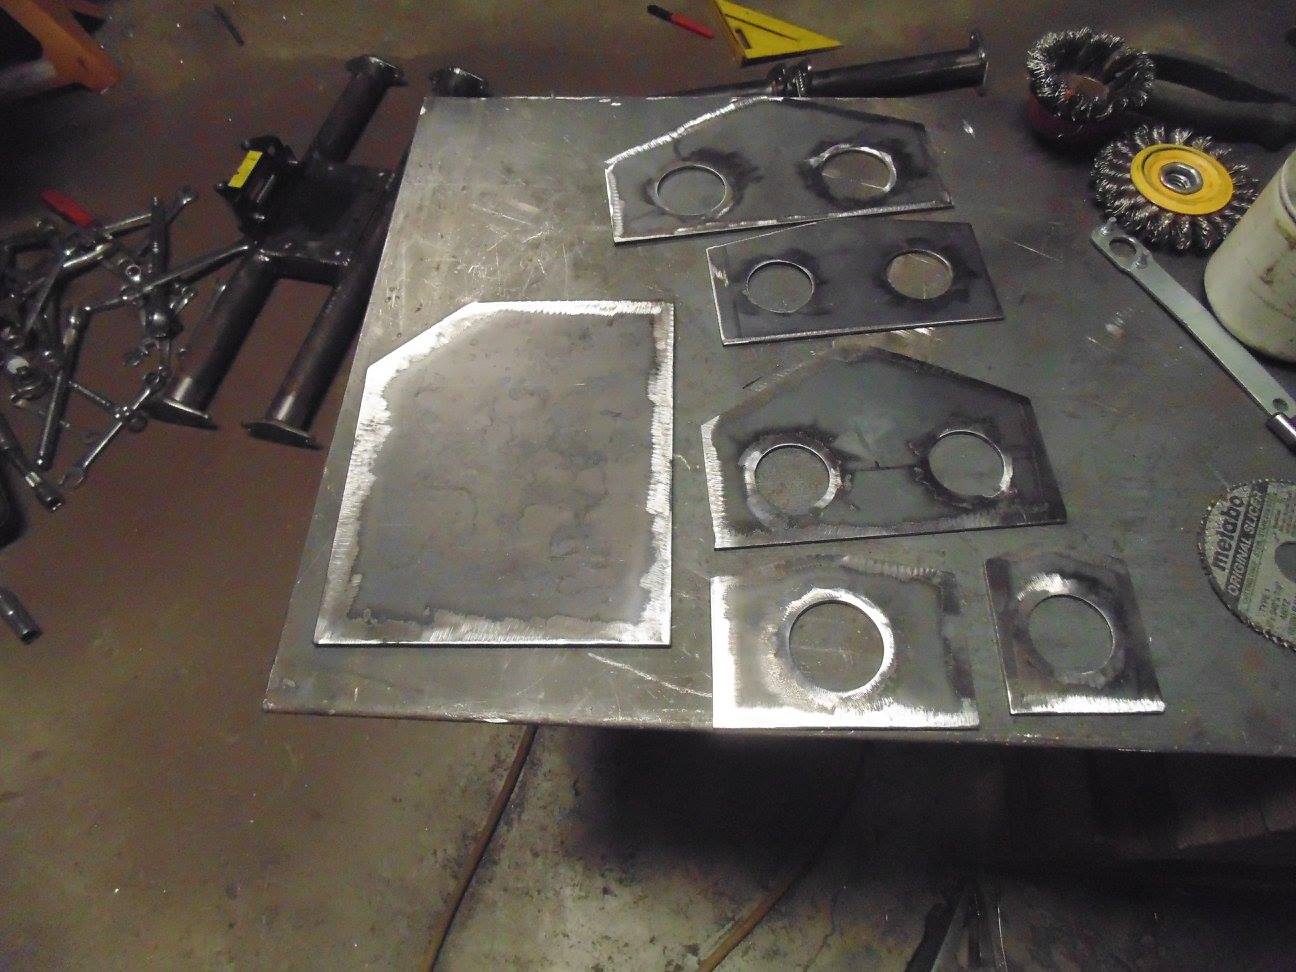
Here is the oil pan armor kit I made after work today.

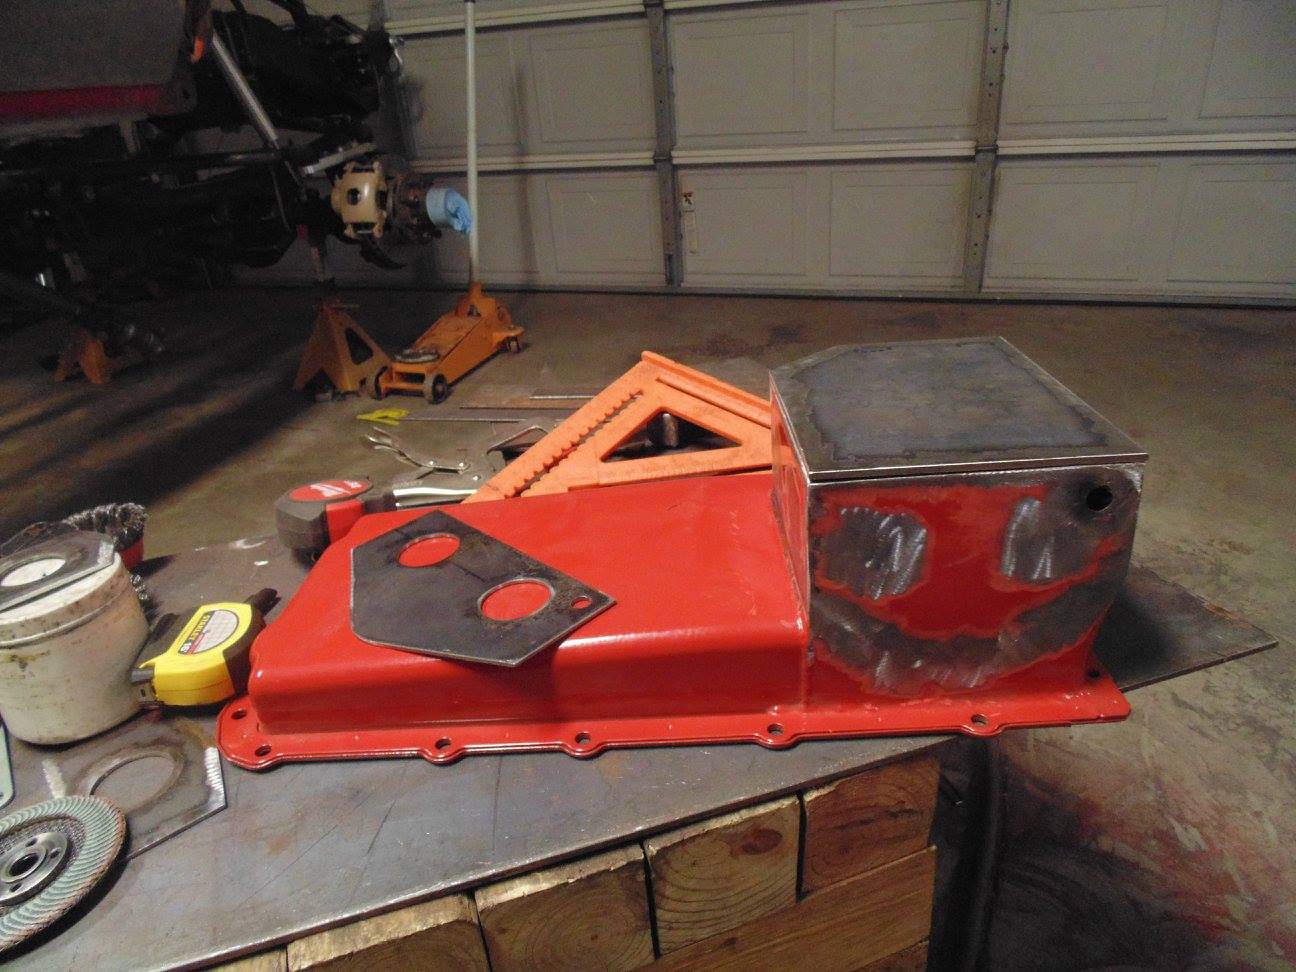
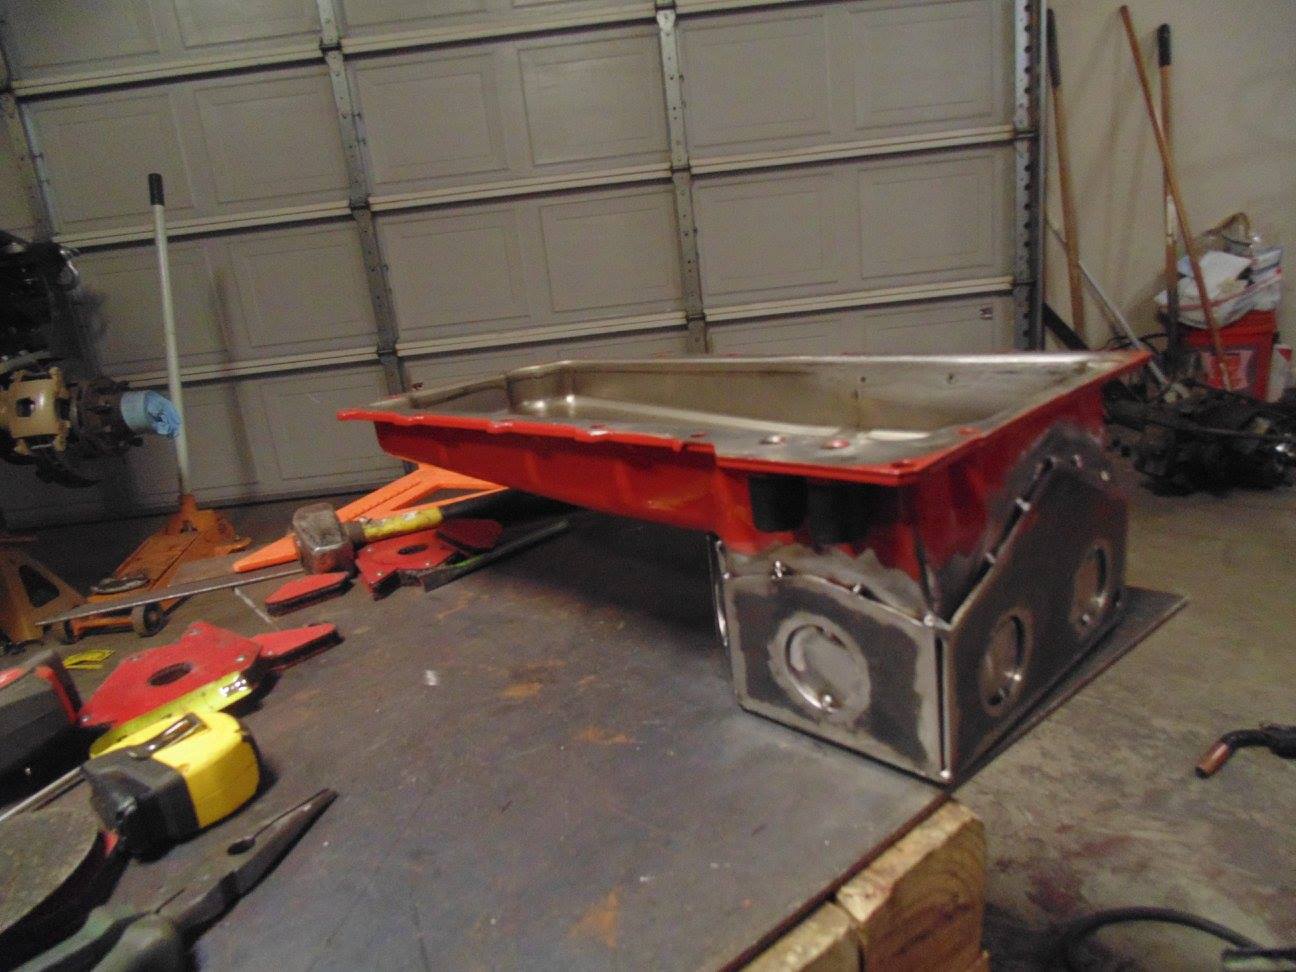
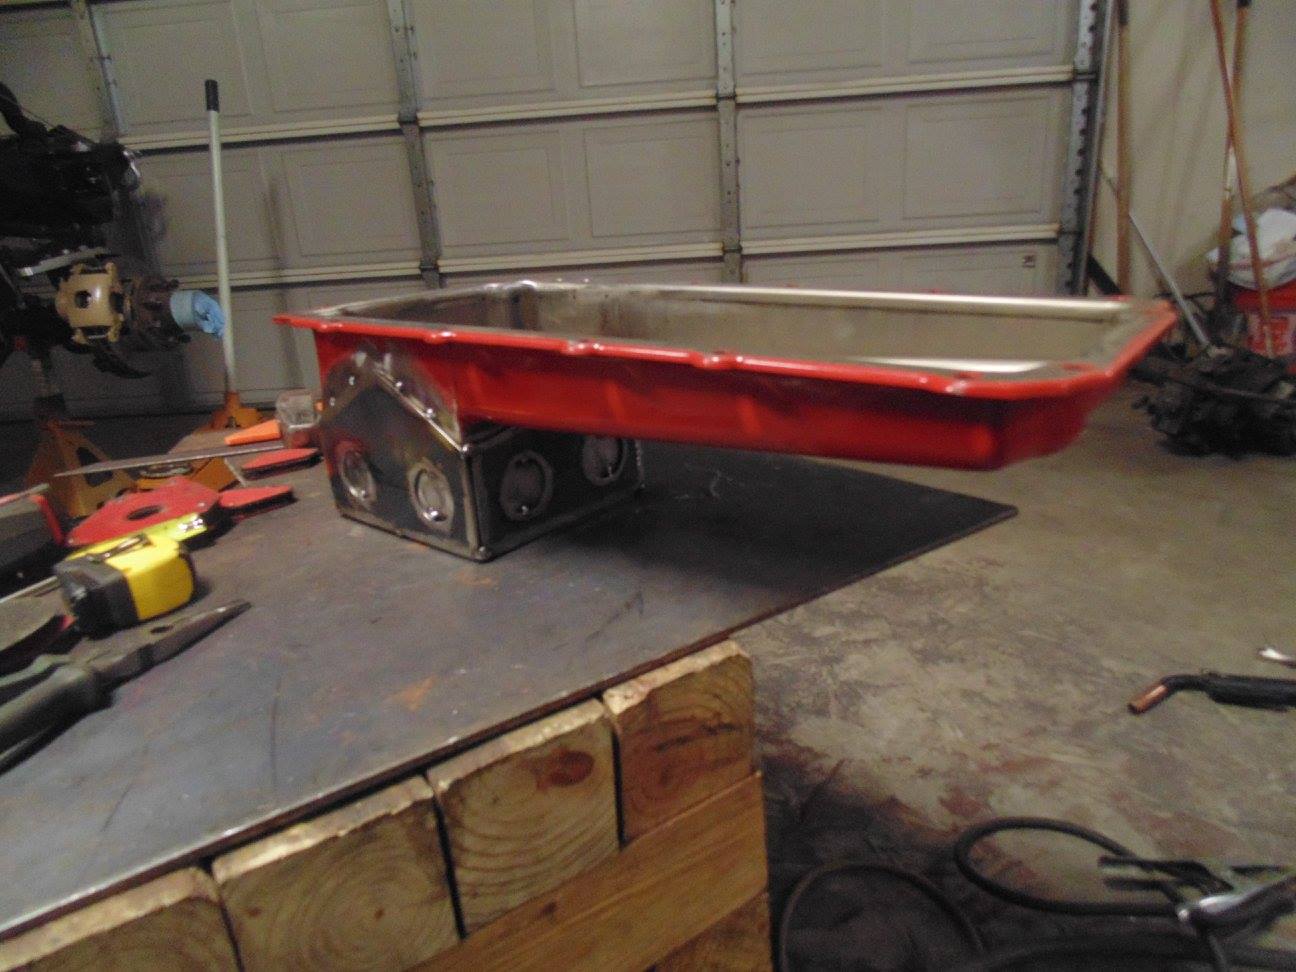
More paint removed. Had to remove the oil pan drain plug because it was in a bad spot for my armor. I am relocating it to the back right of the pan.

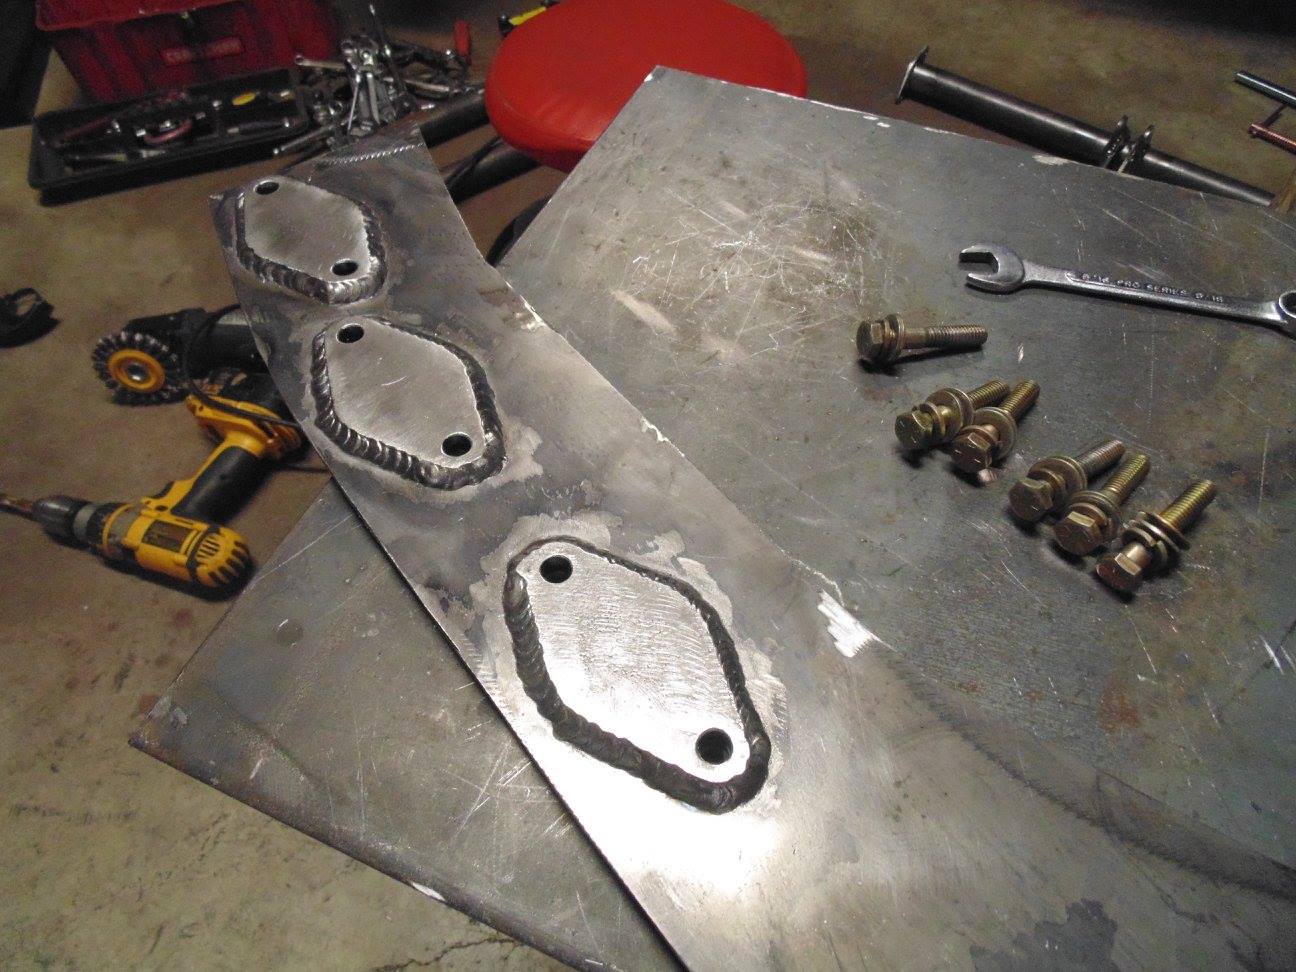
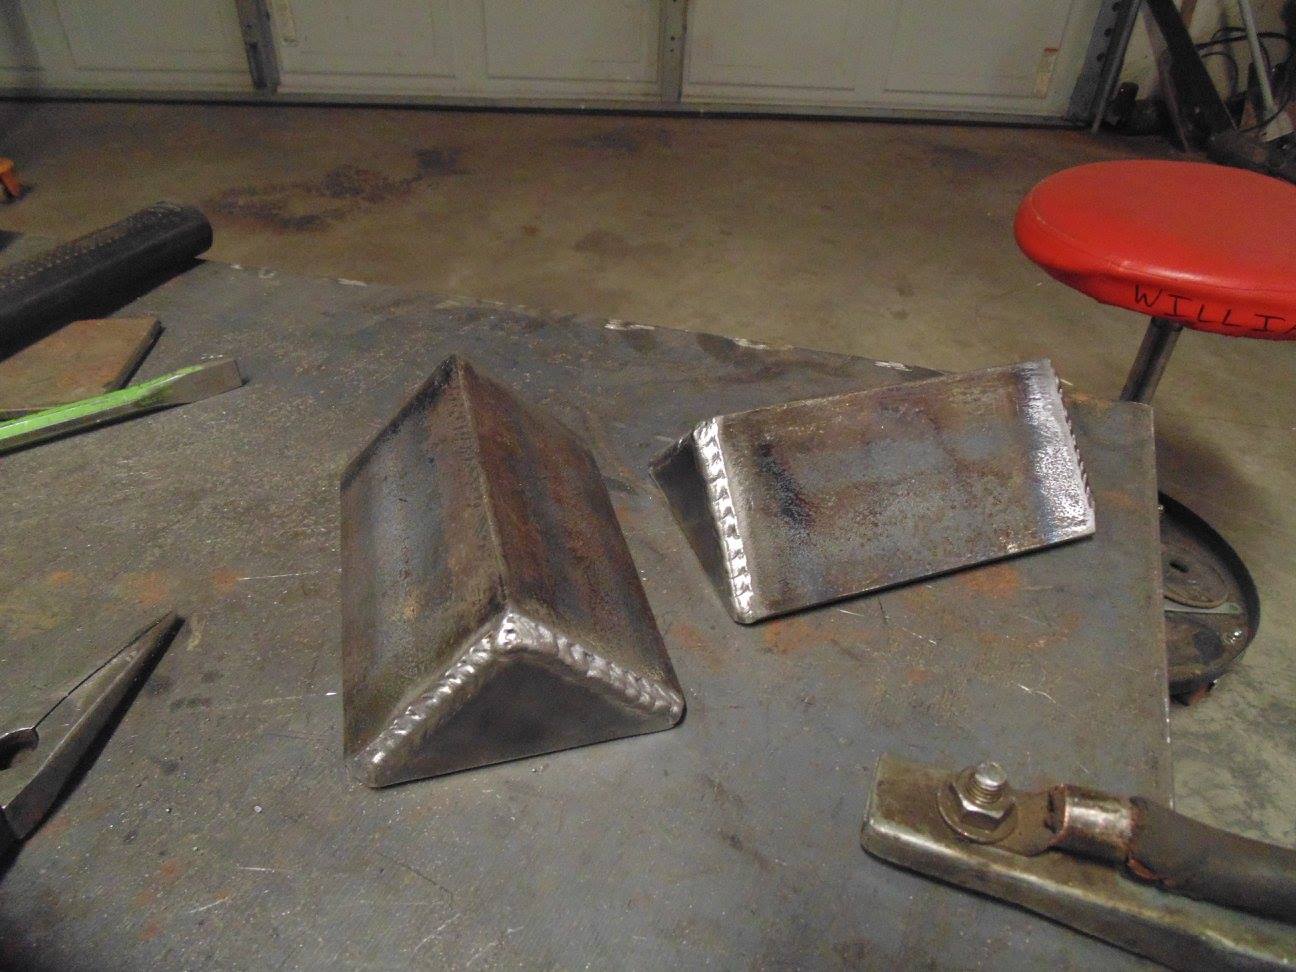
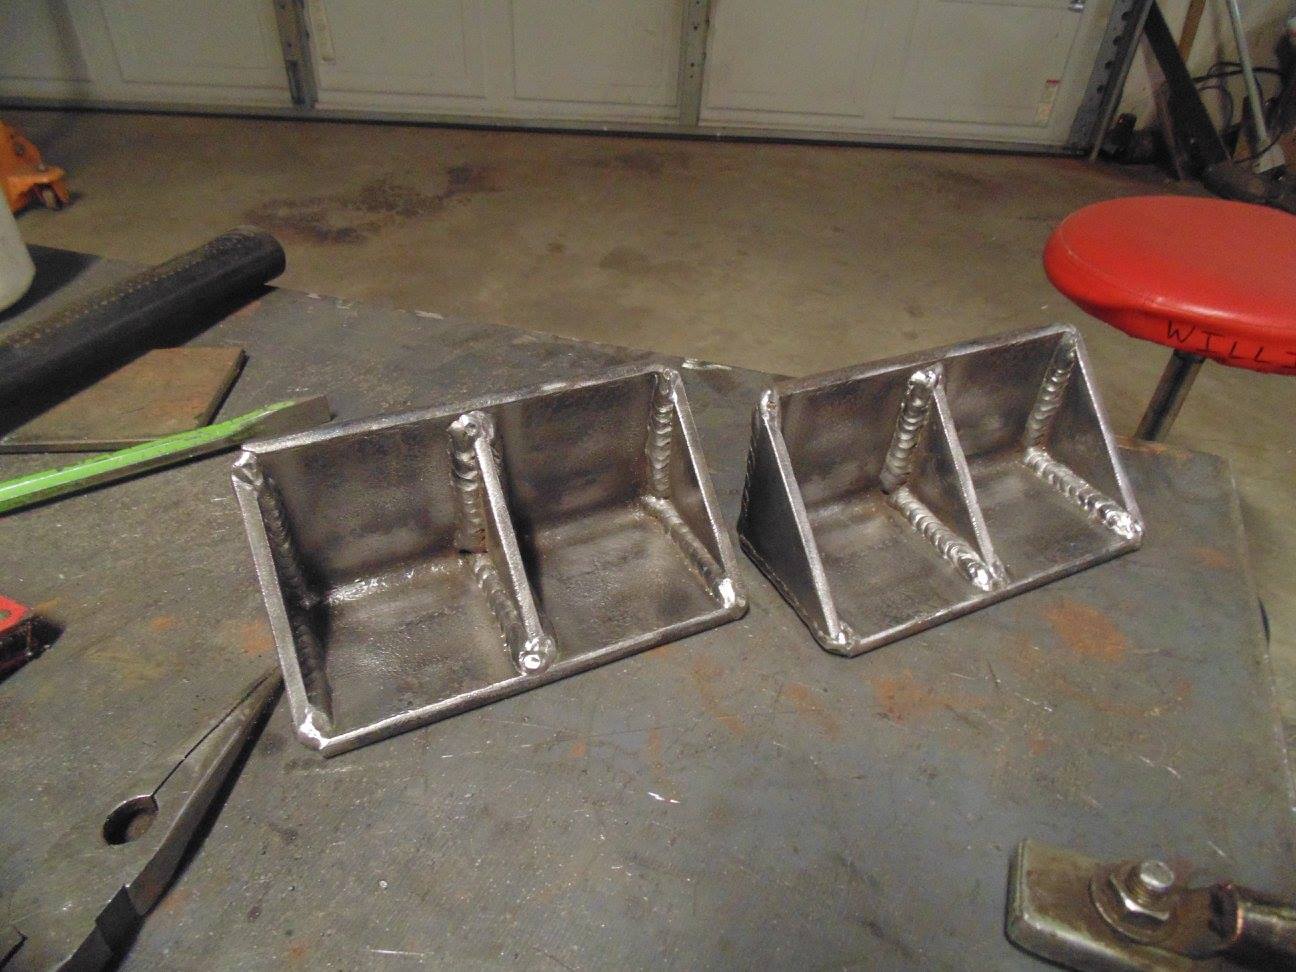
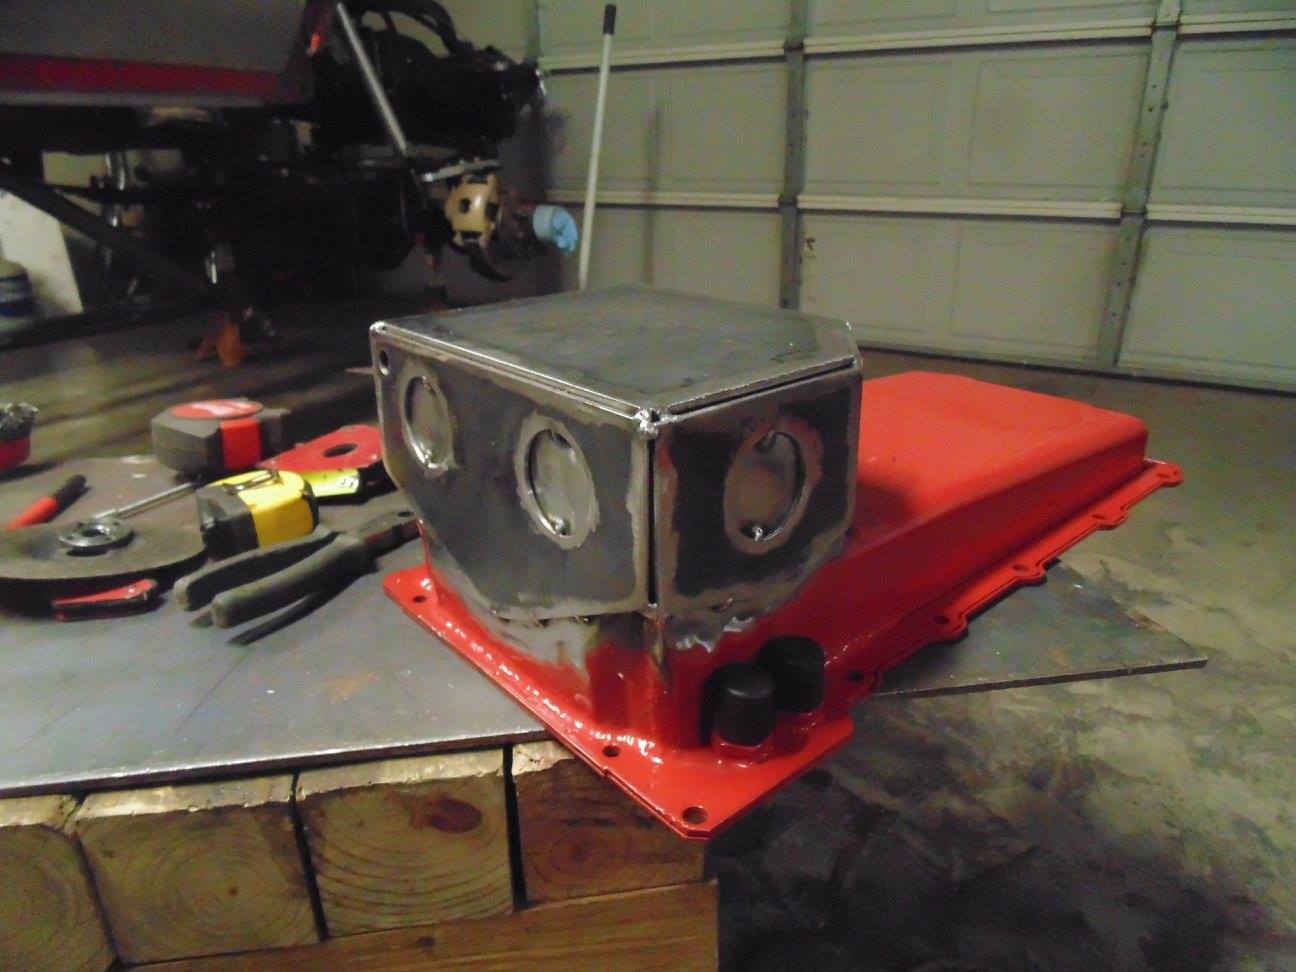
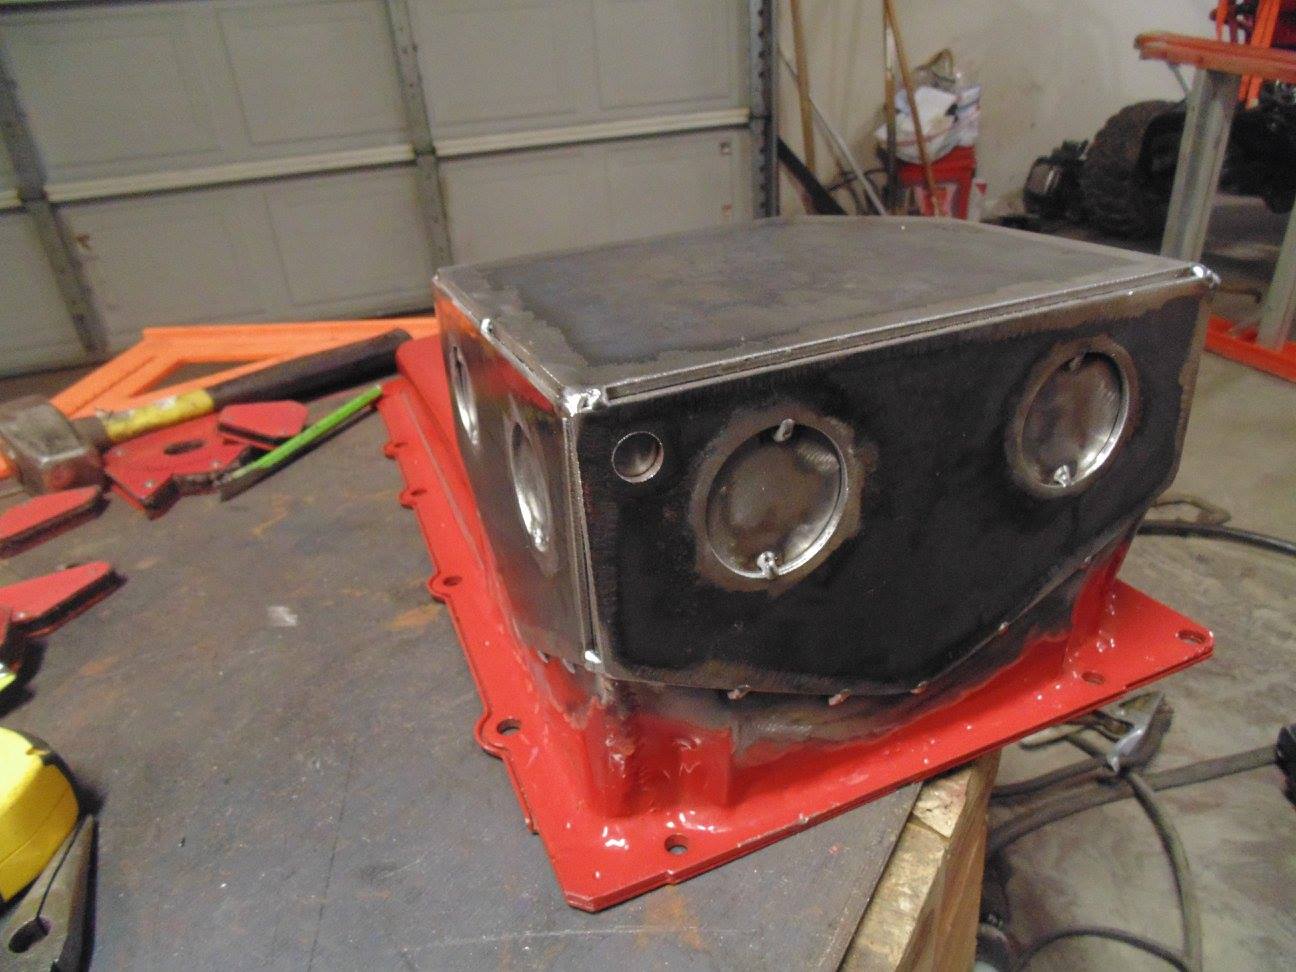
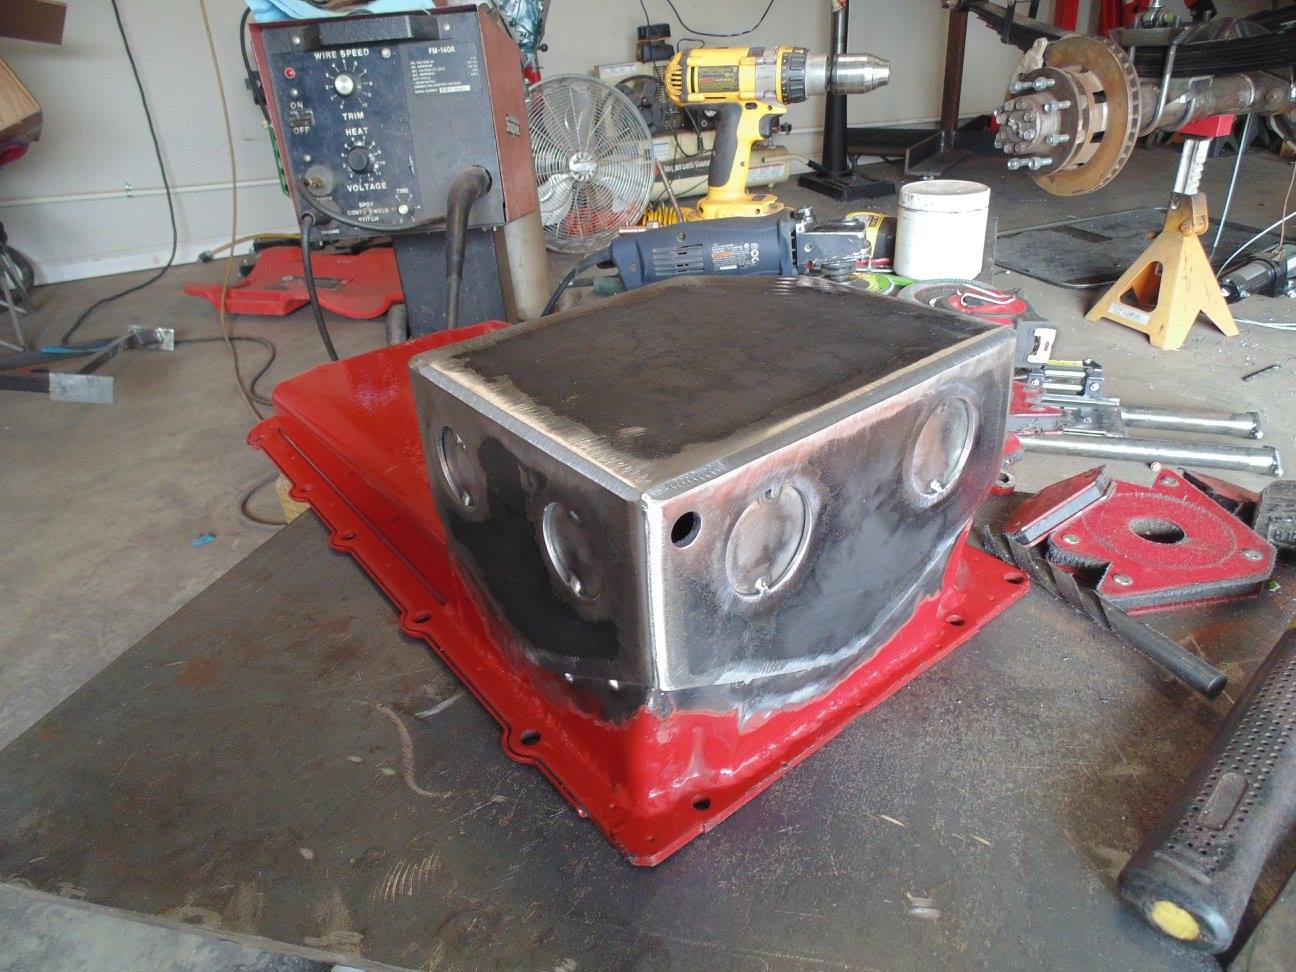
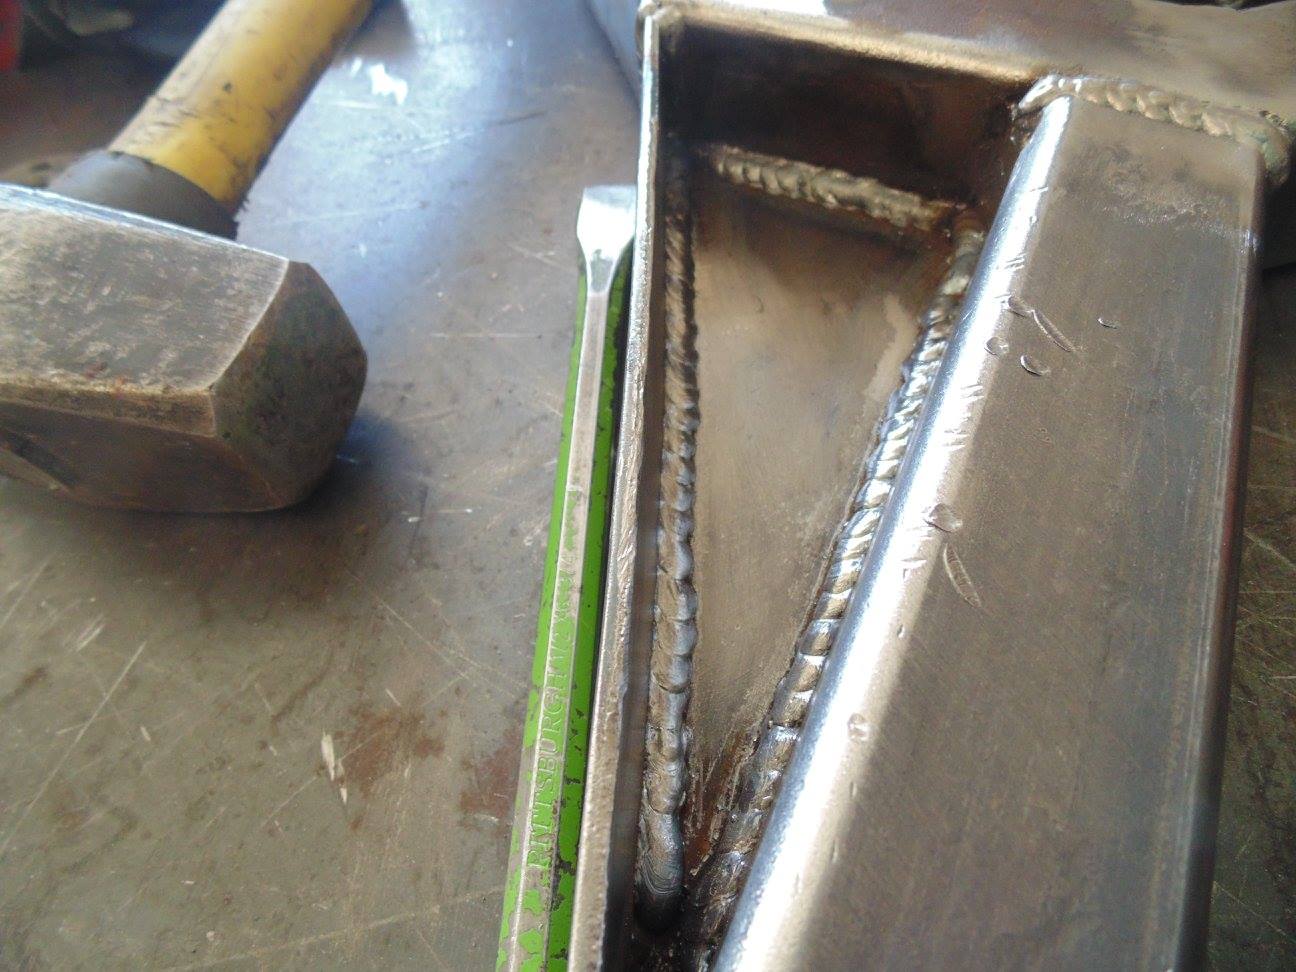
The original wall thickness of this pan is .055 inches. That's just not going to cut it for me. The bottom armor plate is 3/16 and the side armor plates are 1/8"

I don't have any plans to armor the shallow part of the pan as it will be out of harms way

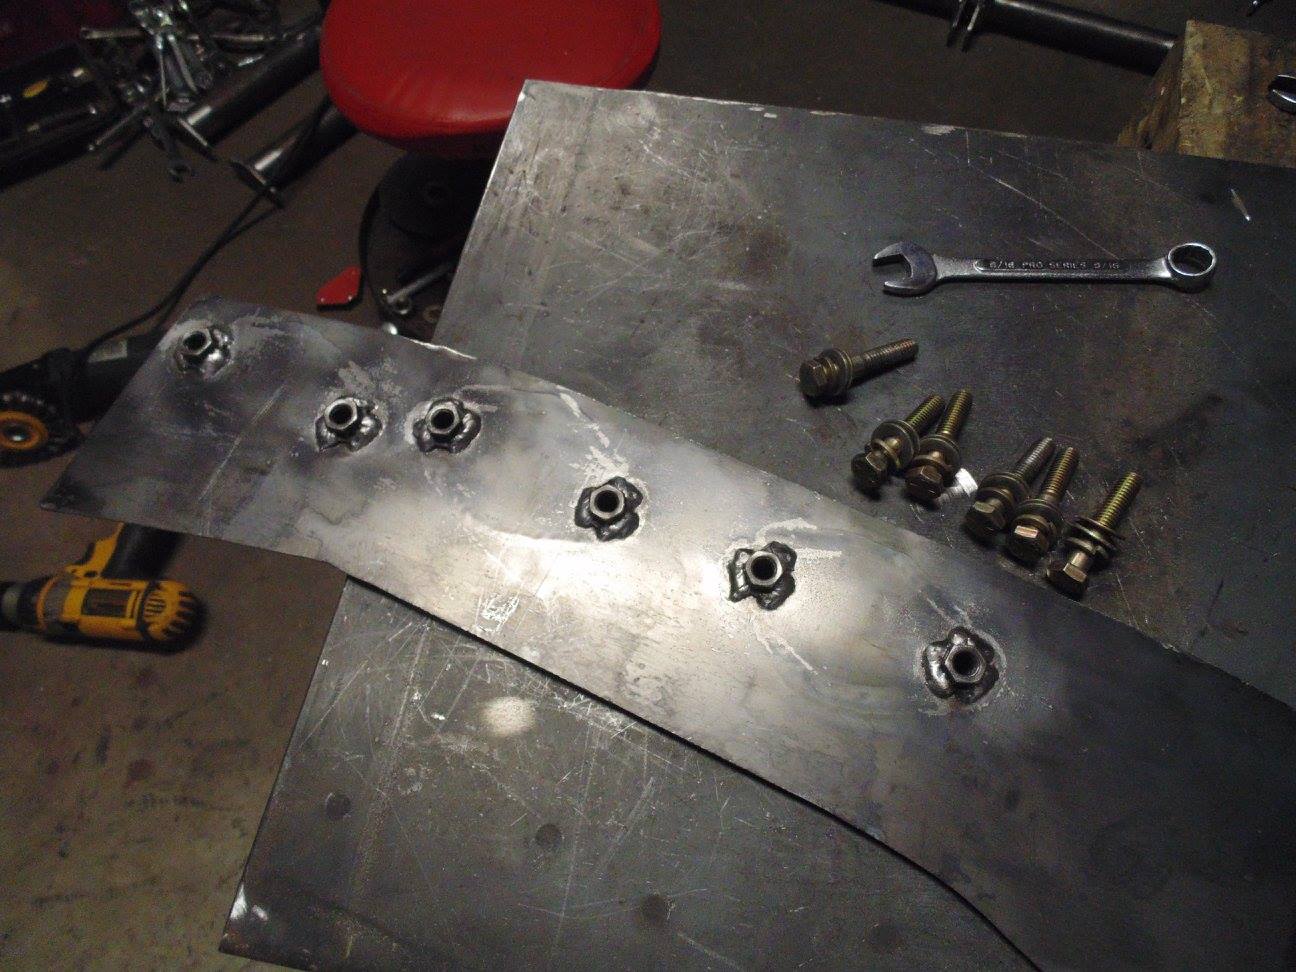
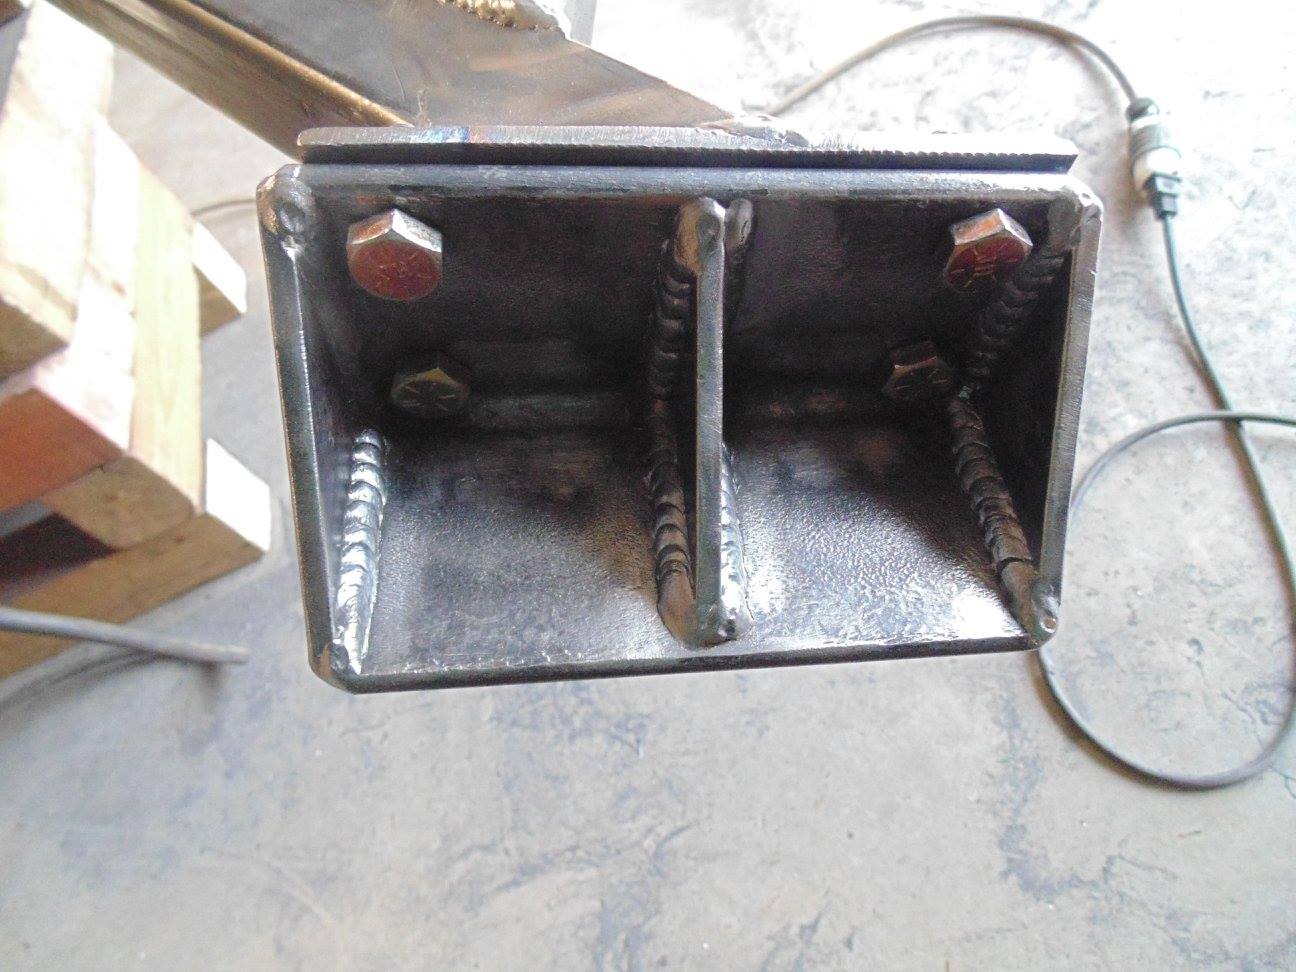
This smaller hole in the rear armor plate is where the drain plug will be relocated. Just have to go get the right nut, drill out the actual pan and then weld the nut to the armor plate inside and out so it is leak proof

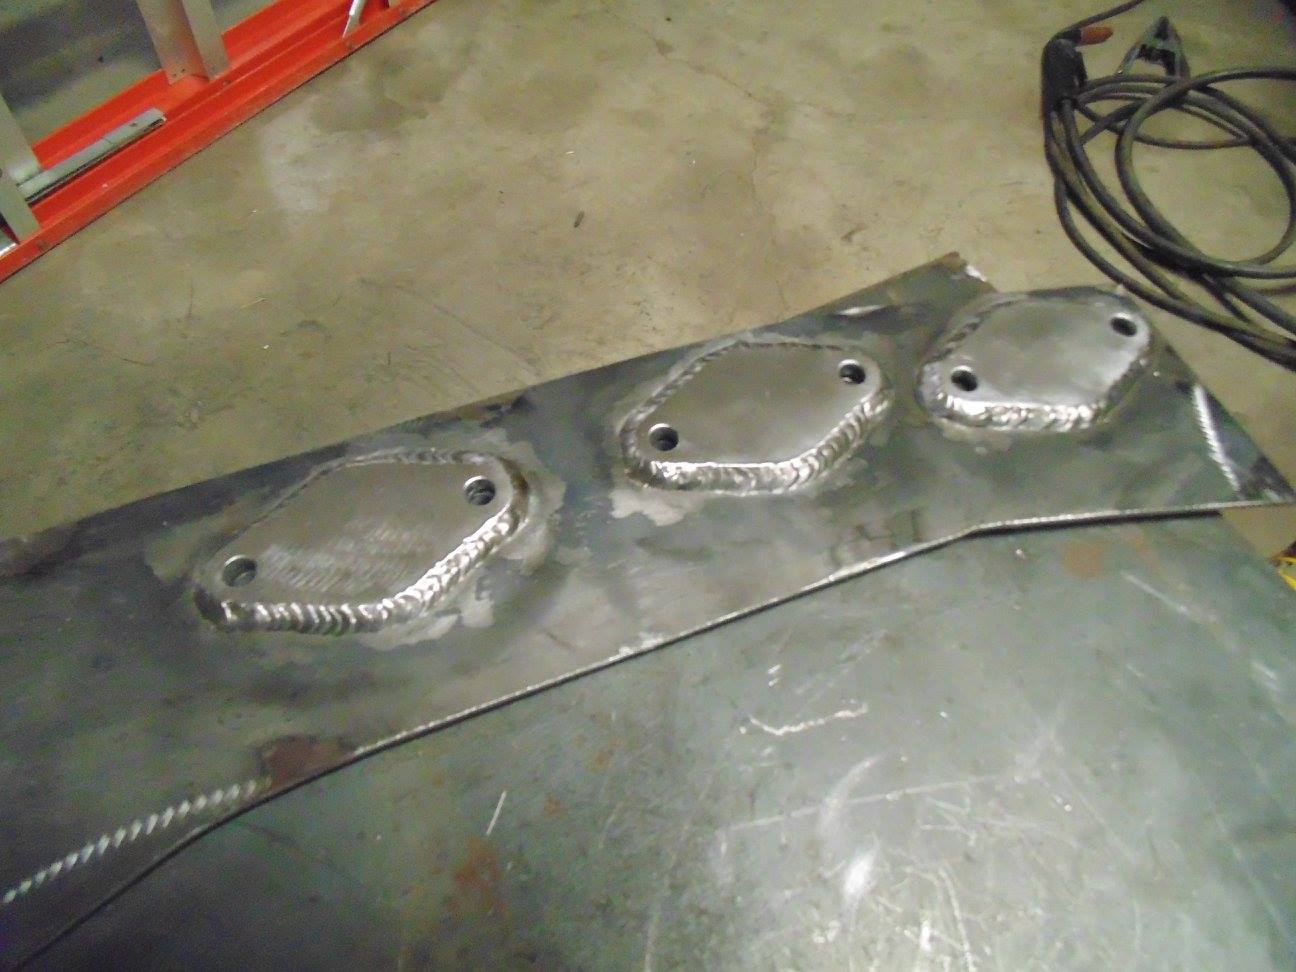
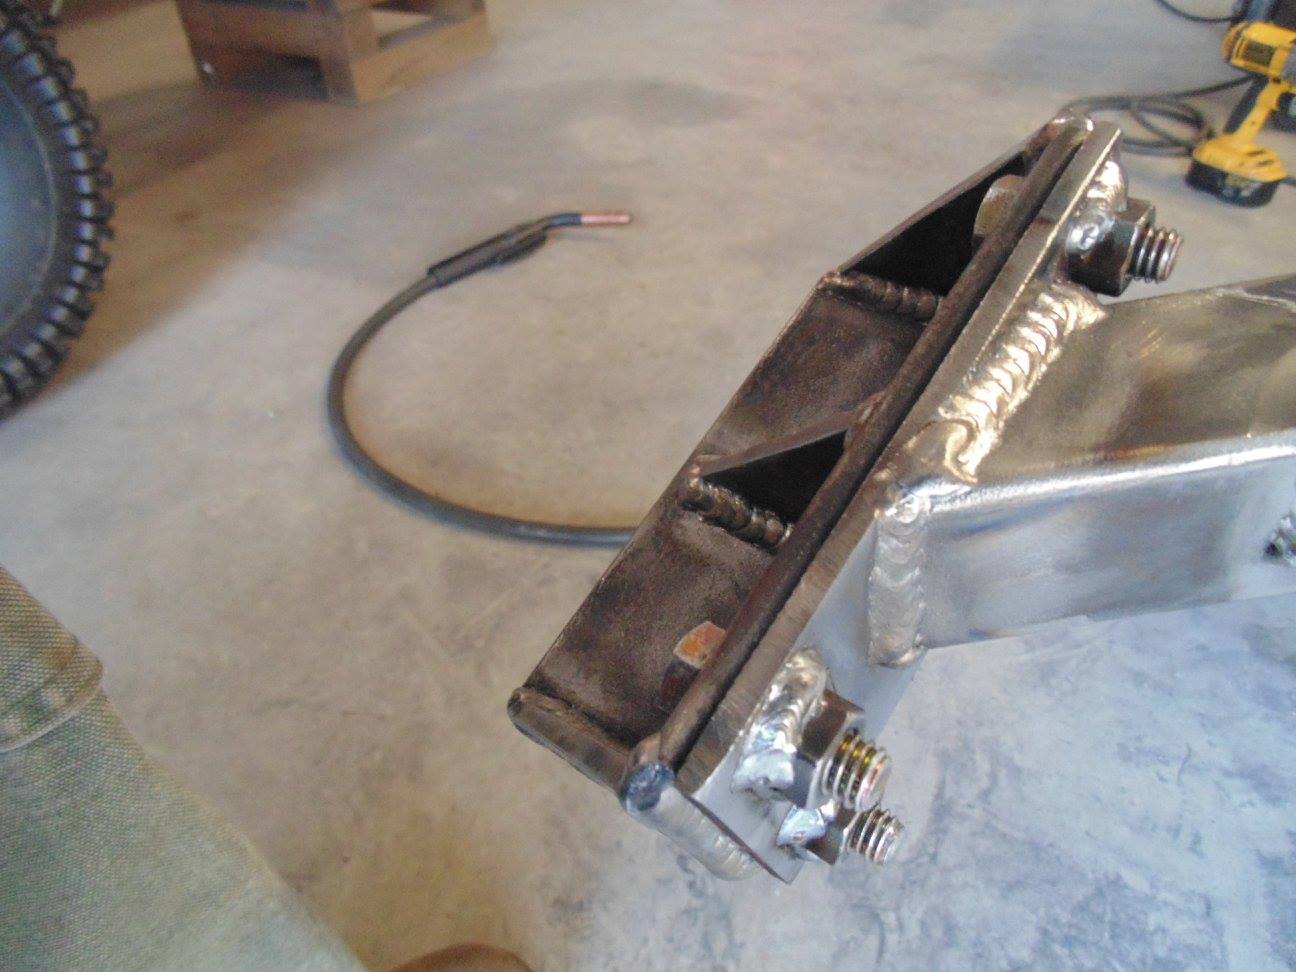
Not sure yet if I will fully weld in the circles or just do a couple small stitch welds in there. I am a little concerned about burn through even with the welder turned way down. I was already planning on stitch welding the tops of the armor plates to the pan body.

Tomorrow I will fully weld the 1/8" armor plates to each other and do the stitch welding to the pan body
 
Last edited:
I have done a tack then blow it with compressed air thing a couple of times to eliminate warping on thin stuff.

If you warp that your screwed cause it could very well pull the flange down.

That's I think the only thing I would be worried about
 
Got the armor plates all welded up.

Ground the welds down for a seemless look. Beveled the edges at the bottom plate and rounded the corners on all the side pieces

Decided I am going to have a buddy TIG all the circles and upper plate edges to the sheet metal pan. Will result in a lot nicer finished product and I don't have to worry about burn through with the MIG. He knows what he is doing so it will be in safe hands
 
Last edited:
Set the oil pan project aside until next weekend and worked on the belly skid some more

Got my diagonal tube braces cut and welded in and the start of the box gussets

Everything burned in pretty good. I still have to add some pieces of plate in all the corners with welded flange nuts to hold up the 1/4" skid plate

The vertical flat stock is the start of the box gussets in these corners. Those areas will eventually be completey closed in with 1/8" plate
 
Last edited:
Started the boxing process on the corner gussets

Got the bottom plate welded inside and out on both sides of the belly skid

Also drilled all the holes for the front frame attaching points of the belly skid

And welded flange nuts to the back for ease of installation and removal
 
Last edited:
Danm that is a old snap on welder! My buddy has one his dad left him and his dad pulled it from a fire many many yrs ago. Great welder but seems he says parts are hard to get for it.
 
Danm that is a old snap on welder! My buddy has one his dad left him and his dad pulled it from a fire many many yrs ago. Great welder but seems he says parts are hard to get for it.

Haha, yep, it has some history to it alright. I have put about 60 lbs of wire through it over the past 2 years without issue. I did just order some more .030 tips for it on ebay but I imagine some of the actual internals could be hard to source at this point. Anyway, it has a 100% duty cycle and 140A output. I gave $400 for it along with the bottle on the back (obviously not the same one anymore). Hard to beat that deal but I am itching for one of the new Esab Rebel dual voltage multi-process units. Ian said it is by far his favorite machine for all around fab but damn do I not want to shell out $1,600 for one. If only money grew on trees. :thinking:
 
Price on Esab is not as bad as I thought it would be to be honest figured 2,200. Yes parts are hard to source, he is looking for a parker solenoid and no luck. Think he is going to call them this week. I let hi m borrow my Hobart 140 since we have been good friends over 15 yrs and never done me wrong once.
 
Well, I have been doing quite a bit of shopping online the past couple days. This aftermarket oil pan has lead to quite a few unplanned but very welcome upgrades. The new pan does not have a built in filter hookup but instead has two male -10an fittings for a remote oil filter. Since the new pan also has a smaller sump and therefore reduced capacity I decided to gain back that lost capacity plus some added capacity by beefing up the oil system with a remote dual filter assembly, thermostat controlled oil cooler w/ electric fan, and 3 qt oil accumulator. I didn't want to run different size lines or tons of adapters between all these components so I had to do quite a bit of hunting for everything in the -10an size. In the end, I have a running total just under $500 in parts, hose, & fittings plus the original $250 for the oil pan itself.

I am modeling the system after the following diagram from Pirate but running dual remote filters instead of a single remote filter
 
Last edited:
Pic isn't working but it sounds like a nice system. How much capacity was lost with the new pan?
 
Last edited:
Top Bottom