CK5
Register an account today to become a member! Once signed in, you'll be able to participate on this site by adding your own topics and posts, as well as connect with other members.
Sounded like you were hosting it last night Dave! :haha:

Sorry for the hijack but you mentioned it. :doah:
What about the auto show.??? Going tomorrow?

I was pretty fubared last night Dean....took it easy tonight and enjoyed Second city comedy show....auto show and deep dish pizza Sunday!
 
Finally finished reading the entire build and have nothing useful to add except, nice job. :waytogo:

I cannot believe that I missed the thrash build a few summers ago, since we are darn near neighbors, And I travel I-94 past your exit weekly. :dunno:

Again nice job, if you ever need another set of hands count me in.


Jim
 
Also checking out the pump outlet, it measures .230 I.D. Dam that seems small don't it?
The fuel lines to the injectors are I believe a -4 AN, just seems dam small to support 600 hp?

I used a combination of 3/8" hard line and -6AN soft line. The FAST kit came with 6 AN.

My pump has quite a small restriction on the outlet as well, probably around 1/4" on the ID. This really isn't a problem as the high pressure of the gear type pump will be able to flow a lot more fuel through a small orifice than the old low pressure carb pumps. The old line size rule of thumb doesn't apply equally to EFI fuel lines. A 3/8" line can supply 600 hp easily. And as you noticed, the outlet of the pump is quite restricted as well without ill effect.

The issue is on the inlet side, my inlet is probably around 1/2" on my in tank walbro pump. And although you are running 6 - 7x the pressure of a carb on the outlet, the inlet will be pulling a small vacuum. Max vacuum is less than -30 psi pressure differential, or 0 psig. So the inlet will be your restriction, although I don't ever expect the pressure to get that low or you have a major restriction.

Also keep in mind, as you raise the pressure, you increase the boiling point, just like a higher pressure cap on your radiator will increase your boilover point. That works the opposite as well, as you create a vacuum and lower the pressure on the inlet side, boiling point decreases, and if the boiling point drops below fuel temp you will get cavitation of the pump and no fuel flow. This is why an in tank pump works so well, the entire line is high pressure except for the tank itself which has a lot of fuel to stabilize temperatures. This is also why electric pumps in the rear of the vehicle are less likely to have cavitation or vapor lock, because more of the line is pressurized.

With that said, if that pump is rated to 600 hp, I wouldn't worry about it. As long as you dont restrict the inlet any more than the pump itself, and keep the pickups as short as possible with the pump as low as possible so it gets more gravity feed. The less restrictive the inlet is, the better the system will work. Once it comes out of the pump, the pressure will do the work.

run a floatless setup, no moving parts... ;)


image.php

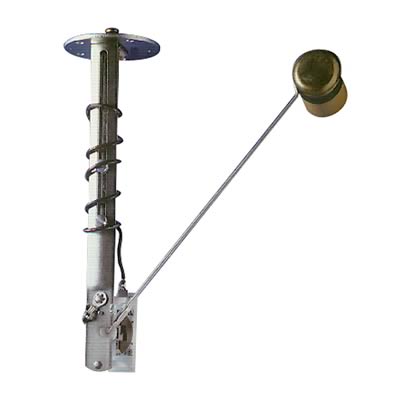
I agree, I run two of those on the boat and they work great. You just cut them to length and then tune the empty and full points, which you could do by putting the sender in a tall cup of gas if it's not easy to get to when installed.


One other note, you are probably already doing this, but I suggest you don't use any NPT ports in your fuel system. I hate them as they never seal right when the fuel eats the sealer eventually, which seems to happen even with fuel proof sealer. Use AN fittings or bungs that have the o-ring seal in them, they work perfect everytime, and they make them in aluminum female bungs too.
 
I was pretty fubared last night Dean....took it easy tonight and enjoyed Second city comedy show....auto show and deep dish pizza Sunday!

I have no direct experience to be sure, but based on the FB posts I saw Zim is a "happy drunk" :D


-G
 
Finally finished reading the entire build and have nothing useful to add except, nice job. :waytogo:

I cannot believe that I missed the thrash build a few summers ago, since we are darn near neighbors, And I travel I-94 past your exit weekly. :dunno:

Again nice job, if you ever need another set of hands count me in.


Jim

Jim, if your that close that often, you gotta stop by sometime man!
shoot me a PM when you think you could make it by here....I'm 7 mi from I-94 exit 85.


I used a combination of 3/8" hard line and -6AN soft line. The FAST kit came with 6 AN.


With that said, if that pump is rated to 600 hp, I wouldn't worry about it. As long as you dont restrict the inlet any more than the pump itself, and keep the pickups as short as possible with the pump as low as possible so it gets more gravity feed. The less restrictive the inlet is, the better the system will work. Once it comes out of the pump, the pressure will do the work.


One other note, you are probably already doing this, but I suggest you don't use any NPT ports in your fuel system. I hate them as they never seal right when the fuel eats the sealer eventually, which seems to happen even with fuel proof sealer. Use AN fittings or bungs that have the o-ring seal in them, they work perfect everytime, and they make them in aluminum female bungs too.

Yes, we will use the AN fittings on the tank!


I have no direct experience to be sure, but based on the FB posts I saw Zim is a "happy drunk" :D


-G

Yeah I don't get too angry anymore....I'm out to have "funnernhell" as best I can manage....seems I don't remember alot of Friday night...and we were just headed out to shoot pool??:doah: Fireball Cinnamon whiskey....I highly recommend it, but will do my best to avoid it now :whistle:
 
Final tank prototype (I hope)

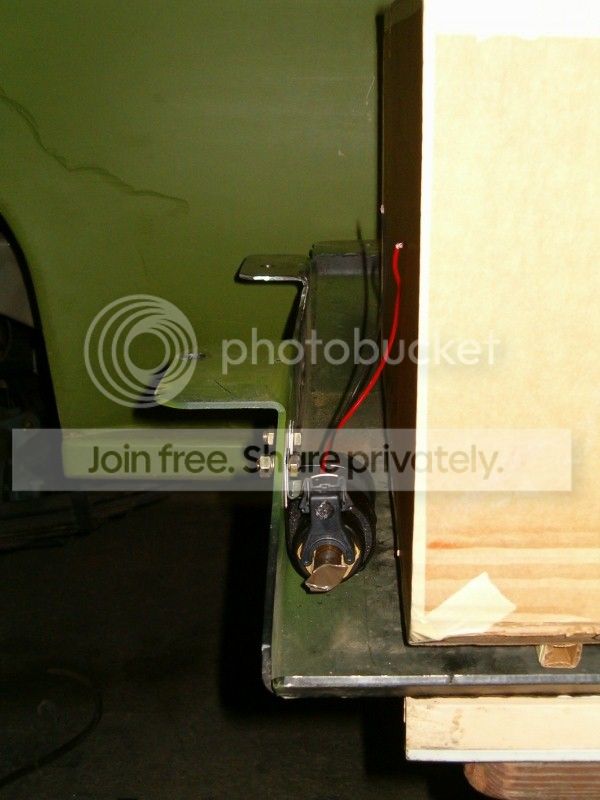
pass side view from the front of the tank...about 3" clearance between the tank and the skid/frame, the Drivers side will have about 1" clearance.
The fuel pump will be mounted as low as the bottom of the tank, and protected by the skid plate.

HPIM4324800x600_zps5d2d8d4b.jpg


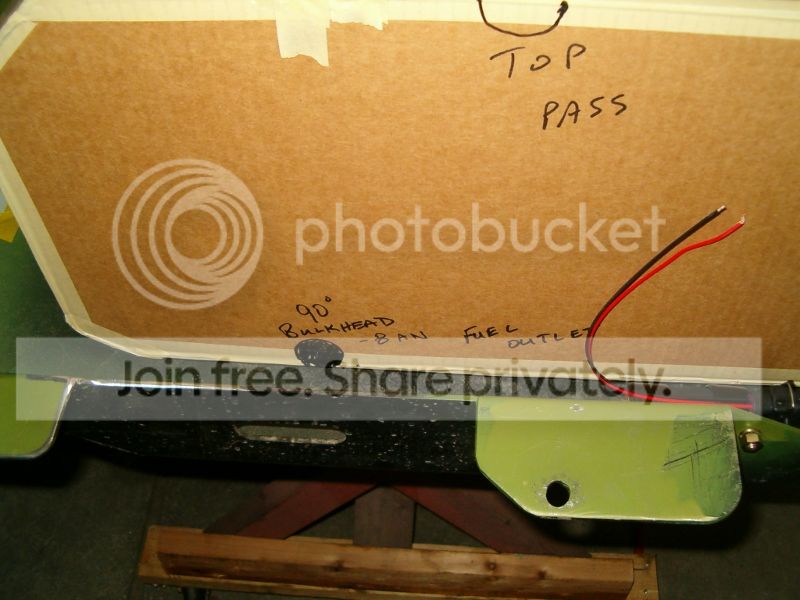
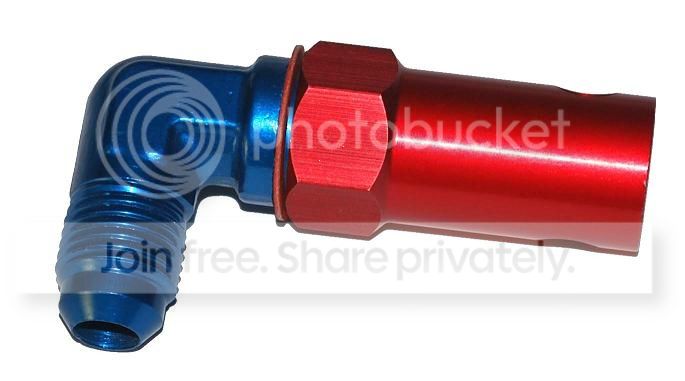
The fuel outlet will be at the bottom of the tank with a 90* bulkhead to the fuel pump.

HPIM4325800x600_zps16dab999.jpg


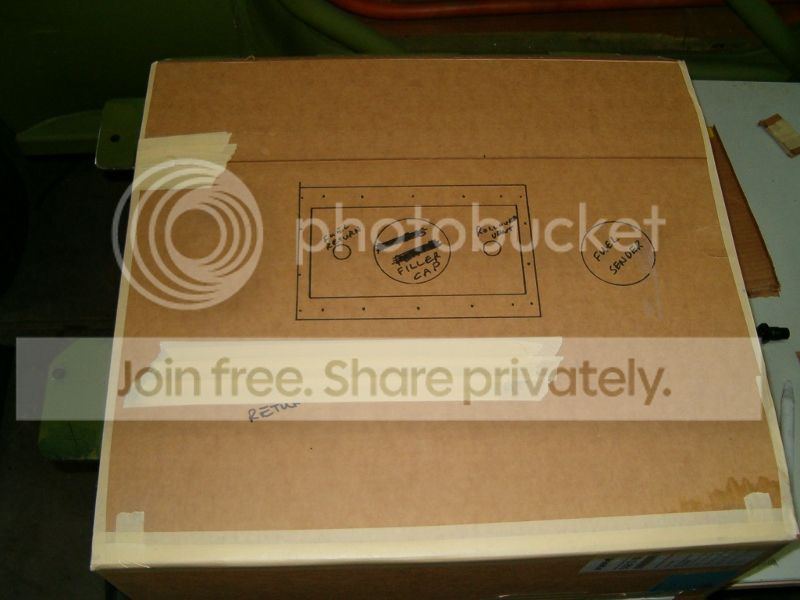
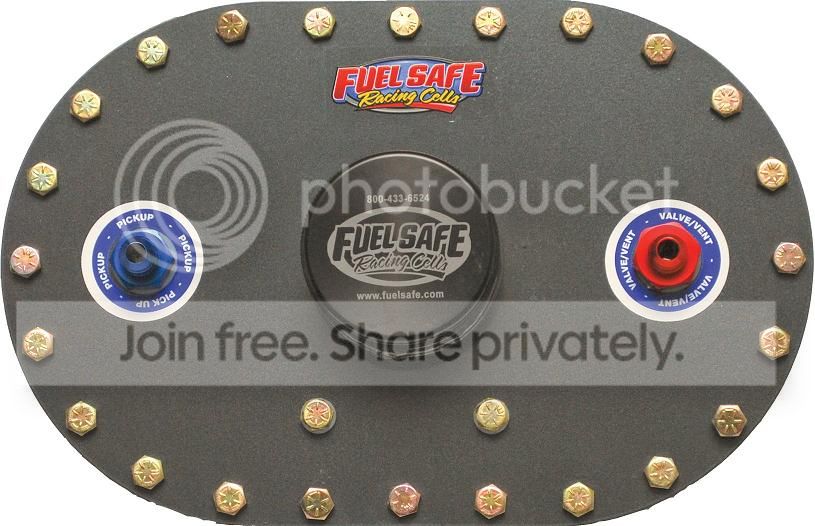
Top of the tank will be like this....a filler plate with the filler cap/rollover vent/fuel return line port.
I decided to go this route to keep the tank at close to 30gal....I will have to raise the floor to accomodate this, but I have some floor issues to deal with anyway..."here comes the snowball effect"
this will also allow me to take the tank out from the top if necessary.

HPIM4327800x600_zps4a0cd2fa.jpg


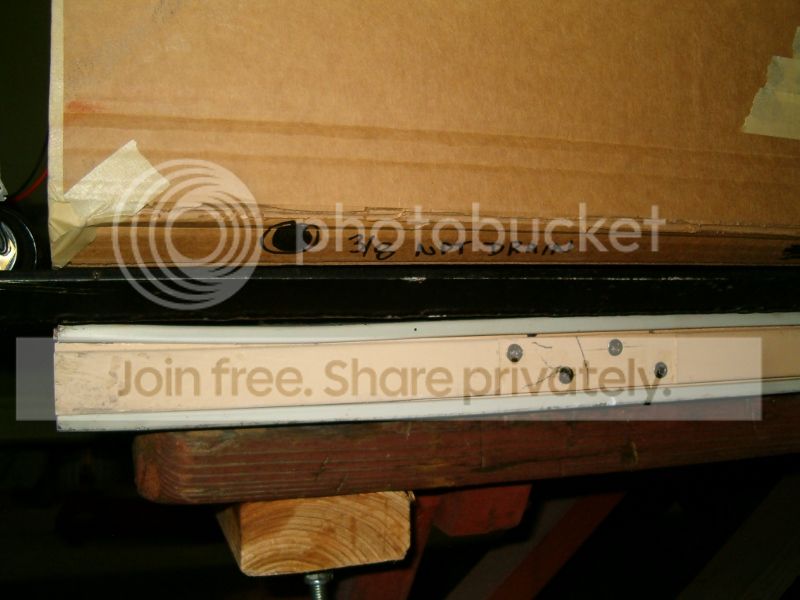
Front edge of the tank will have a drain...

HPIM4329800x600_zps9f2b4460.jpg
 
You have been busy. Looks good Dave!:thumb:

thanks Dean...I'm sure Kert will make it look way better than the drawings :waytogo:

Tank looks good. 30 gal outa keep ya happy on the trail for a few hours.

If it keeps the 454 happy, I'll be happy!


[Top Center Rollover venting…-6AN...FATS system
Top fuel return port...-6AN
Top fill screw on cap w/ O ring seal-2.5" ]

These items to be handled by this unit:
SF6X10A_zpsd1ade911.jpg


This plate includes plate, gasket, bolt kit, metal screw on fuel cap with Oring gasket, 90* rollover vent valve

and 90* fuel return port, both -6AN

ITVV06-90_zps8aa8ad53.jpg


Bottom drain pass. front corner..3/8" NPT


[Side outlet port for fuel pump...-8AN B.H. w/90* to pump, -8 hosebarb to pickup puck]

The outlet port will be this piece...
th


Fuel sender unit...Summit racing

sww-439361-f_w.jpg


Mounting flanges

4 walbro pickup system to central puck

Interior baffles...TBD
 
Last edited:
can you do the "3 sides and down" vent with the room available? From what I understand that is a better/safer vent routing than the FATS.
 
I think so Matt, would that provide adequate ventilation for the tank while the engine is running?
 
I don't see why not, the FATS system I did on the Sonoma because of packaging was probably 10' of 3/8 fuel hose and never had any problems. Could bump up hose size a little too.
 
I think part of my problem on the Maiden as it was, the fuel vent hose I had run to a filter above the tailight housing, but it also had a low spot in it that acted like a water trap, and wouldn't allow the tank to vent properly....so it was tough to fill, and may have lead to some issues with the fuel to the pump as well?
I need to be sure I have no low spots in the system this time, and I also think the fuel return from the FI will help with fuel flow as well.
 
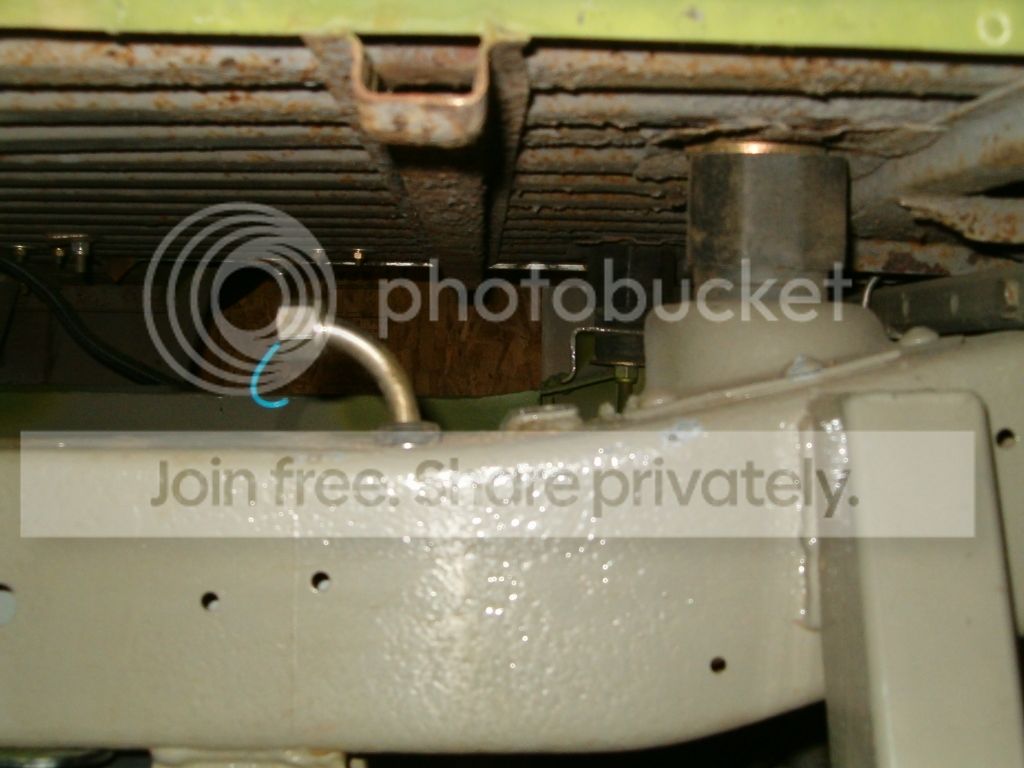
The floor of the Maiden is getting weak, the body mounts behind the rear seats are starting to push up into the floor,
and need to be strengthened up,

HPIM43031024x768_zpsf00cc43a.jpg


I also need to raise the floor behind the rear seats to accomodate the new fuel tank.

I was going to mount the new tank to the skid plate, but after talking with Kert (glad he brought this to my attn),
we thought that might not be the best route....if the skid takes a hard hit, and the tank is bolted to it,
it could break a mount from the tank, possibly causing a tear or hole in the aluminum tank. Although that skid is pretty stout,
it could possibly happen, and a fuel leak, and possible fire scares the hell outta me,
so I want the tank mounted separate from the skid.


Here you could see if the bottom of the tank was bolted to the skid, it could be an issue if a hard impact was to hit
where the tank mounting would be (on the sides of the tank at the bottom)

HPIM4324800x600_zps5d2d8d4b.jpg


So alternative methods for mounting need to be considered.
I thought of having a tube cradle to mount the tank to, then mount the cradle to the frame, separate from the skid plate.
The I got thinking I need more room on top of the tank for clearance of the filler cap, and rollover vent/fuel return fittings,
and I have to raise the floor, so maybe making the mounts on the side of the tank and having it fit
into the hole in the floor and bolting it to the floor.
Of course the floor would have to be thick enough to support the 200lbs of fuel + the tank weight would have to be considered.
Was thinking of doing a 1x1x 1/8" angle as Paul did for his flooring on his K5.

floor5.jpg


this would allow me to raise the floor and support it, and also make a structure for the fuel tank to sit in,
with a tank access plate that would protect the top of the tank and lines..
.a small fuel filler door could be attached to the tank plate.

Sound feasible or any other ideas for this dilema?
 
If the floor is getting weak, my guess it is cuz its rusting away :whistle: I would cut out the whole thing and just fab in a new piece like Paul did. That way you can put your body mounts where you want and make a hole for the tank or how ever you want to put it in.

I would think its about the same amount of work as doing that square as doing a whole new floor.
 
Got tired of trying to find the pics but are your rear seats attached to the floor or cage?

I would do the cut the whole thing out build a frame to support what you need to the put sheet metal over the frame and be done.

You can sink your battery in it, build a cooler mount, storage box etc.
 
You could redo the whole floor but for some reason this approach wreaks of the snowball effect. Does it really need it?

If the body mounts are pushing through, you can reinforce that area alone.

The area of your tank is pretty large and its really not that much weight for the floor to hold. Picture it this way, your tank and fuel is no heavier than an average sized man. The structure of a pickup floor is the same as your blazer. I've hauled many a small blocks and big blocks in the bed of a pickup basically just setting on the pan and a block of wood. Don't recall i've ever seen a floor in a pickup or blazer for that matter give way or even really appreciably budge. I've never loaded one to failure....

How far gone your floor really is, that's the question. I don't think any of us can make as meaningful of an assessment of that as you can.

Which way is more work? Seems to me chopping out the entire floor would be more work considering the cage, seats and whatever else that would need to be removed or modified.

Just my .02 for ya.
 

Latest Posts

Top Bottom