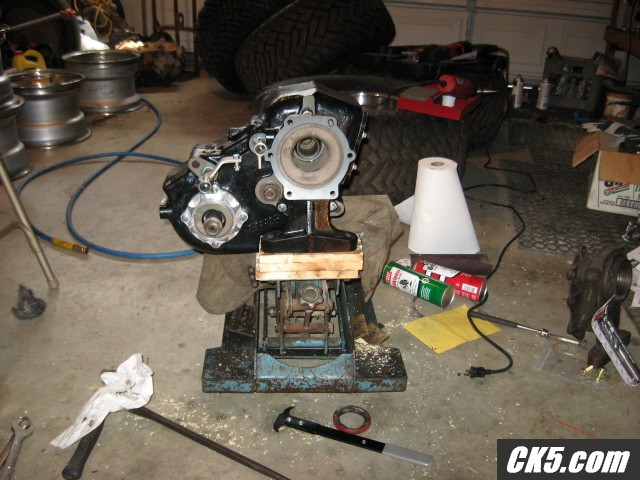
CK5
Register an account today to become a member! Once signed in, you'll be able to participate on this site by adding your own topics and posts, as well as connect with other members.

The headache build..

Who said I was going run low RPM?:D It's a sand toy.
In actually, the redline is about 6500 rpms, but it sure does leave the hole hard. If I get the POS going by labor day, I may even put NOS on it. I need to it going so I can tweak it. There are a lot of new guys coming with fast stuff.
 
What modifications have you done to your trucks suspension to make it hook up for sand racing? What tires are you using? Do you race in low range or high?

Sorry for all the questions, just curious.
 
Now you've got my attention. I'd like to see more!
 
So far the suspension is stock with the addition with Cal-traks bars in the back. I'm impressed with the Cal-traks because when I load the suspension on the street and take off, and the blazer with an open differential would leave two even black marks. Unloaded, the blazer would do a dog leg burn out. I now have Easton in the back.
Cal-traks hang low so it’s not ideal for rock-crawlers.
So far, I’m the only one with a set.
Suspension set-up for sand with my previous experience on my 73, I have found softer is better. That’s why I going to try a 52" spring swap on the 74.
As how the 74 works on sand now, I have no idea because I keep breaking it. A big powerful motor just destroys stock drive trains in record time. I knew the stock drive train won't last but not in 15 minutes.
The best tires for the sand would be wider is better and IMO Fun-countrys is the best street tire. Anything better would be a paddle.

When I raced it last spring, I used bald BFG mud-terrains, because I have not lifted the blazer yet to fit my 33x16.50x15r Fun-countrys.
 
An update--I’m still waiting for my shims for my transfer-case from Off-road Design, so this week I went by my friend's shop and bought some rear springs for $150. He doesn't know what the springs are for because he bought a bunch of stuff from the local off-road shop that shut down 10 years ago.
I think the springs are McCoy's 2" to 4" rear lift springs for second generation blazers. McCoy is the company that makes springs for Rancho. I had McCoy's springs on my previous Jimmy.

New rear springs

Before,

After,


The part number on the springs are MC C 1411.
I also took the front springs off today. I'll torch off the front spring brackets
tomorrow if I don't become a coach potato.
 
Last edited:
Agreed on the McCoys and Rancho.

Matter of fact, those exact springs you have, I watched 4 of them "try" to sell on eBay but not one bid considering the seller wanted $199.00 for EACH spring!!! They were brand new, too. I wanted to get two of them because its not everyday you find any springs for GM's that have the military wrap on one end.
 
The springs are expensive when new. I remember when I bought a set for my Jimmy new 15 years ago. The front set wasn't too bad but the rear springs were outrageous. $199 sound about right, but if you going spend that kind money, you go buy a custom set.
 
My package from ORD arrived last Monday, but I didn’t do much the whole week other than painting my old rear springs for my 52" spring swap for the front.
Saturday, I worked on my brother’s truck, so Sunday was the time I’ve worked on my blazer.

The first problem I ran into was the ORD rear hangers for the front springs were too big for the hole in my frame. I didn’t want to drag out the torch again, so I took a piece of scarp steel to make a jig for a hole-saw.
I used a set of transfer punches and center-punched though two holes of the old hanger. I then bolted the old hanger to the piece of metal and installed a bushing and sleeve. I then used a transfer punch to center-punched the pilot hole.

Here is the jig bolted into place. For some odd reason, the pilot hole came 1/8" higher than I wanted. No big deal, I used a hole-saw that was big enough to clear the new hangers even if the hole was not centered.​
Using the hole saw to make the hole bigger.​

Part of my package from ORD was shims for the counter gear on an NP205. I assembled my transfer-case Sunday night.

 
Last edited:
I’m all alone here in my tread having an orgy with Rosie and her five sisters. No matter, I have progress pictures, and I have a lot of work to do tomorrow to get her going for Labor Day.
A poor picture of my 52 spring swap.

Pictures of my transfer case install.

Here my NP205 mounted to my transmission jack. I drilled two holes into the jack so I could mount my transfer-case.​

I really have to raise my Blazer to get my transfer-case on my transmission jack under the frame rail.


Transfer case mounted to the transmission. ARP bell-housing studs worked really well on the back end of the TH400. The adapter went in easily.
 
Last edited:
Nice looking stuff! :thumb:

On the NWF 205 covers, what is the extra hole on the lower rear cover for (note: brass plug)?
 
I’ve no idea what that plug is for. I guess it’s for filling the case when it’s clocked.
 
Didn’t get much done today, but I installed my transcooler, tightened down my front suspension, and fix my nephew’s bo bo.
My nephew wanted to help me get my Blazer running. I let him install the rear drive-line thinking it was something he could do without messing up while I bend hardlines for my transcooler. I was wrong! On the axle end it looks like the cap fall off and he reinstalled it, but needle bearings fell down in the cup.

I found out someting was wrong when my nephew said something broke off and one of the u-bolts is stripped. He installed the driveshaft off centered.

After I took off the rear driveshaft and found my brand new yoke is chipped.
 
Last edited:
Small update, I haven't really worked on my blazer lately because I've missed my deadline of Labor Day weekend. I still need to work on the steering and brake lines. For the steering I need somebody to machine my flattops.
But, for the brakes, I got custom Crown brakelines from Extreme Crawlers.

And my new Ultimate 400 from Mike's transmissions came in.
It has a reserve manual vavlebody with trans brake.
 
Last edited:
My brother got in a fight with his psycho wife, so he came over and helped me (more like forced me) swap my transmissions. Otherwise, I would have stayed on the coach all day watching TV.
This is my new torque converter that came with my transmission. My engine-builder ordered it. It’s much fancier than I expected. It has anti-ballooning plants and 7/16 drive bolts. I have to drill out my flex-plate to accept the larger bolts. I took the converter off to fill it with ATF.
The transmission ready for install.
Here is the finished install plus my transfer-case shifters I had to modify because the shifters where designed for the 465 or Th350. I going to have to weld in and cut out another hole for the transfer-case shifters in my trans-tunnel.

 
Last edited:
Keep it going... I'll be back for Christmas and after tossing some new parts on my K10 I'll be headed that way...hopefully you can meet up with us this time.
 
Well Avery, I don't think I'm going to get it going by winter break. Laziness and lack of funds have prevented me from working on the Blazer. I probably meet you out there with my brother since he has a working 4WD.
Anyway, I actually left the house today to do some work on the blazer. I didn't get much done, but a little work was better no work.
I finally drilled out my flex-plate so I could bolt up my torque-converter and work the cooler hoses.
I pulled my gauge panel out so I could install my trans temp gauge. I wish I knew I was going to do this otherwise I would of done it two years ago when I install the other gauges.

 
Last edited:

Latest Posts

Top Bottom