wow great work, and very handsome pup!
CK5

You are using an out of date browser. It may not display this or other websites correctly.
You should upgrade or use an alternative browser.
You should upgrade or use an alternative browser.
Ryoken's 89 Crew Cab Tubebed build... aka Mutt....
- Thread starter ryoken
- Start date
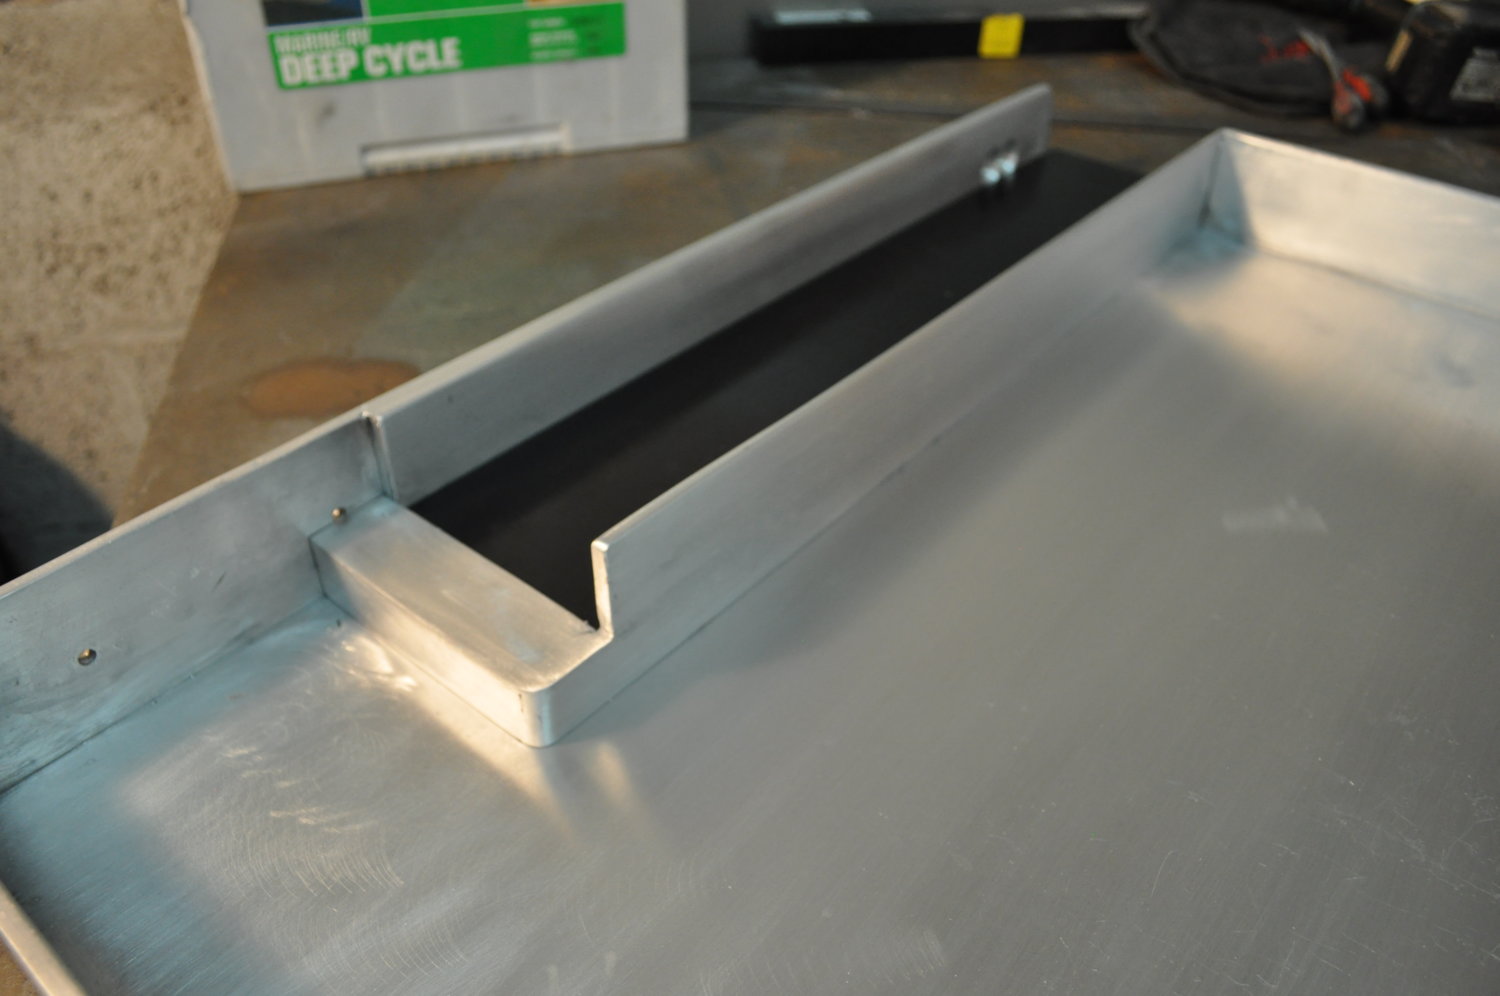
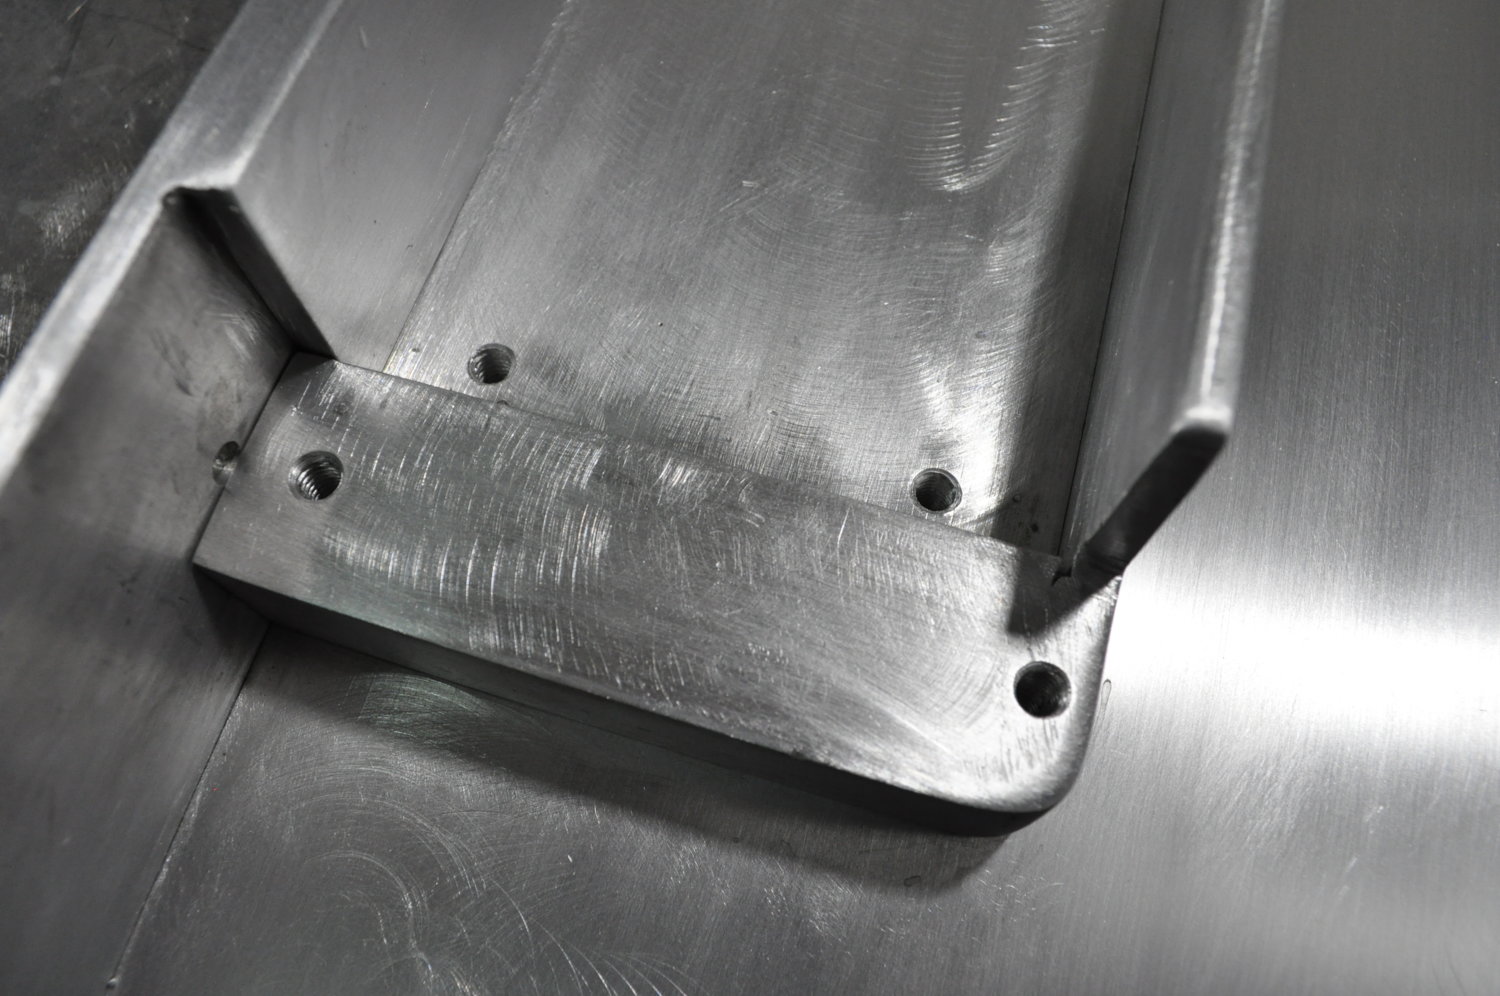
here's some random build babble.... i had talked about hacking out the area for the track.. same as appeared on top, but would have the lower 1/2" removed in that area... I liked the idea for thru-bolting.... but i decided it was WAY easier to just make it 3/4" thick, than tap it... worst case, I can still thru-bolt it.. there is a 1/2' of clearance under the tray.. I'm planning on 10 holes all-together for track/UHMV/Delrin....
That k5 in there is looking quite neglected... 

That k5 in there is looking quite neglected...
storage locker....
")
BOO!
We need a dislike button for that!
We need a dislike button for that!
BOO!
We need a dislike button for that!
yeah, I know... nobody hates it more than me... lot of effort in that rig...
 but I have to stay on this track for now, for once... can't spare labor/cash to do anything to that.. heck, I'm pilfering from it....
assuming i don't fall off a boat to my demise, I'd like to realistically be back on it in about 4 yrs.... finish it just in time for my non-retirement age...

* Ryoken - off to The LAB™ to see how delrin drills... *
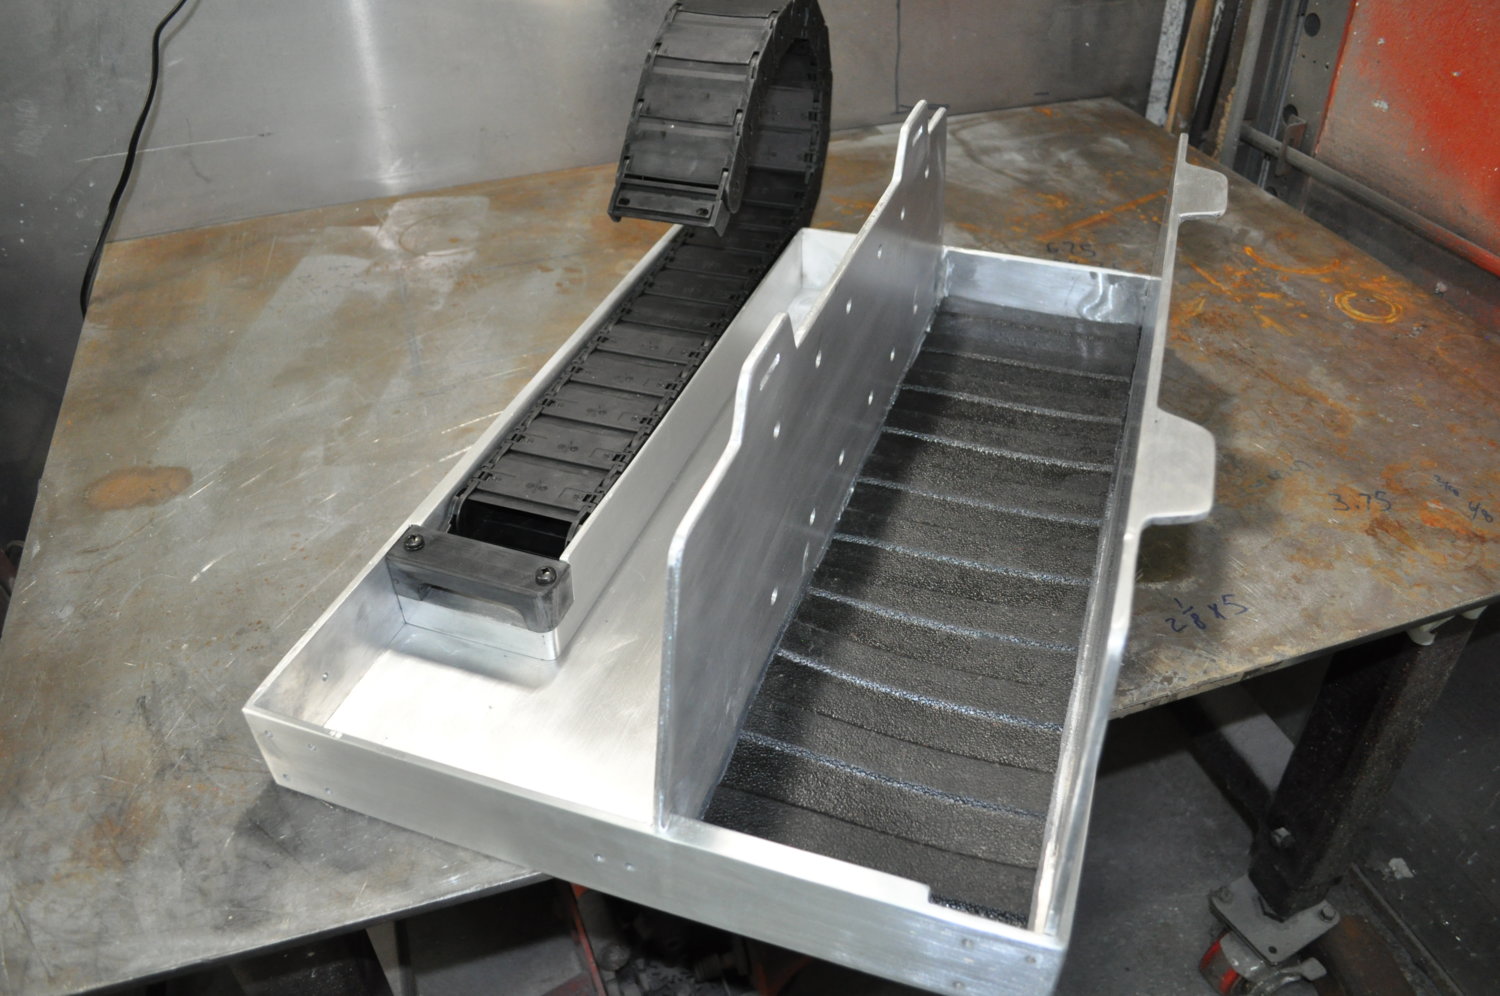
so here's an end of the day mockup... still have to go back and do some alum work at the chute end... and obviously some finishing on the delrin... that's the hardware....
and this is actual track height, to the walls.. the UHMV is cut and under there...
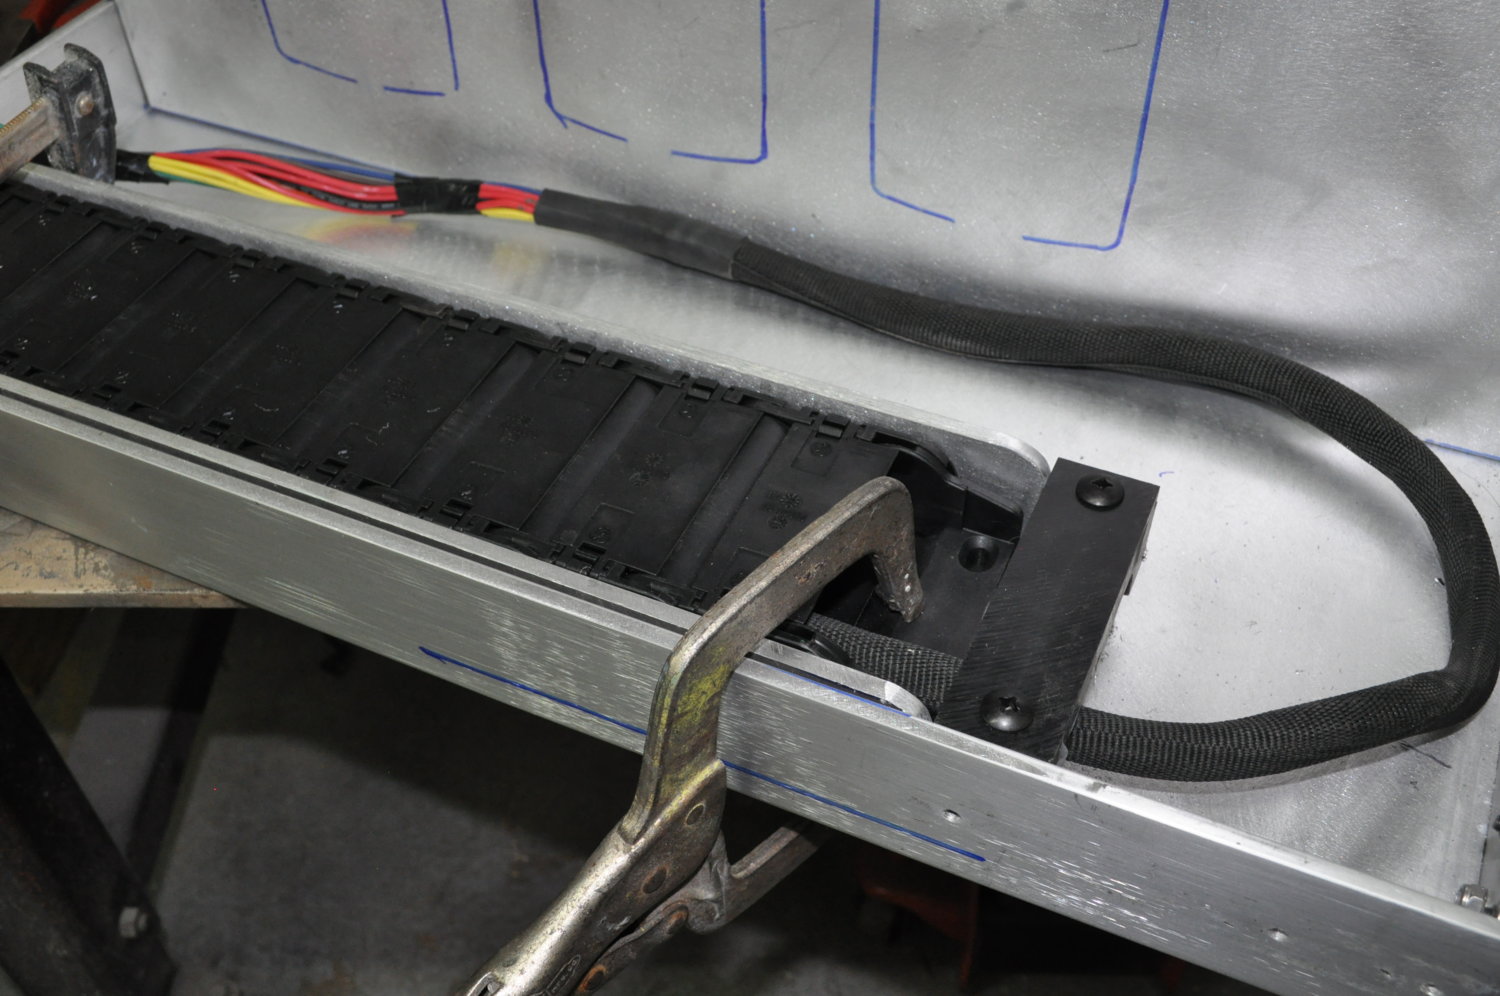
the next few days will be spent bouncing back and forth between getting the 1/0 in fabric/shrink and welding up some stuff at the front of the chute and getting that all ready to burn in....
.
and this is actual track height, to the walls.. the UHMV is cut and under there...
the next few days will be spent bouncing back and forth between getting the 1/0 in fabric/shrink and welding up some stuff at the front of the chute and getting that all ready to burn in....
.
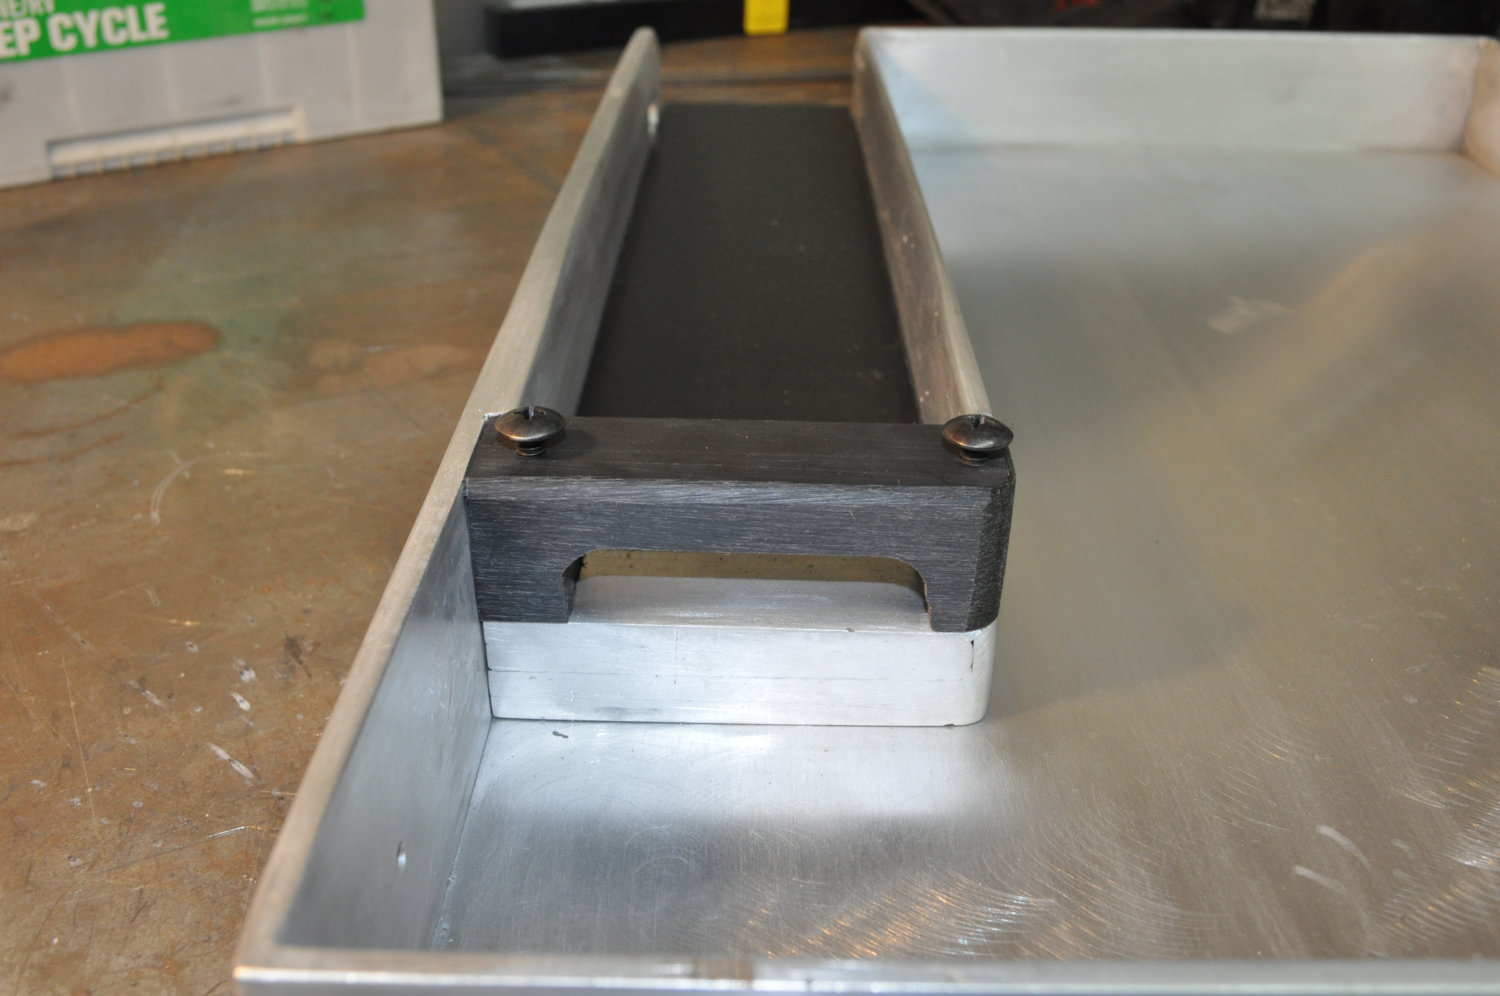
so, I made this today.....
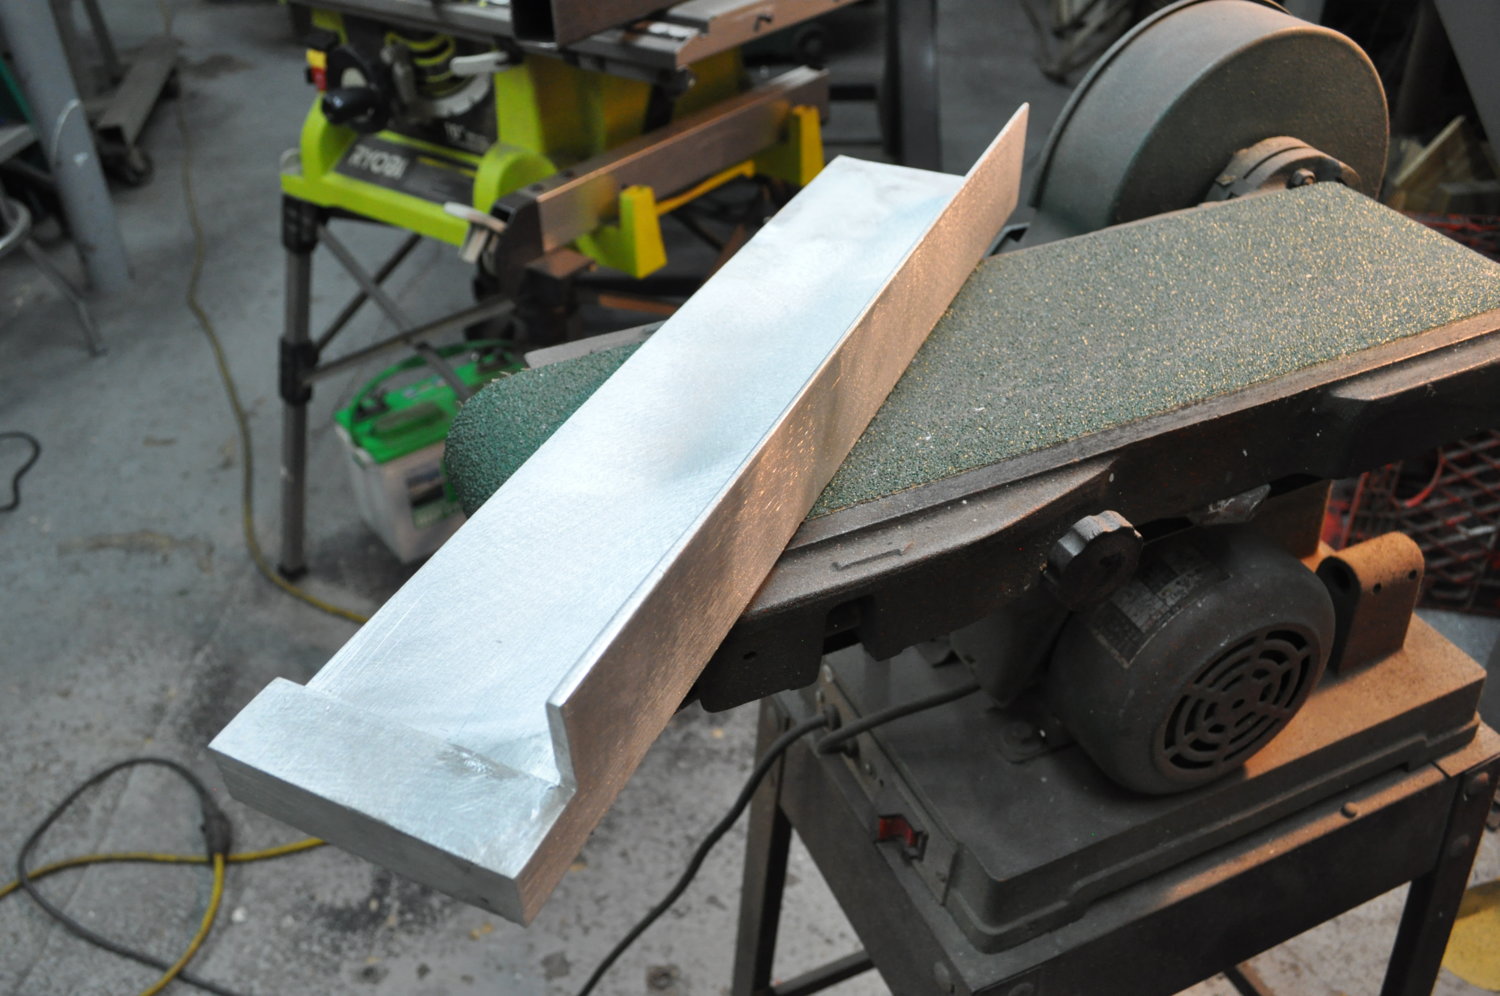
you might be able to see in this pic, that i tapered the top 3/4" at an angle, for about 3/4 of the length... wouldn't need it up front, as the carrier never leaves the track.... it'll be more visible once i wetsand everything...
i changed the sidewalls to not be "roundy" at the front.... when i realized the delrin was sitting up near the top, it made more sense...
the only rounded edges of the delrin will be the one up front and on the front/side.....
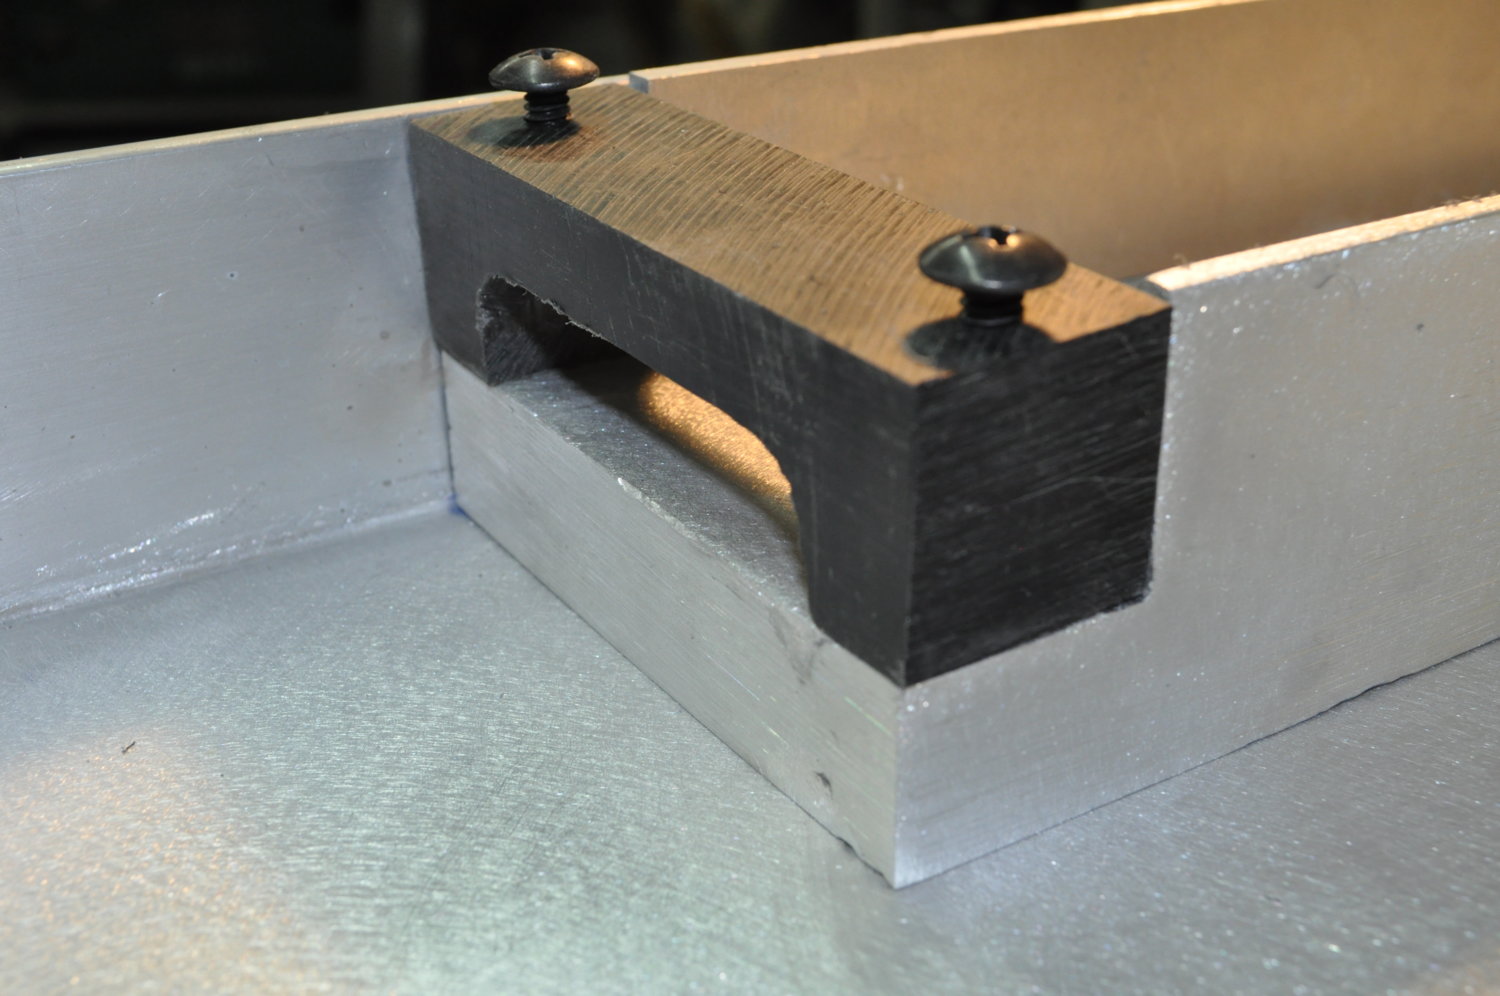
here you can see the deeper section, the UHMV and track fill up that alum spacer height.....

gotta get dog food in the morn, but hopefully I can get the other sidewall shaped, and burn it all in tomorrow..... in keeping with the rest of this tray, there will be no exposed weld... all clean corners....
you might be able to see in this pic, that i tapered the top 3/4" at an angle, for about 3/4 of the length... wouldn't need it up front, as the carrier never leaves the track.... it'll be more visible once i wetsand everything...
i changed the sidewalls to not be "roundy" at the front.... when i realized the delrin was sitting up near the top, it made more sense...
the only rounded edges of the delrin will be the one up front and on the front/side.....
here you can see the deeper section, the UHMV and track fill up that alum spacer height.....
gotta get dog food in the morn, but hopefully I can get the other sidewall shaped, and burn it all in tomorrow..... in keeping with the rest of this tray, there will be no exposed weld... all clean corners....
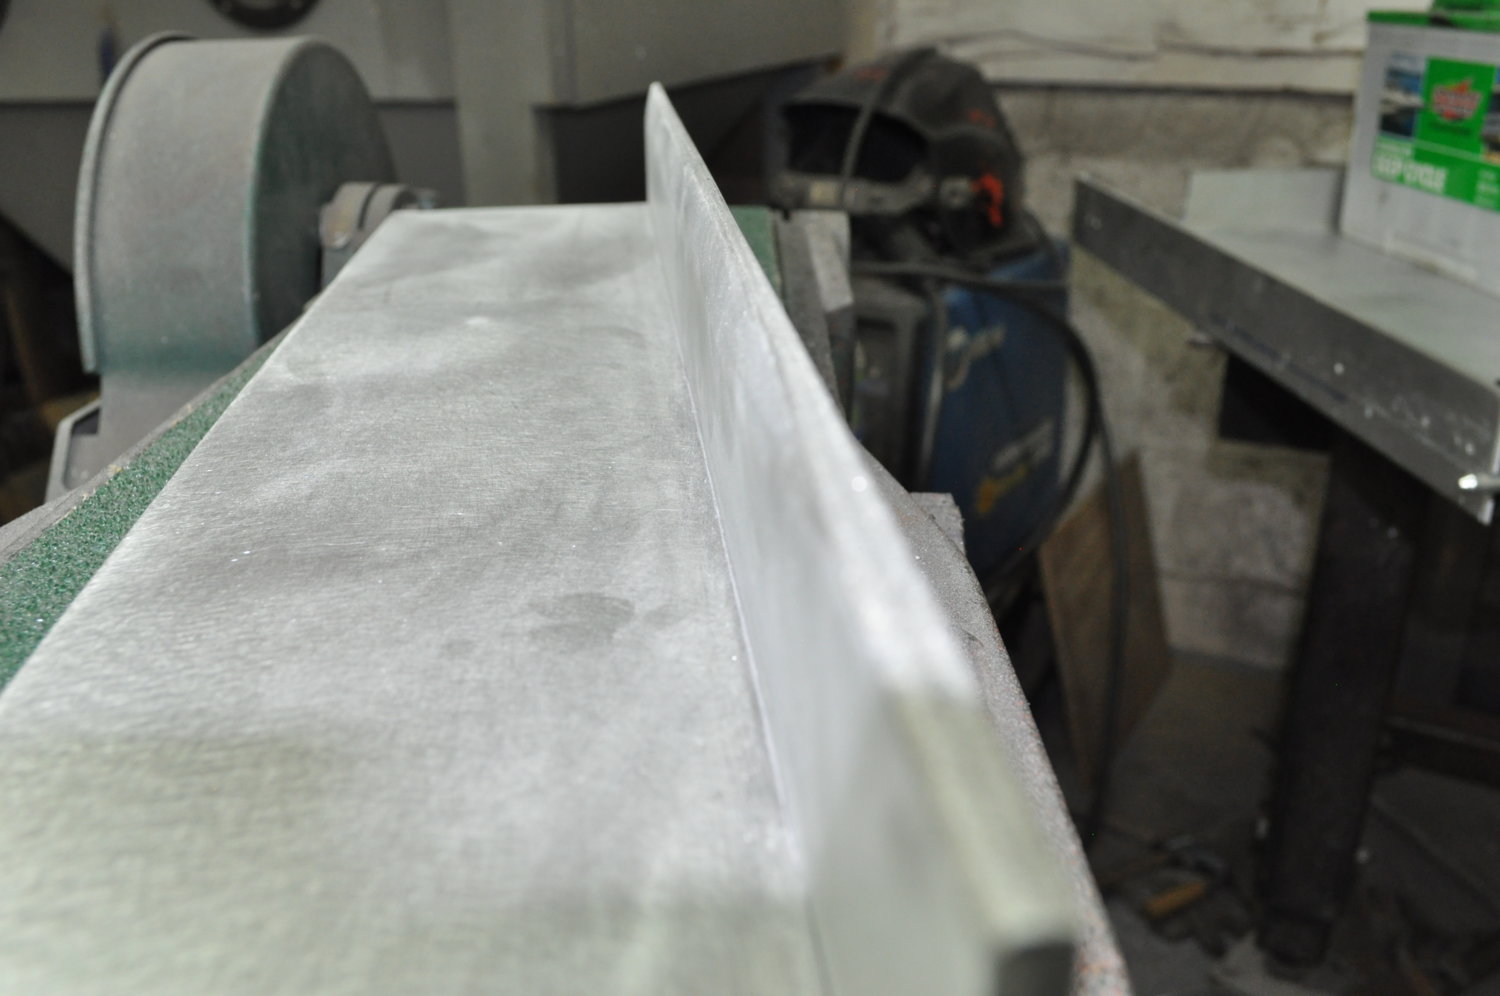
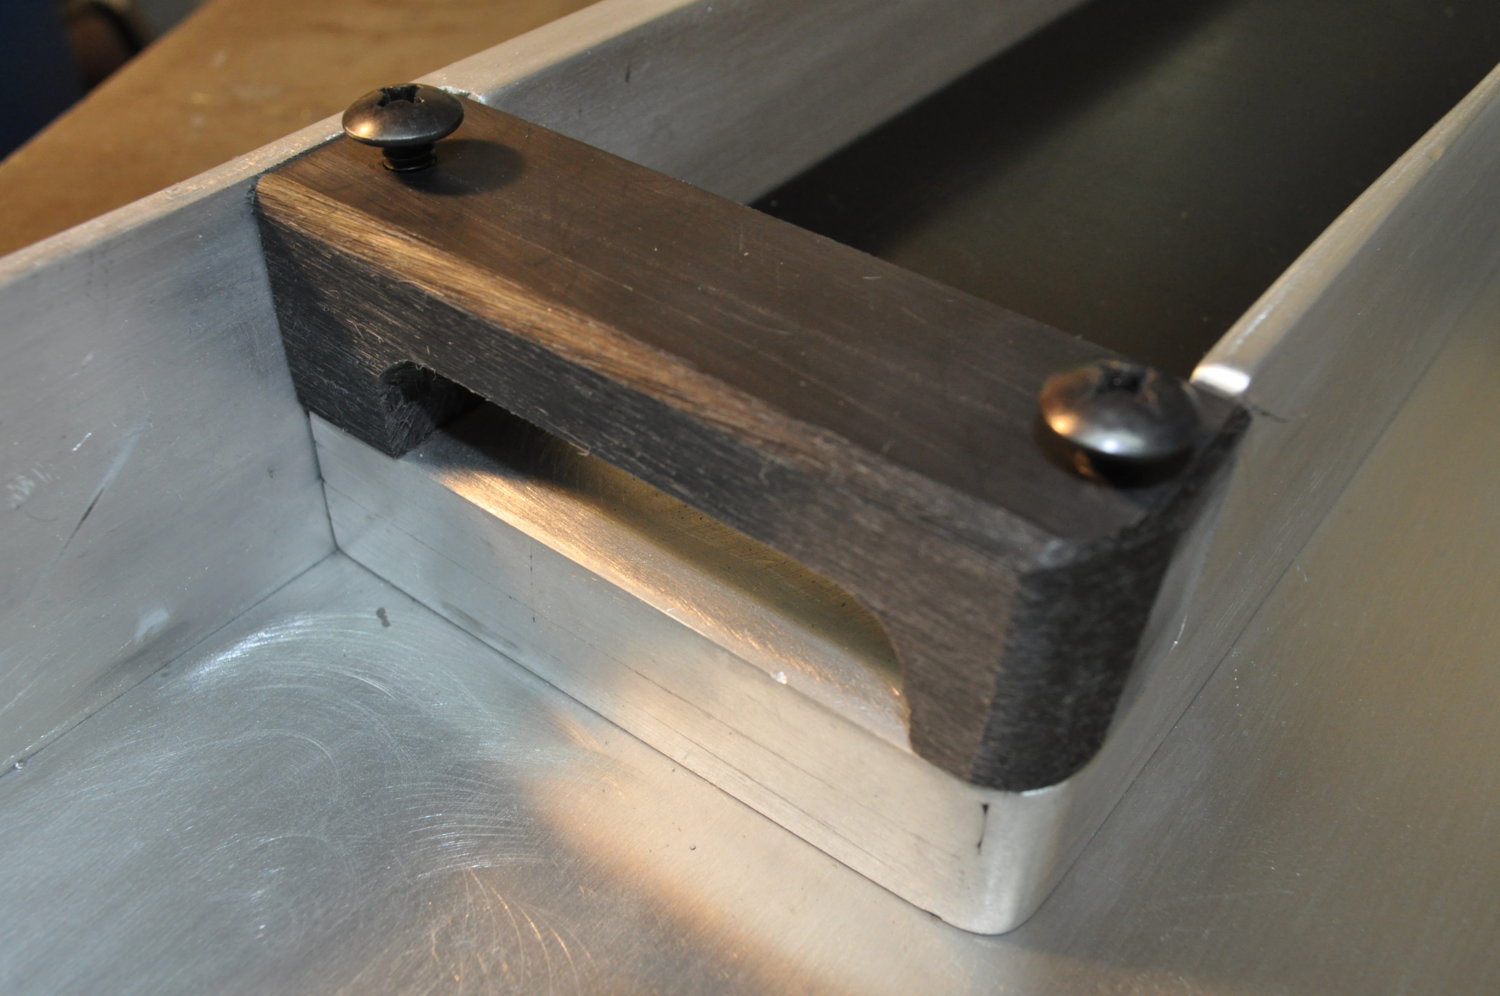
how I spend my fri nights, wetsanding delrin while watching Food Network...
still need to round those corners off, but i was curious how it would sand....
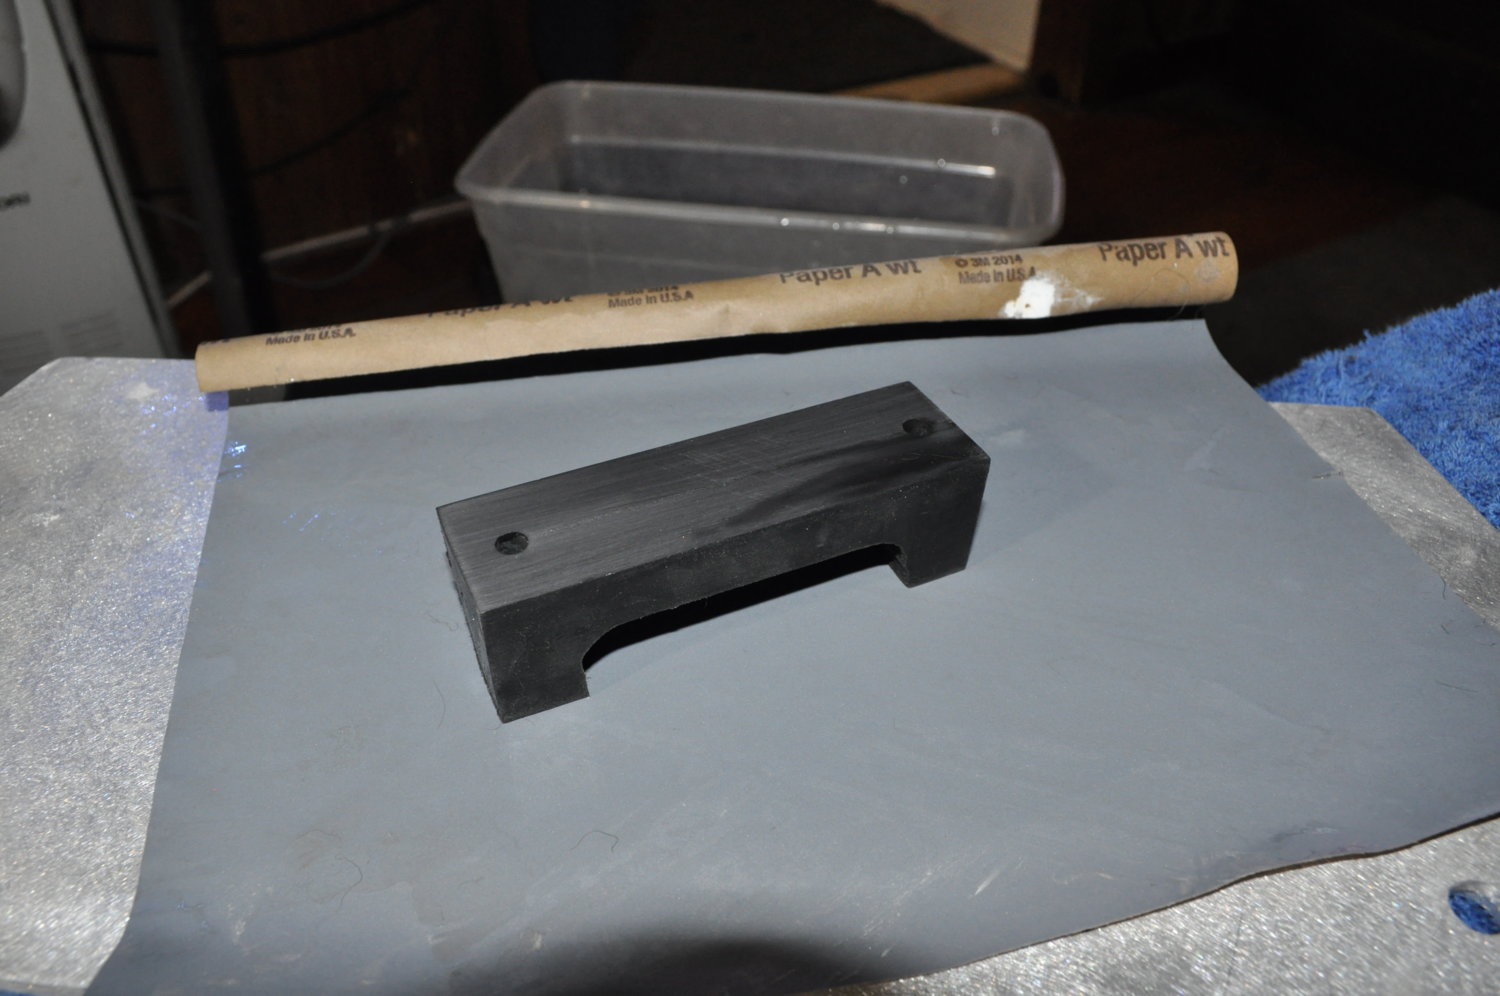
it gets damn nice with 600... i'll prolly just go that route, leave em matte finish... but I bet this sh*t would polish up.....
still need to round those corners off, but i was curious how it would sand....
it gets damn nice with 600... i'll prolly just go that route, leave em matte finish... but I bet this sh*t would polish up.....
Last edited:
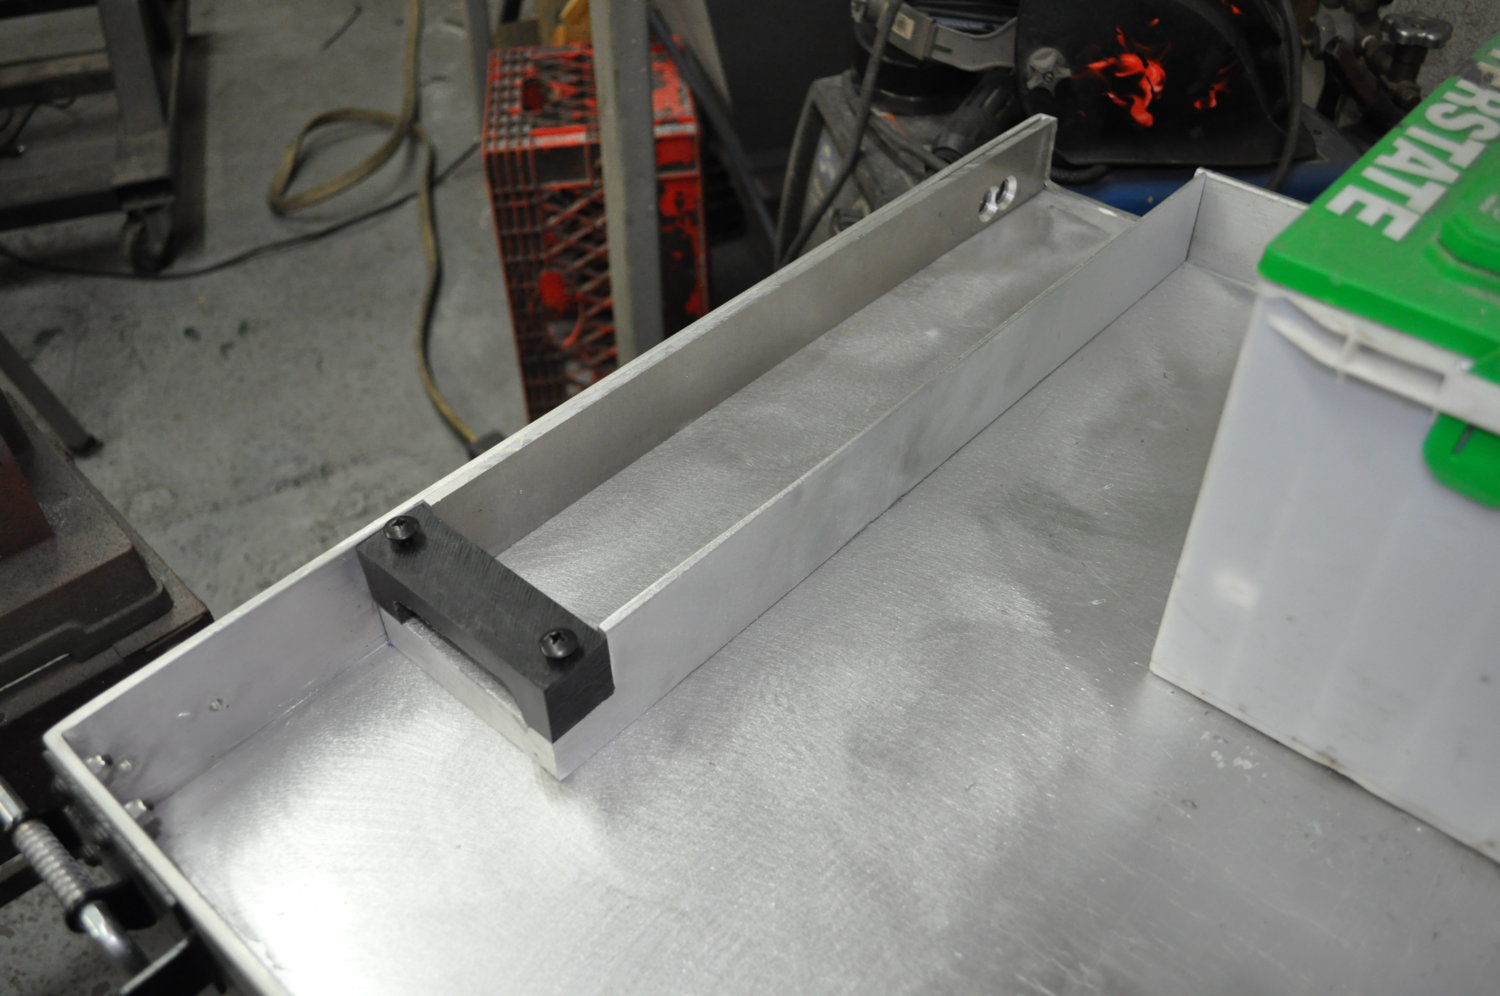
more sluttin.....
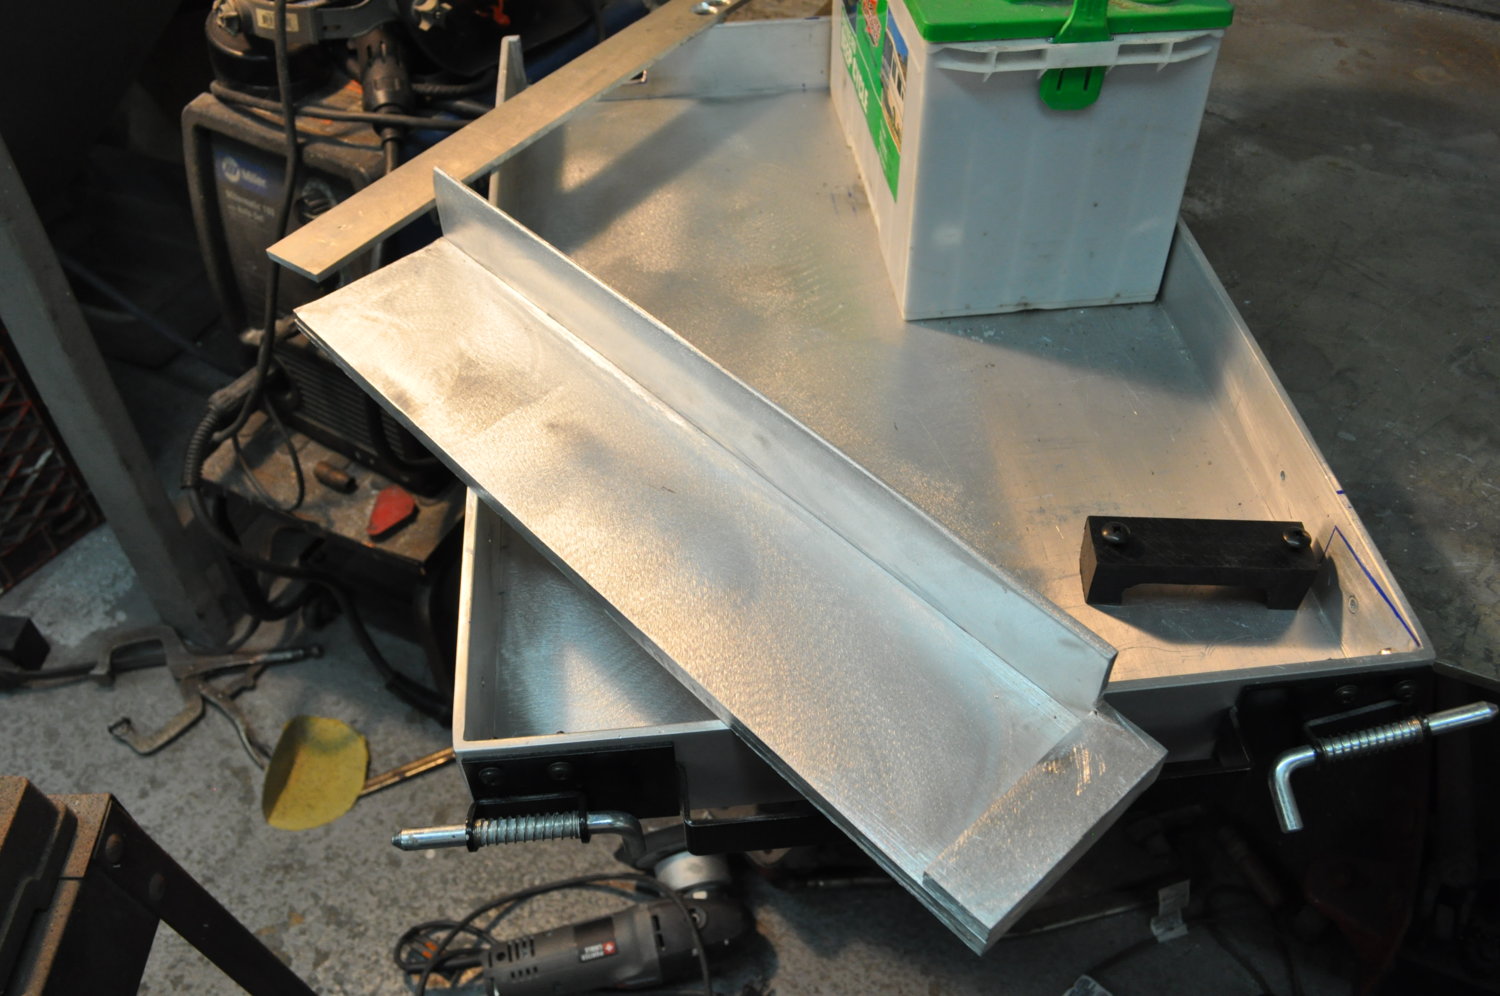
here's part of the tray install, lower plug welds.... it's also fully welded on the top left and whole back section...
welded and fully shaped.....
the delrin rough shaped....
need to do a final wetsand on it tonight....
it matches the brain pic.....

pleased with how it's coming out.... that was a big hurdle.... tomorrow I'm gonna work on drilling and tapping for the hardware..... than I'll be working on getting the outer holddown wall in...
one of the issues is that on many of these panels, i need to do a pre-emptive 220 block on them before welding in... makes final "burnishing" much easier... both other walls need it prior...
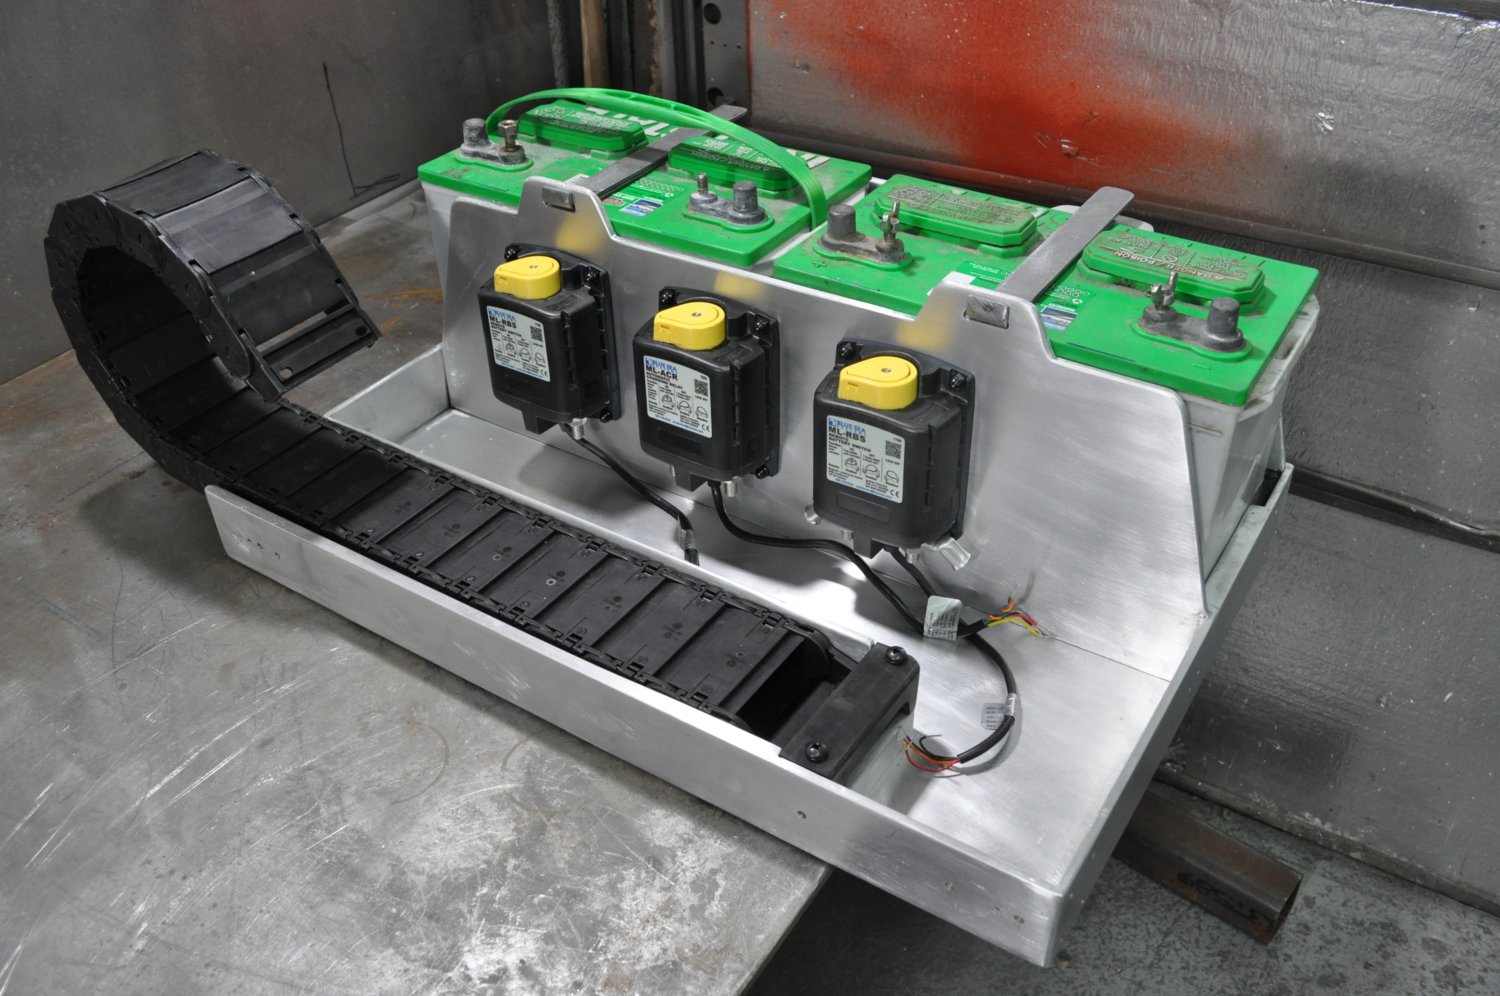
wait till you see the switch/ACR hardware, trick.....
.
here's part of the tray install, lower plug welds.... it's also fully welded on the top left and whole back section...
welded and fully shaped.....
the delrin rough shaped....
need to do a final wetsand on it tonight....
it matches the brain pic.....
pleased with how it's coming out.... that was a big hurdle.... tomorrow I'm gonna work on drilling and tapping for the hardware..... than I'll be working on getting the outer holddown wall in...
one of the issues is that on many of these panels, i need to do a pre-emptive 220 block on them before welding in... makes final "burnishing" much easier... both other walls need it prior...
wait till you see the switch/ACR hardware, trick.....
.
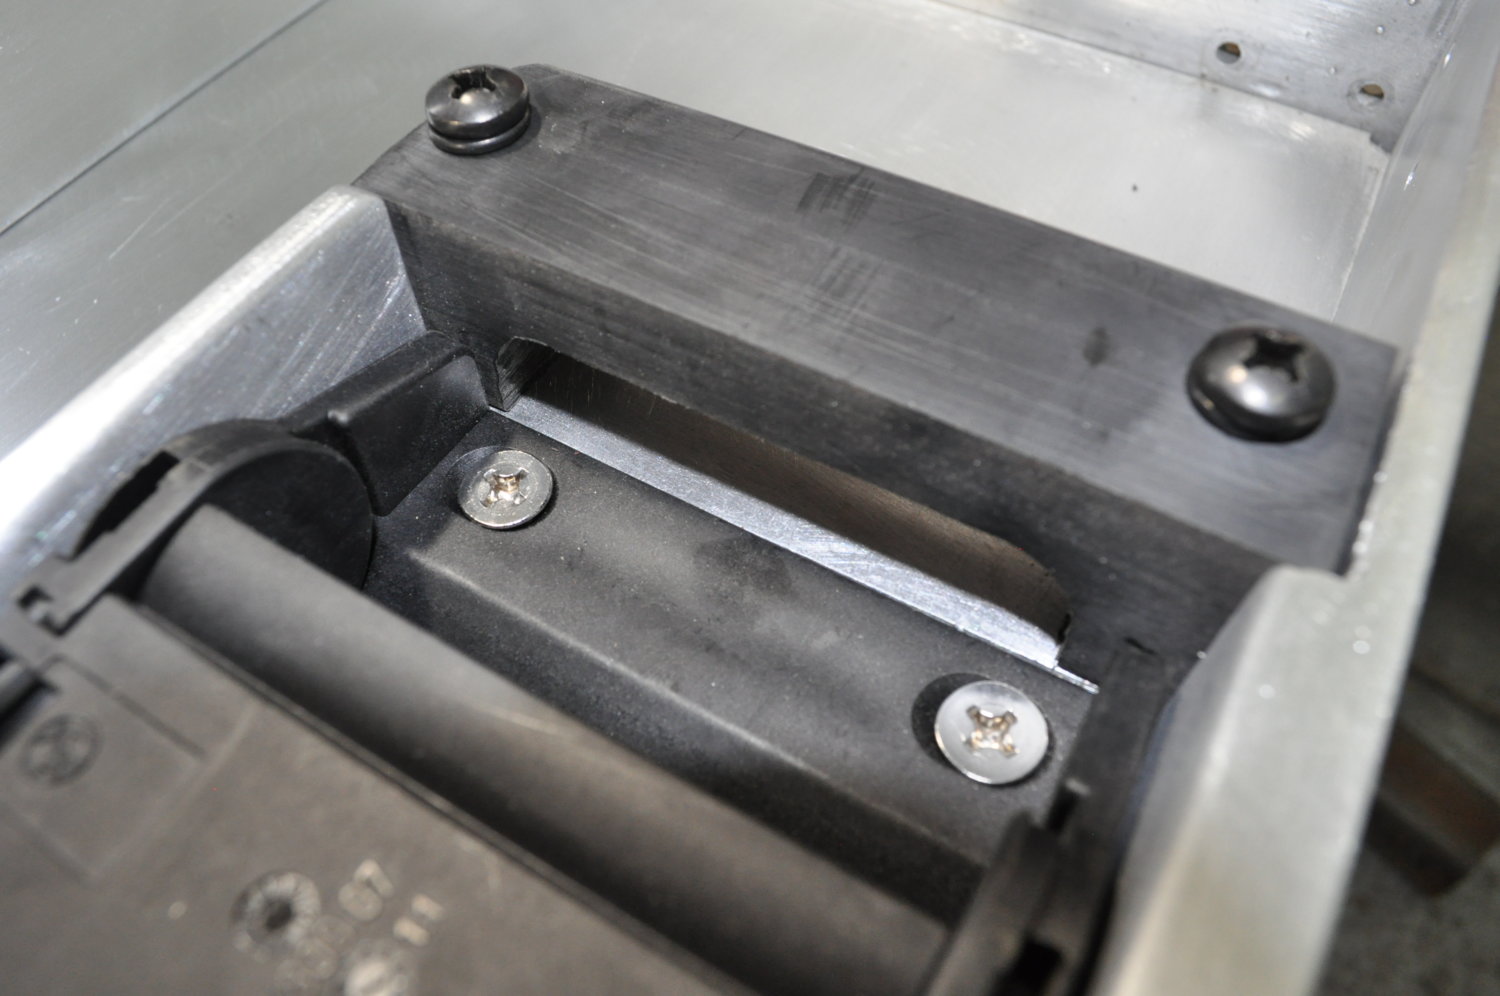
here's how the switches are working out....
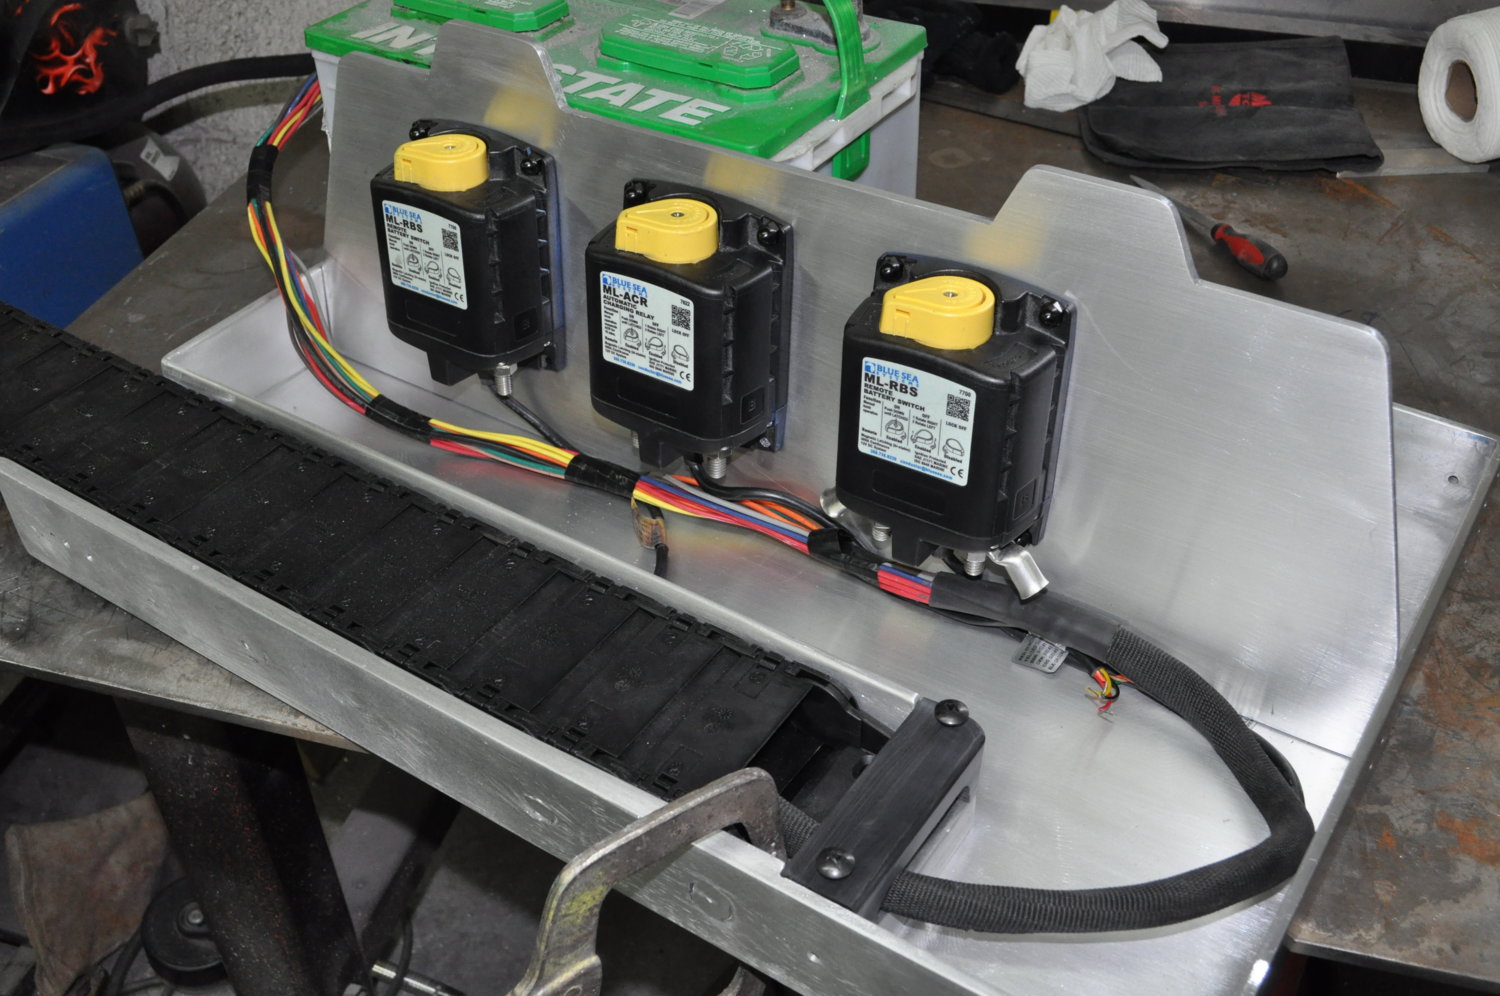
ss black acorns out front....
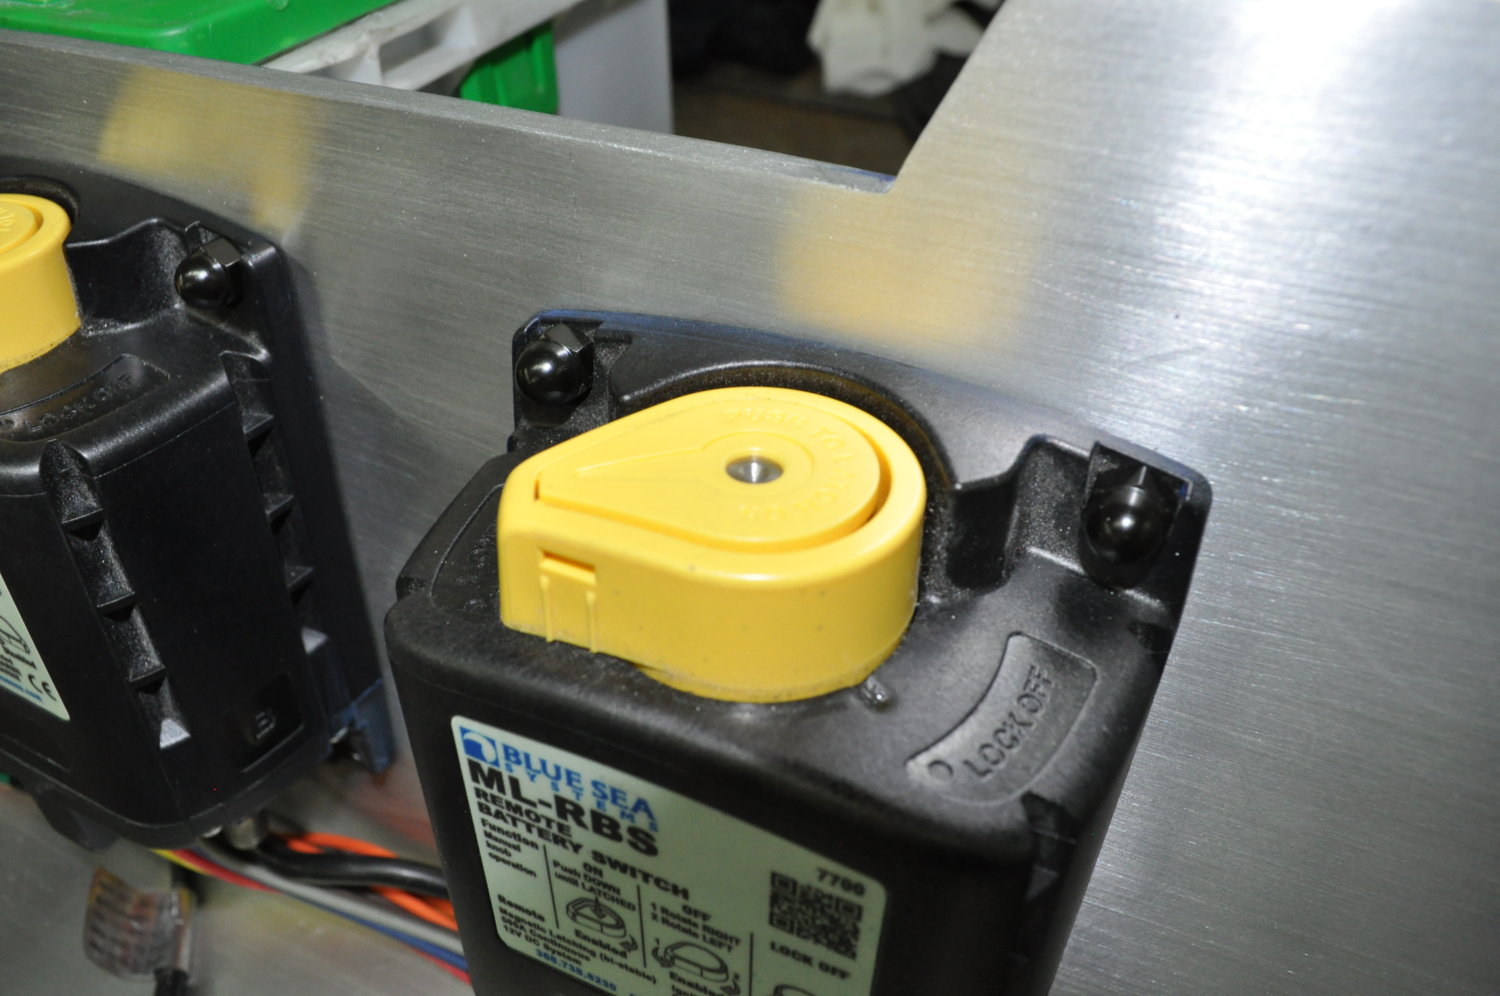
to ss countersunks....
ss black acorns out front....
to ss countersunks....
Looking good as always, cool to see this idea coming together.here's how the switches are working out....
ss black acorns out front....
to ss countersunks....
Check this out:
https://www.browntool.com/Listview/tabid/344/CategoryID/62/Level/a/ProductID/223/Default.aspx
You can adjust it to control the depth of your coutner-bore. you can adjust it on the first one gradually going deeper until you get just what you want and then lock it down and have a repeatable result every time. Works in a press or hand drill. Old aircraft guy recommended it to me when I was doing a side project at work and wanted to do a bunch of countersunk rivets.
Looking good as always, cool to see this idea coming together.
Check this out:
https://www.browntool.com/Listview/tabid/344/CategoryID/62/Level/a/ProductID/223/Default.aspx
You can adjust it to control the depth of your coutner-bore. you can adjust it on the first one gradually going deeper until you get just what you want and then lock it down and have a repeatable result every time. Works in a press or hand drill. Old aircraft guy recommended it to me when I was doing a side project at work and wanted to do a bunch of countersunk rivets.
neat, never saw that before, thanks.... i see march's birfday present now..
yeah, got a bit deep on that one... usually i'm pretty careful, i've done hundreds on this rig... but when i get in a bit of a rush...
i do have some leeway there.. those are actually "undercut" heads... a "standard" head will bring that back out and work fine on the 1/4" too..
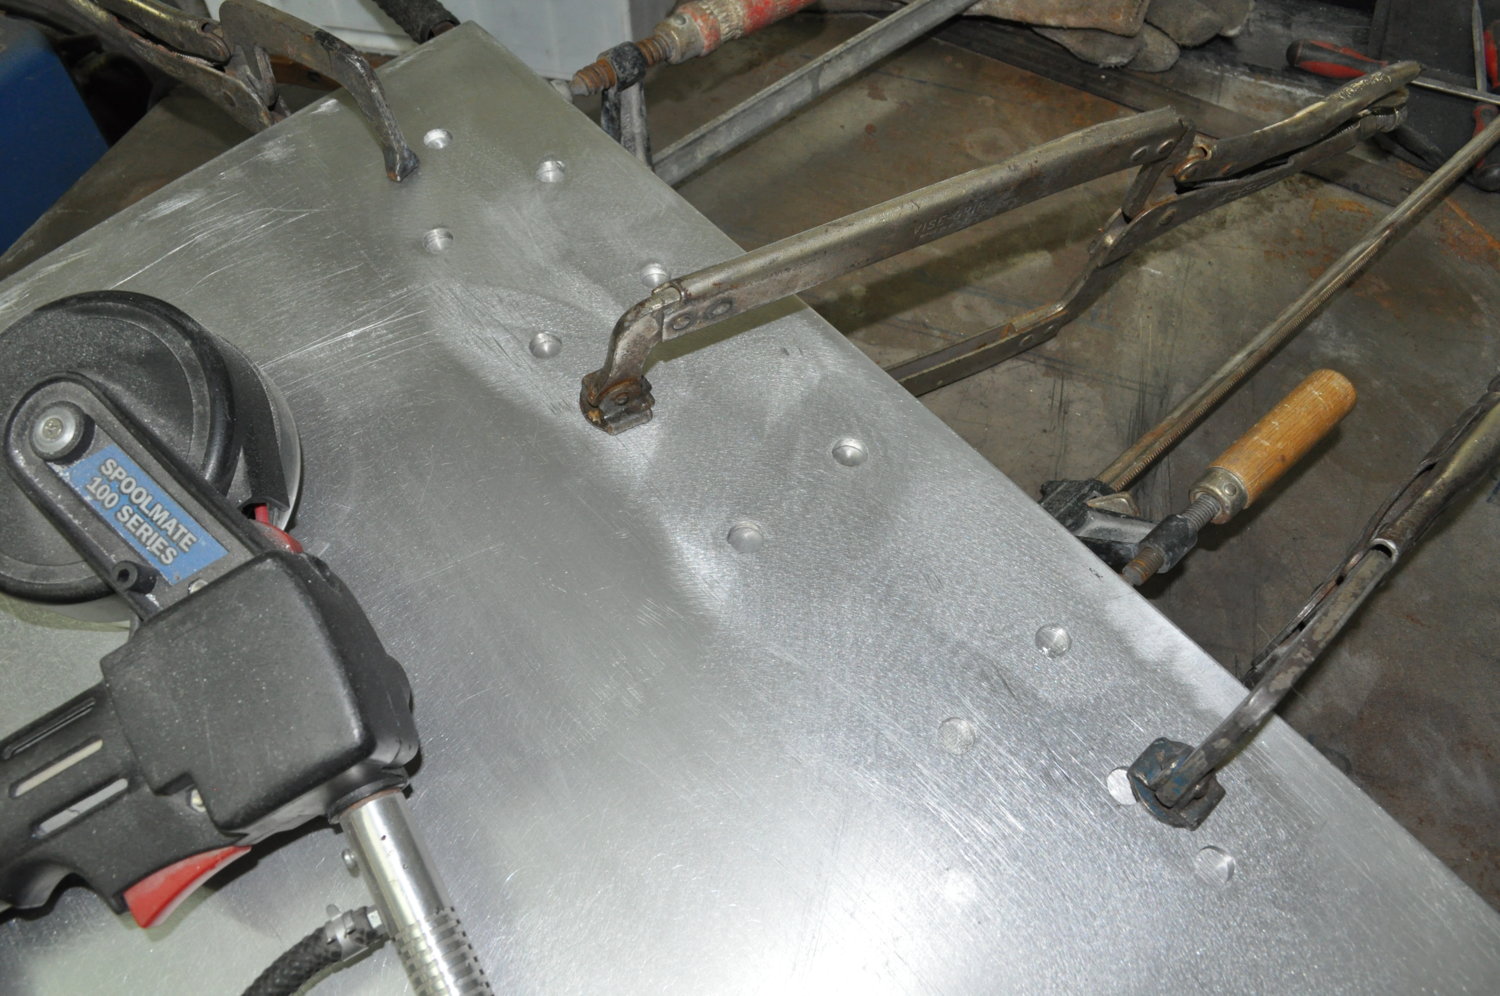
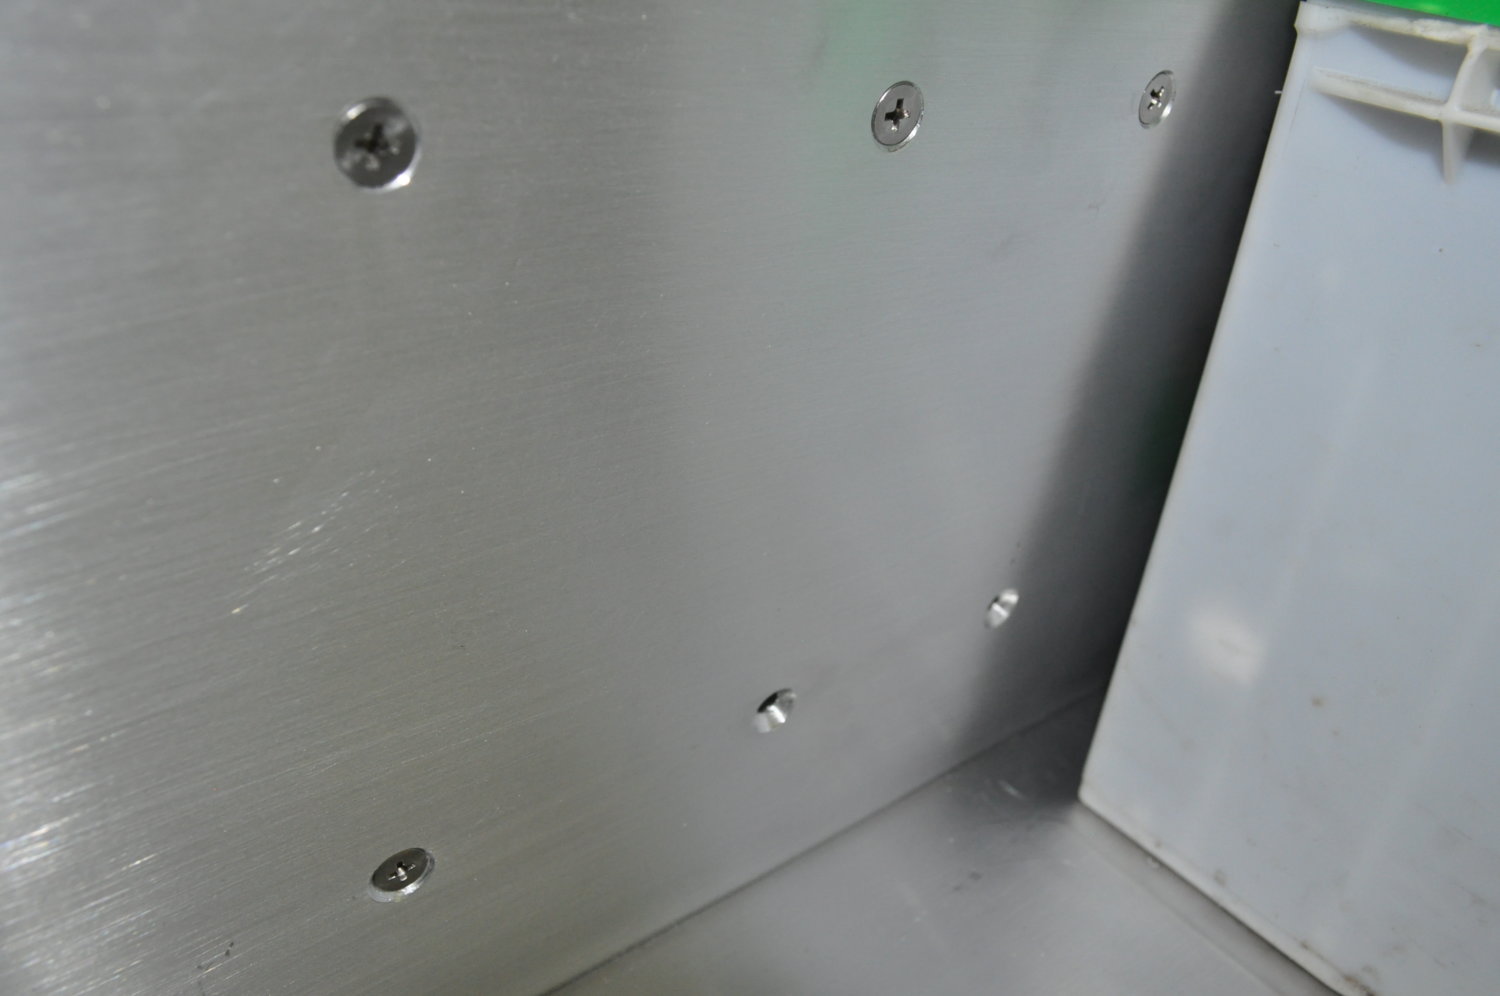
holddowns are basically done.... getting ready to burn in the walls after i make the small front spacer........ than i'll drill the bar stud holes...
holding off on the carrier/UHMV mounting holes till tomorrow.. i have a new tap coming in I wanna try...
.
Last edited:
That’s all turning out super nice! I can see all that planing and time paying of with the coolest battery tray ever.
That's the great thing about that tool is you can just lay into it until it hits then move to the next one, Don't hardly need to think about it once you get it setup.It also makes it so you almost don't need to think about being square, you just bear down until it is all the way down flush.neat, never saw that before, thanks.... i see march's birfday present now..
yeah, got a bit deep on that one... usually i'm pretty careful, i've done hundreds on this rig... but when i get in a bit of a rush...
i do have some leeway there.. those are actually "undercut" heads... a "standard" head will bring that back out and work fine on the 1/4" too..
holddowns are basically done.... getting ready to burn in the walls after i make the small front spacer........ than i'll drill the bar stud holes...
holding off on the carrier/UHMV mounting holes till tomorrow.. i have a new tap coming in I wanna try...
.
One of the great things I like about here and co-workers that have come from different backgrounds is getting different exposure to tools or techniques that I never would have seen on my own. There are probably a hundred or so of those examples of these that I've picked up in your build threads alone

That’s all turning out super nice! I can see all that planing and time paying of with the coolest battery tray ever.
thanks bud....
")
it's one of those kinds of projects that there isn't any "just fudge it all together to see if it actually works"... need to do it as right as possible, or not at all... still a long way to go, but I can see the video clip playing in my head of this thing opening/closing...
I've done some interesting vehicle mods over the decades, but I think this one may take the cake.. just due to the whole cable carrier deal...
the 2 things that will have me super giddy is the day i pull the tray out/in with that cable carrier tracking... I'm actually mostly curious about the sound....
and when i get the switching up in the cab set up and you push the momentarys, and you here each bat switch "clunk" from that compartment...
all ready to burn the switch wall in tomorrow.. that will be followed by the little front spacer... final grind/shaping/sanding.. than to drilling/tapping... sharkhide.... than cable building....
I’ve been reading this page so often all the targeted ads I’m getting are for wire harness building courses! Looking great!
I’ve been reading this page so often all the targeted ads I’m getting are for wire harness building courses! Looking great!
it's that time of yr for me, trying to entertain you guys...
on that note, between building the tray/slides initially, and now this whole deal, I'll prolly have another 250+ hrs into the rig, INSIDE this compartment alone...

ok, sorry for another slutfest.. but, I ummmmm, got a lot of chit done today...
the tray is about 95%... all the metalwork is done... just need to drill a couple holes and sharkhide it..... maybe give it a bit more wetsanding....
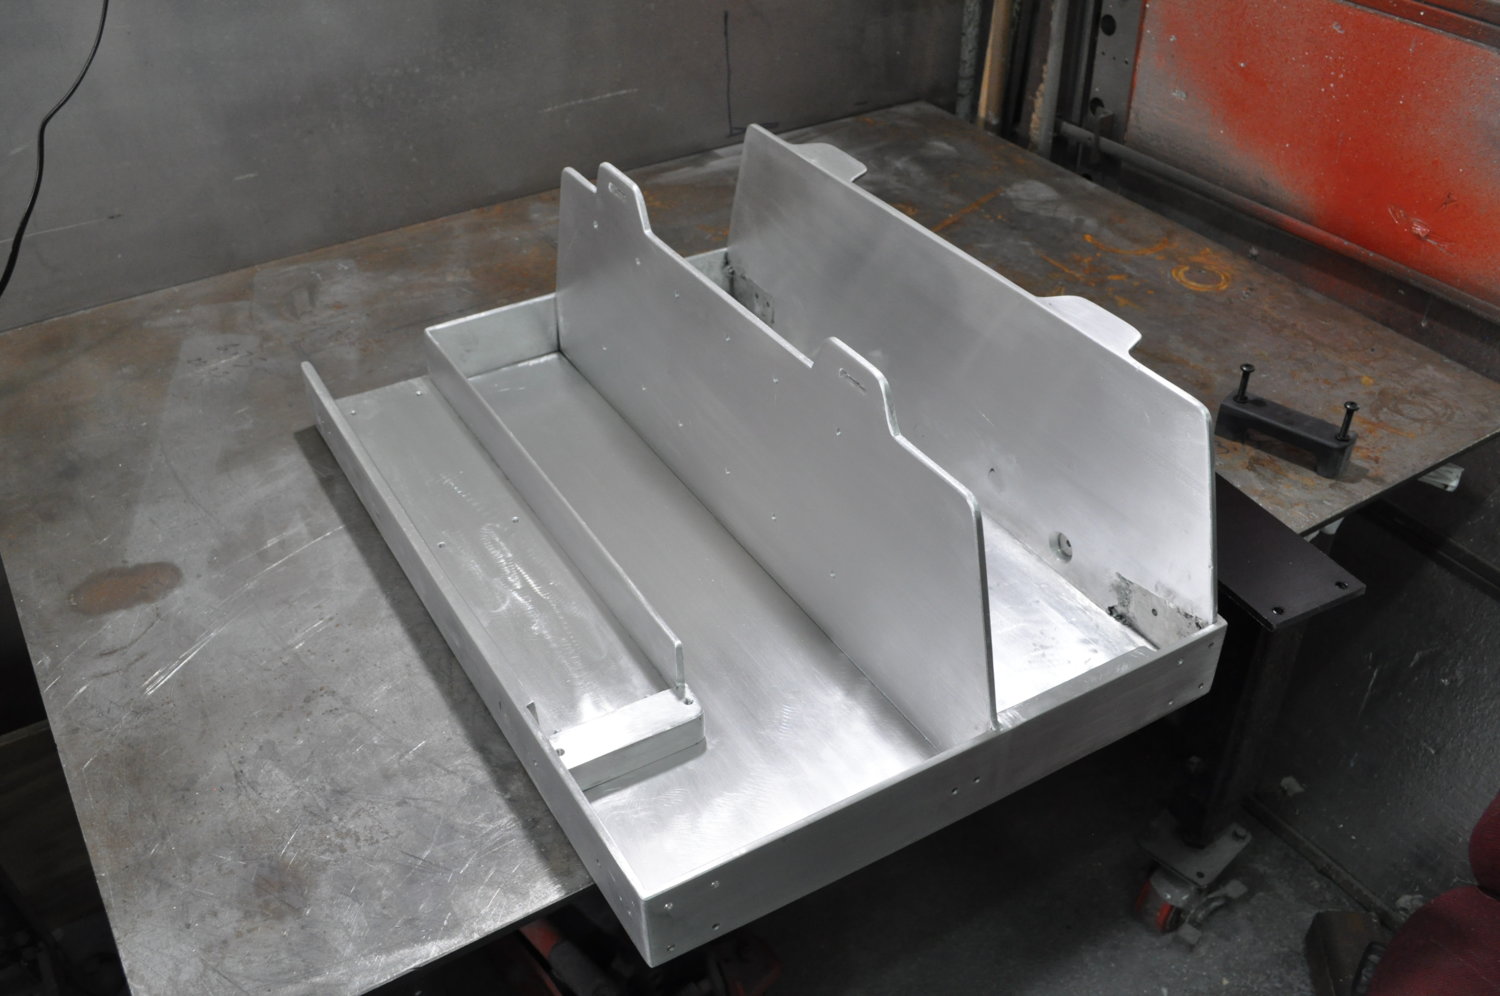
including all the tapping..
putting it together....
the UHMV countersinks like crap.. it's soooo soft.. you'd need a brand new bit.... i had a pretty fresh one, but a bit of alum knocked it down enough to give me issue.. good enough tho....

tomorrow I start work on the 1/0's.... shrinking/routing/securing.. maybe get it in sharkhide....
the sad thing is, there is still a good bit of work inside the box to do.. hopefully the weather holds out.....
.
the tray is about 95%... all the metalwork is done... just need to drill a couple holes and sharkhide it..... maybe give it a bit more wetsanding....
including all the tapping..
putting it together....
the UHMV countersinks like crap.. it's soooo soft.. you'd need a brand new bit.... i had a pretty fresh one, but a bit of alum knocked it down enough to give me issue.. good enough tho....
tomorrow I start work on the 1/0's.... shrinking/routing/securing.. maybe get it in sharkhide....
the sad thing is, there is still a good bit of work inside the box to do.. hopefully the weather holds out.....
.
Last edited:
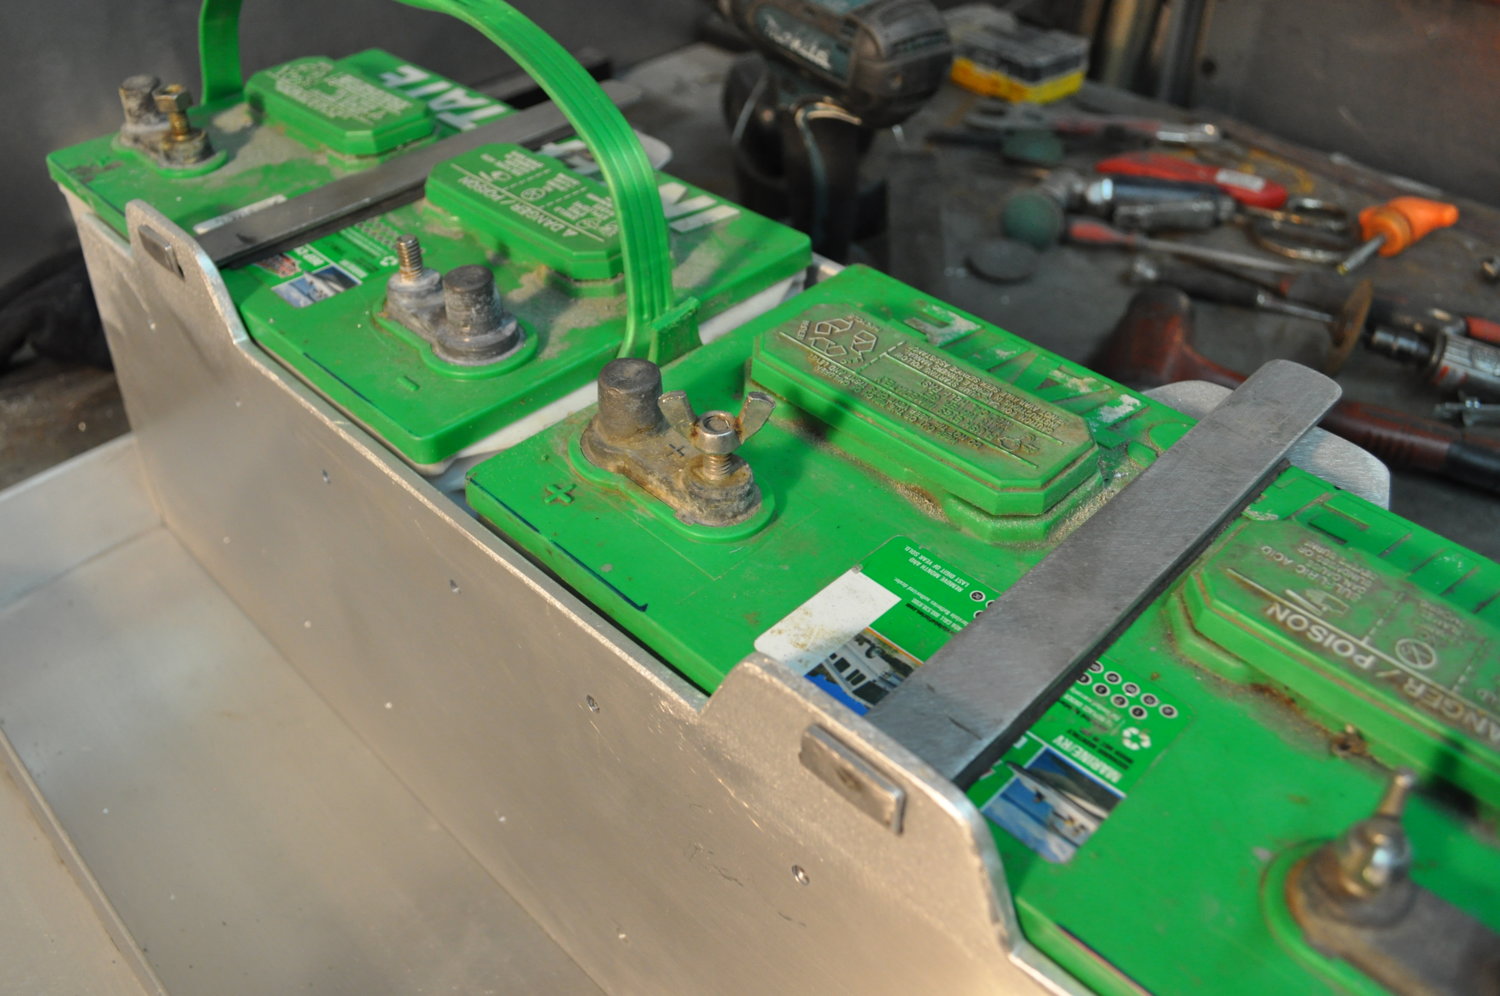
Looks very nice! What is that you laid down under the batteries?

